
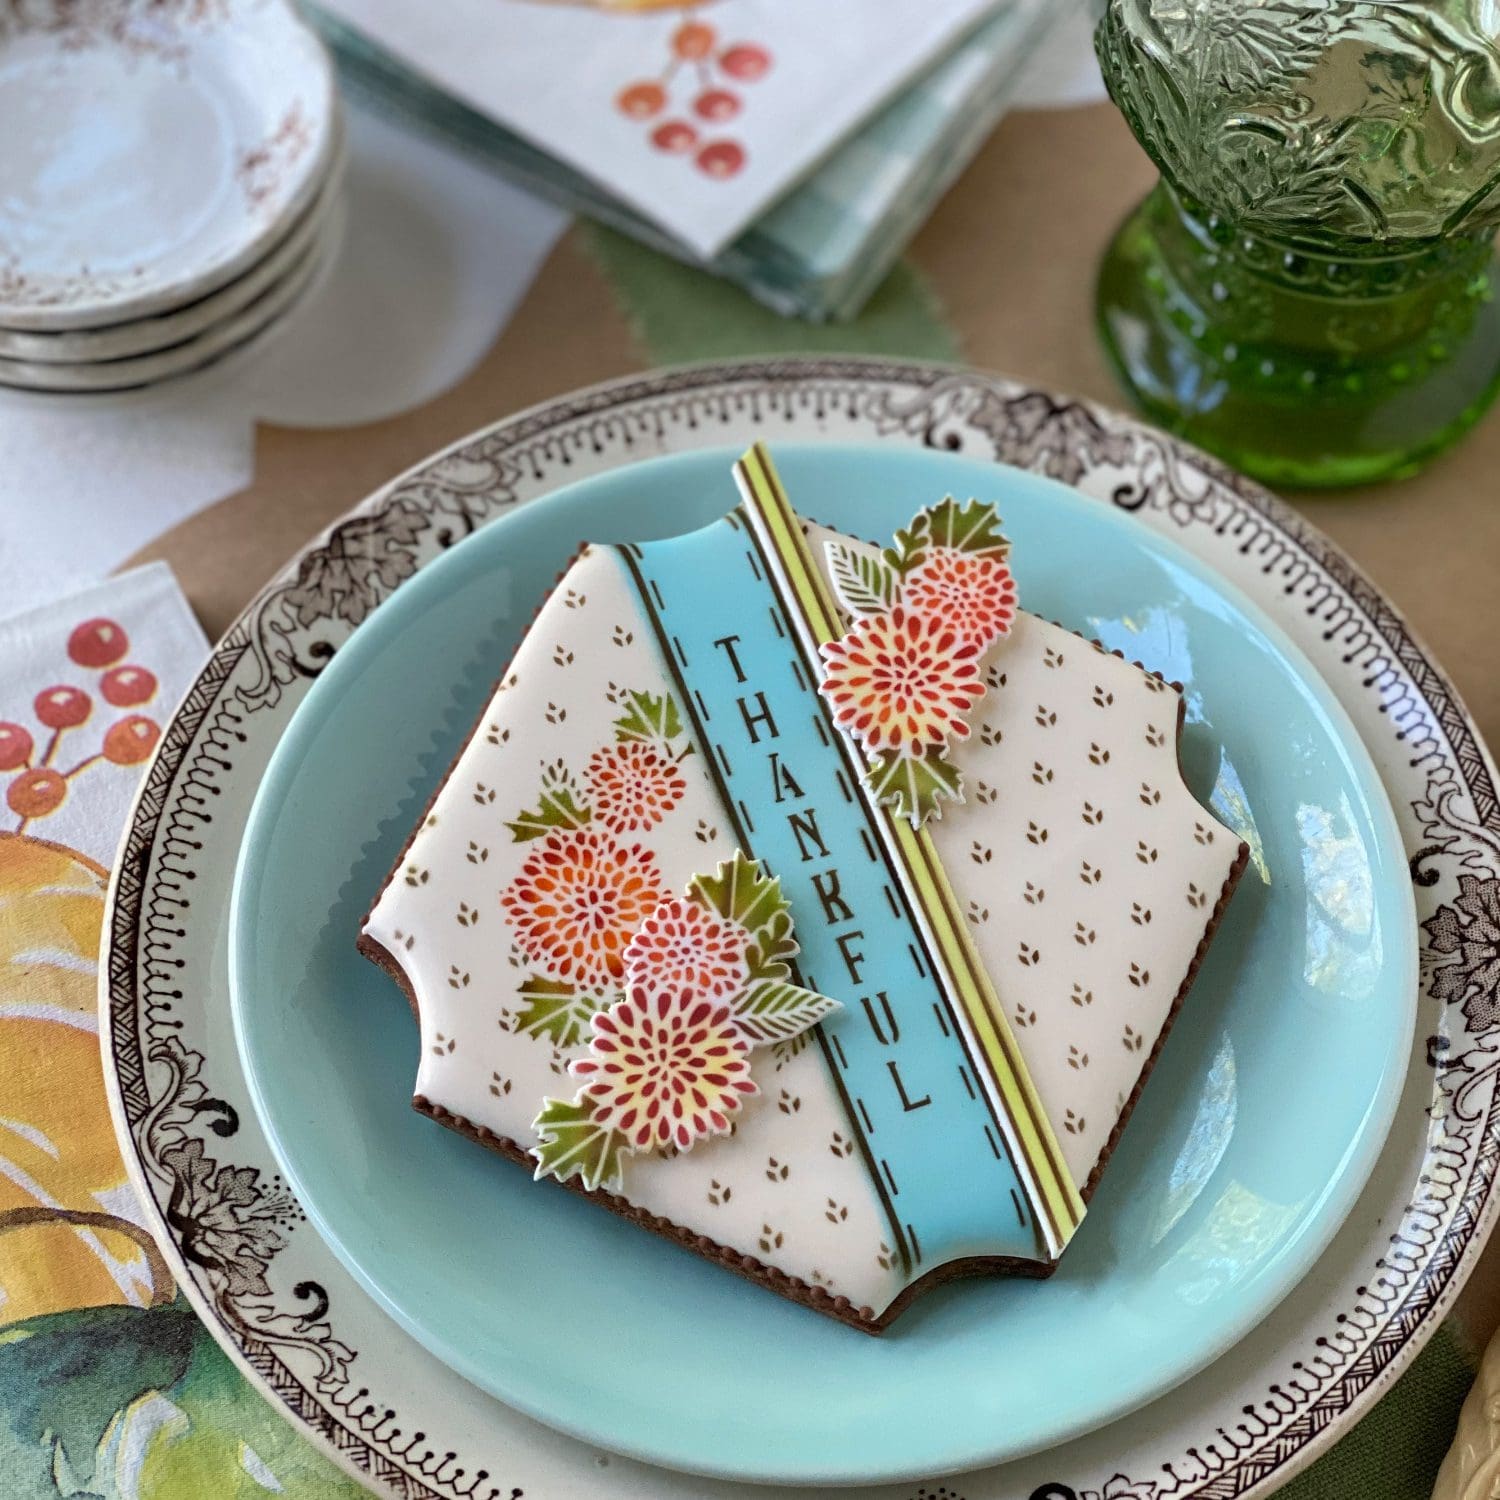
I’m a sucker for stunning place settings, and particularly ones with an element of surprise. That’s why I’m especially excited about this month’s release, which will allow you to make a plethora of Thanksgiving place cards! (The surprise for guests is that they’re edible too!) You can use my readymade inscriptions in the message and frame set, or leave the frames empty and write or pipe guests’ names inside instead. (Because my handwriting is horrendous, I custom-designed stencils with my family members’ names, so I could personalize this release for my own holiday table. You’ll see some pics of these cookies below.) I also love this month’s stencils because, just by varying the foreground elements you place on top, the designs can range from fun and whimsical to elegant and refined.
A word of caution: Be careful as you’re opening both sets – they contain more tiny masks than the typical set, and you won’t want to lose any! The design elements and messages are purposefully smaller than usual, so that they’ll fit nicely on stick cookies and other long shapes. Though, as you’ll soon see, they make dramatic large-scale place cards too.
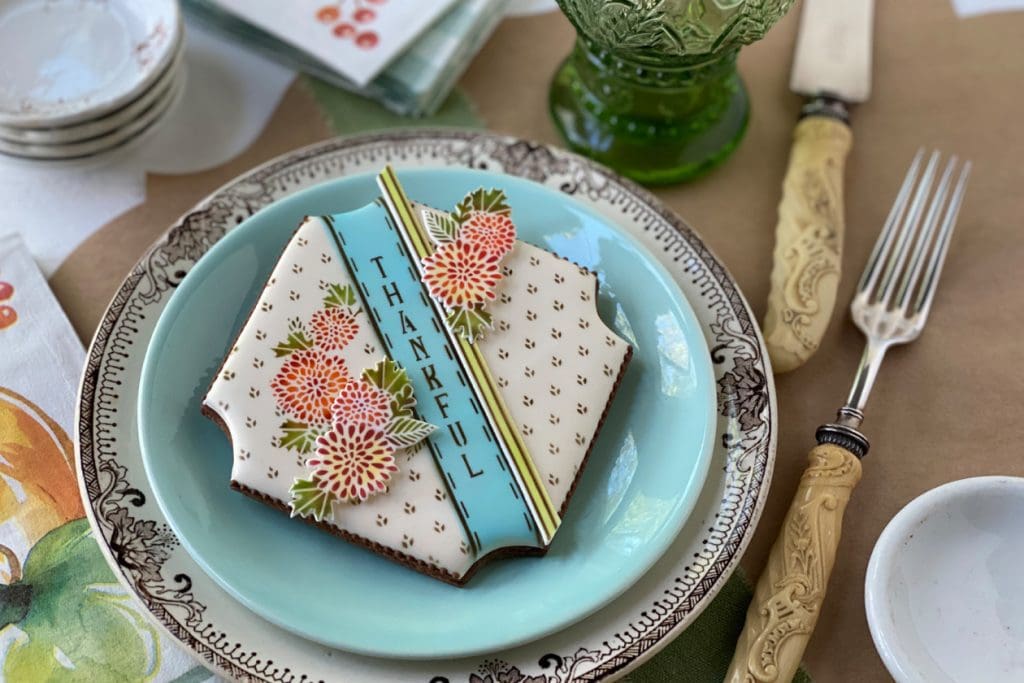
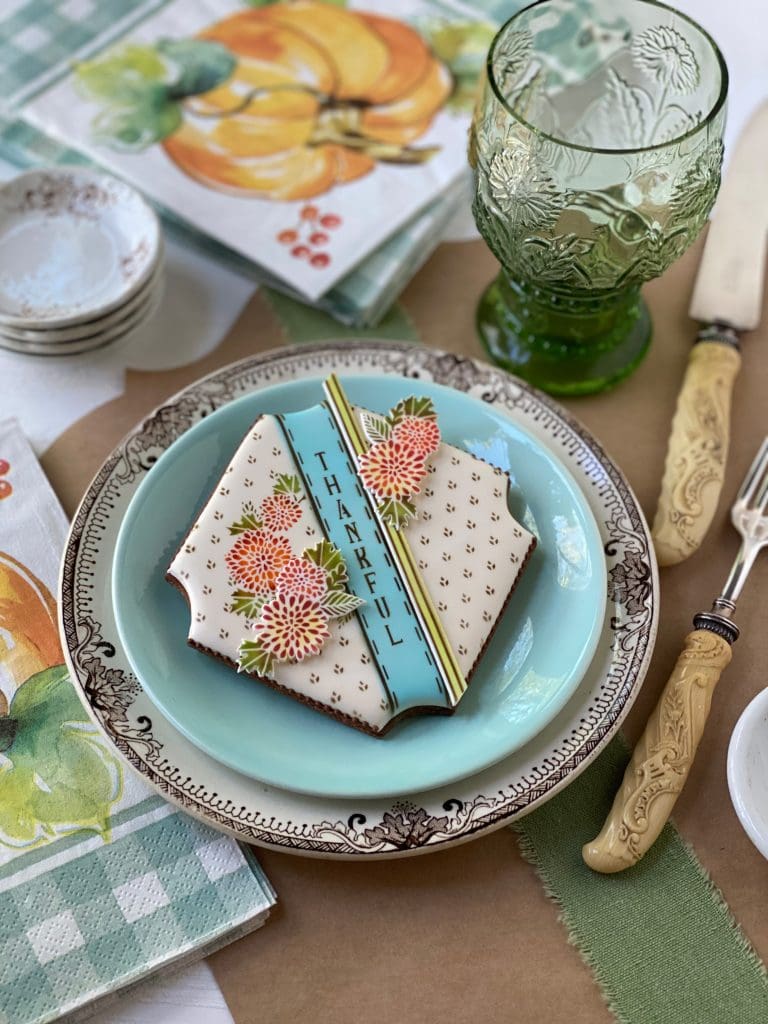
Here’s a snapshot of what I’ve been talking about, first in full table setting-form . . .

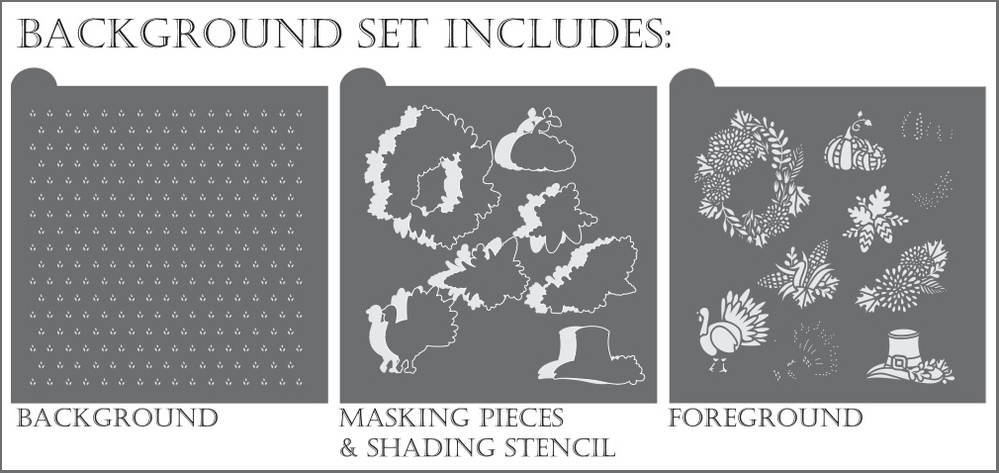
And now in my usual in-a-nutshell form . . .
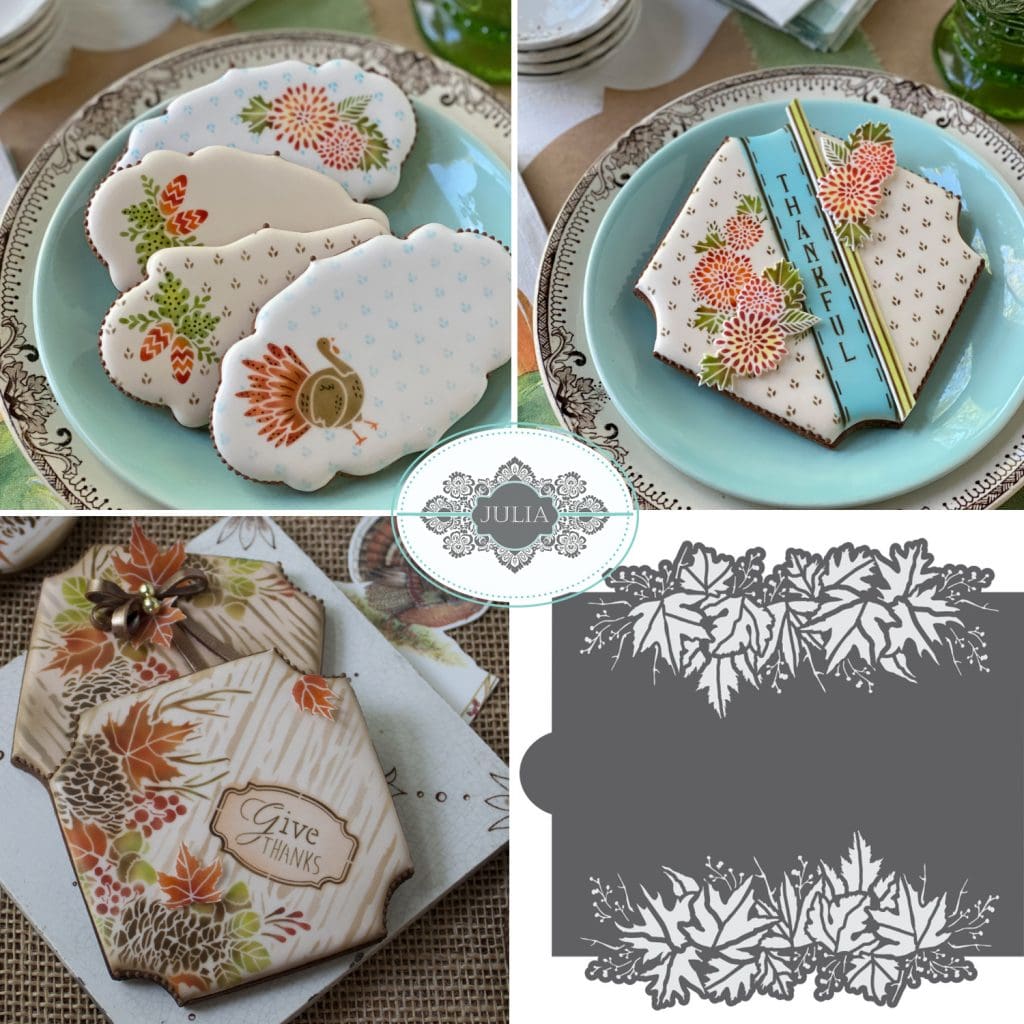
To help you find the stencils responsible for these cookies, check out these quick links on my partner Confection Couture Stencils‘ site:
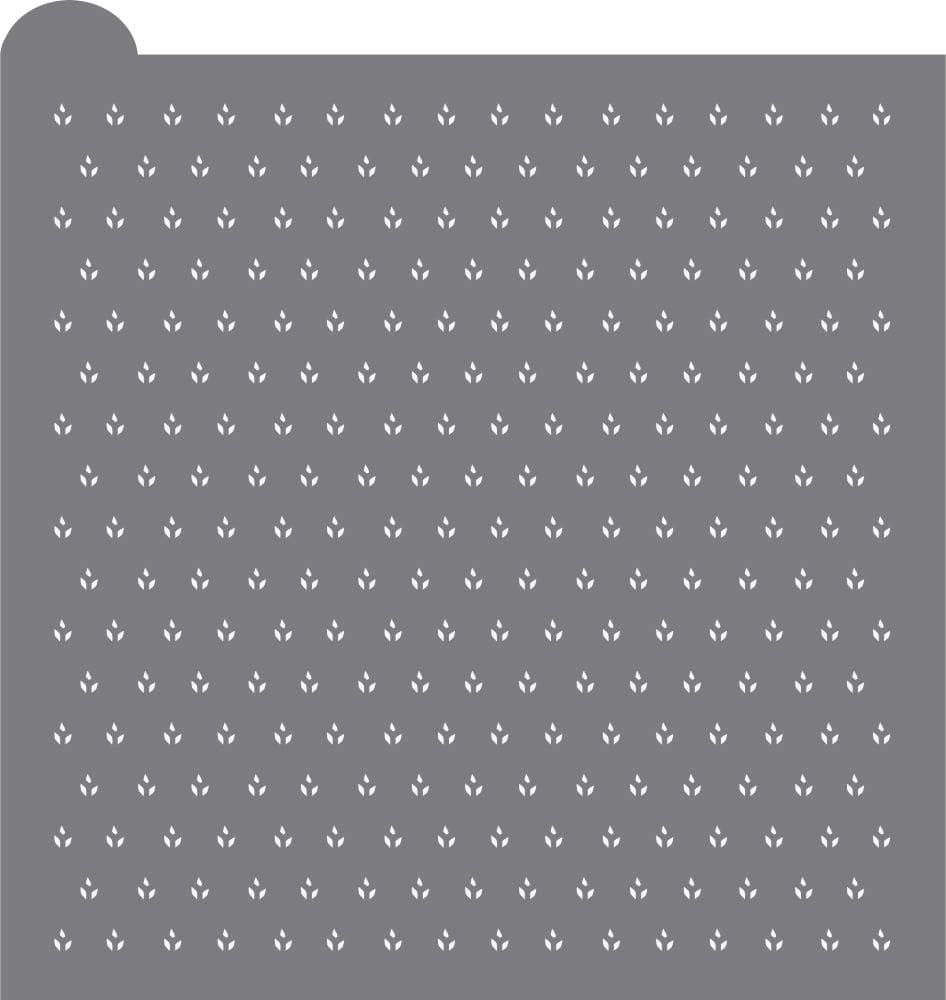
Also, as you hopefully know by now, the background stencil in the background set (the mini ears of wheat, pictured directly below) is sold separately and can be found under Ears of Wheat Dynamic Duos™ Background Cookie Stencil on my partner’s site.
More awesome news: I am now designing and releasing a cookie cutter each month to go with my stencils! This month, I introduce the Denver Plaque, a crisp, streamlined design sized perfectly for place cards! It is hot off the 3-D printer (after many rounds of QA testing), so I didn’t have time to work it into the real cookies pictured here, but this graphical rendering should give you a good idea of how it will look with this set.
The ends and center of the cutter are purposely flared to accommodate the many cute foreground elements in the background set – either before or after messages, or smack dab in the center of the cutter. My stencil partner is also producing my new cutter line. Together, we’ve worked hard to ensure that the cutters have the most precise cutting edges possible, while still being very durable. Read more about my cutter line on my blog, including how I plan to name each cutter after a special person in my life!
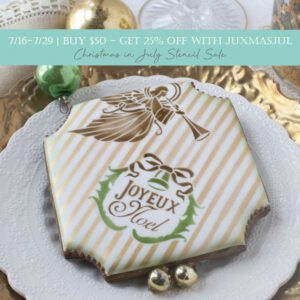
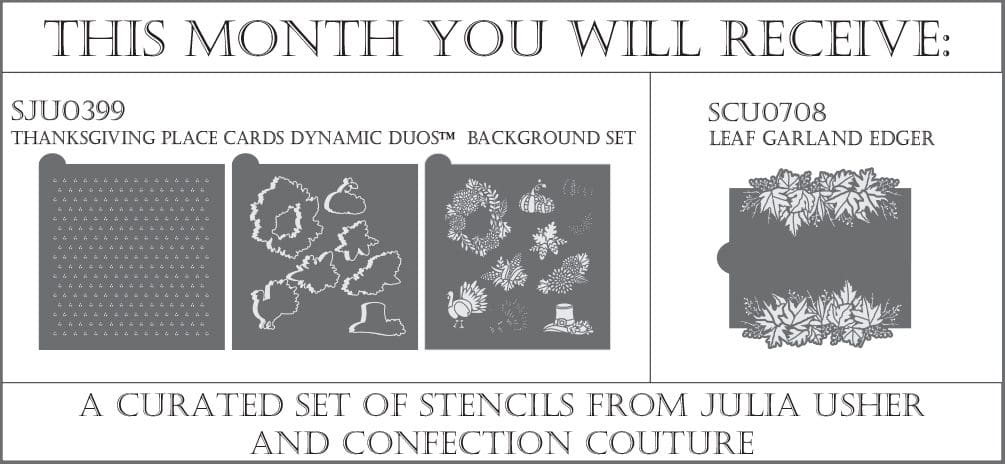
So much news, I know! But before we get into the meat of this post (how September’s two complementary stencil sets work), please allow me a short grace period to introduce my Stencil of the Month Club to those not yet in the know. If you join it, each month you’ll automatically get the current month’s background set along with my partner’s single companion stencil, all at a substantial (>15%) discount. For example, here’s what my club’s offering looks like this month:
As I mentioned, the background set is jam-packed – so you’ll have more design options than ever. Speaking of which, take a gander at the style reel below, which shows just a small subset of the designs possible with both the background and message and frame sets. Wow!
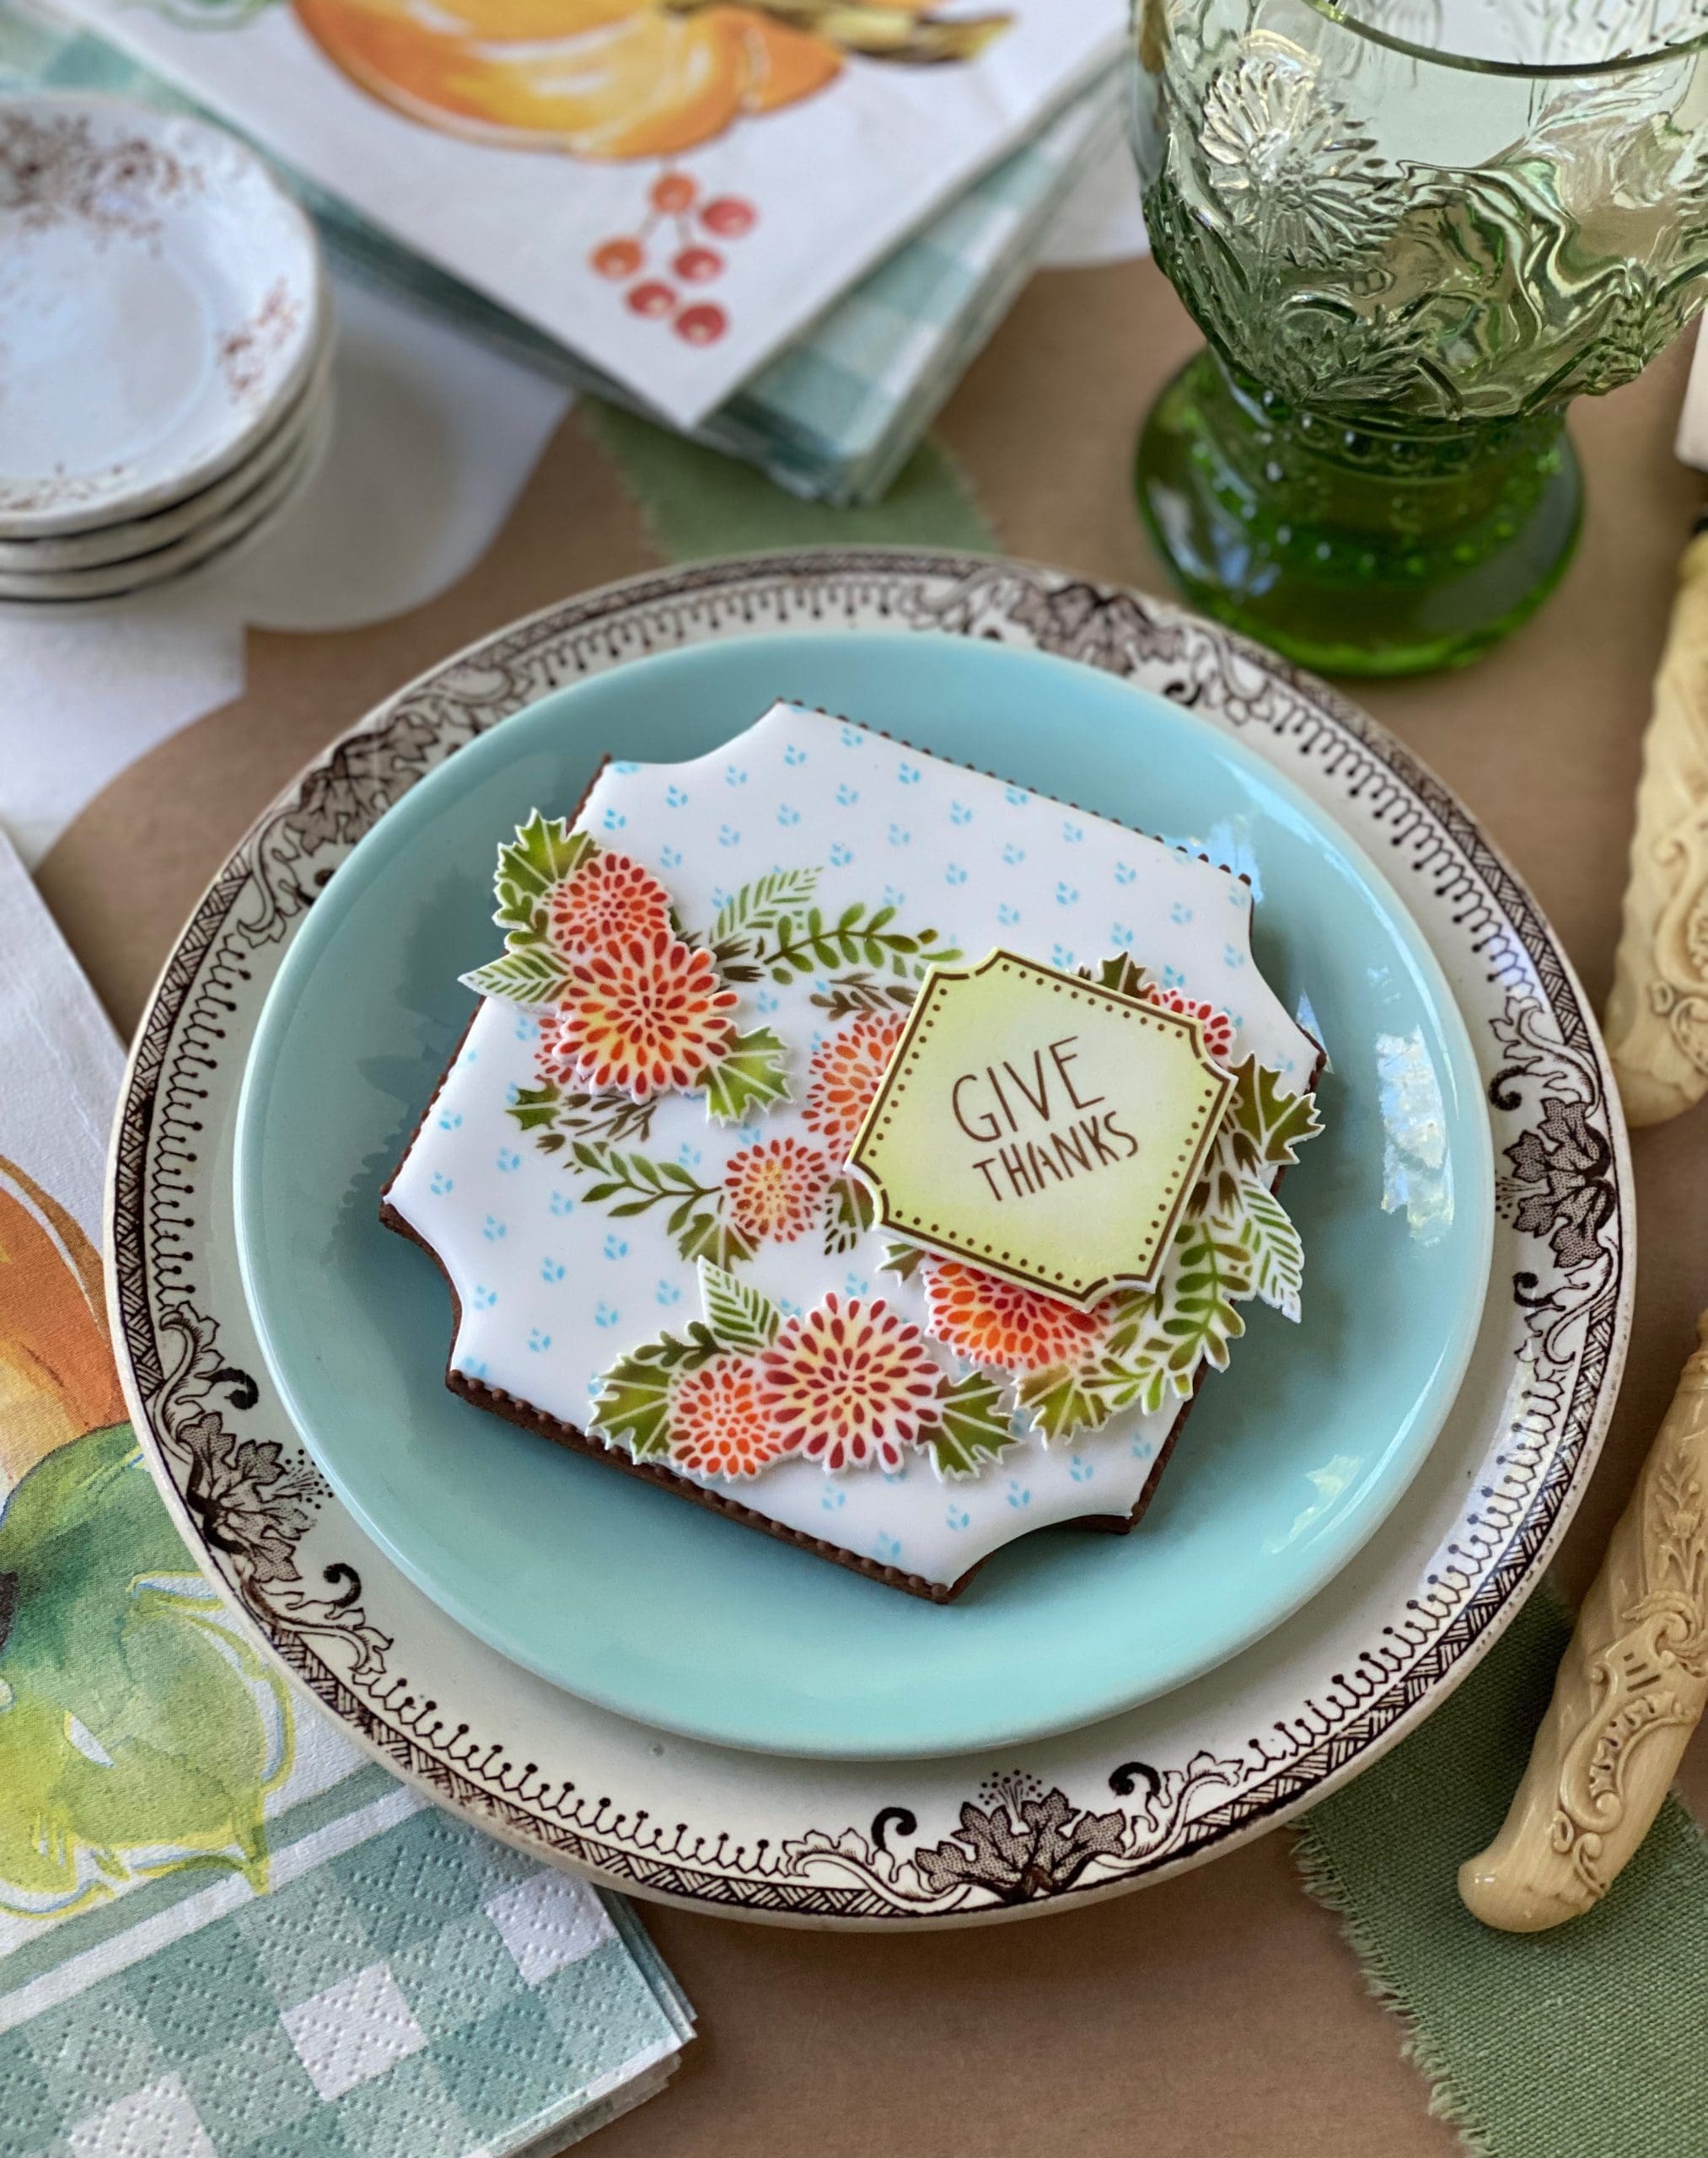
For more info about how I made one of these designs (the cookie in the title image of this post) take a look at this super-duper time-lapsed tutorial as well . . .
Got an appetite for more?! Read on for additional info about how I crafted several other designs . . .
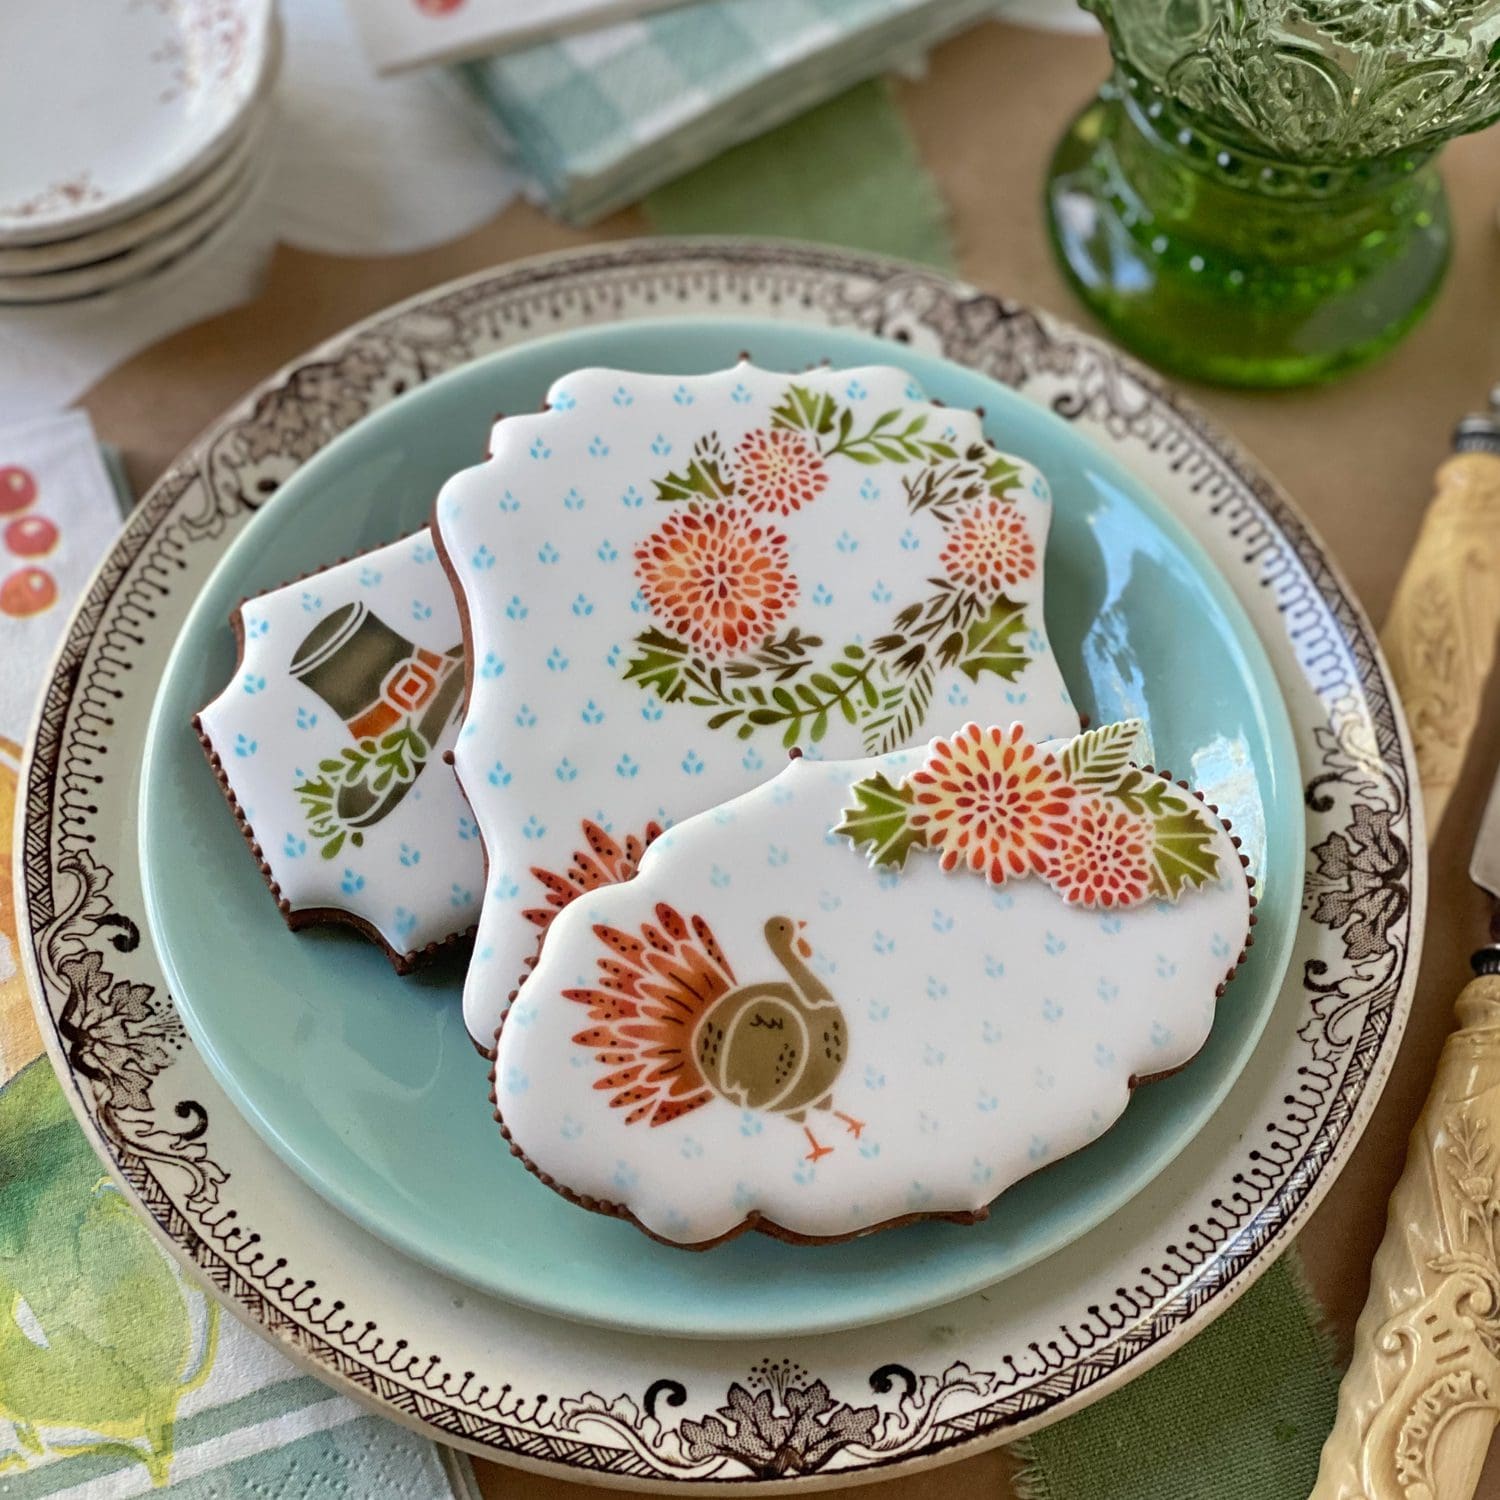
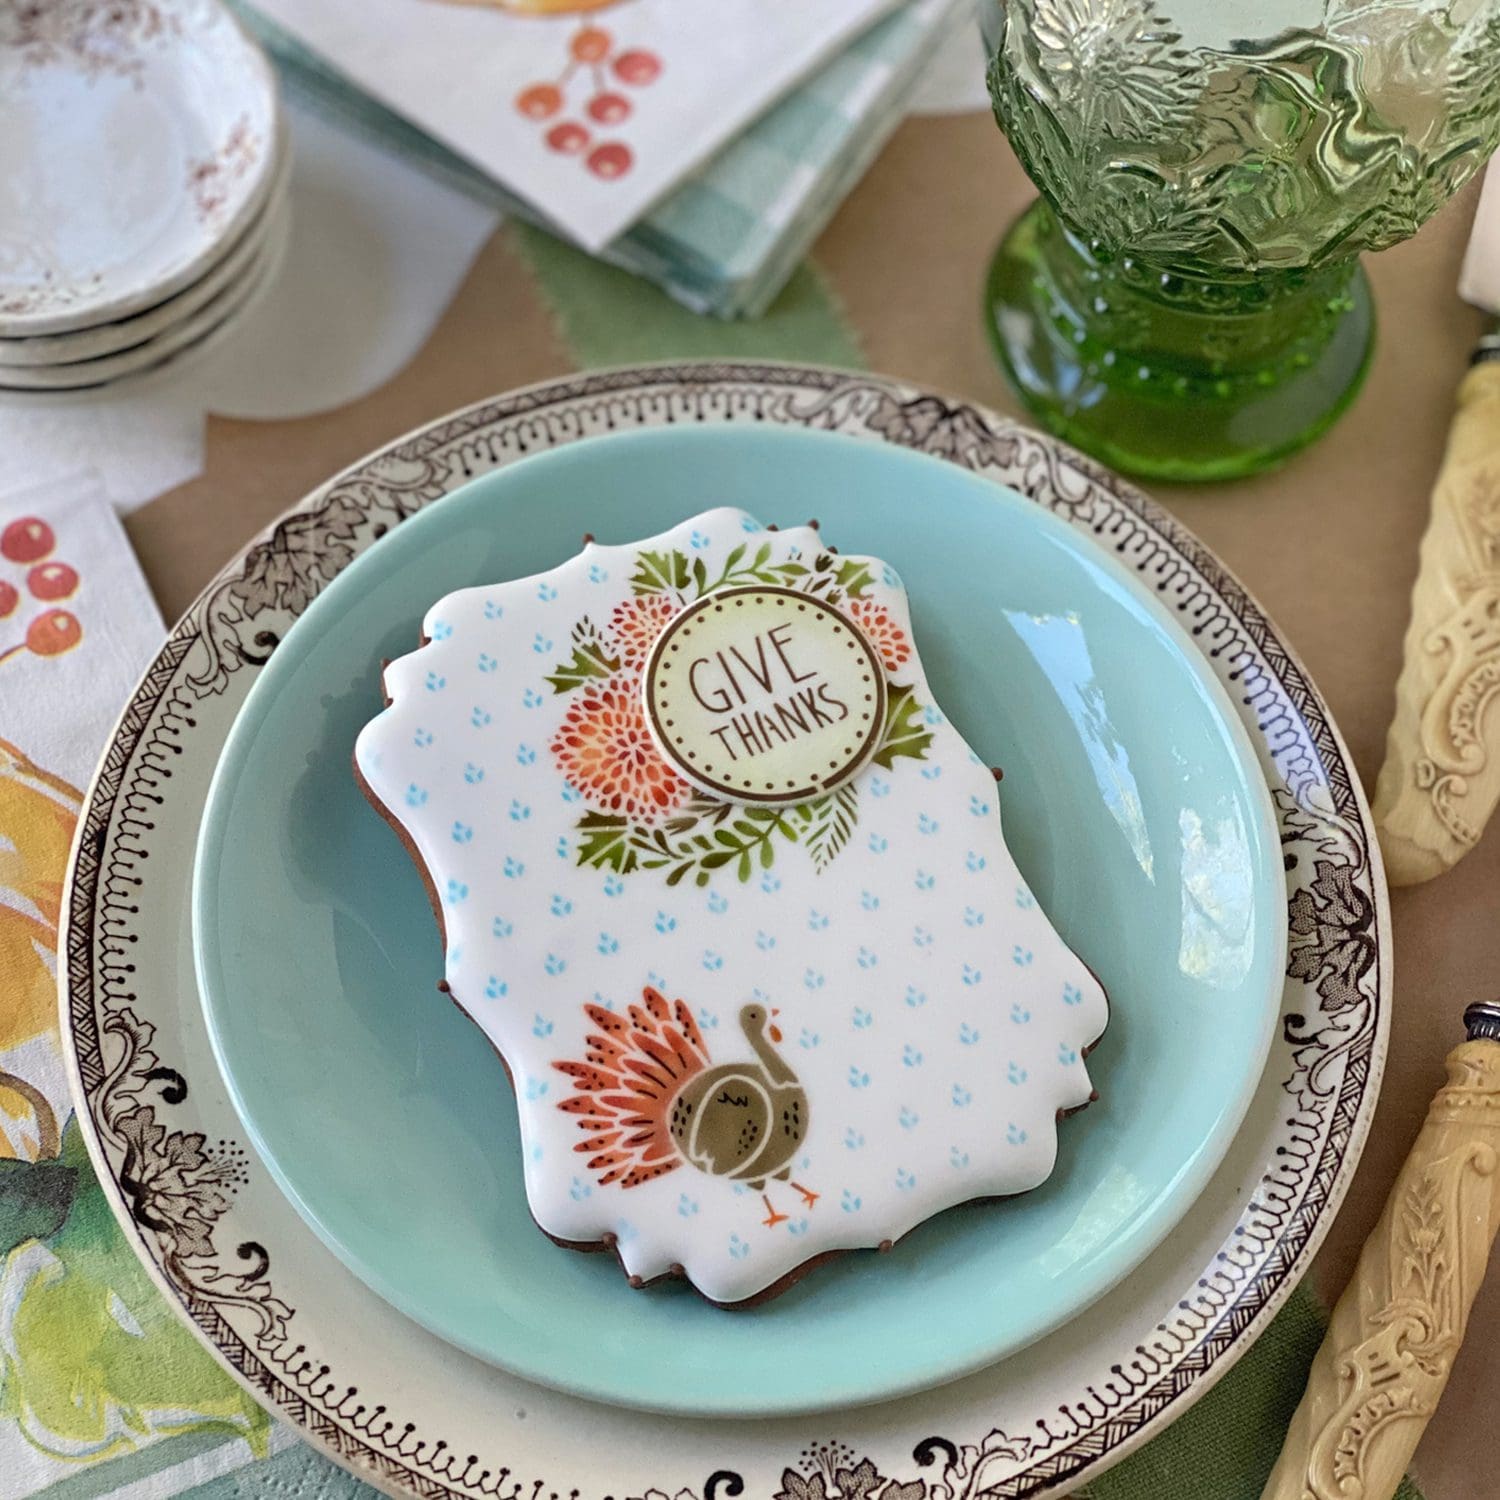
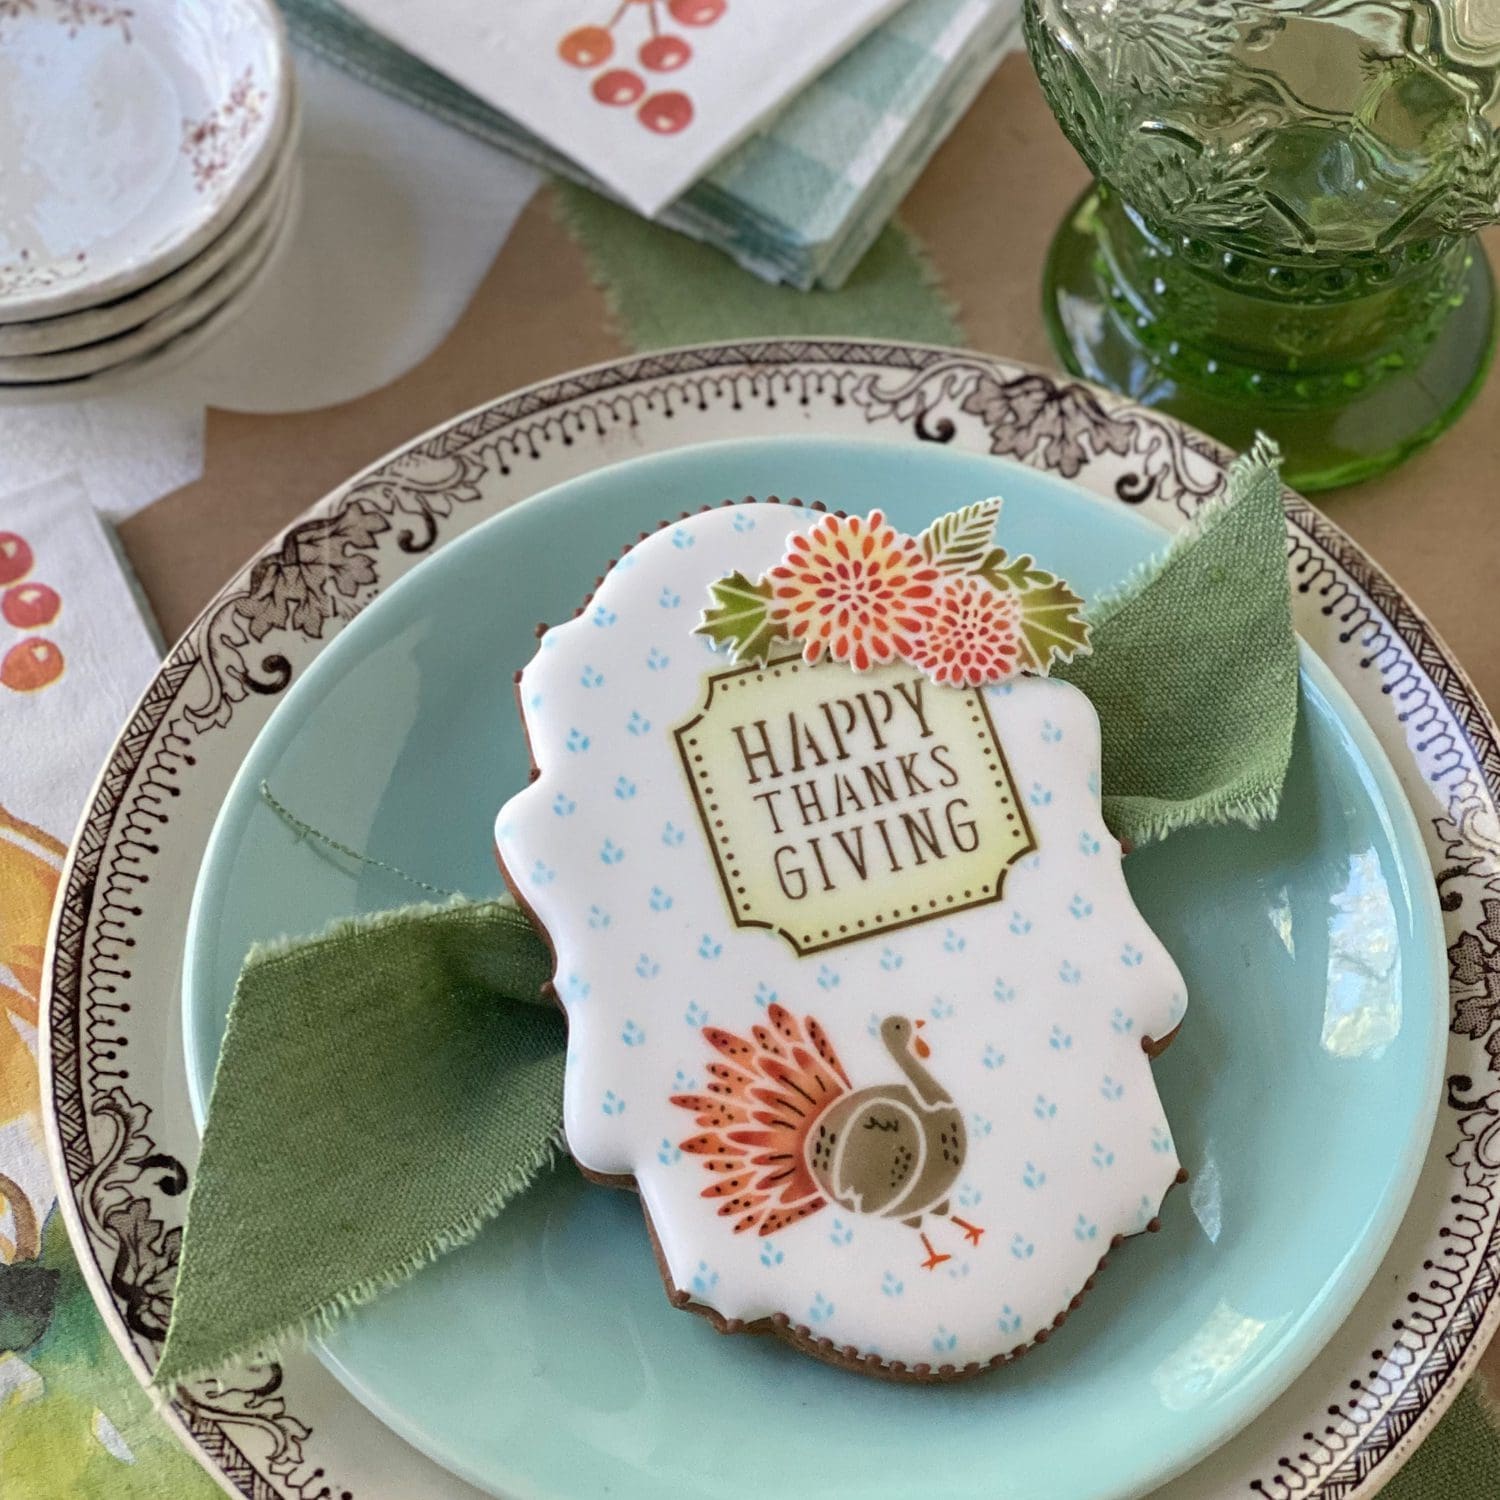
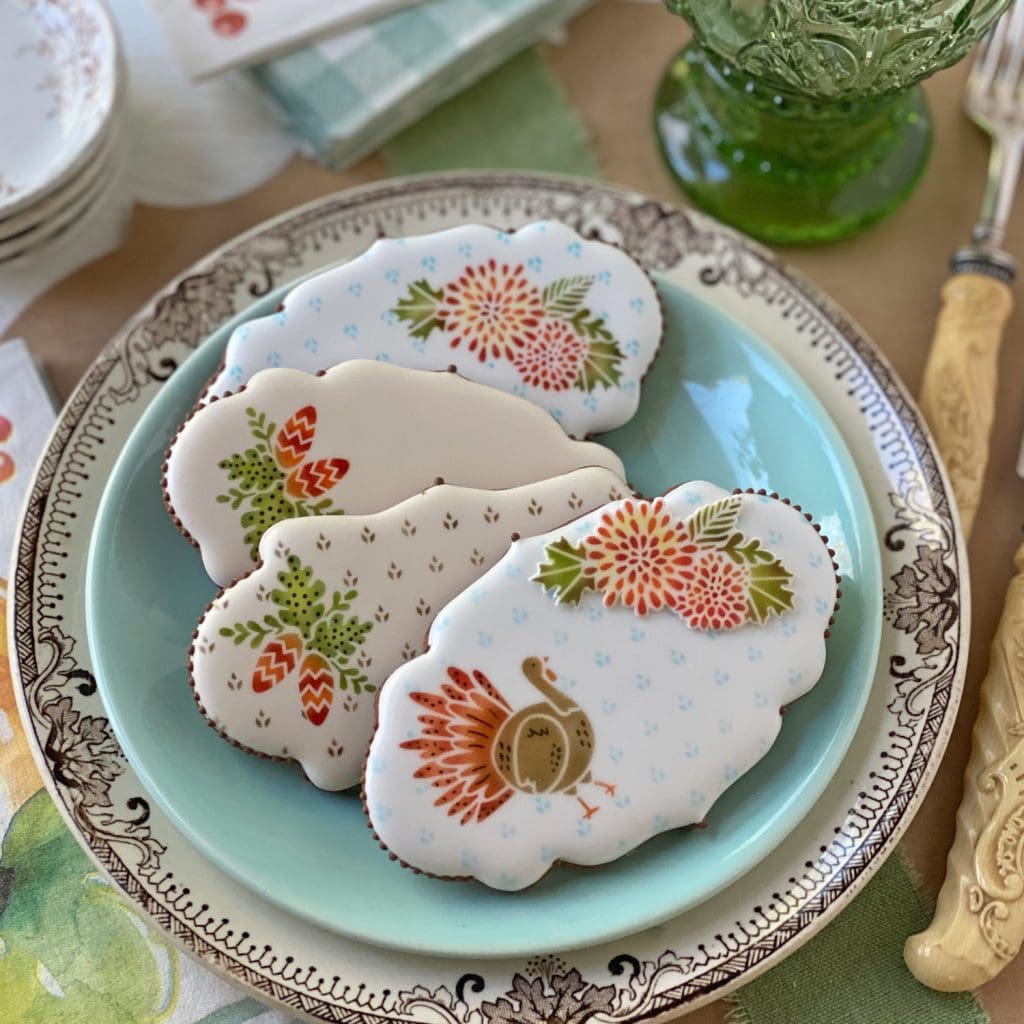
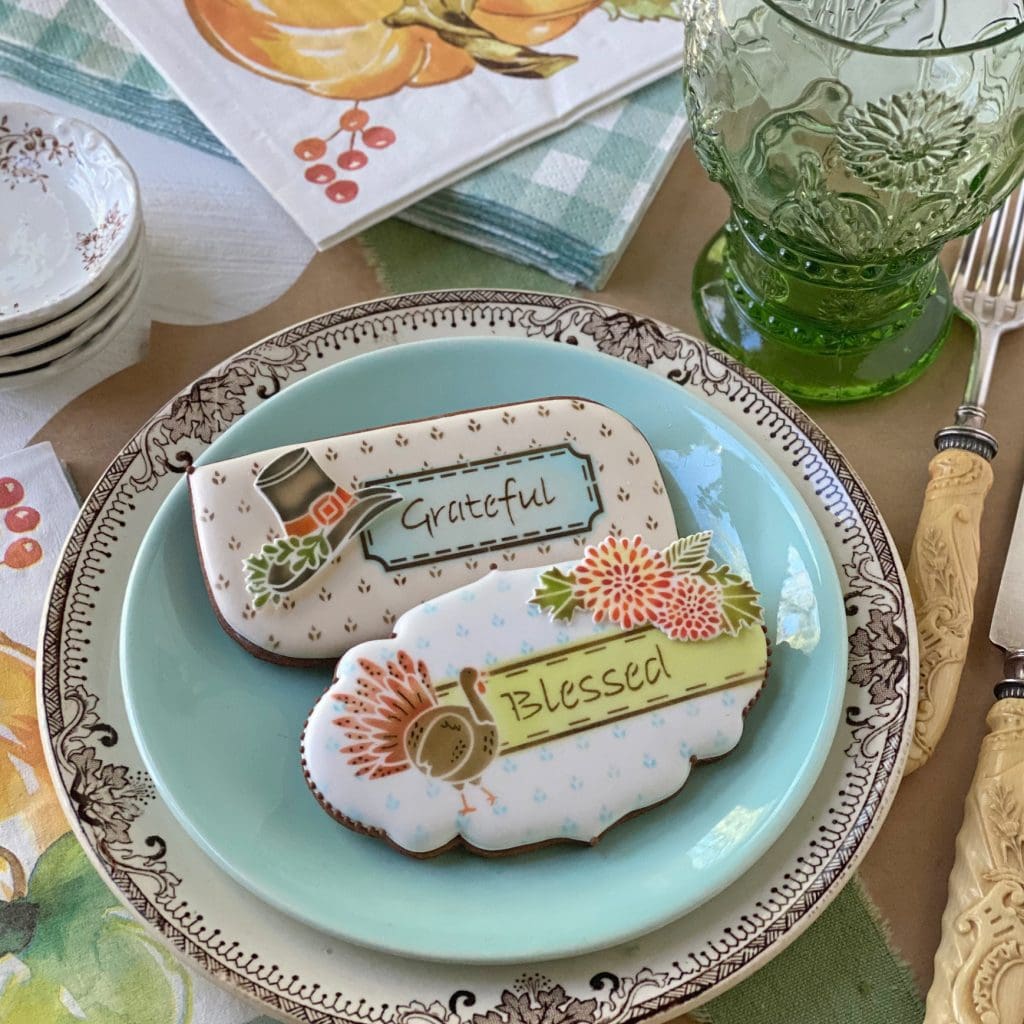
The background stencil (pictured far left), with its mini ears of wheat, is obviously perfect for fall and Thanksgiving-themed sets. However, because it’s so understated and delicate, it’s also an ideal complement to almost any other overlay. (Remember, elements from all of my sets can be mixed and matched!) You’ll see the background stencil pictured below with an assortment of the foreground elements in this set (namely the turkey, small mum bouquet, and whimsical folk art pine cones) . . .
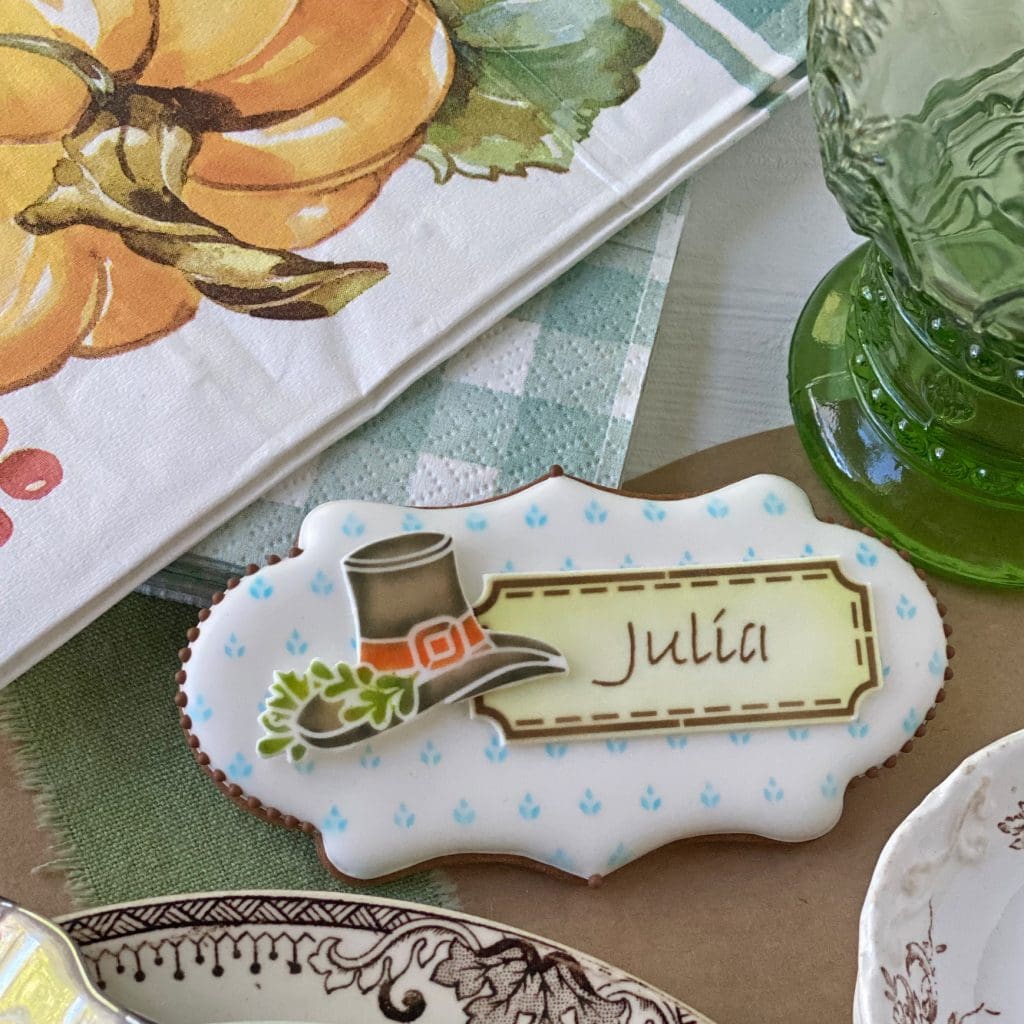
Here it is with the addition of a Pilgrim’s hat and a mum wreath . . .
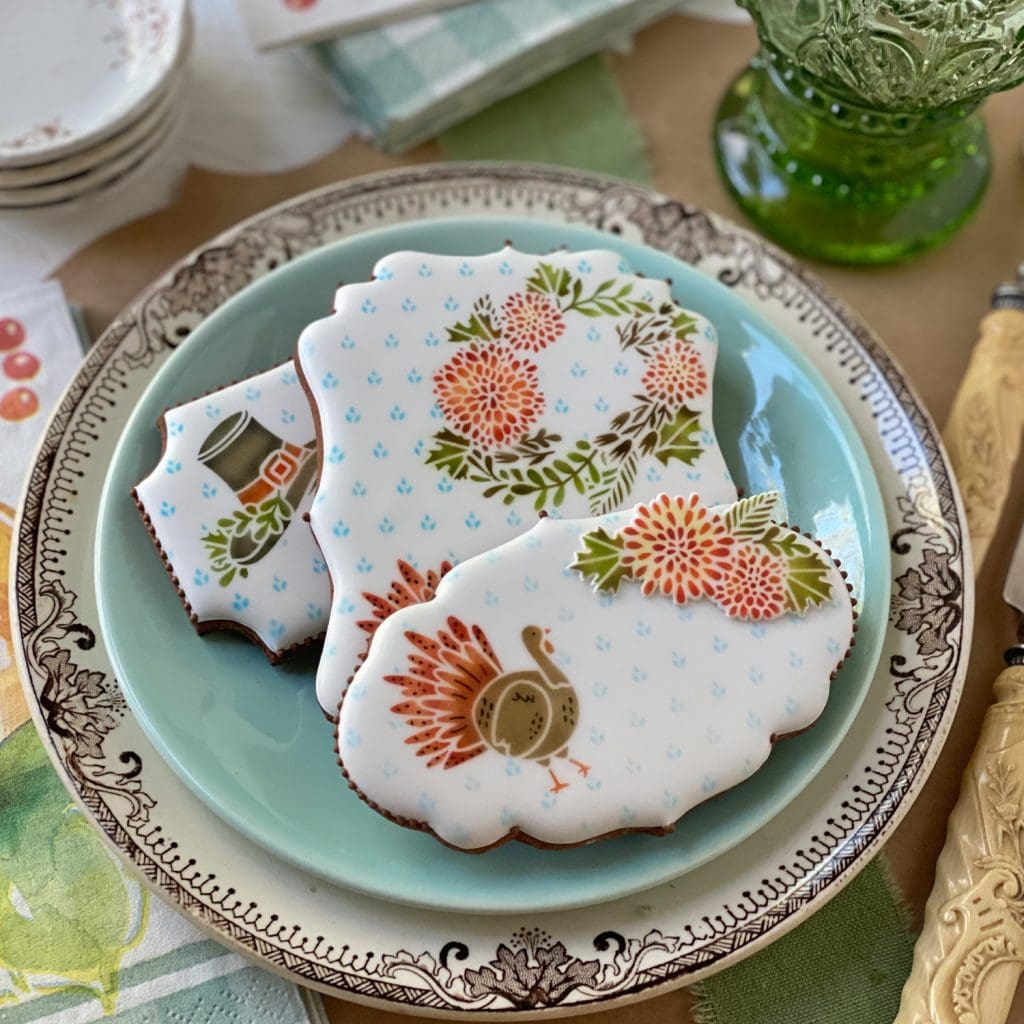
Note: The small mum bouquet on the cookie in the foreground (above) is a fondant appliqué (a thin sheet of airbrushed/stenciled fondant), whereas all of the other elements were directly airbrushed on the cookies. The colors used throughout this post include Spectrum Flow Baby Blue for some of the backgrounds; Chefmaster Harvest Brown for other backgrounds, the turkey body, and shading on leaves; AmeriMist Orange for the mums, hat buckle, and turkey feathers, feet, and beak; Chefmaster Super Red for feather and mum lowlights; AmeriMist Super Black for the hat; and AmerMist Electric Green and Avocado Green for the foliage. The yellow highlights on the mums were achieved by dry-dusting with Petal Crafts Lemon Yellow compressed petal dust, though most of their yellow colors would work just as well.
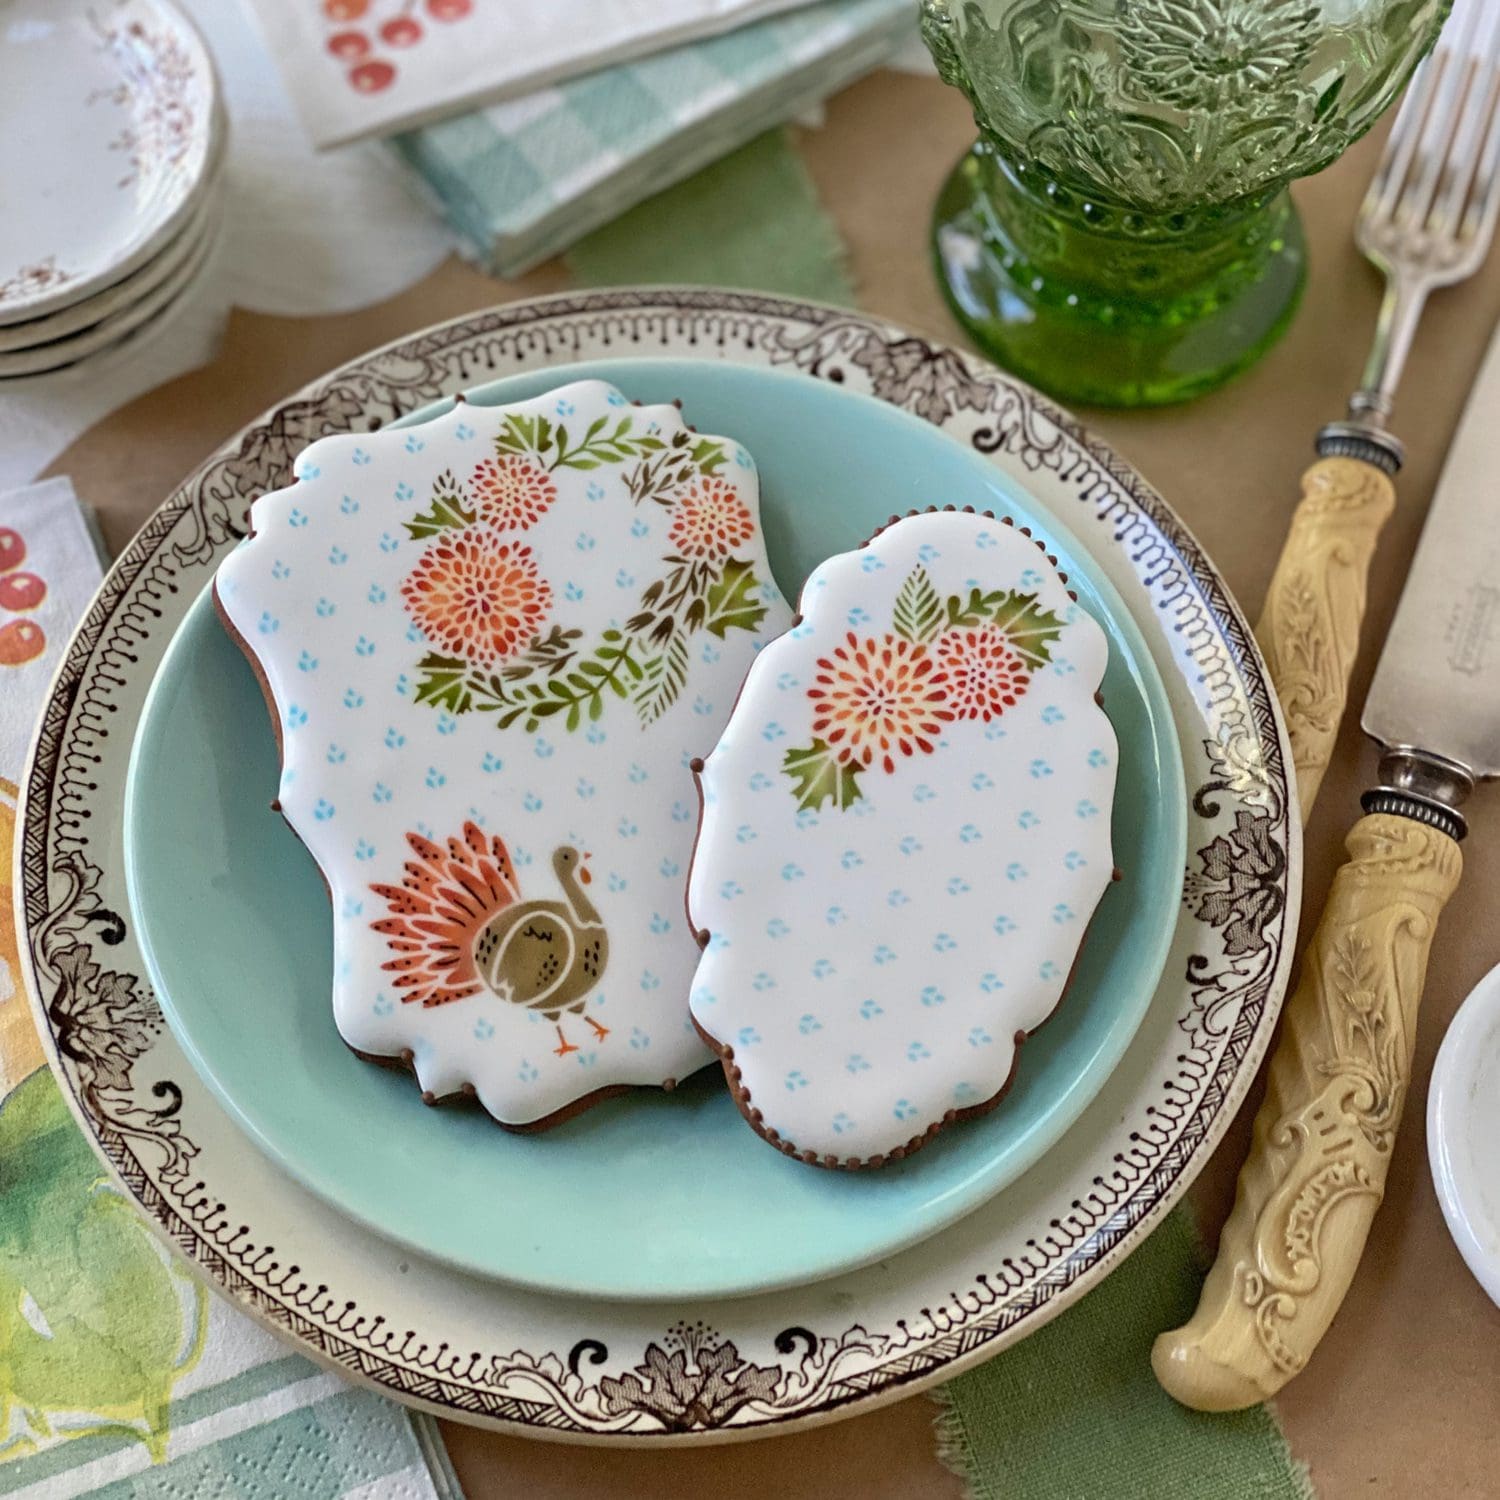
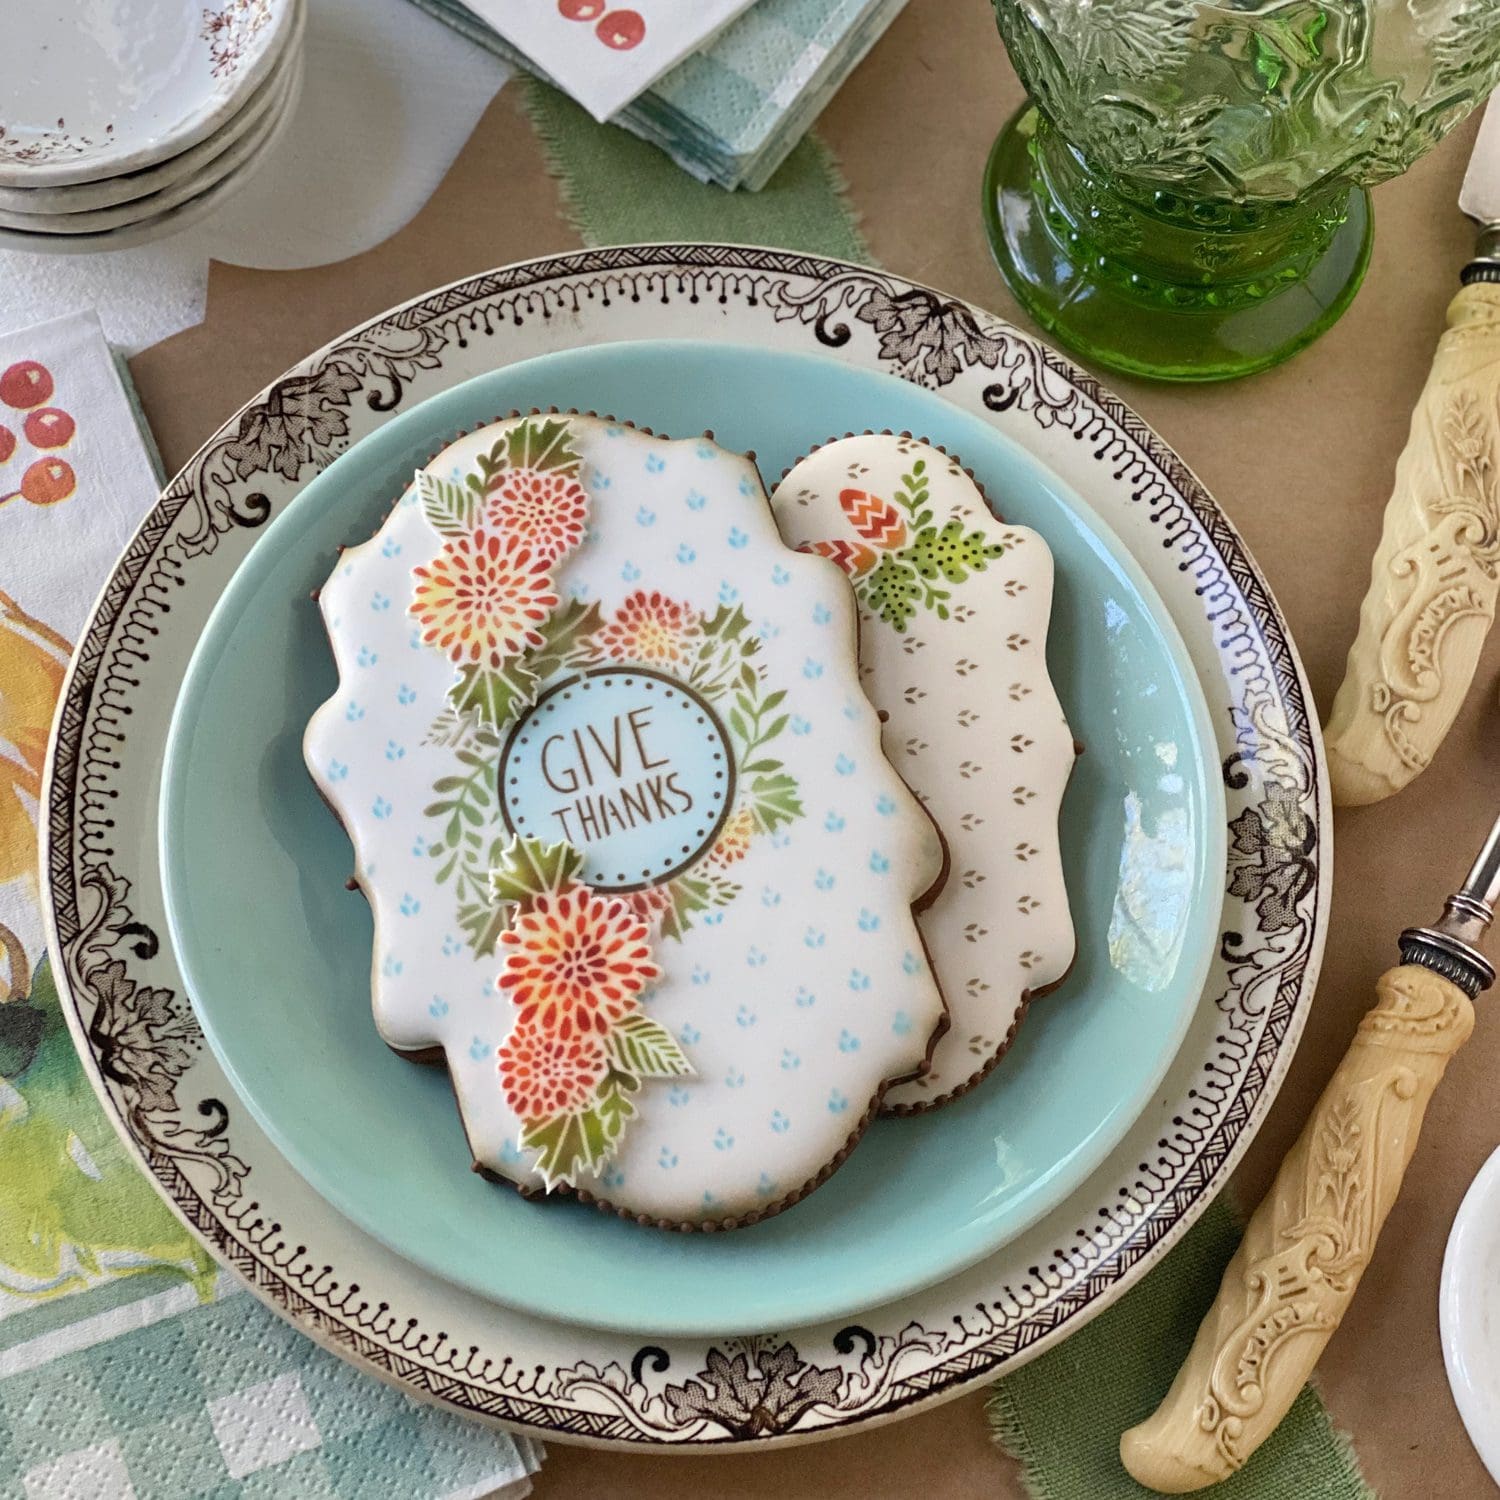
Below is a closer, less obstructed view of some of these cookies. You can use as many foreground elements as you want on a cookie (!), but I usually limit them to two (maybe three) to allow room for additional messages from the complementary message and frame set. (More on that set in a bit.)

And an even closer view so you can appreciate the details on the turkey . . .
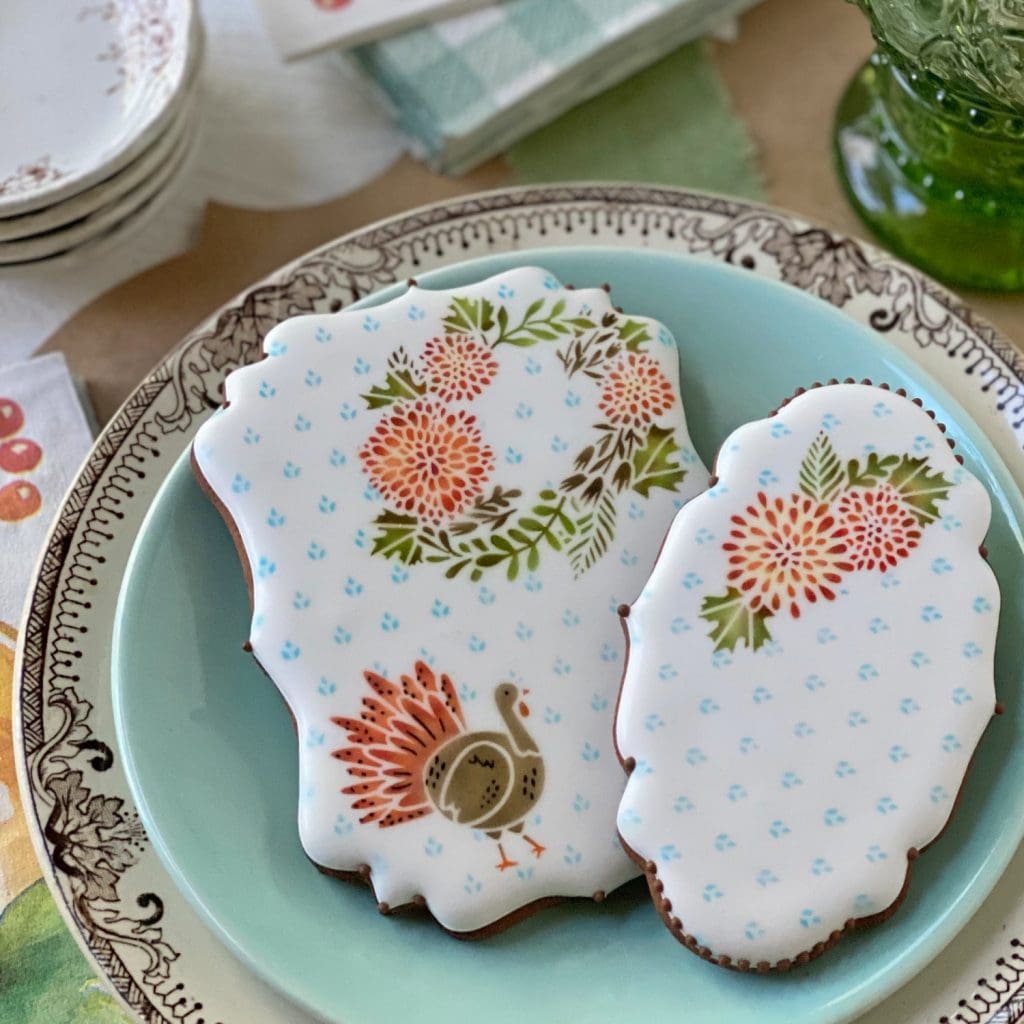
About those fine points . . . Another cool thing about this set is that several of the foreground elements – specifically the turkey, folk art pine cones, and mini pumpkin (not pictured on any of my cookies here) – come with overlays that allow you to superimpose additional details. For instance, all of the tiny black lines and dots on the turkey were layered on top of the other colors using the turkey’s overlay. For your convenience, all three overlays are included on the same stencil sheet that contains their corresponding foreground elements.
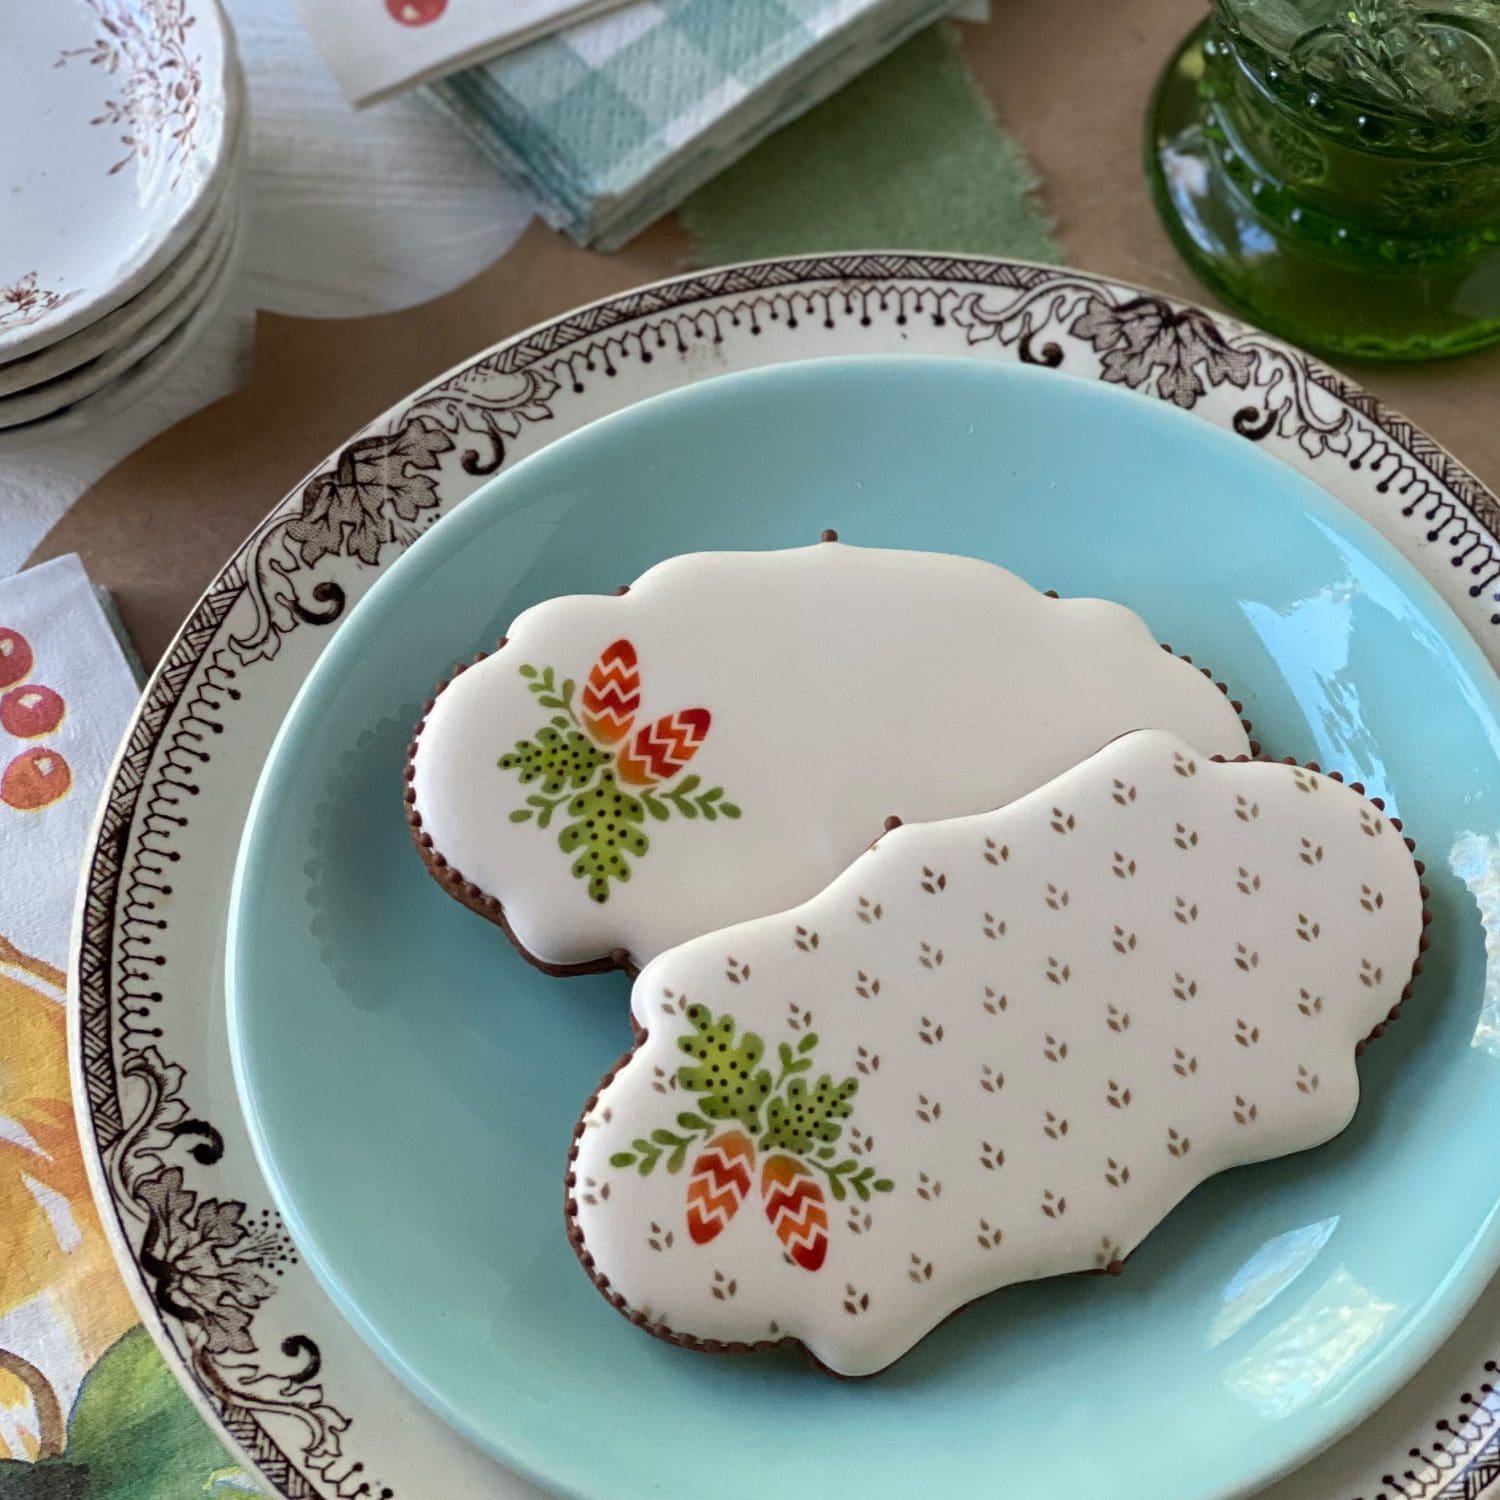
Now . . . the following two cookies depict how you can alter the “mood” or “feeling” of a stenciled set just by changing up the background icing color. Here, I used pale ivory instead of pure white to create a more muted (one might also argue, more autumnal) look . . .

And, of course, just the foreground elements can be used without any background stencil, as the top cookie (above) clearly demonstrates. Once again, the black dots on the leaves were superimposed on the green using the corresponding overlay.
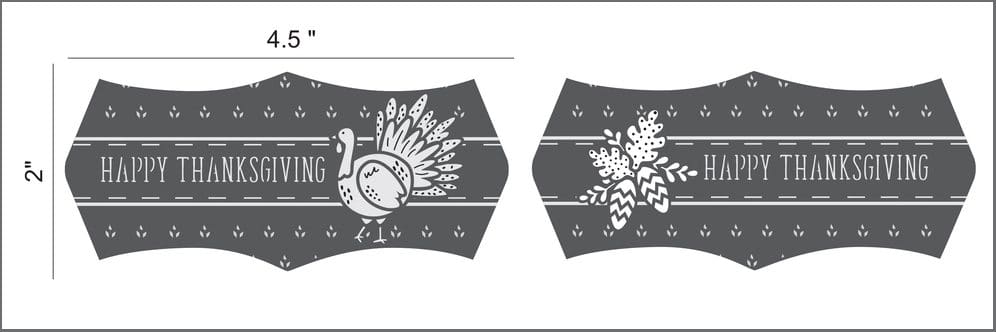
The background set alone can create all of these cookie wonders and more, but this release isn’t called the “Thanksgiving Place Card” for nothing! It’s got more than the usual number of messages and frames to allow you to turn your cookies into a ton of tabletop greetings!
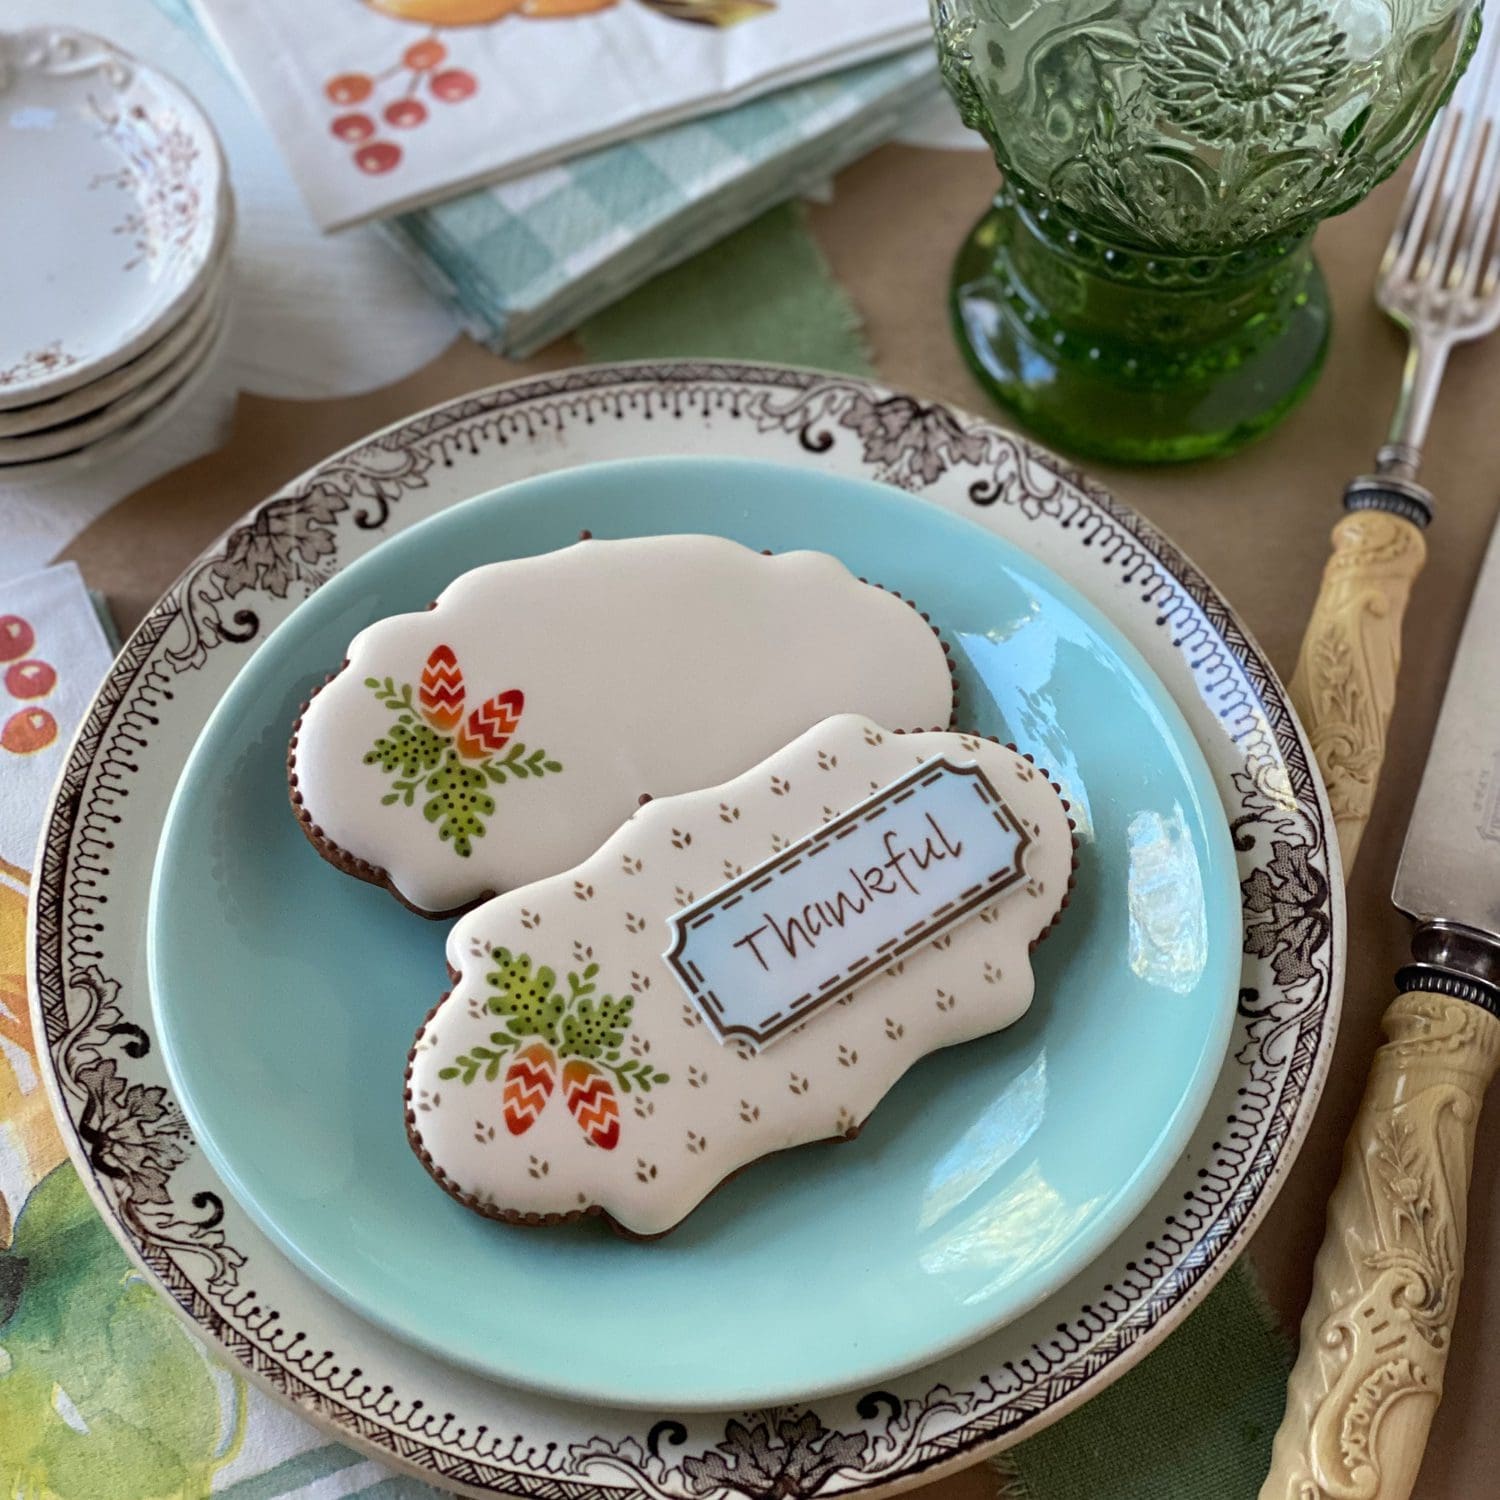
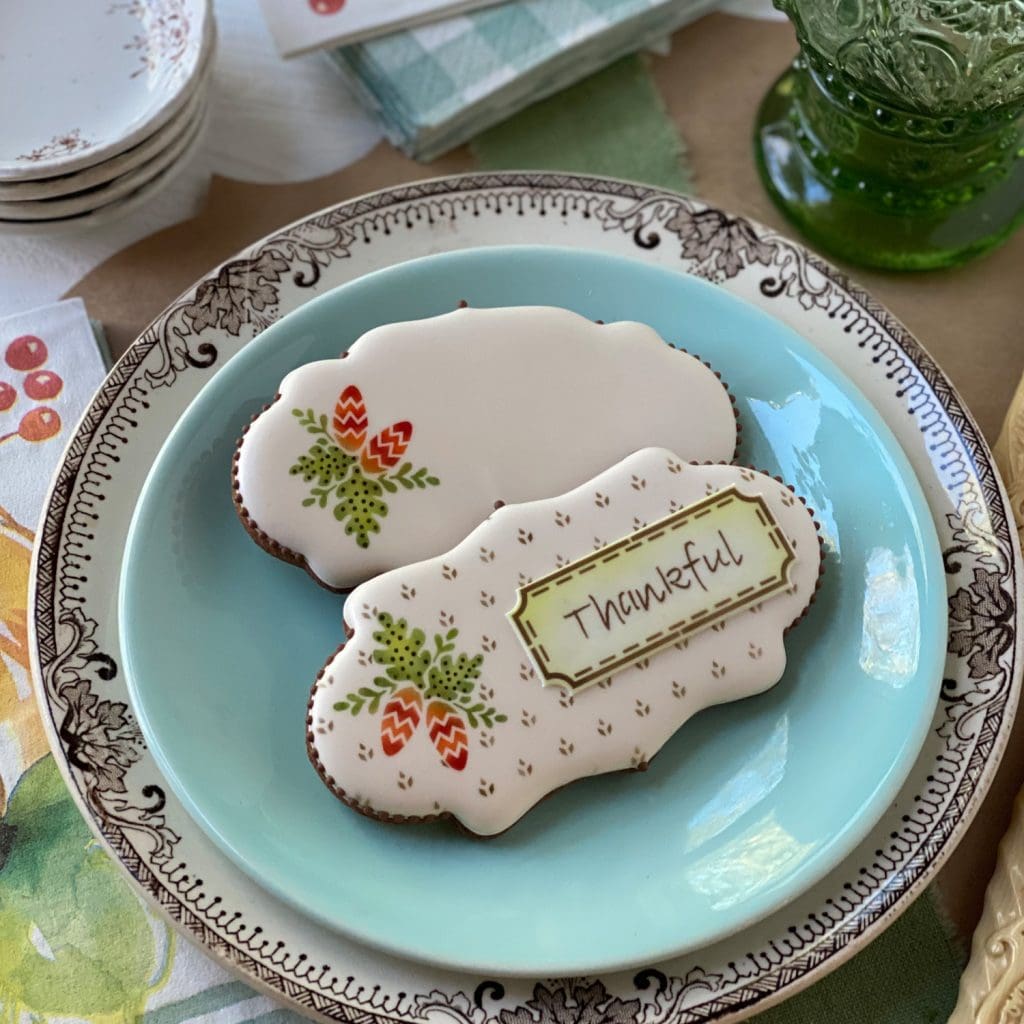
Let me start by sharing some smaller place card-styles using some of the more whimsical foreground elements (the turkey, hat, corn, and pine cones). These cookies are the same ones pictured directly above; the only difference is I added a blue “Thankful” fondant appliqué.

Fondant appliqués afford almost boundless design flexibility, as I’ve said before. Just make them in advance and “try them out” on various cookies until you settle on the best possible design; then commit them to the “right” cookie with royal icing. Though sometimes committing is easier said than done. A green plaque also looks great on this cookie . . . oh, which way should I go?! ![]()
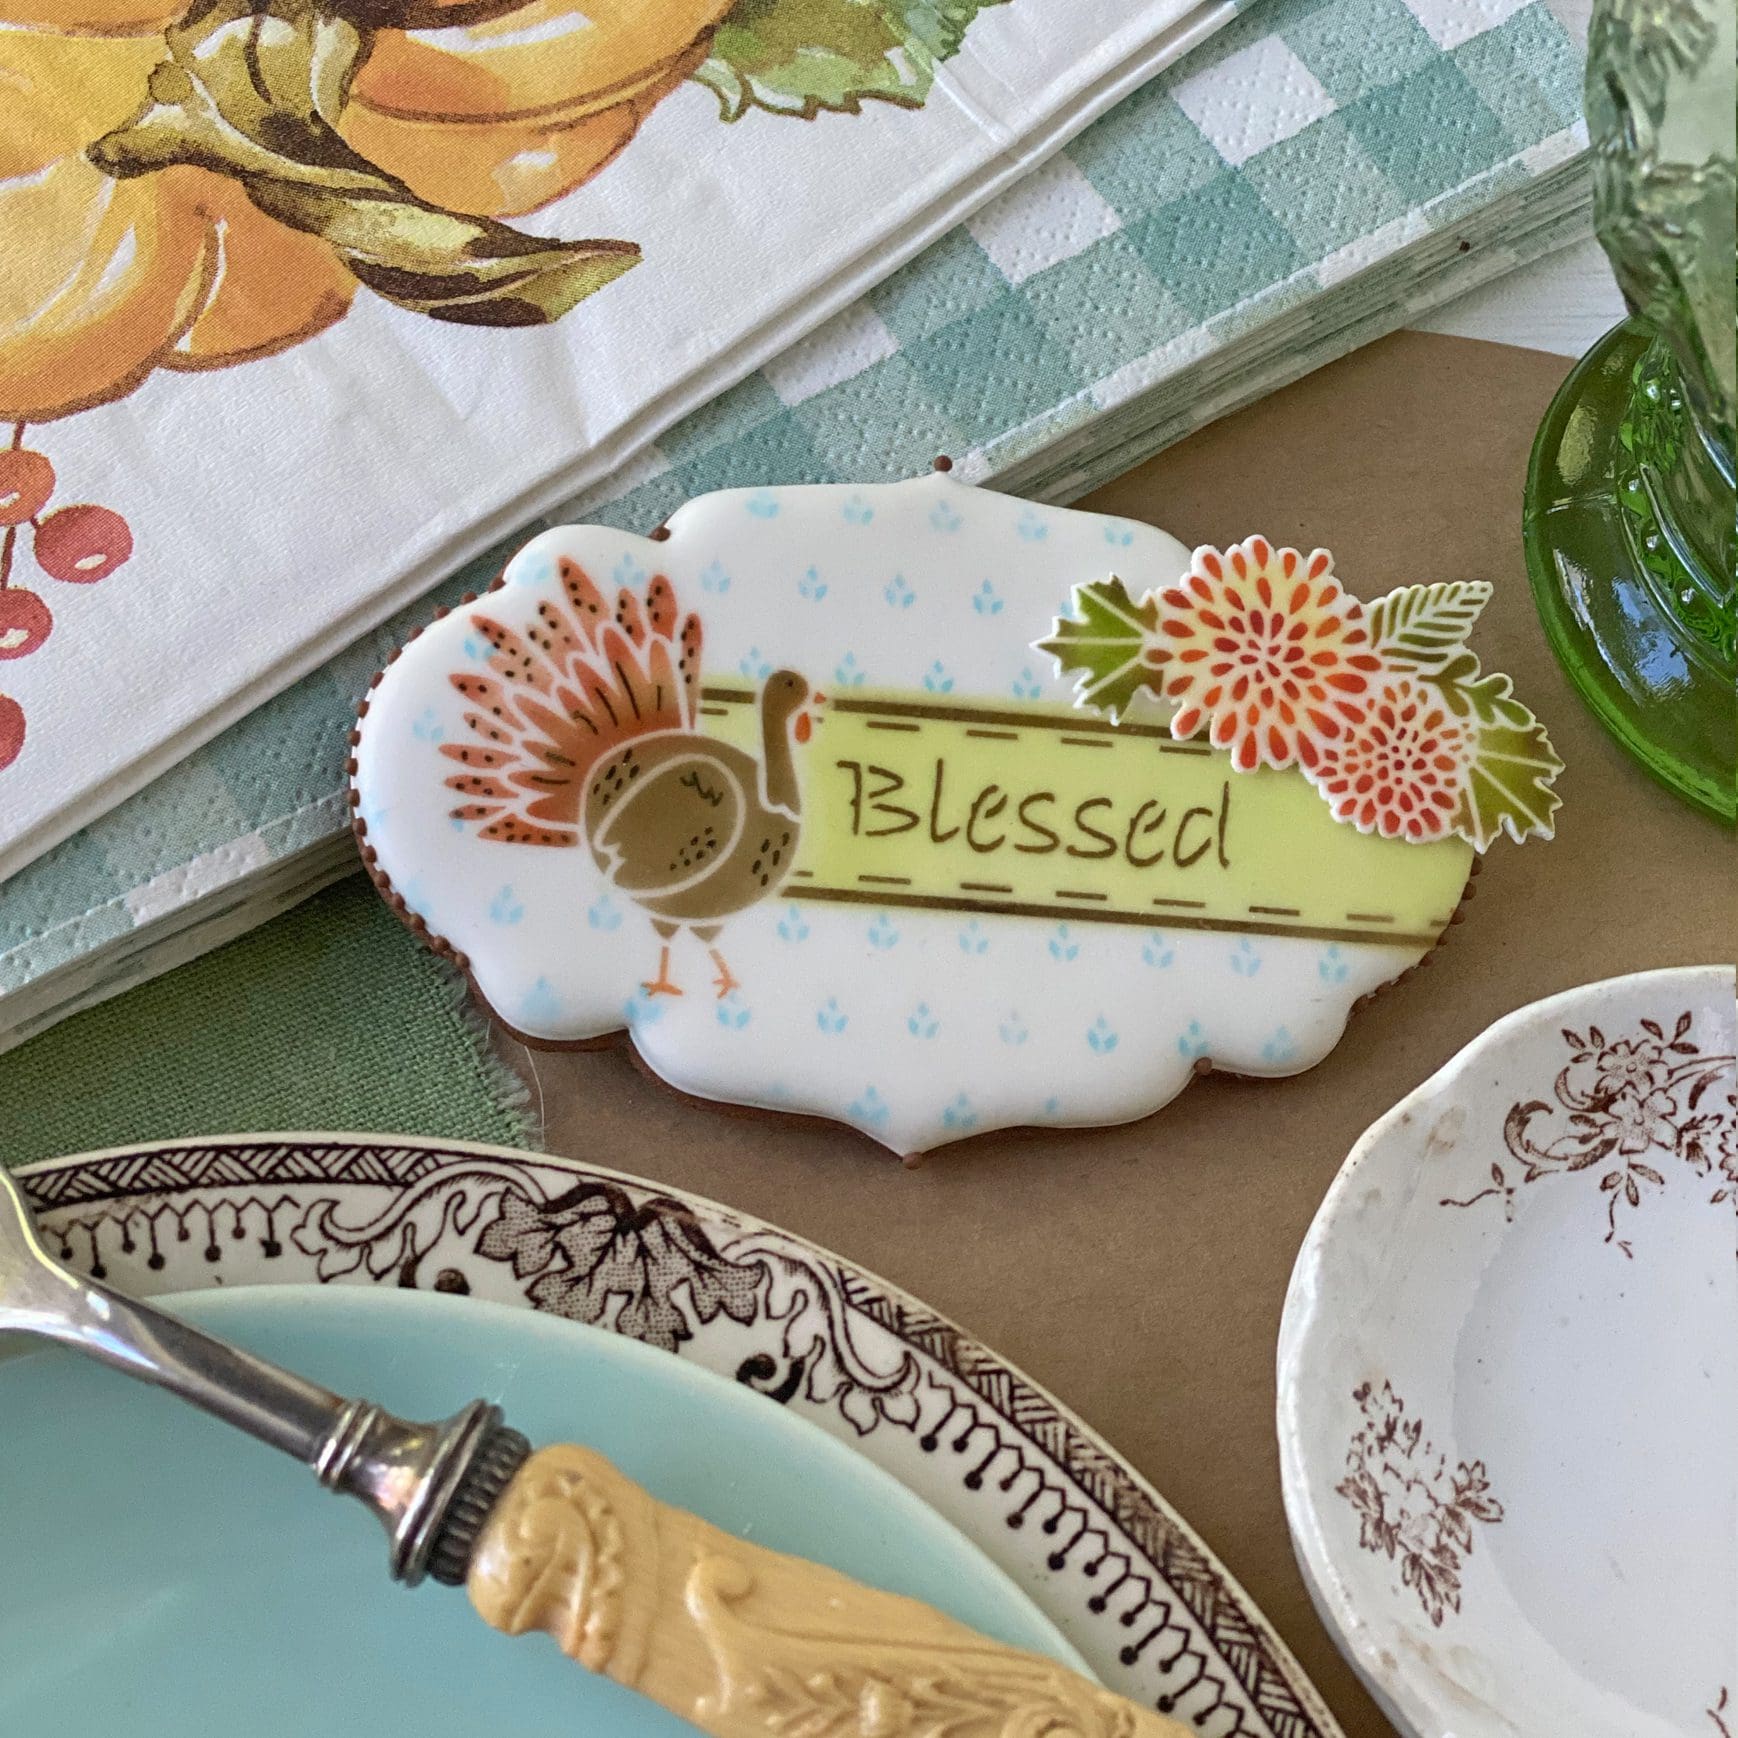
Of course, the messages and frames can also be directly airbrushed and stenciled on the cookies, as was done on both cookies below. They can also be overlapped with other directly stenciled elements, as with the turkey and “Blessed” message on the foreground cookie.
And a little extra dimension from a fondant appliqué (the mum bouquet) is almost always a good thing . . .
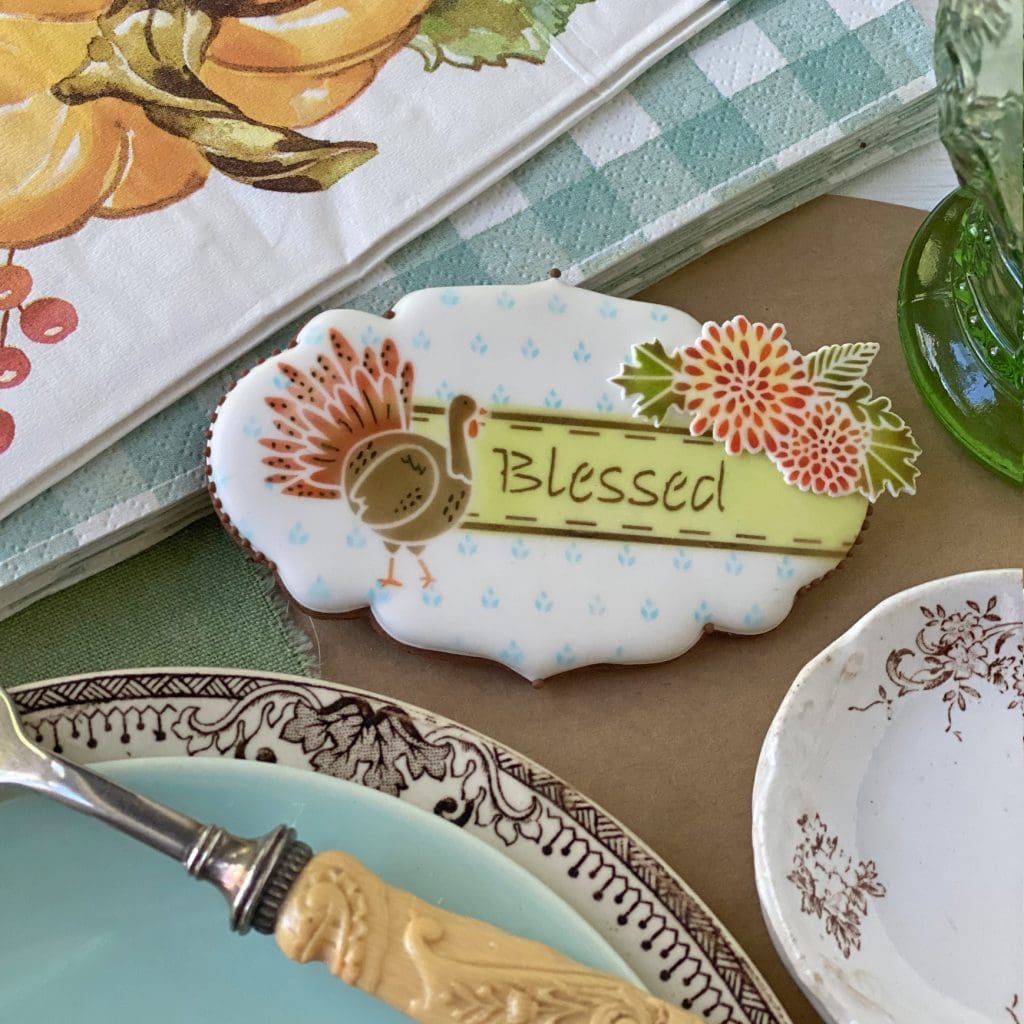
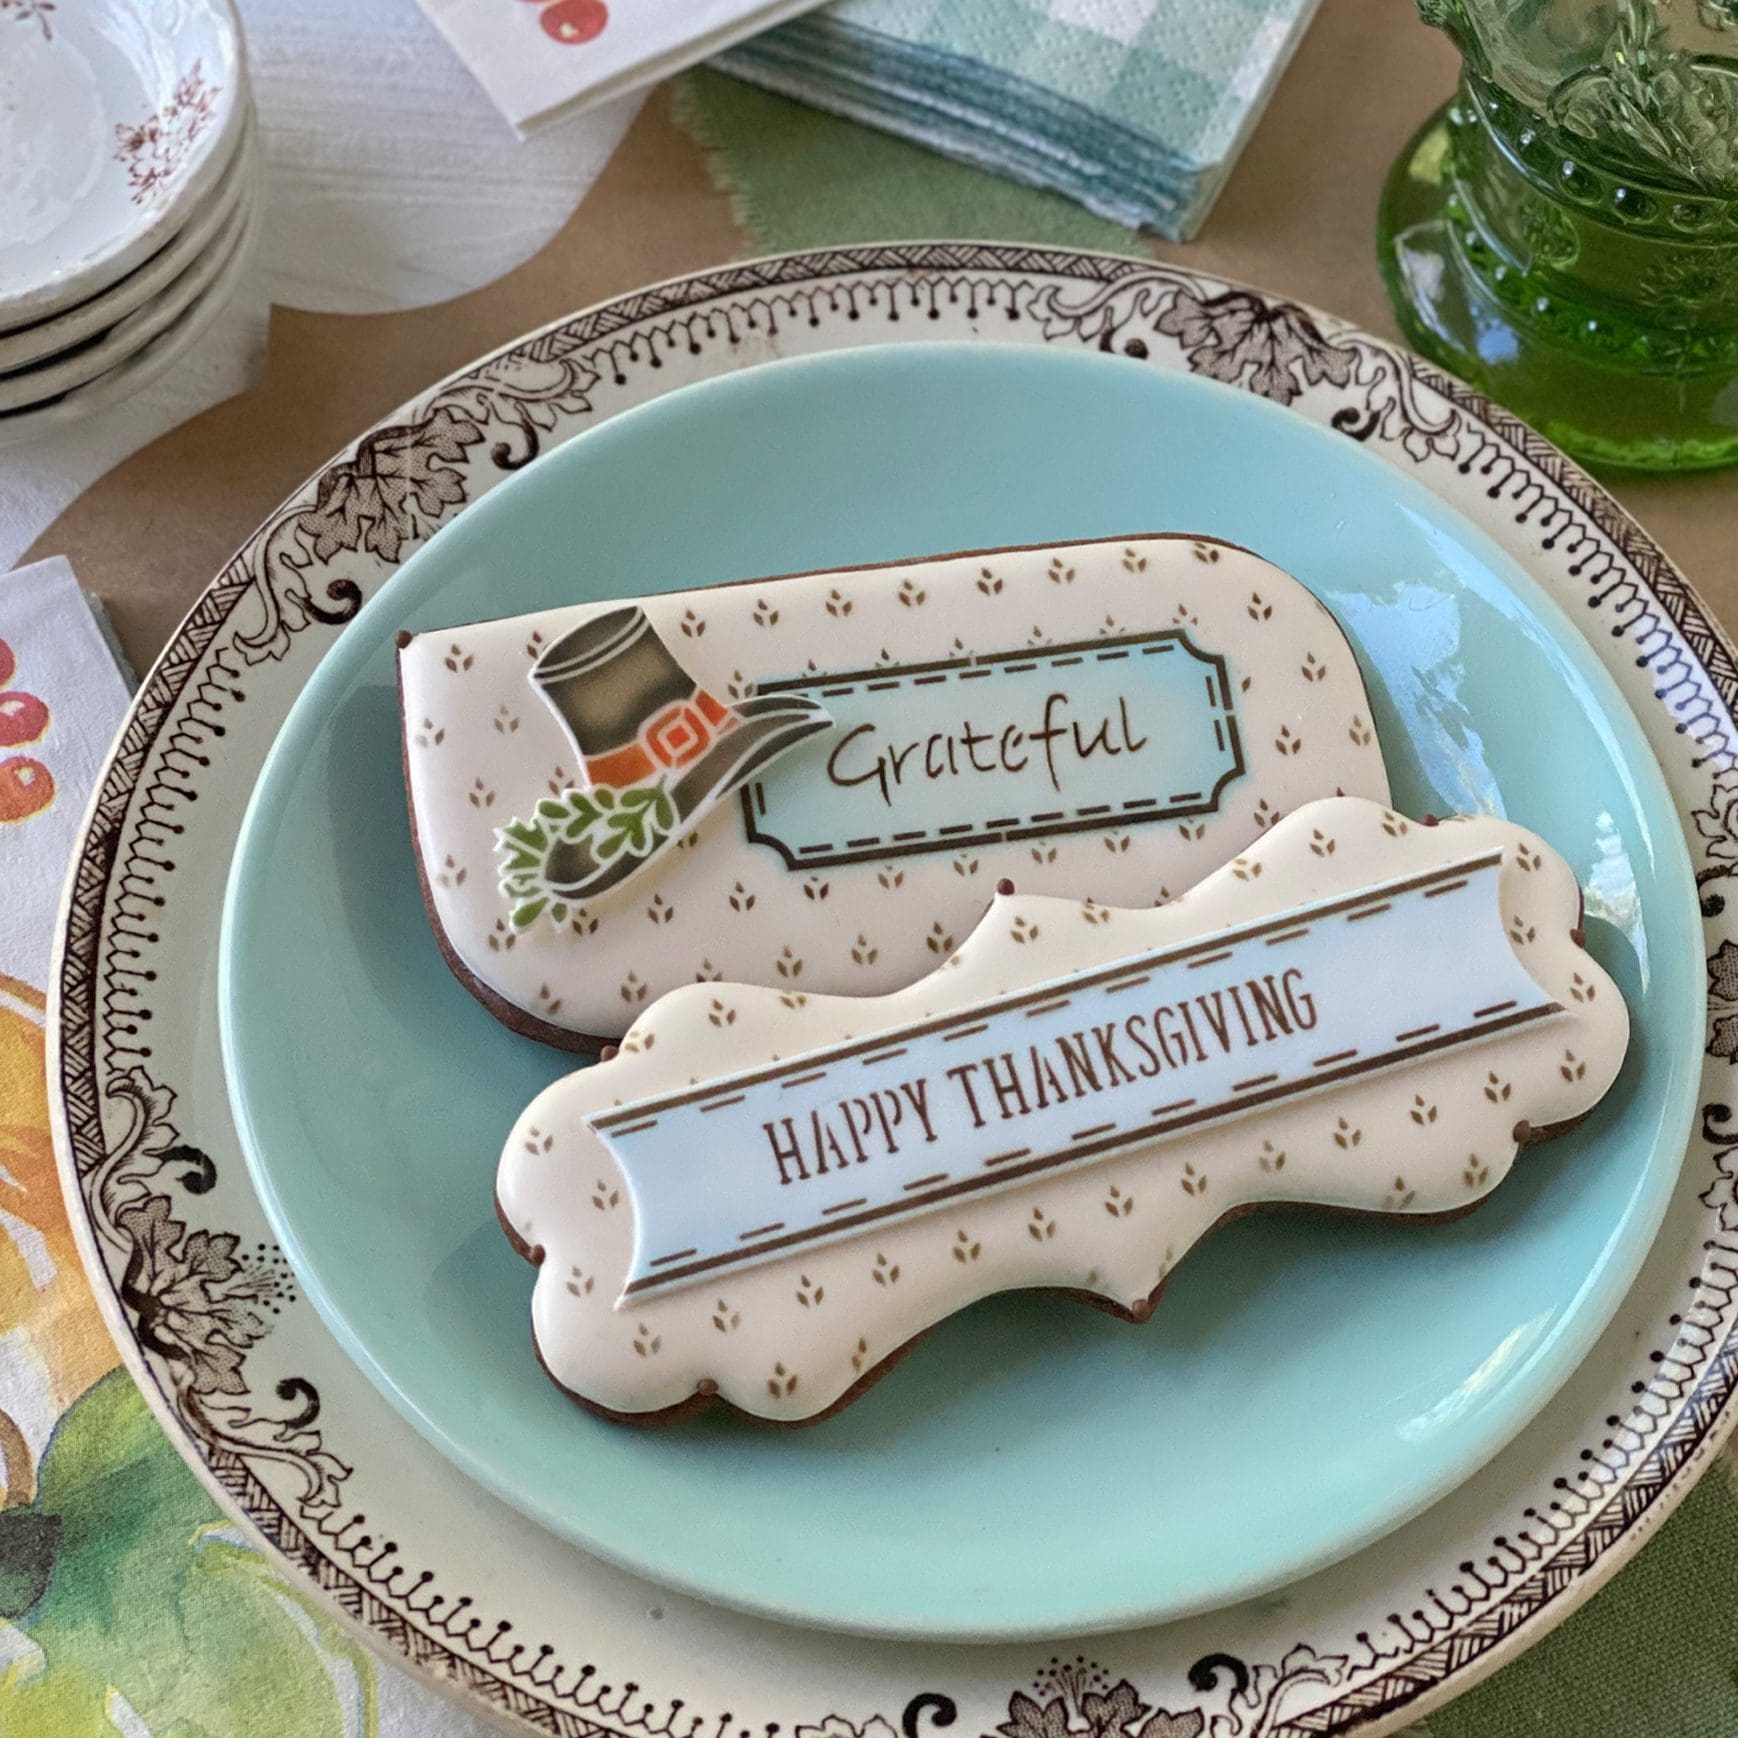
The following photo more clearly demonstrates the difference between directly airbrushed/stenciled elements and fondant appliqués. You can tell the message on the foreground cookie is a fondant appliqué because it sits above the surface of the ivory icing. Fondant appliqués are stiff when dry, so they can even extend off the cookie, as I show in several upcoming designs.

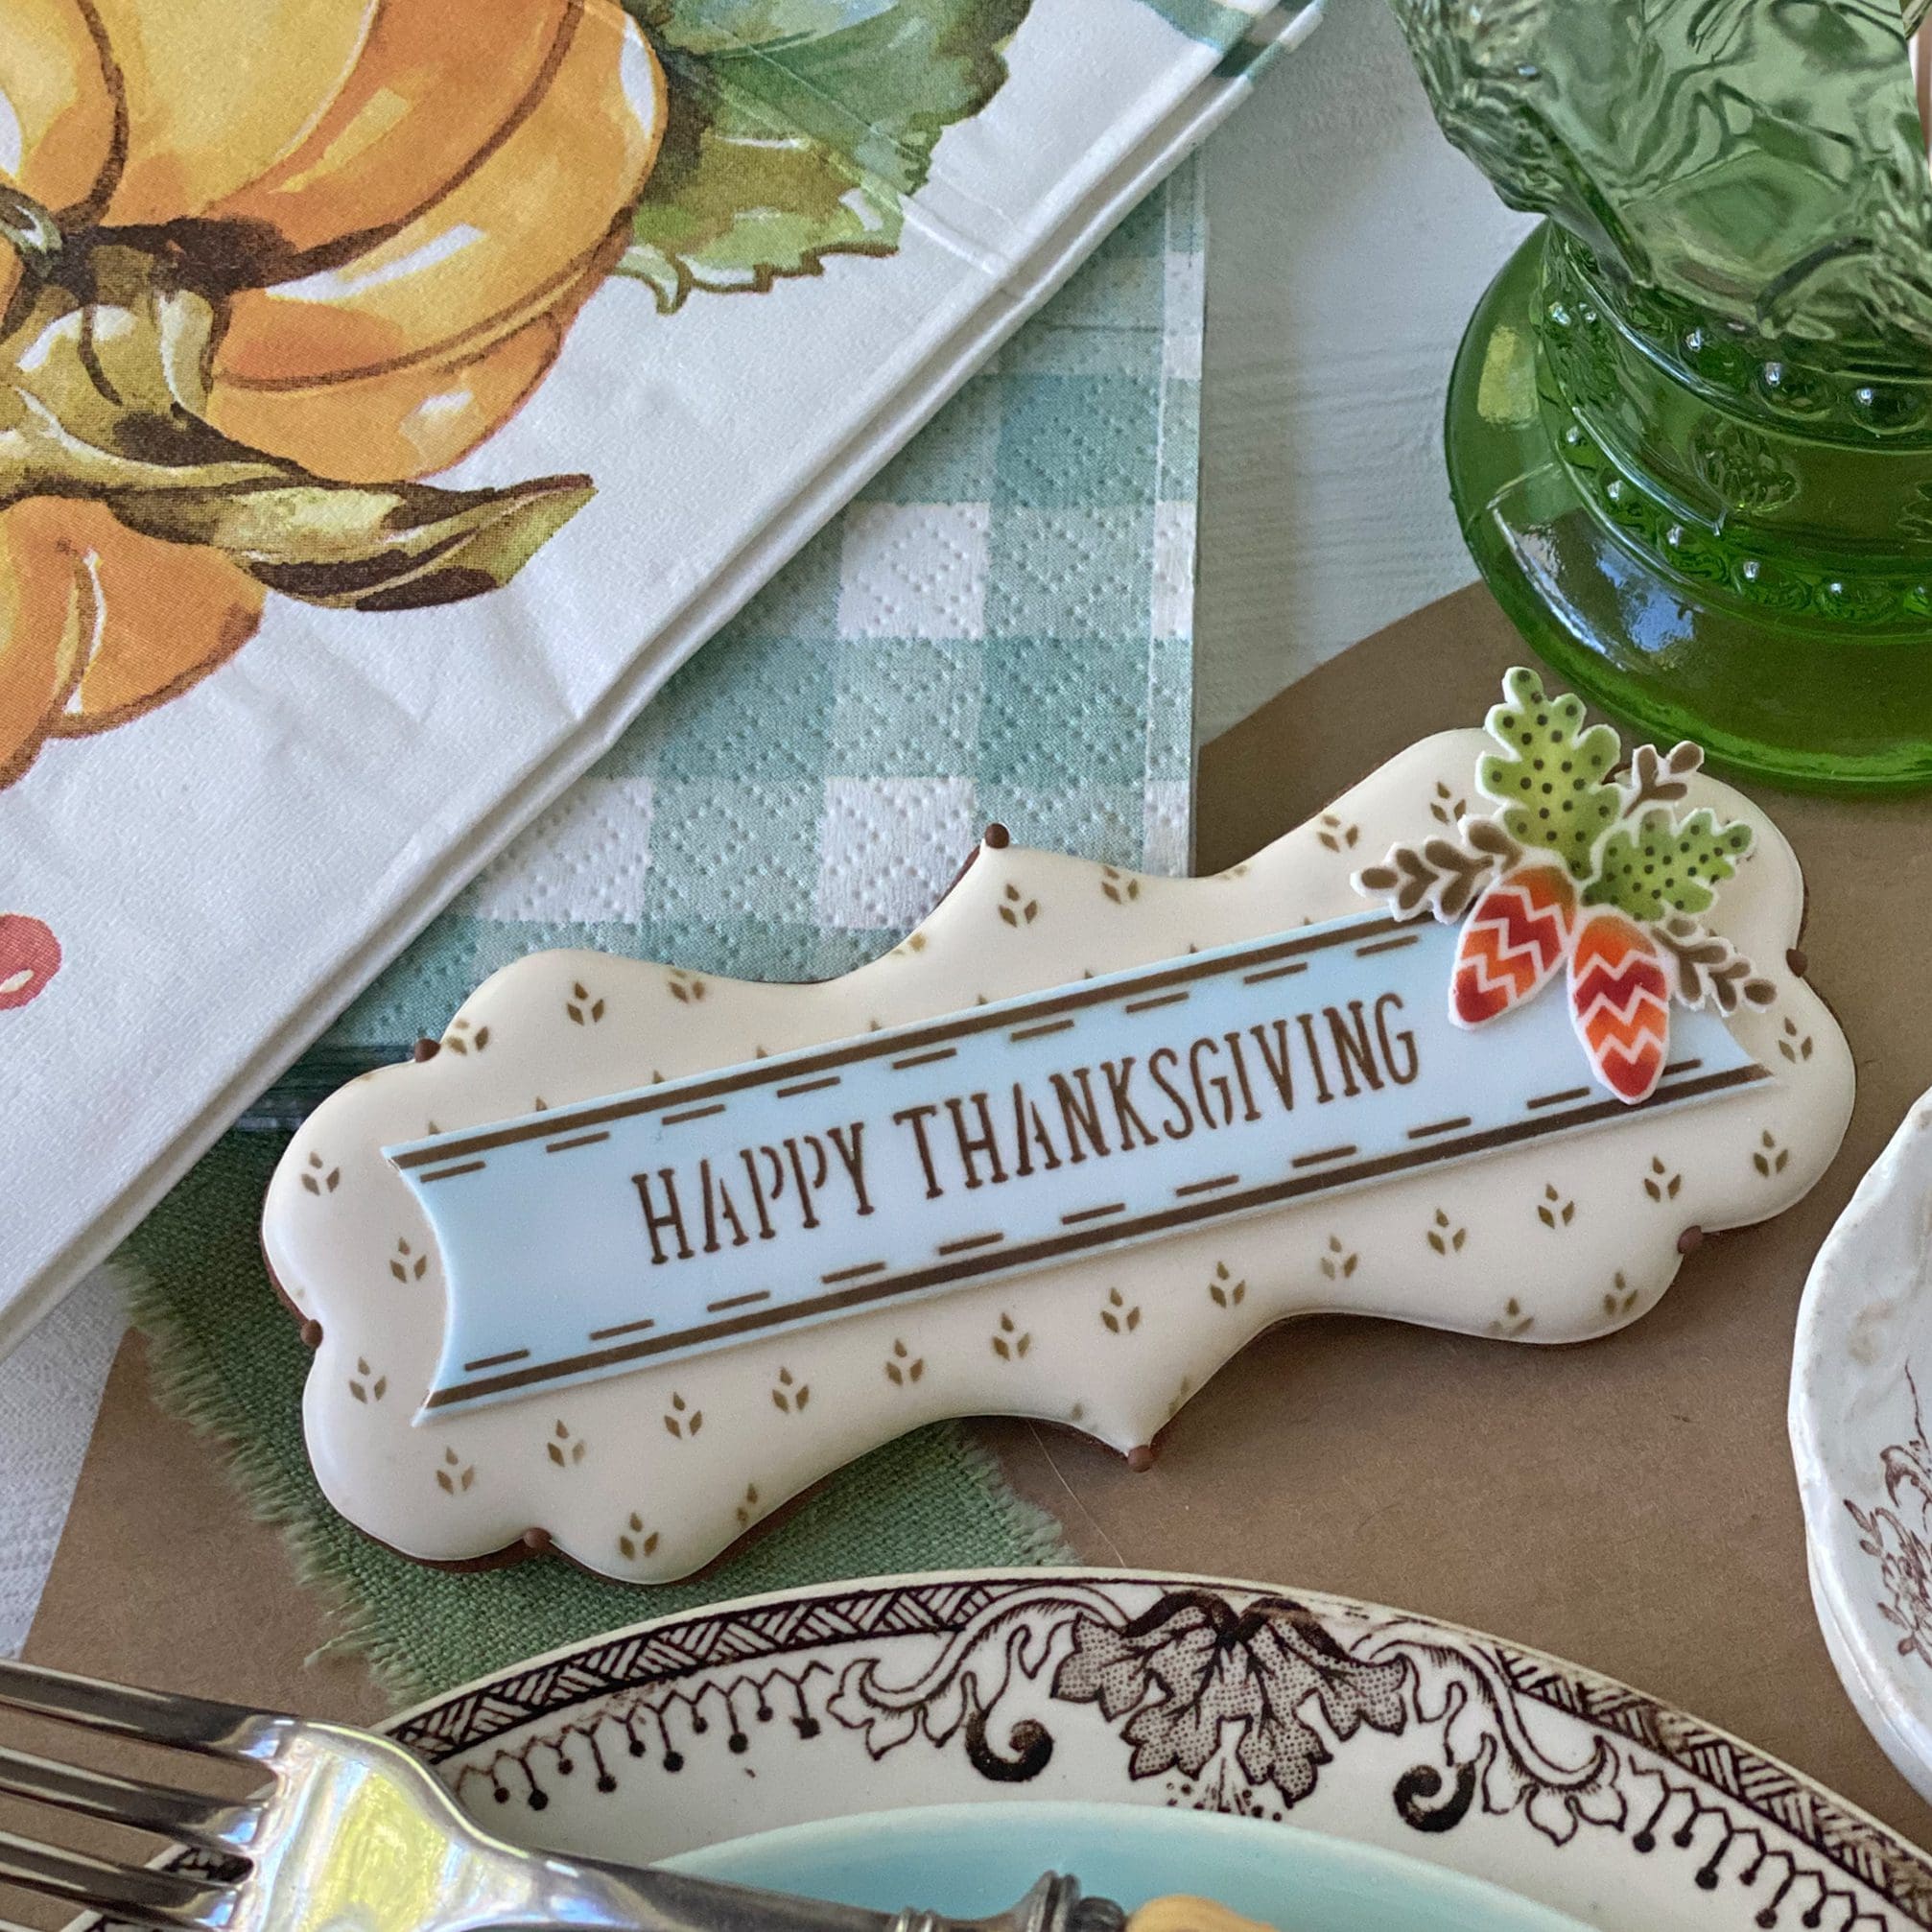
Layered fondant appliqués add even more dimension and interest, as these whimsical pine cones on the message plaque reveal . . .

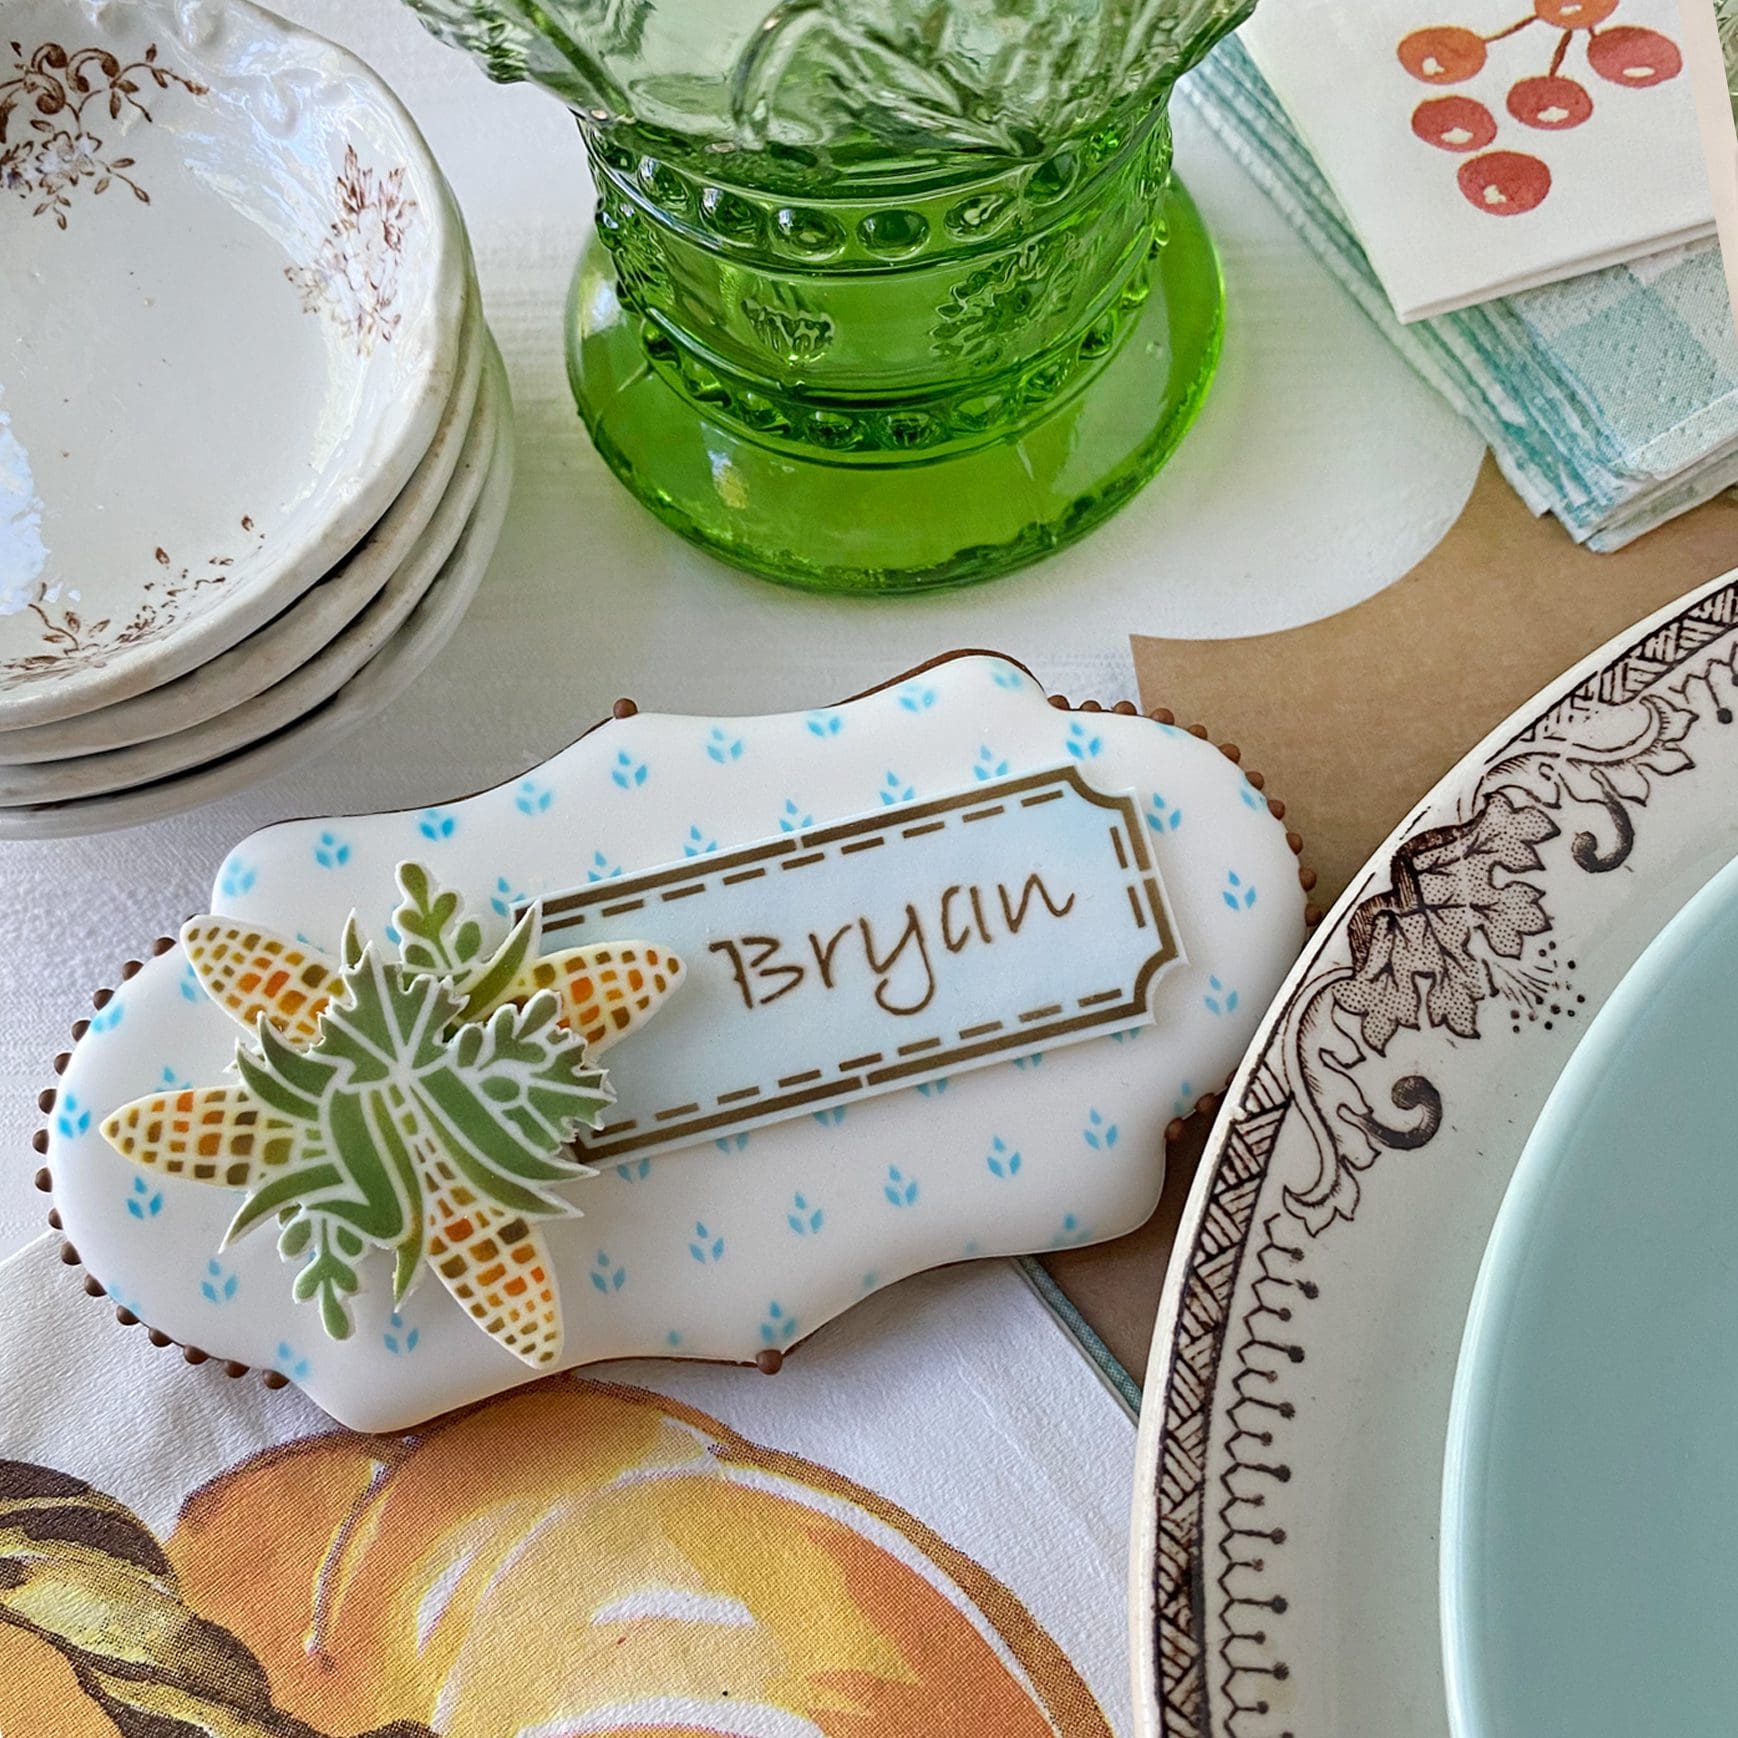
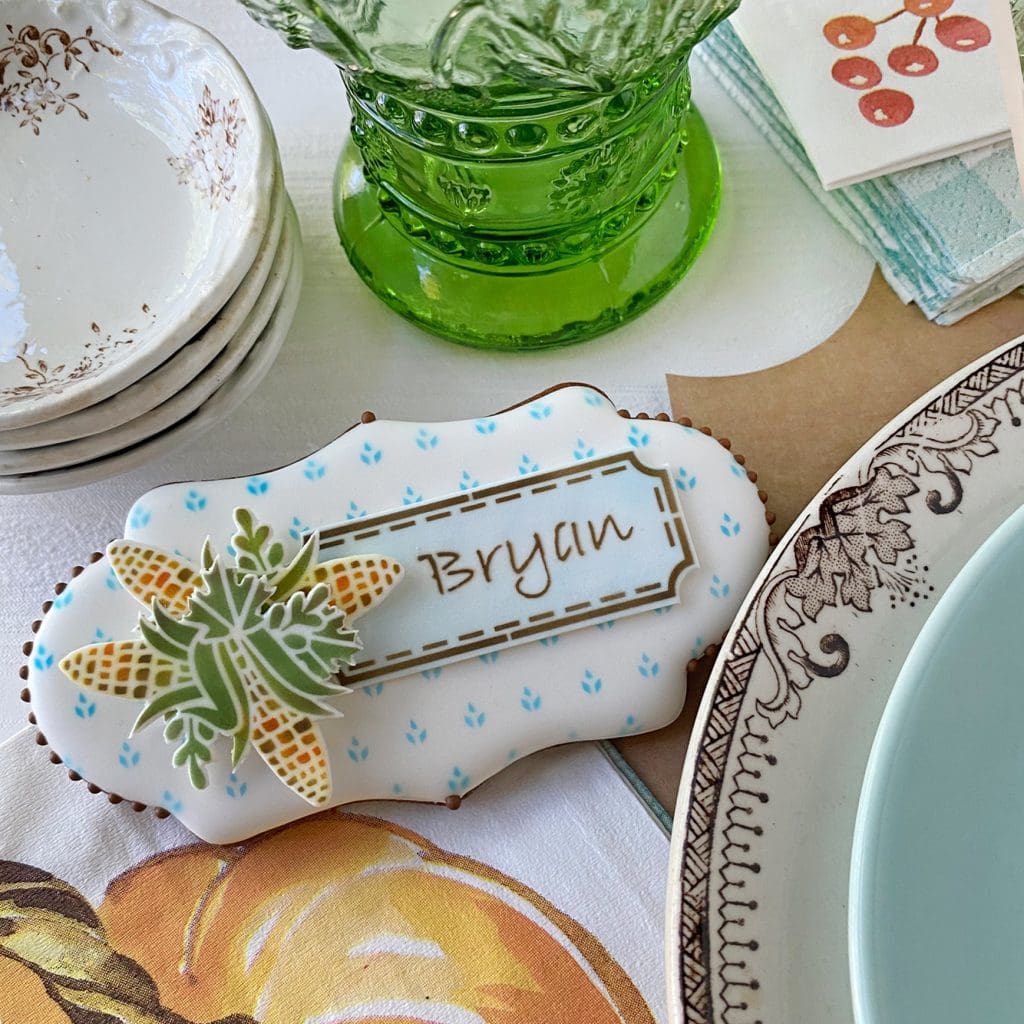
Below, I’ve double- and triple-stacked fondant appliqués. (There are two pieces of corn on top of the “Bryan” appliqué.) I’ve also used my custom stencils, noted at the top of this post, in lieu of some of the messages in this set. Again, if you don’t have time or budget for creating custom word stencils, you can write or pipe whatever you want in empty frames.
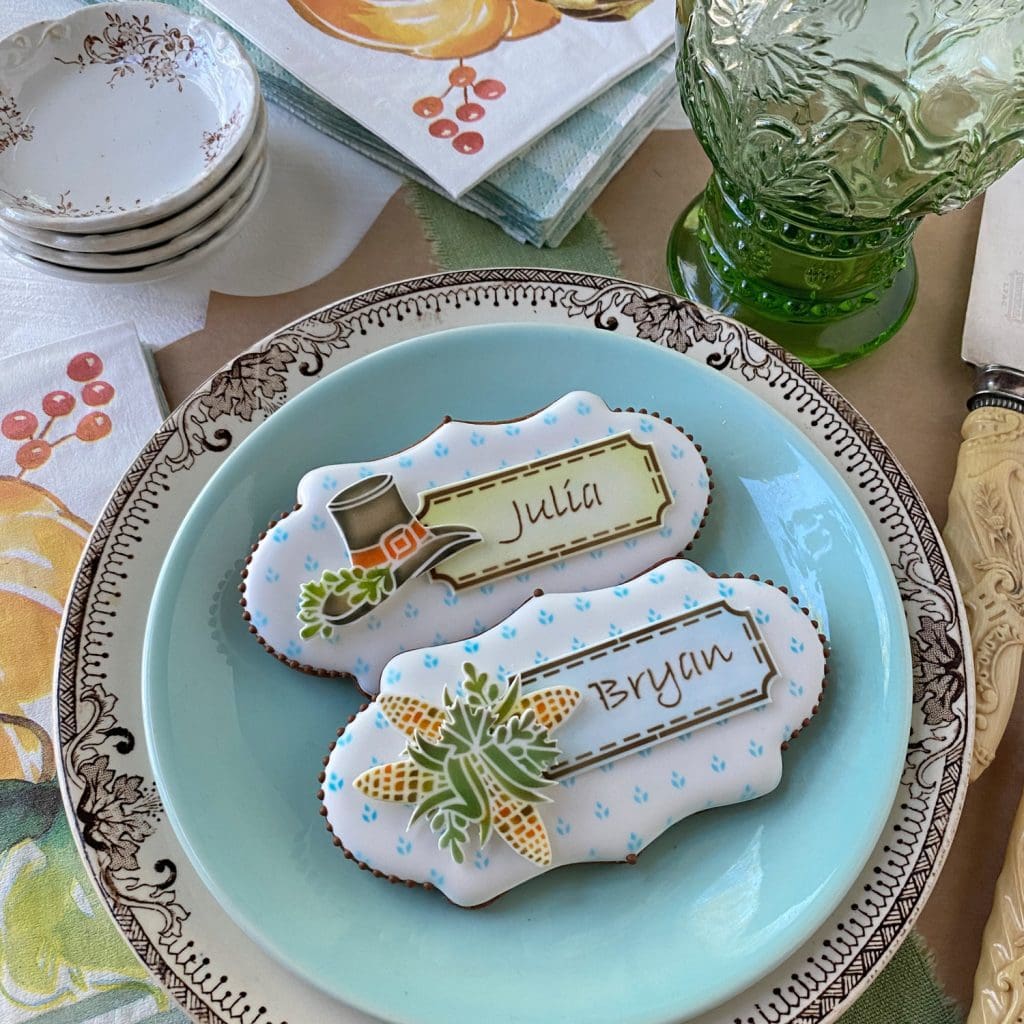
Below are a couple of zoomed-in views of the “Julia” and “Bryan” cookies, to allow you to better see the layering . . .
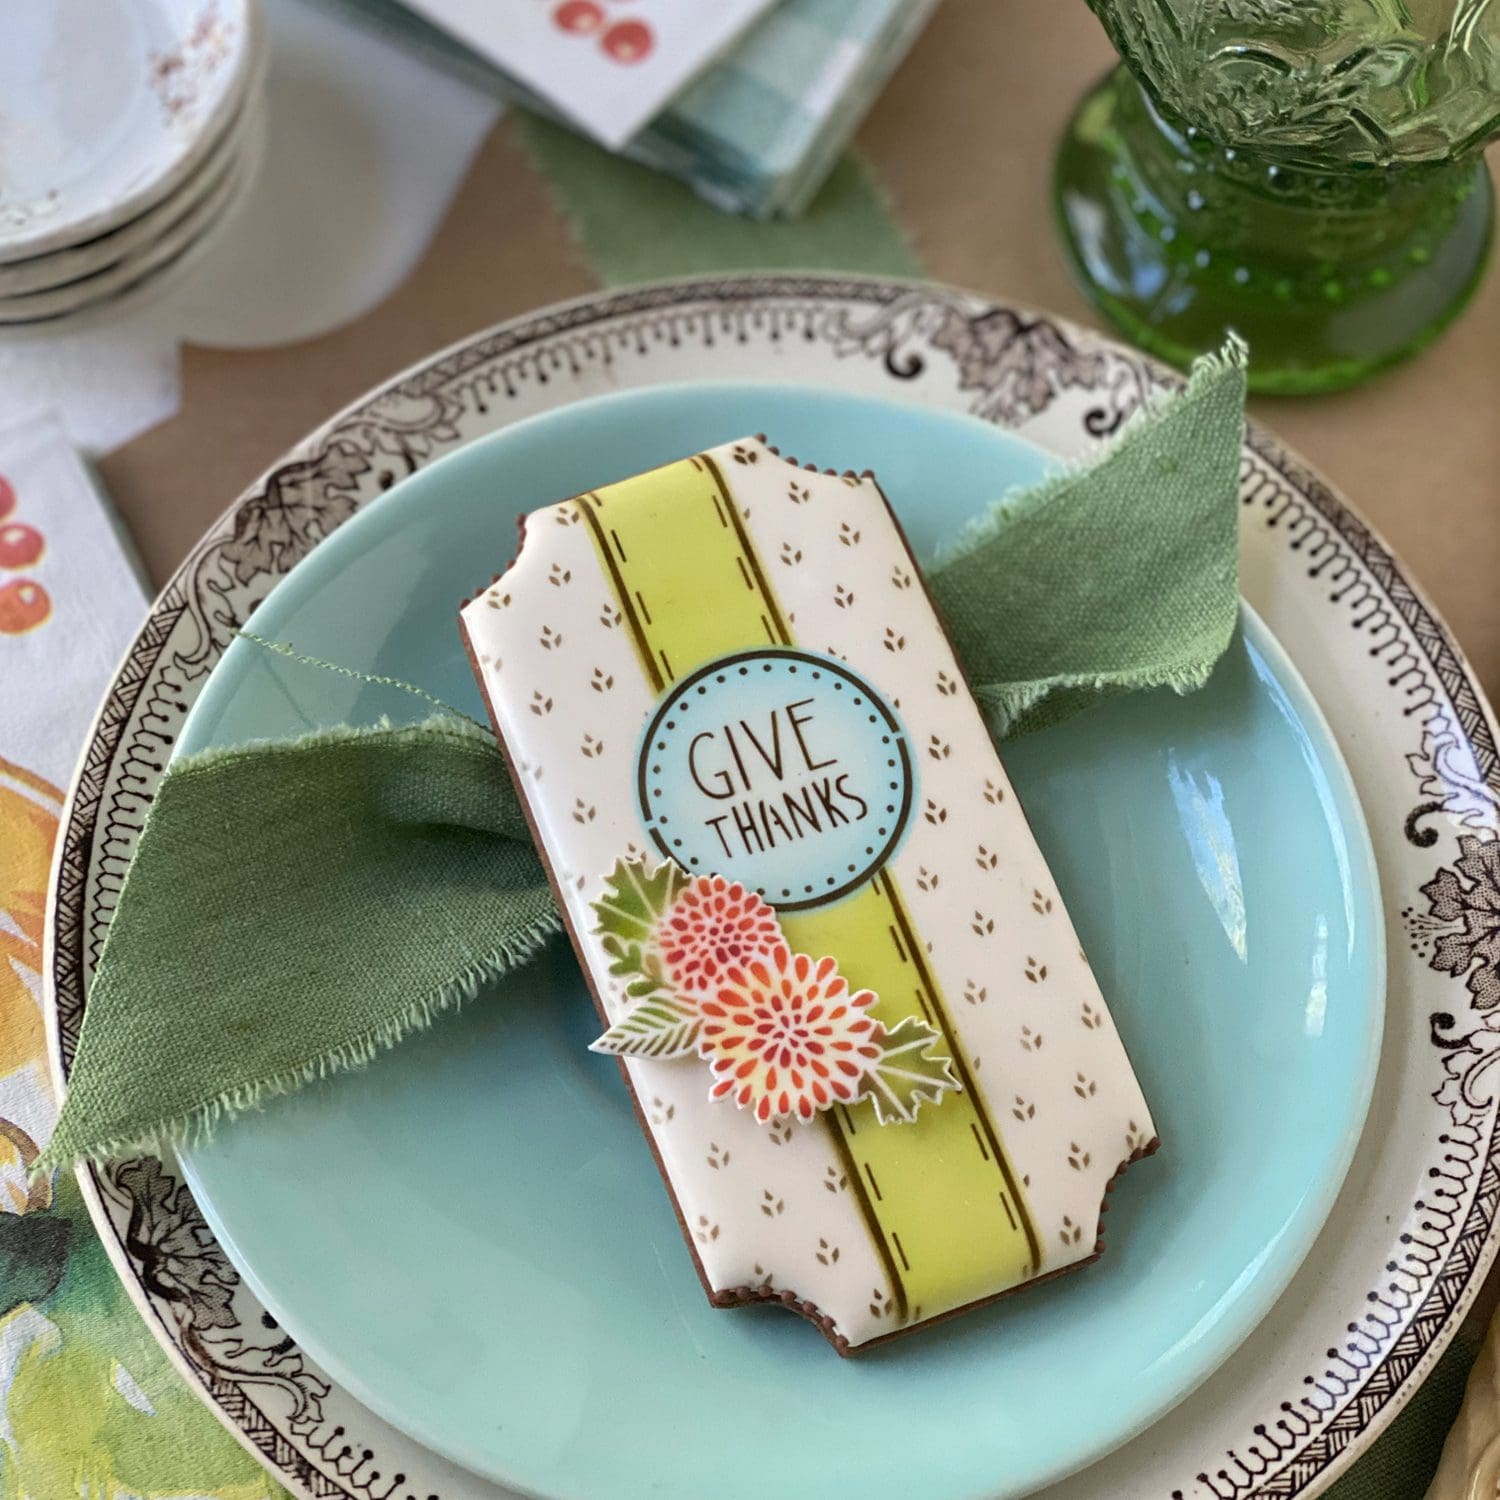
Small, narrow cookies also look great as place cards when oriented vertically. You might just need to fill spare room on the plate with another cookie or embellishment. Here, I used a bit of tied ribbon behind the cookie to close some of the void. And to lend visual continuity to the table design, I used the same ribbon that I used to jazz up my table runner.
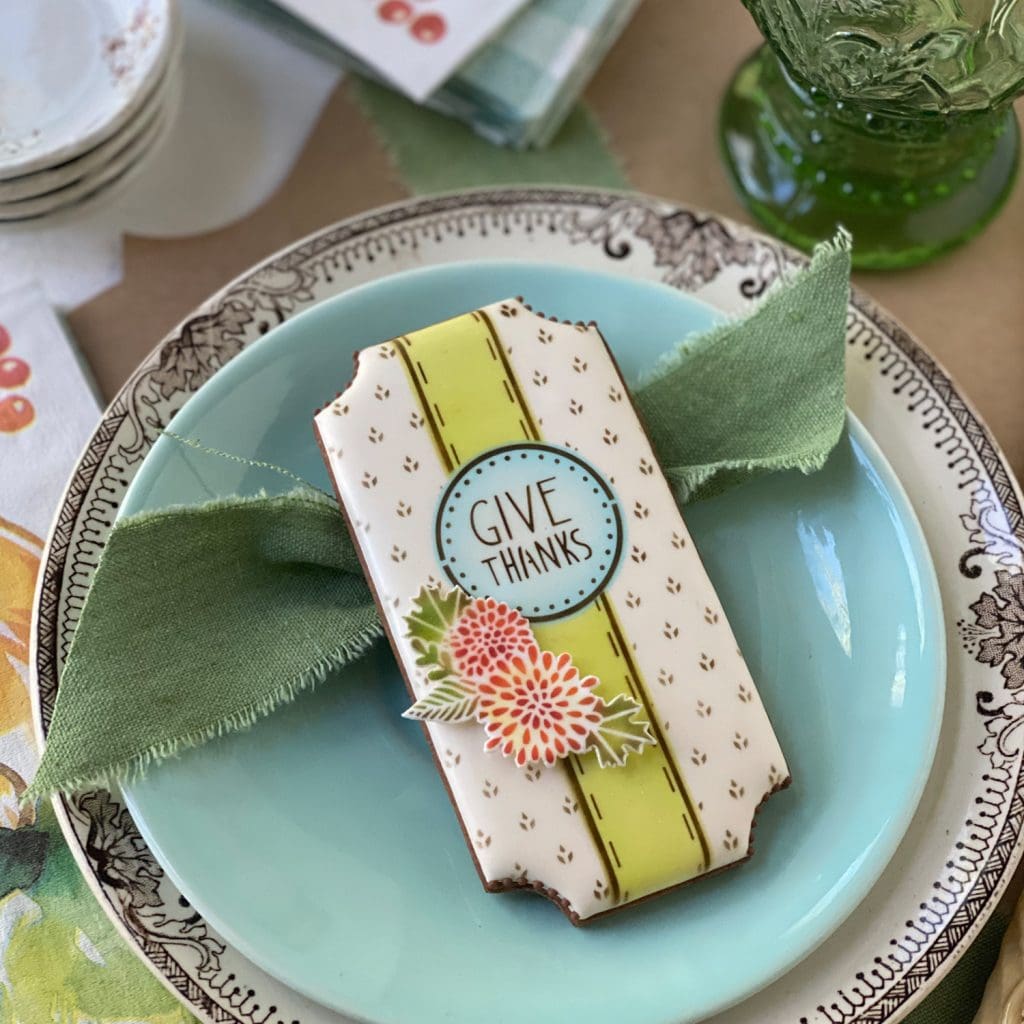
Also to note: I layered one empty frame and one frame with a message to create this striking look. The coloring within the stripe and round was applied with an airbrush using the corresponding shading stencil for each of these frames.
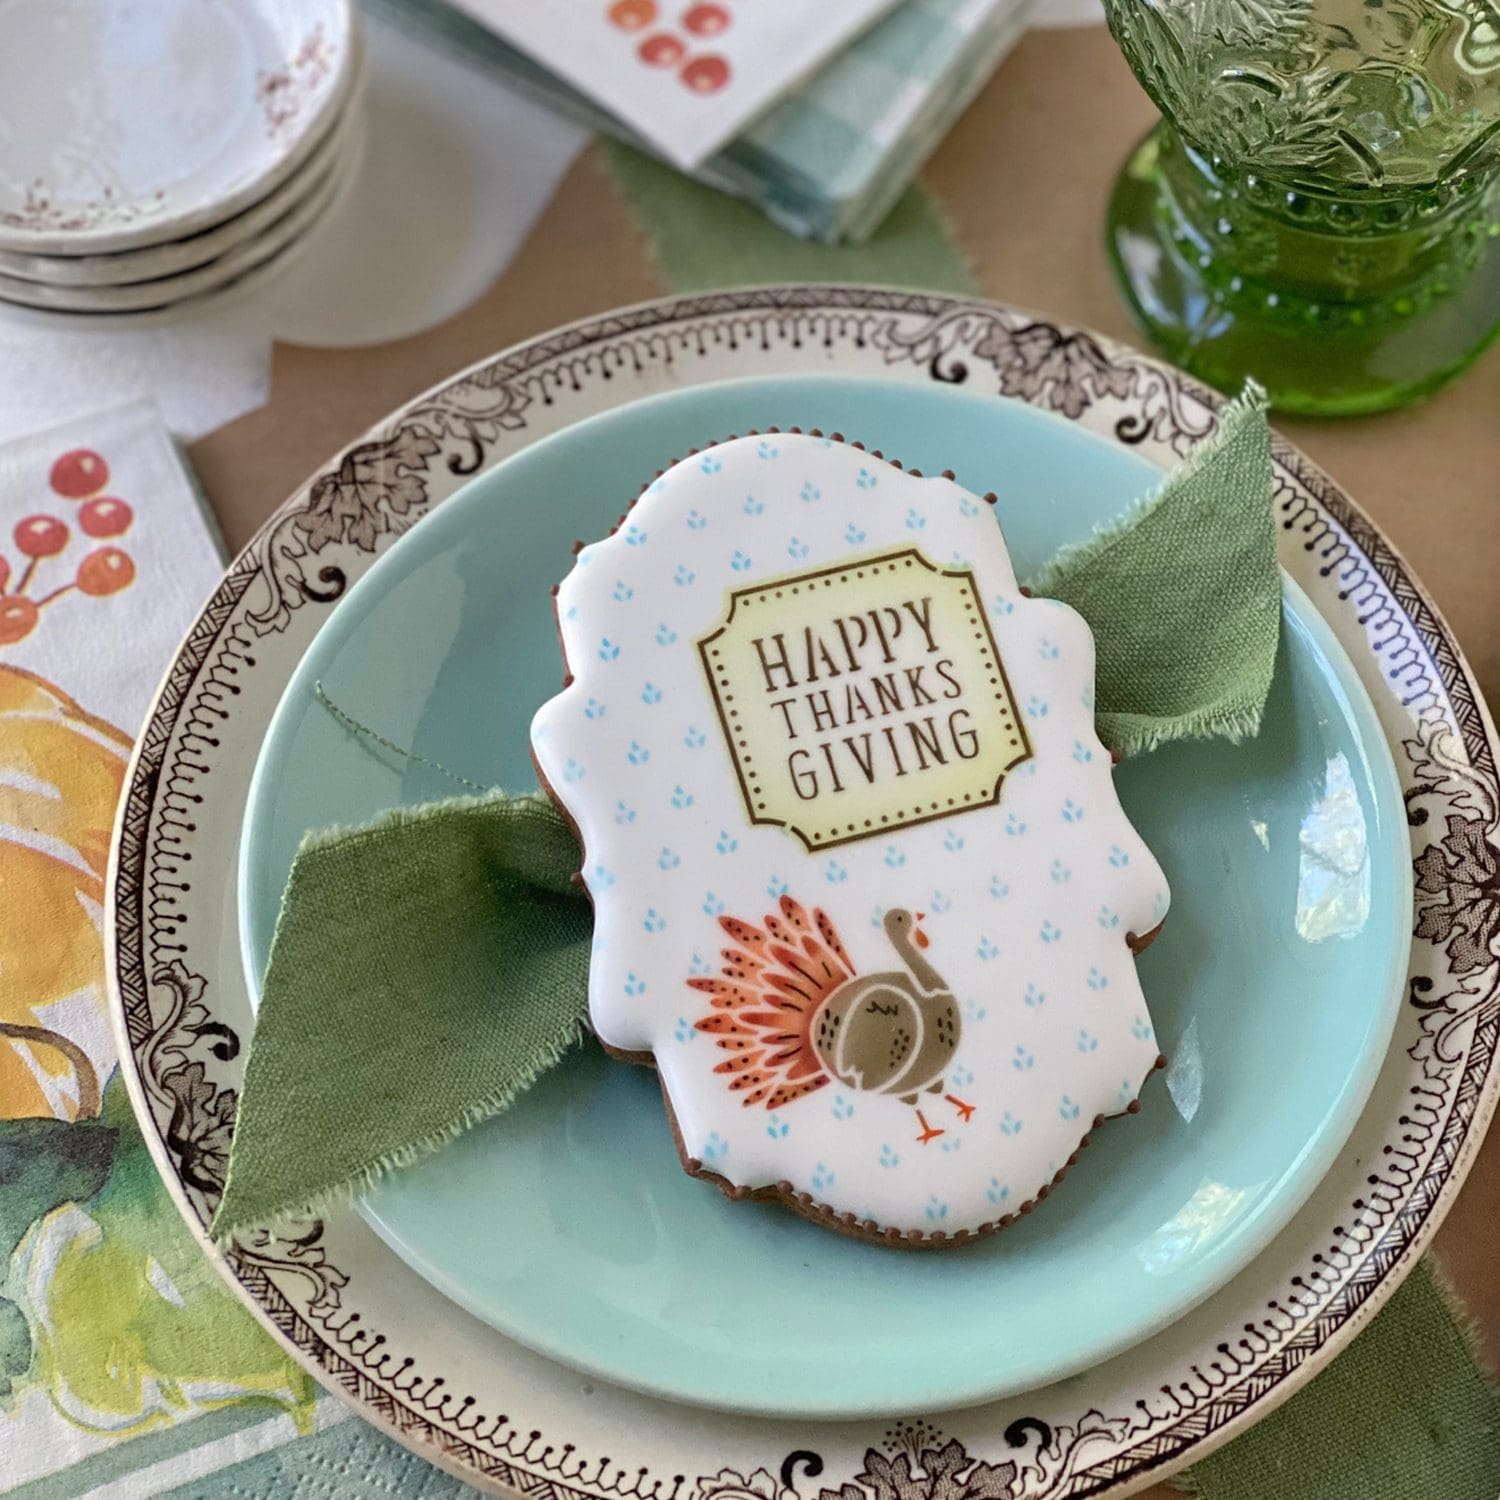
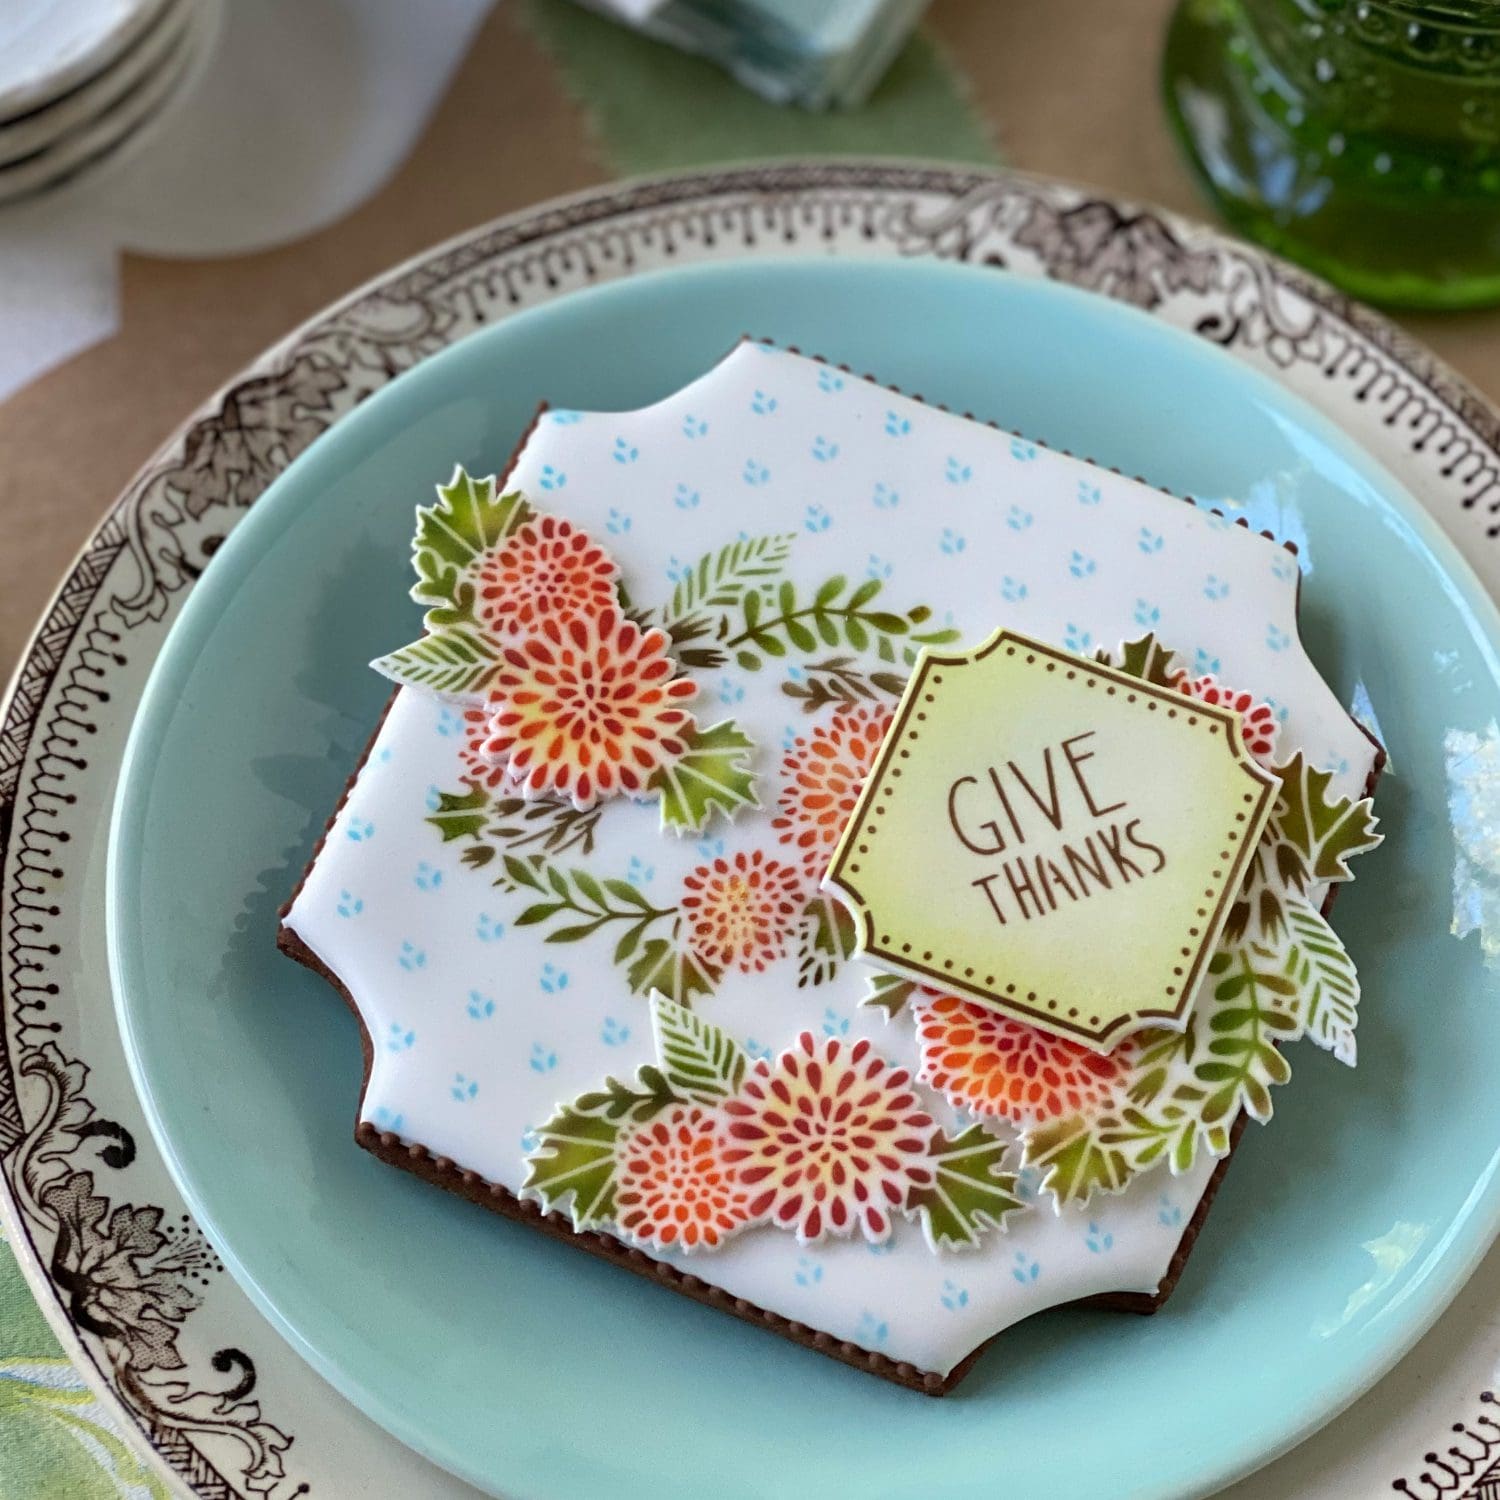
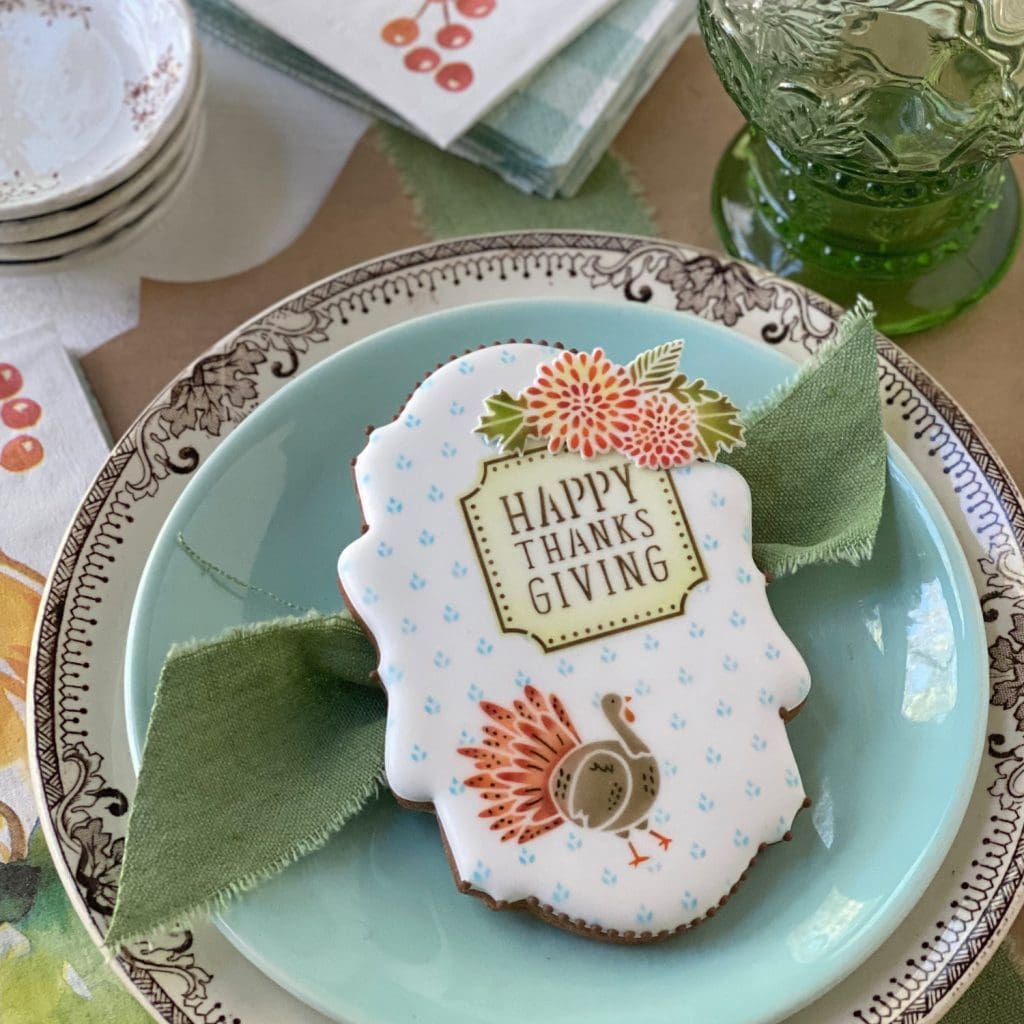
As I hope you have seen, this release clearly works well on small, long, place card-perfect cookies, but larger cookies also work wonderfully as table décor. In all of the following cookies, I used cutters in the range of 3 to 4 1/2 inches (on both dimensions). I also filled the added cookie space with more than my usual two design elements to create extra impact. Here’s a case in point . . .

This cookie is the same wreath-and-turkey cookie posted earlier; I just filled the interior of the wreath with a framed message fondant appliqué. Take a closer look . . .

Ha! I can’t get enough of those teeny details on the turkey. They are the icing on the cake – or the cookie, in this case!
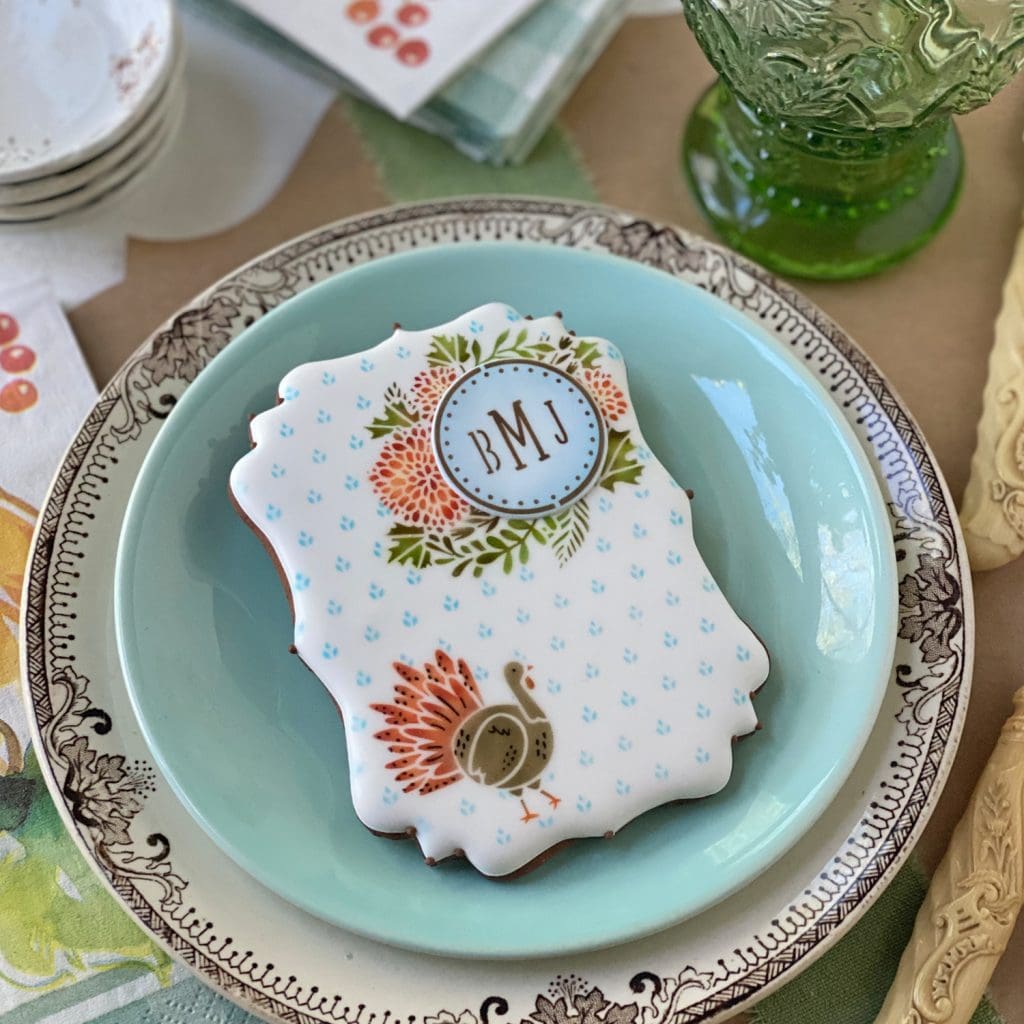
After some fondant appliqué fiddling, I finally settled on the same round frame filled with a custom monogram . . .
I also had visions of adding a modeling chocolate bow and ribbons hanging from the bottom of the wreath, but I got carried away with other big cookie designs and never got around to adding them. About those other designs . . . this two-element one is certainly perfect as is . . .

But, being a more-is-more person, I just had to add a token fondant floral appliqué . . .
Now, to this point, most of the designs I’ve shown have gravitated toward the fun and whimsical end of the spectrum, IMO. It must be that turkey – it’s just so darn cute! But, as I noted at the top of the post, this release can also transcend cute and be outright elegant. In the remaining cookies, I relied primarily on the floral elements and messages and frames (particularly some of the long striped elements) to create more “refined” looks. I’ll start first with a relatively simple design that uses a single wreath and framed message, both directly airbrushed on the cookie.
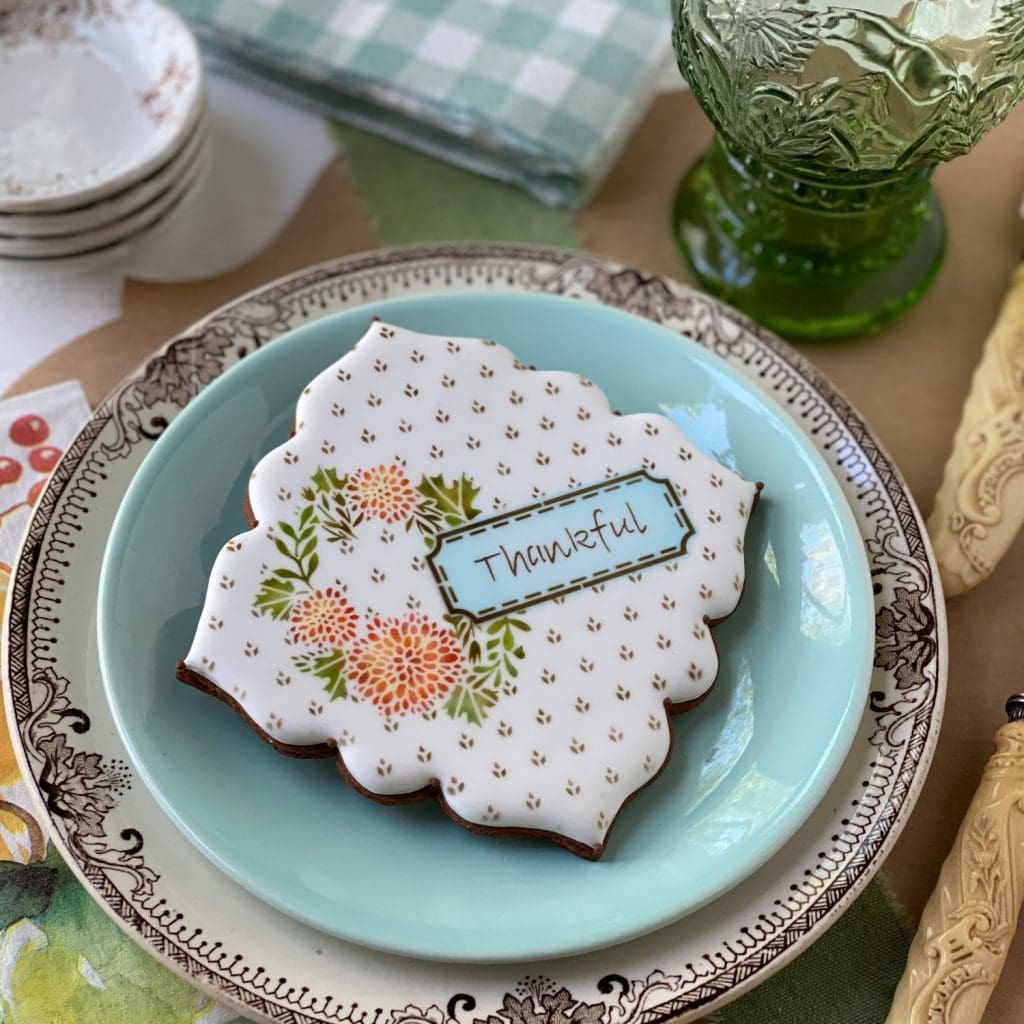
The use of brown, versus blue, on the background stencil also contributes to this cookie’s understated elegance.
To make the next cookie, I combined three directly airbrushed elements to form an entirely different composition. Note how all three elements overlap. Overlapping directly airbrushed elements can take some planning and thought, but once you figure out which element needs to get airbrushed first (the one you want furthest in the background), you just have to use the masks for each element to leave room for the stenciled designs that will go in their spots.
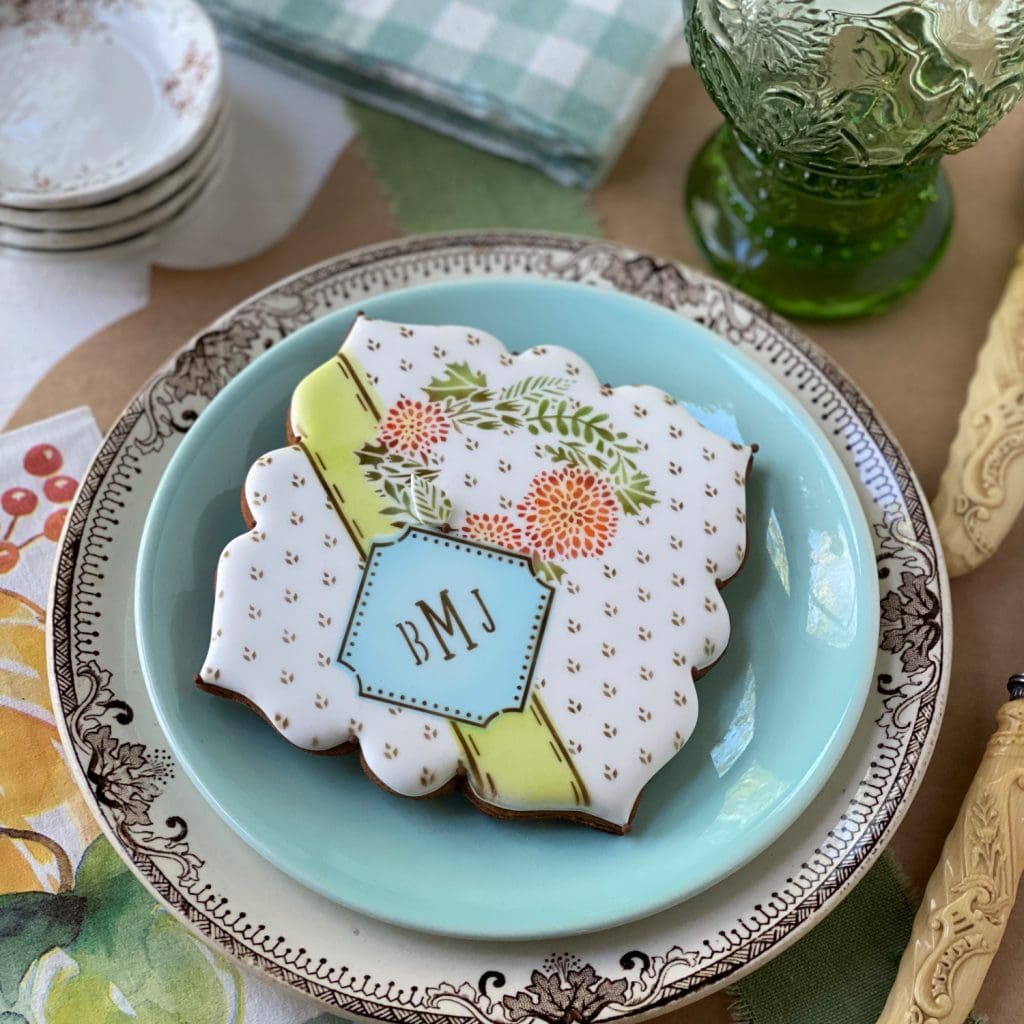
My custom monogram also made a reappearance on the above cookie, but in the mini corner plaque frame instead of the round.
I take back what I said a few cookies ago; the blue background looks pretty darn elegant too . . .

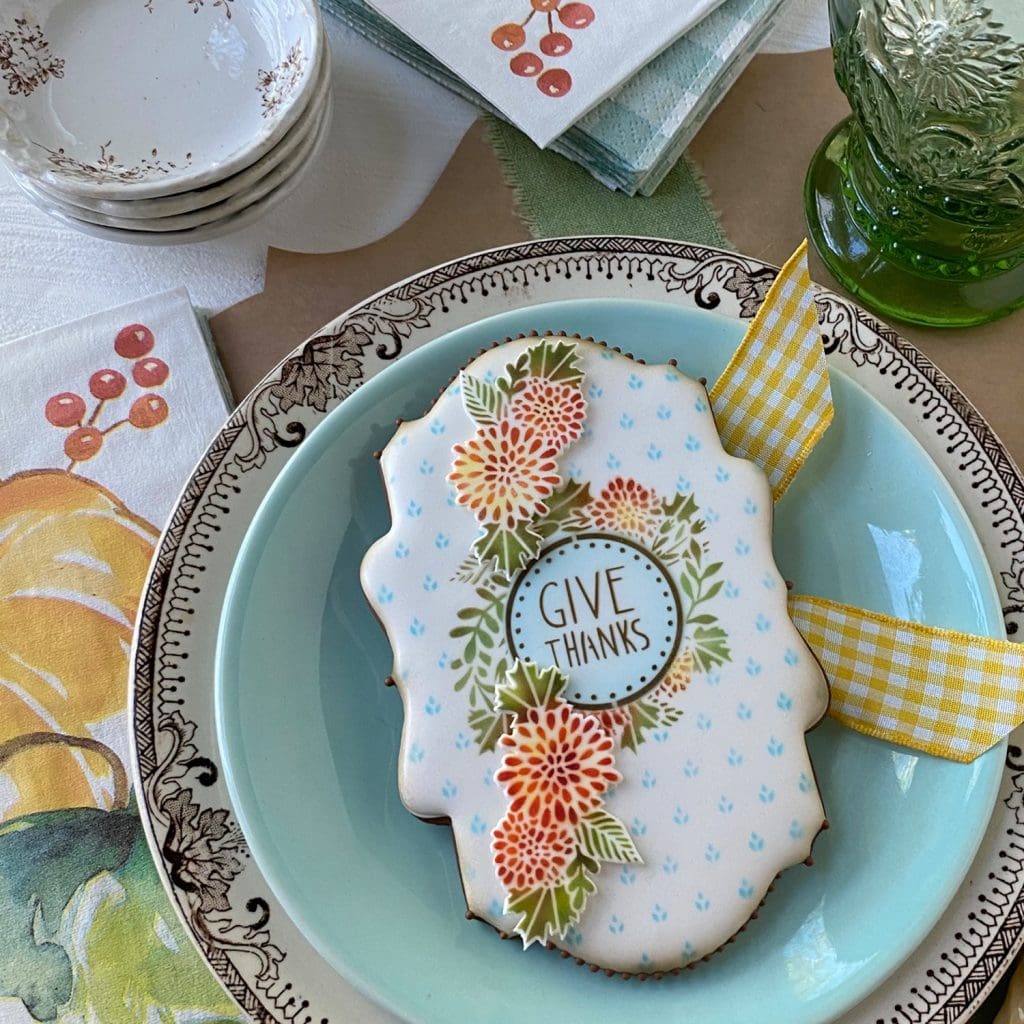
For the above cookie, I airbrushed and stenciled the wreath and framed message directly on the cookie; then I extended the design (and covered an airbrushing glitch!) with two floral fondant appliqués. Whereas, for the next cookie, I started with the same wreath directly airbrushed and stenciled on the cookie, but then layered on three floral fondant appliqués and one framed message appliqué, which sits two appliqués high.

A yellow ribbon also looks sweet behind these cookies, as it draws out the yellow that I dusted on the mums . . .
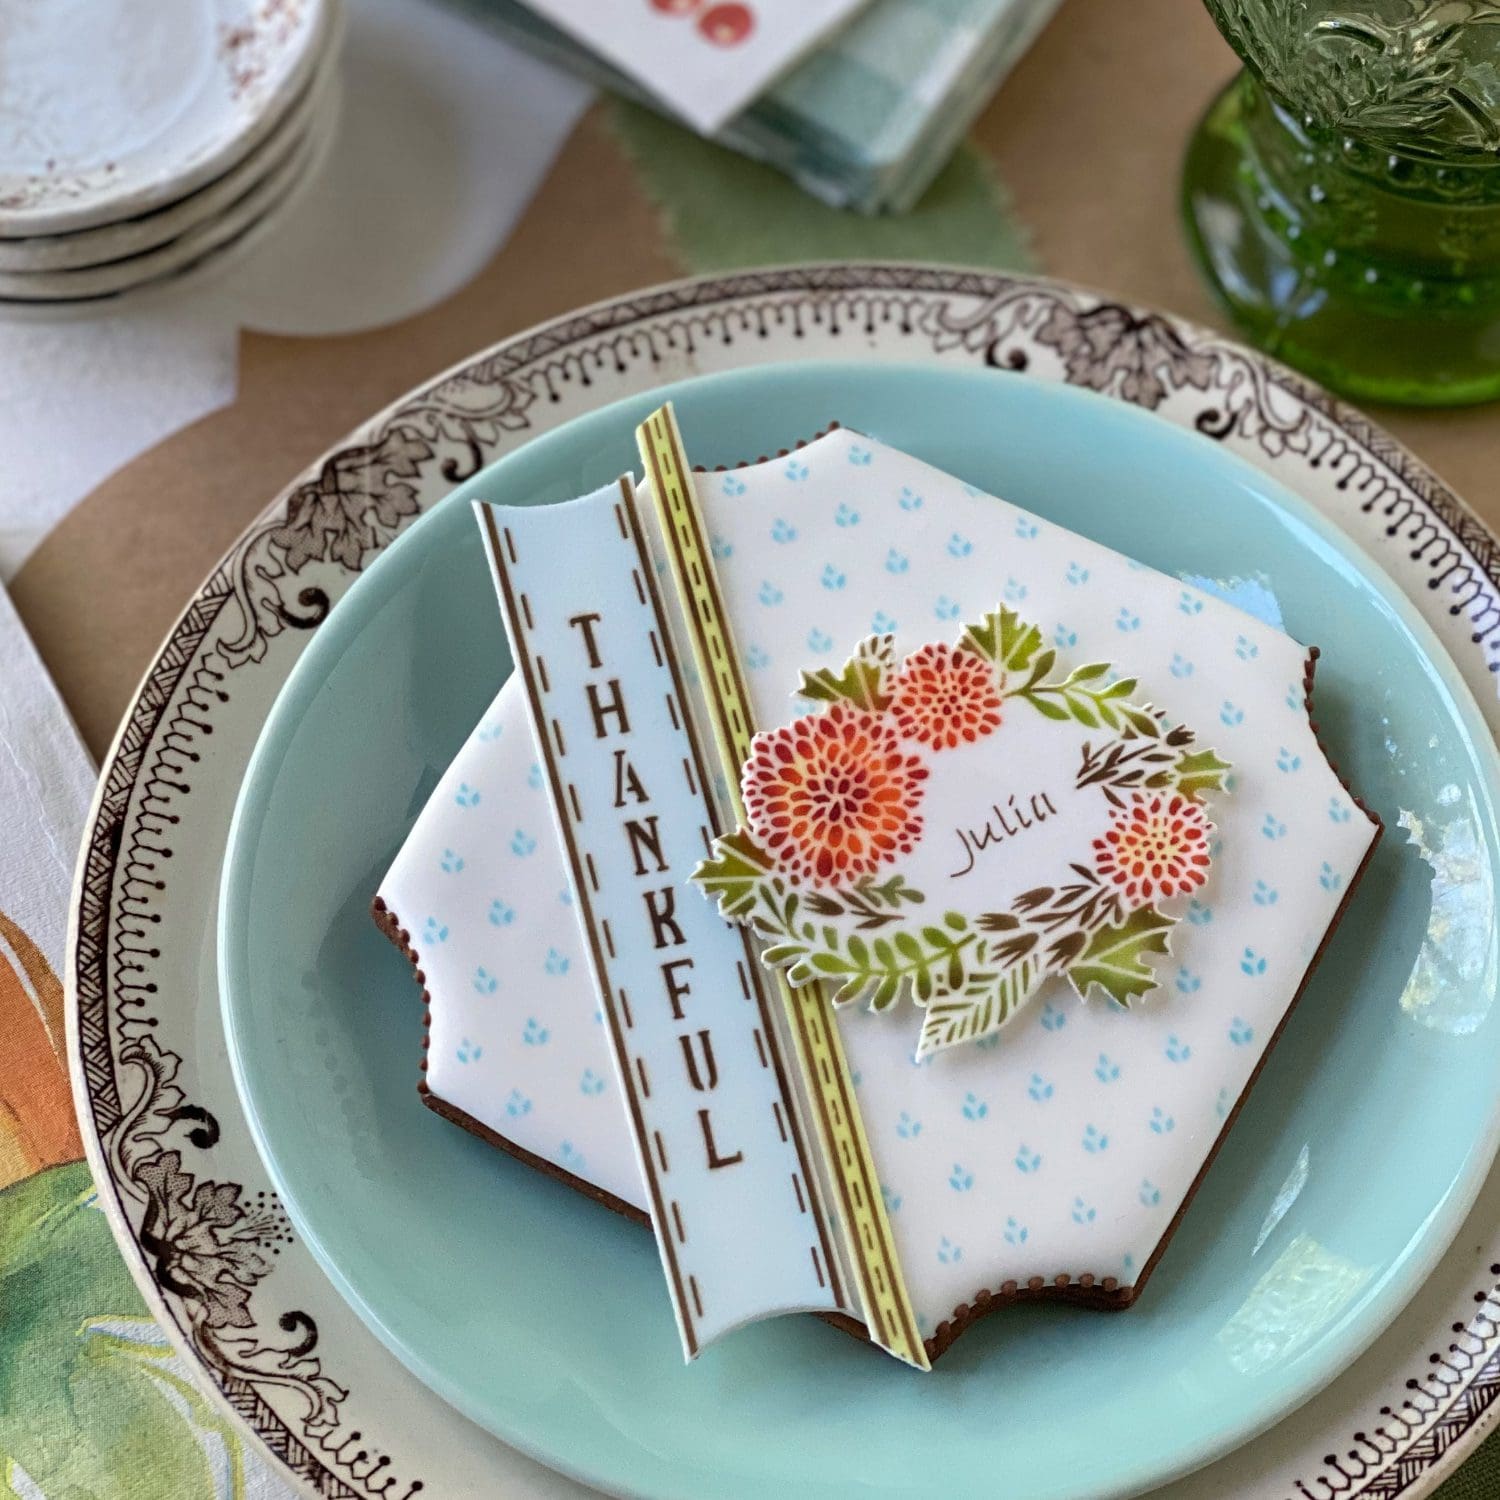
Two messages can also work on a single cookie, as the following design illustrates. I coupled the vertical “Thankful” message that comes with the message and frame set with a tiny custom “Julia” stencil to create this avant-garde look.
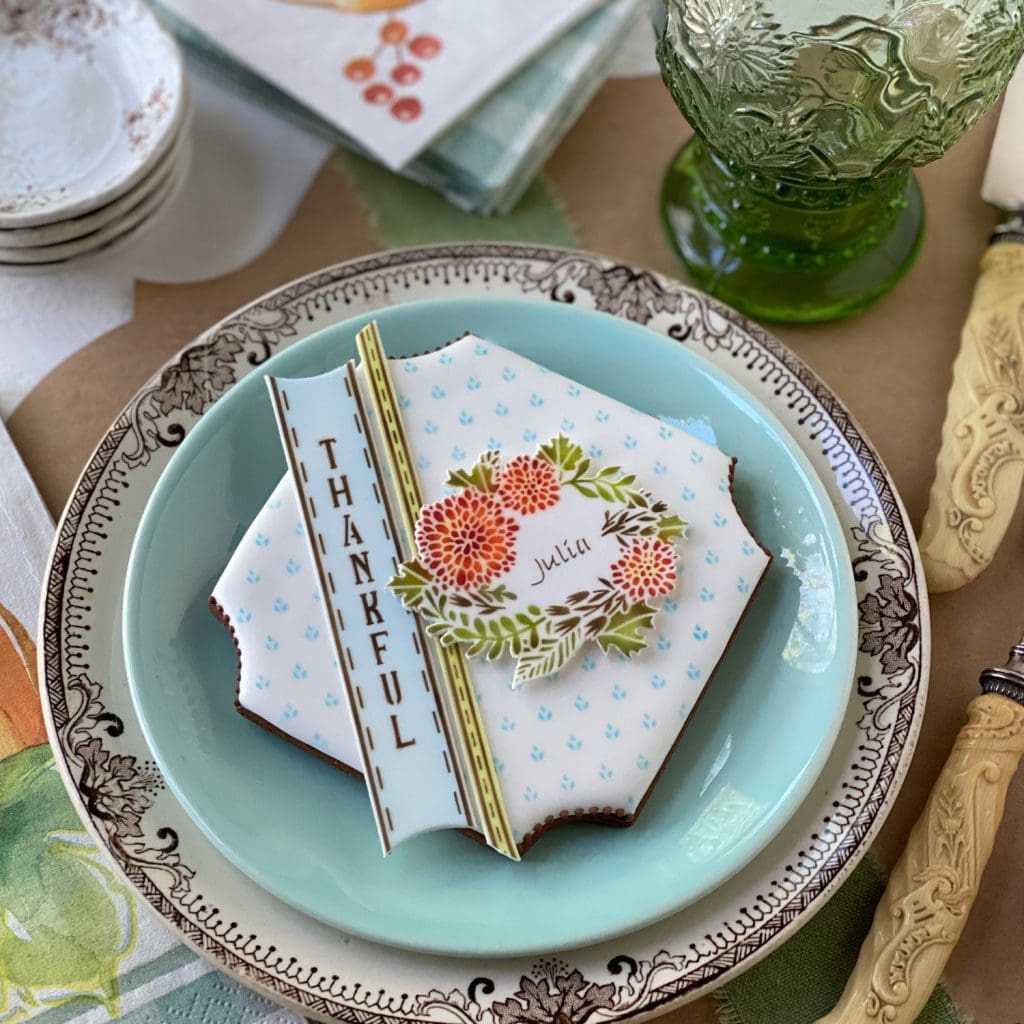
The splash of electric green in the thin ribbon (also an element in the message and frame set) makes this cookie all the more striking, in my humble opinion. ![]()

By now, you’re probably wondering, “When will this post ever end?” I know, I’m sorry . . . I got more carried away than ever this month, mixing and matching the many design elements in these two sets. What fun! I hope you have as much fun with this release too, and that it adds a spark of excitement to your Thanksgiving table.
I leave you with a closer look at the cookie that started this very long post. I’m still deliberating, but I think I prefer the added richness of this brown-on-ivory look . . .

For more stencil inspiration, including other Thanksgiving sets and my new cookie cutter line, check out the links below.
If you have any technical questions about these stencils, just email me at sweetlife@juliausher.com or leave a comment below. Please, however, direct all ordering and Stencil of the Month Club questions to my stencil partner, Confection Couture Stencils, at service@confectioncouturestencils.com. Thank you!