

When a box of Russell Stover’s no longer registers appreciative oohs and ahs, offer this Valentine’s project as a token of your undying love. It says something special, pun intended.
What you’ll need for 1 box:
(See accoutrements, second photo from top)
To make:
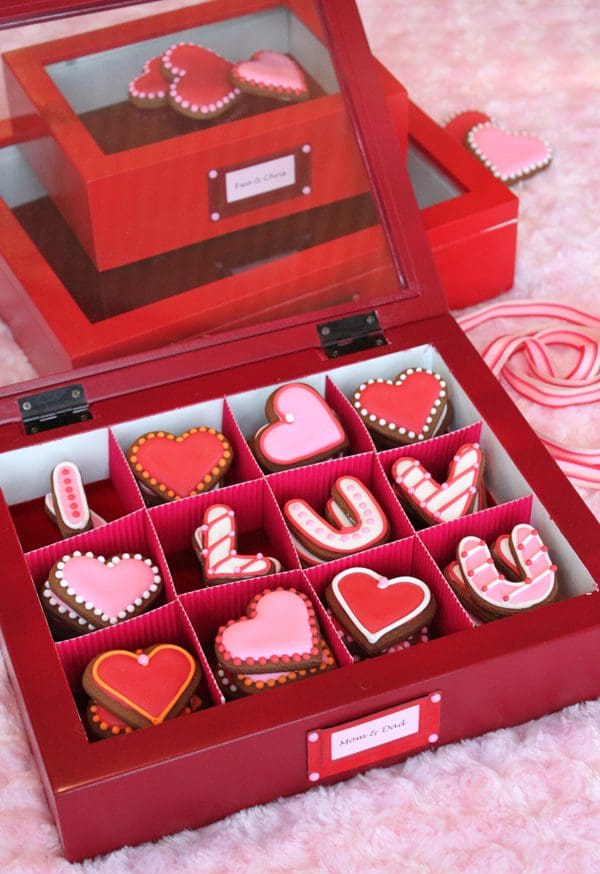
1 | Dress up the shadow box. Be sure to choose a top-opening shadow box, as it’s difficult to get cookies in and out with bottom-opening types. Spray paint the outside in Valentine’s hues, if desired, and let dry completely. (Note: A no-prime style paint will do a better job of adhering to slick metal or plastic boxes.)
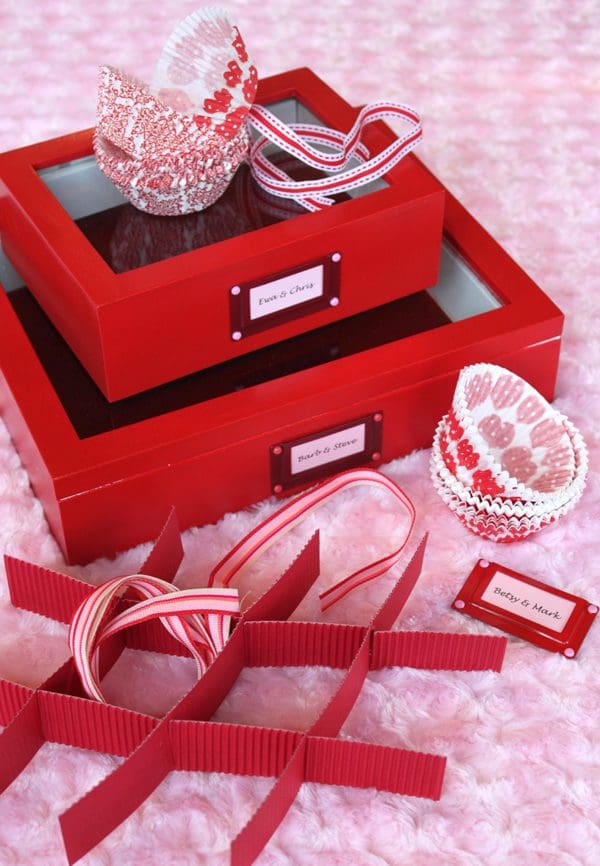
2 | Personalize for panache. I’m all about attaching gift-getters’ names and faces to their gifts. No question about it: these added touches make their lucky recipients feel extra special. I affixed a name plate to the front of my box with hot glue after spray painting the plate and drying it first. Then I printed a name on plain paper, cut the paper to size, and slipped it behind the plate. I also jazzed up the top edges of the shadow box with coordinating striped ribbon.
3 | Line with love (optional). To make a comfy bed for the cookies, cut a piece of 3-ply cardboard (the weight of cardboard that dry-cleaned shirts get folded around) to fit inside the box with about 1/8-inch clearance on all sides. Cut out a piece of velvet or other fabric to fit the cardboard with about 1/2-inch overhang. Affix the fabric to the cardboard with spray adhesive, and then tack the excess fabric to the underside of the cardboard with hot glue. If the cardboard doesn’t lay flat, press it between books for a few hours and the insert it into the bottom of the shadow box.
4 | Divide and compartmentalize. To keep your cookie message from getting jumbled, cookie compartments come in handy. You could simply bundle like cookie letters into cupcake liners and set the liners inside the box, or you could do as I did here and craft grid-style dividers from corrugated cardboard. Start by measuring the interior of the box and deciding how many compartments you need to convey your message. (Make sure to size your compartments to fit your cookies! As a frame of reference, the compartments here are about 2 1/2 x 2 1/2–inches.) For my 12-compartment grid, cut 2 strips of corrugated cardboard to fit lengthwise and 3 strips to fit crosswise. Cut slits partway through each strip at the points where the lengthwise and crosswise strips must intersect to make a uniform grid. Then join the strips together at these intersection points by slipping the strips into the slits.
5 | Spell it out. Slip the grid into the box and group your cookie letters together in each compartment, arranging them to spell out a sweet Valentine’s message. Break up words by inserting stacks of small heart cookies in between. Close the lid, and bring on the love! (I primarily use Royal Icing to decorate my cookies. For the recipe, see the link below.)
Related Recipes and Projects – COMING SOON:
Cutout Gingerbread Cookie Dough.
Signature Sugar Cookie Dough.
Topcoating Technique Tips.