
Yay, I’m back! I know, I know, it’s been a while since my last Kitchen Club kit, but since I’m now releasing kits just five times a year, they all come clustered around key cookie holidays, which tend to be toward the end of the year. Boring admin stuff aside (LOL), let’s move on to discuss my much more interesting Halloween kit, now available for sale on my partner Confection Couture Stencils’ site!
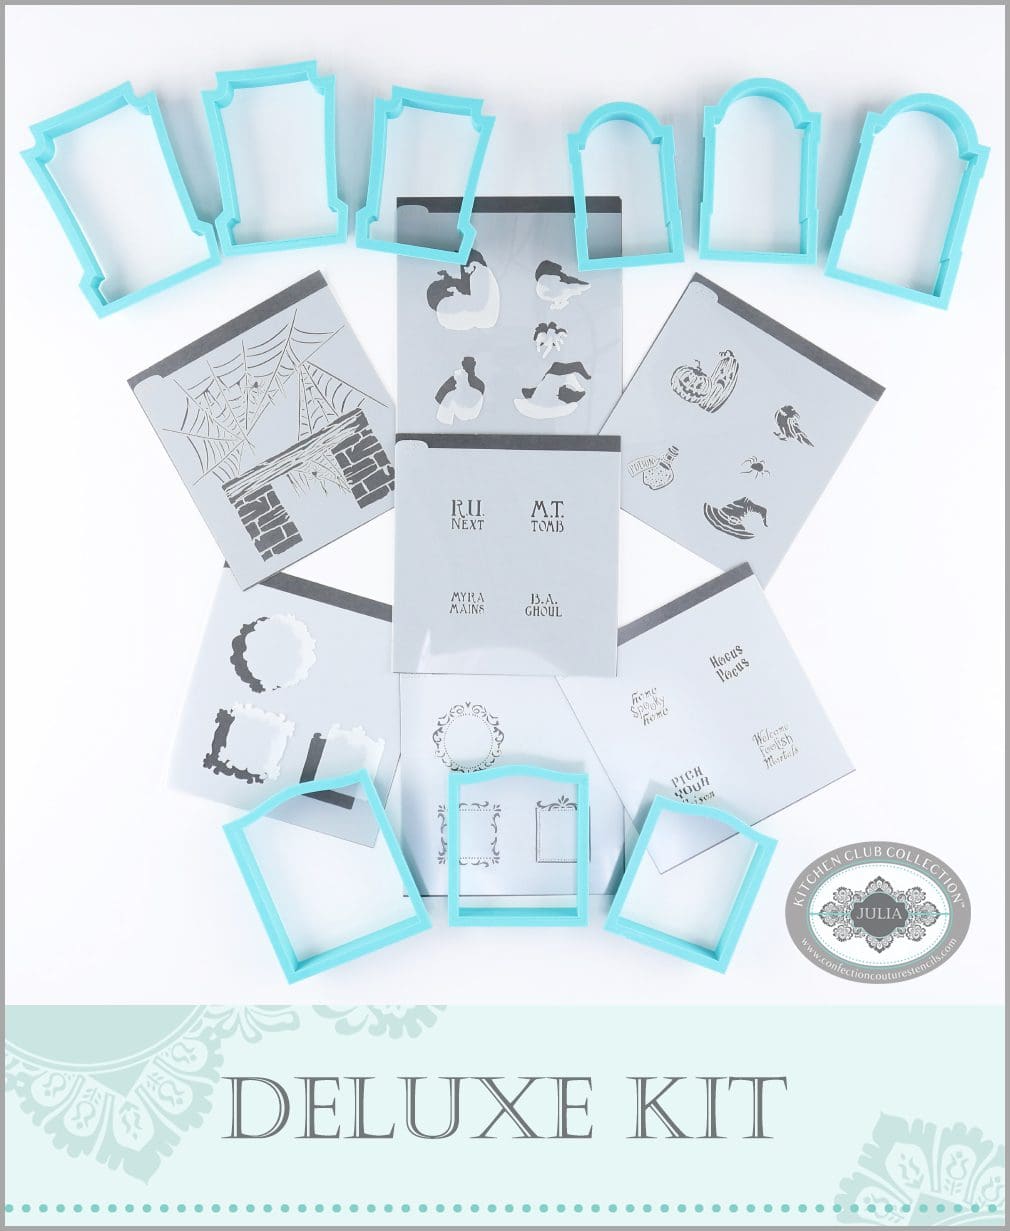
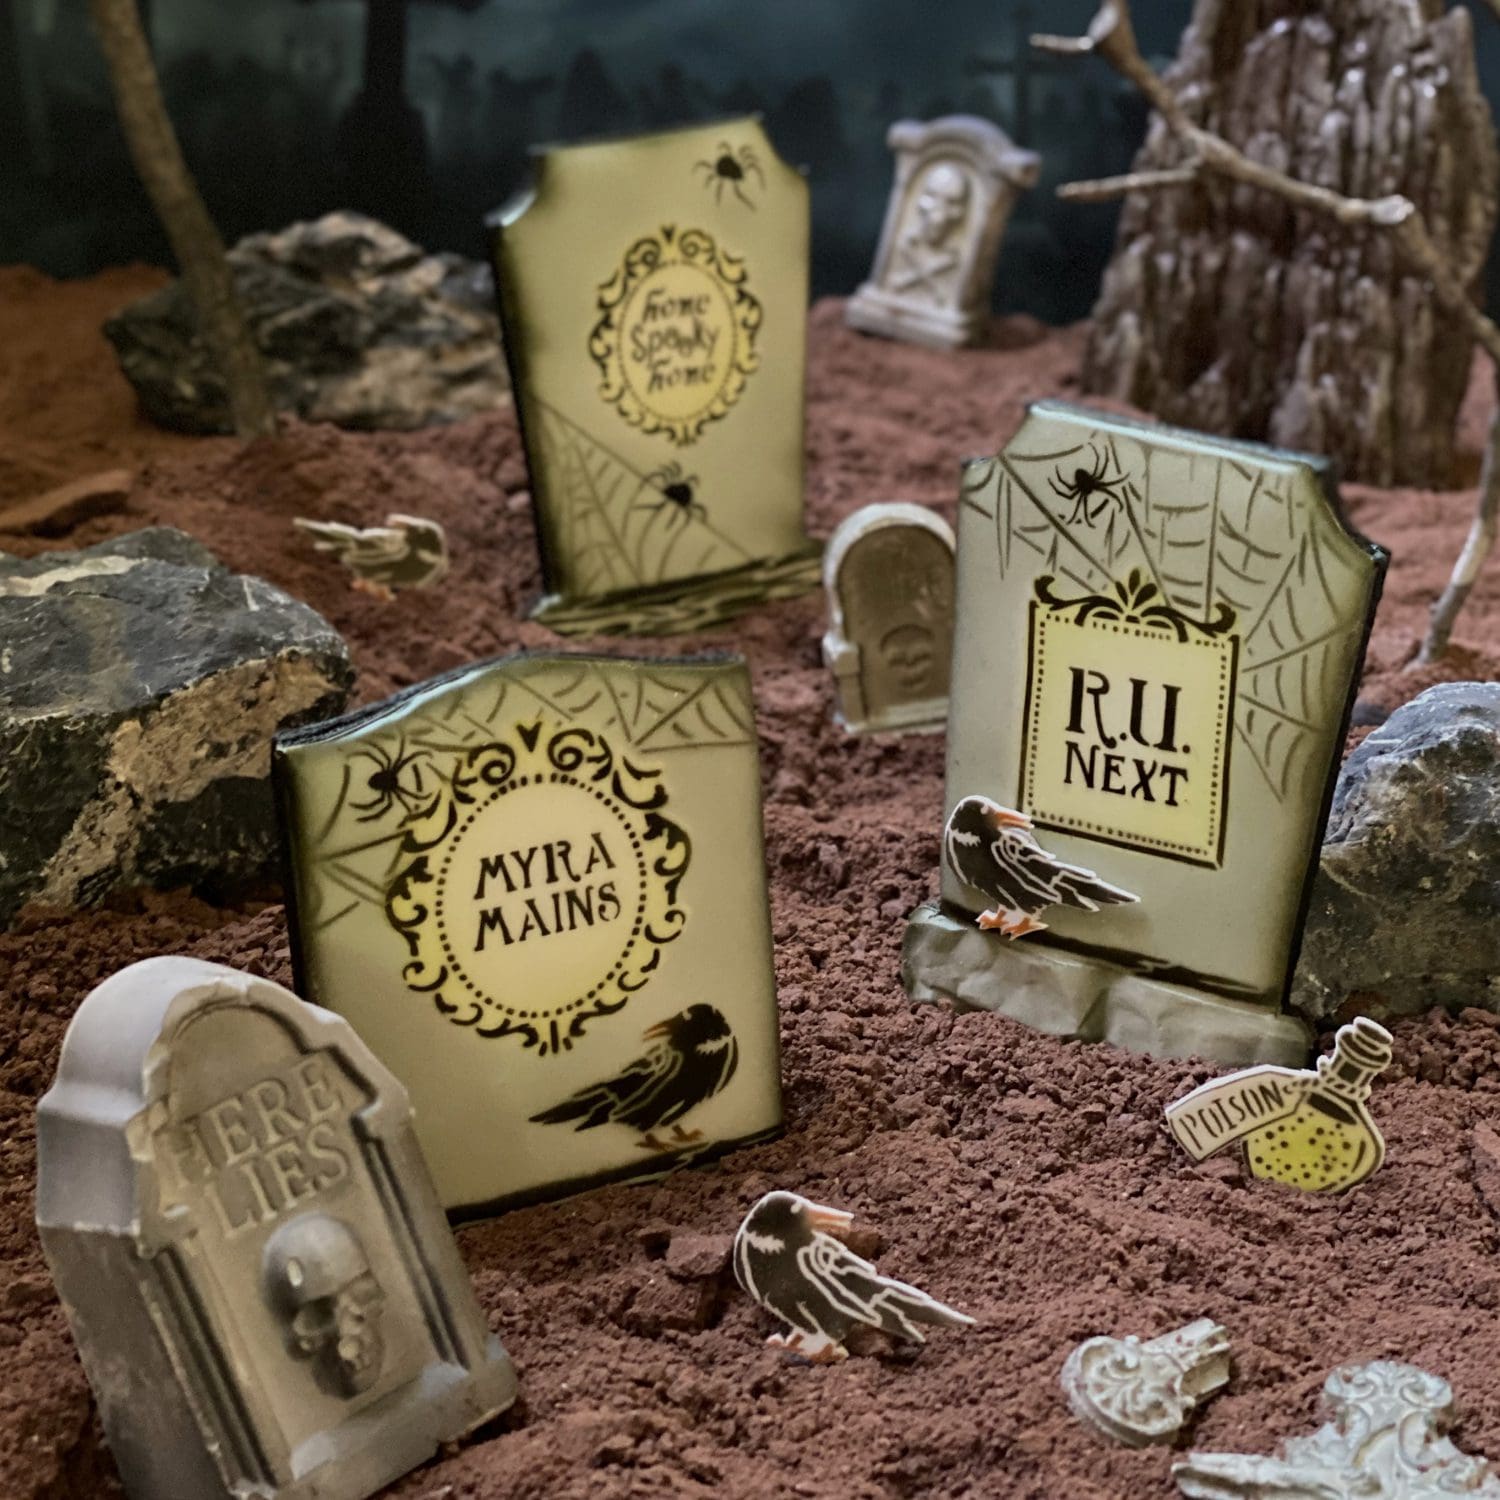
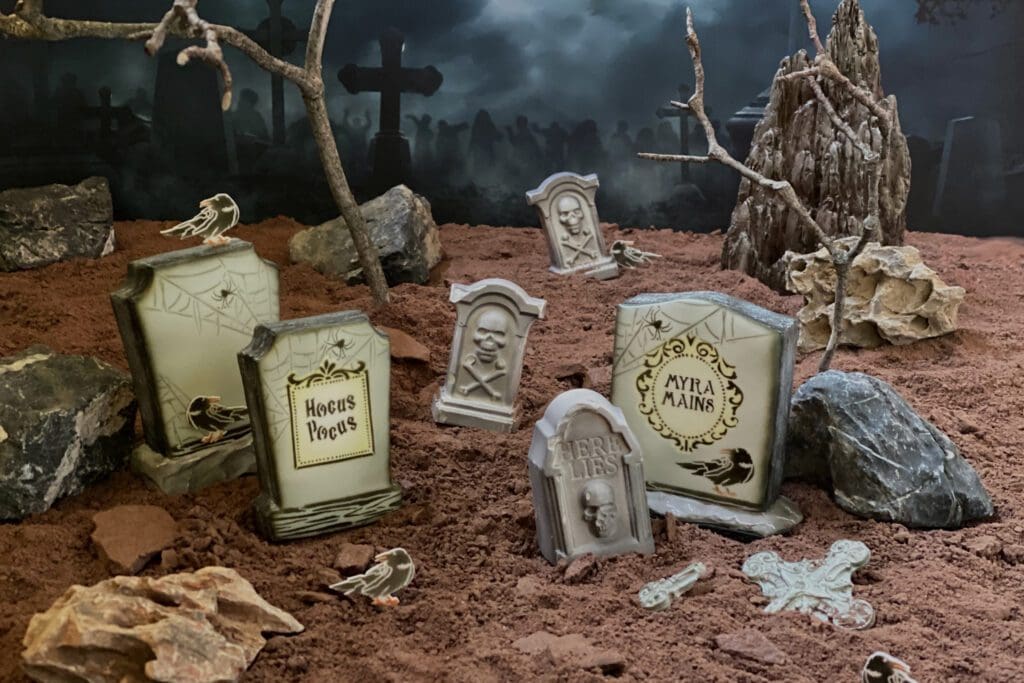
Designed to complement last year’s Halloween Coffin and Skeleton kit, this latest release, simply called Halloween Tombstone kit, allows you to make both 2-D and 3-D tombstones using brand-new tombstone cutters (three shapes in three sizes each) and previously released stencils in my Home Spooky Home Dynamic Duos™ sets. The deluxe kit option even has a brand-new stencil sheet (below center) with very fun tongue-in-cheek epitaphs for the tombstones.
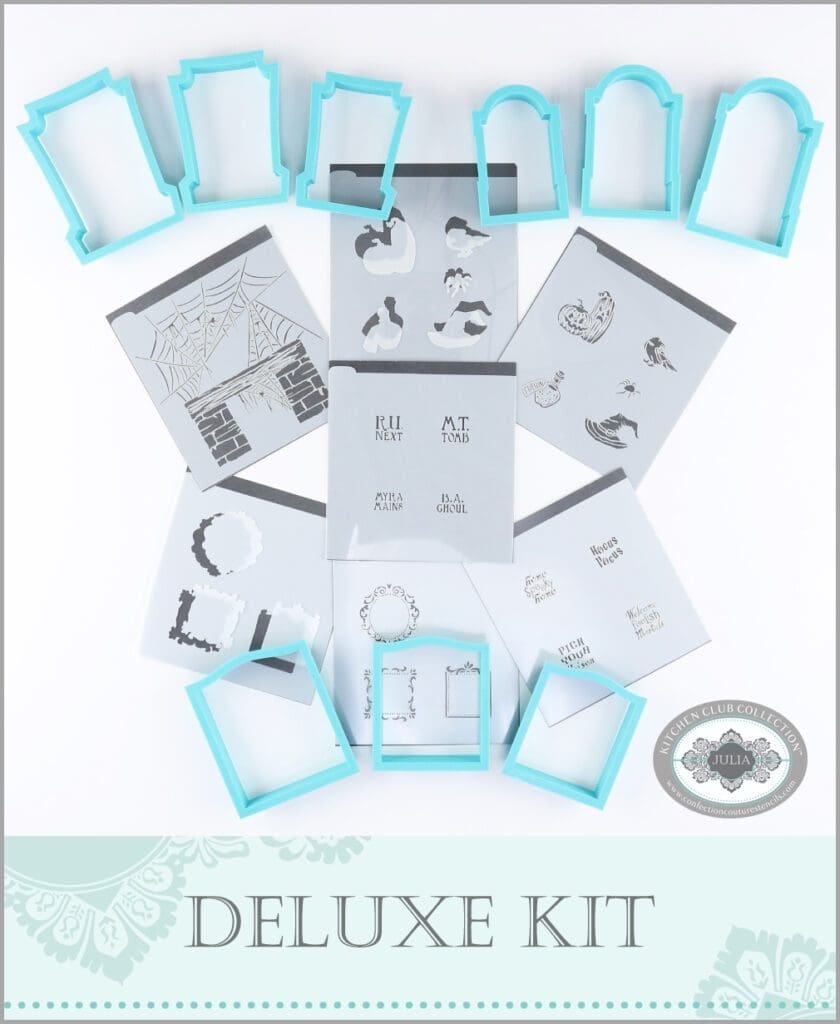
The wide range of cutter shapes and sizes in the deluxe kit allows for quite varied and interesting cookie sets – and edible graveyard scenes if you decide to go that route as I have below.
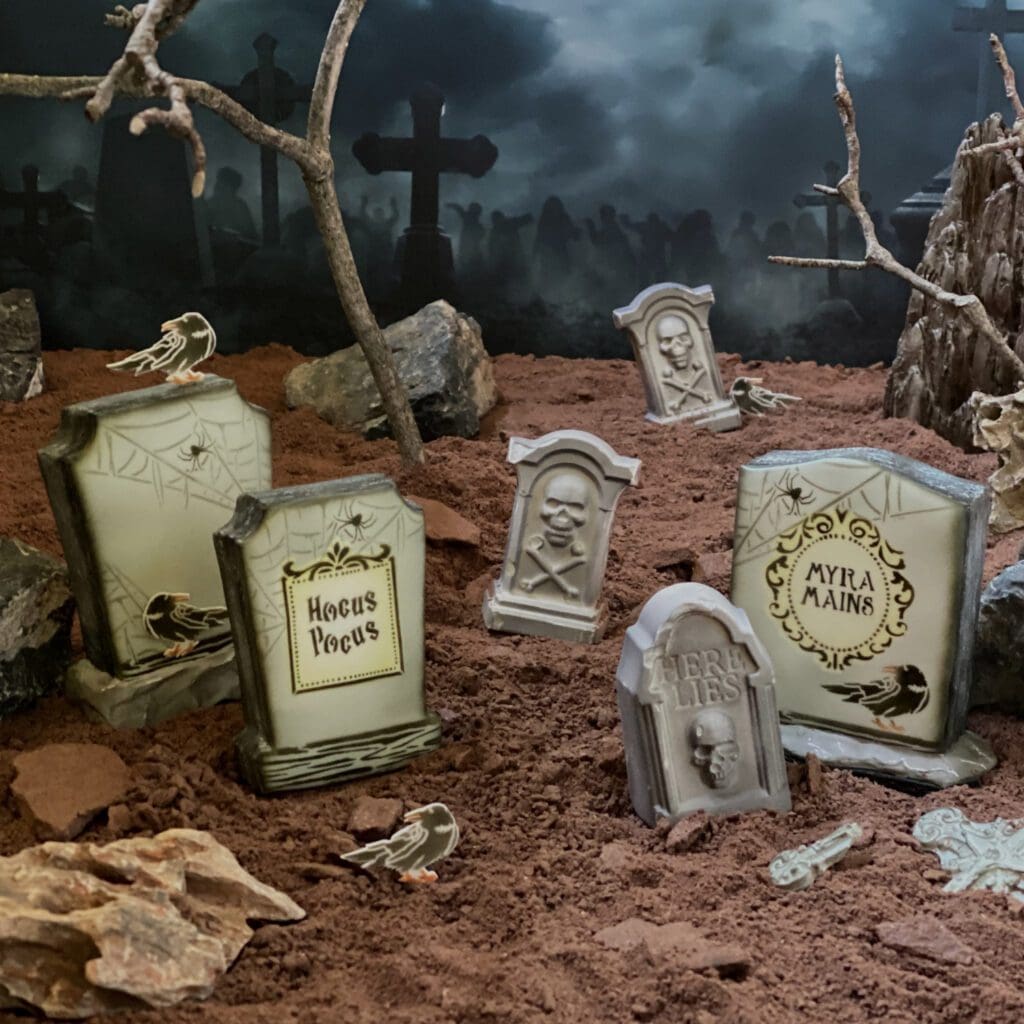
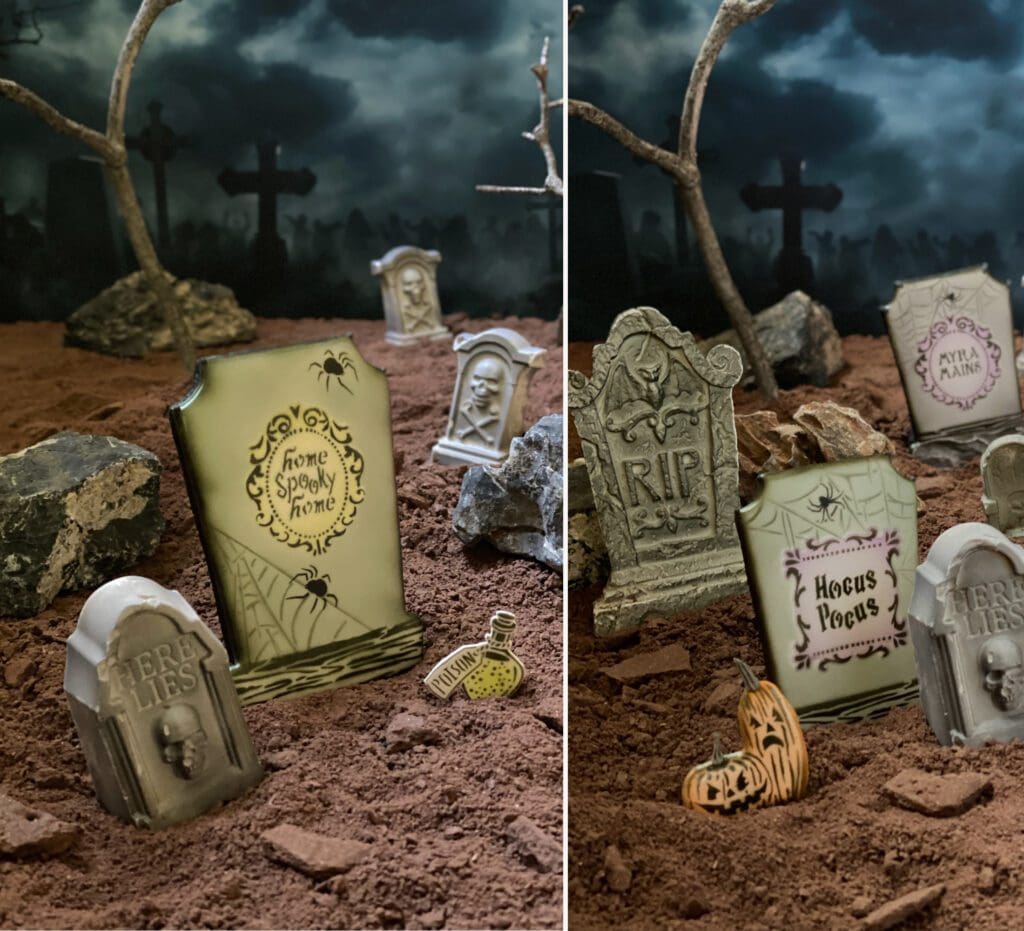
Perhaps you noticed that I chose to take the 3-D (versus the 2-D) path here as well. Each of the three cookie tombstones (pictured left and right) is comprised of anywhere from three to four 2-D cookies that were filed, painted, iced, stenciled, airbrushed, and stacked to create freestanding, sculptural pieces of edible art. They also have the added surprise of being filled with small candies, so they’re interactive too!
But you needn’t get this complex with the deluxe kit. You can use all the same stencils and cutters and still achieve a striking 3-D effect just by perching 2-D cookies upright in cookie crumb “dirt”.
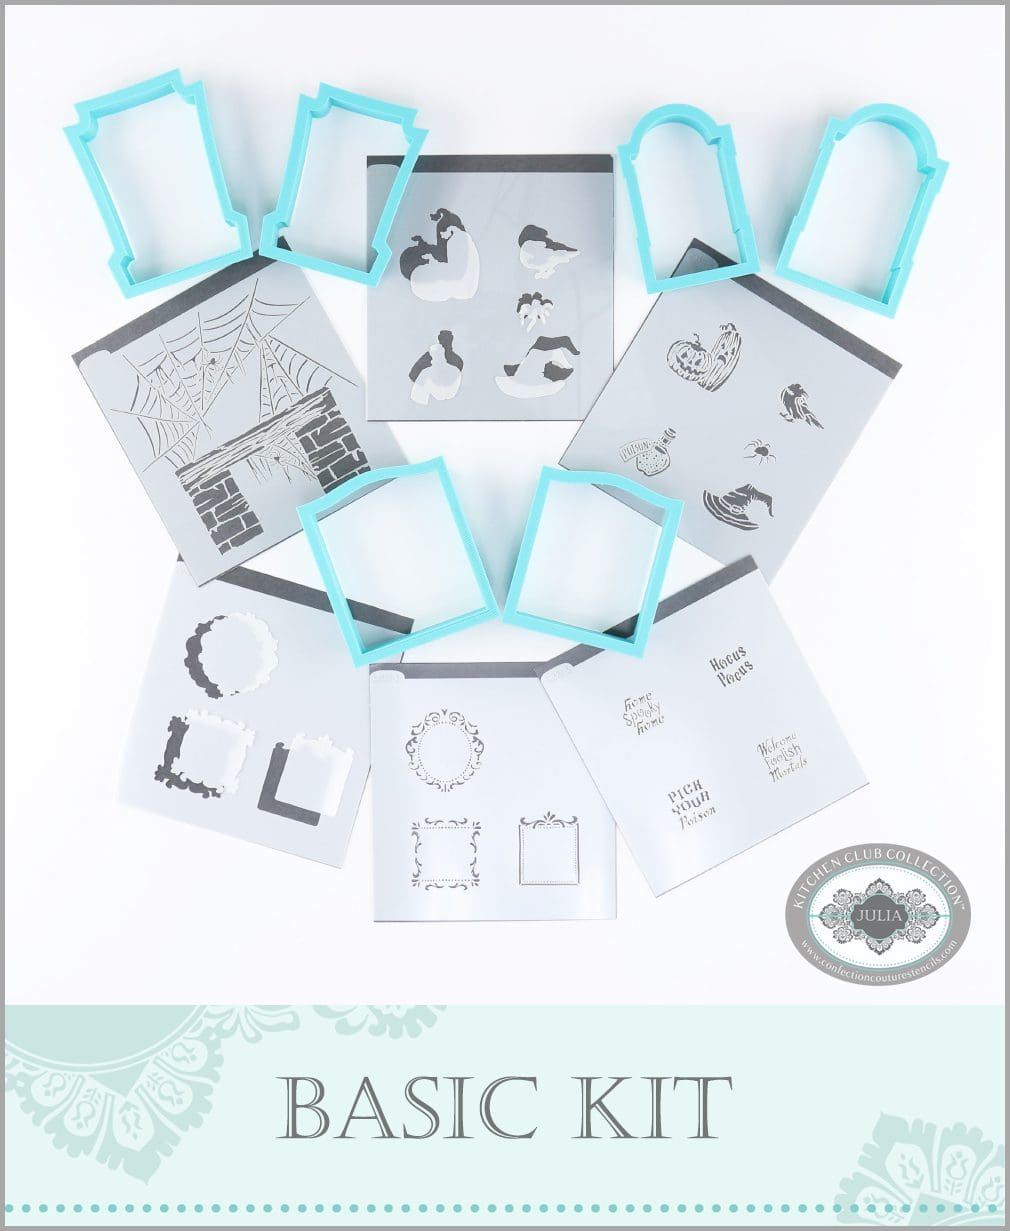
Now, if you’re new to cookie decorating or aren’t sure you’ll have the time for all of this variety, then I have another kit option for you too. The basic kit, displayed below, doesn’t include the Epitaph stencil sheet and has three fewer cutters than the deluxe kit (just the two smallest sizes in each cutter shape).
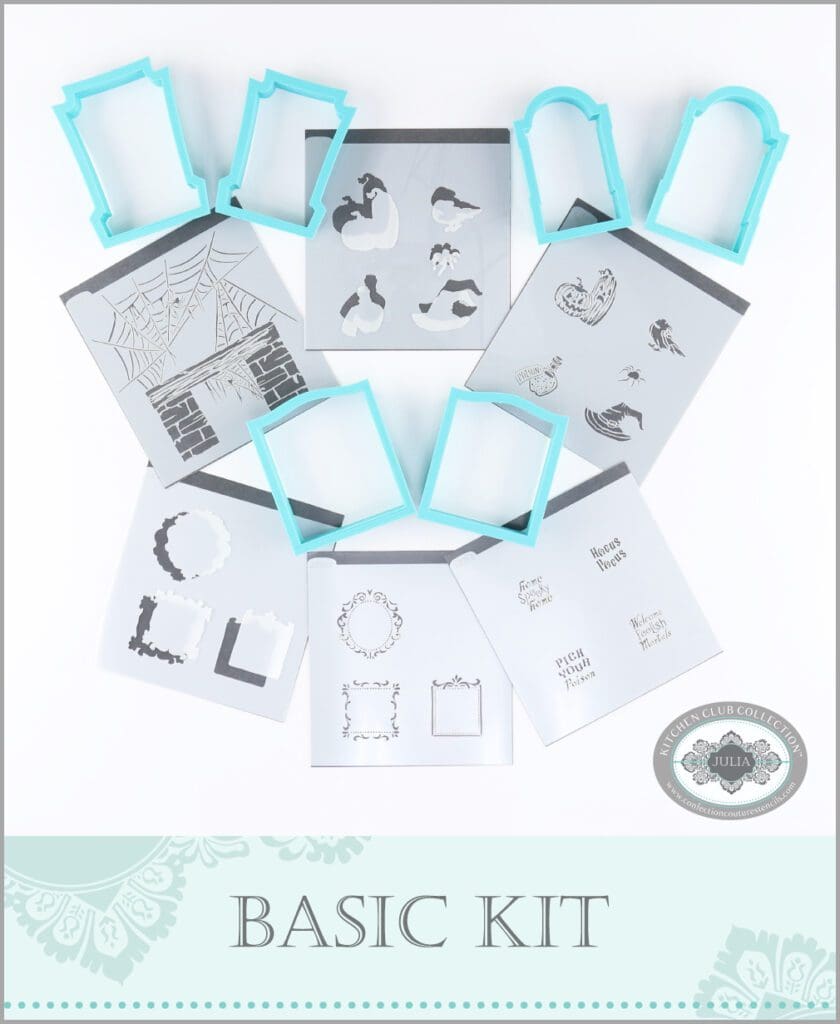
Yet, even with fewer tools, you can still make plenty of spook-tacular cookies – even ones with messages. The tombstones in the foreground (below) make use of two of the six cutters in the basic kit, and two of the four message stencils in the Home Spooky Home Dynamic Duos™ message and frame set, which is also included in the basic kit.
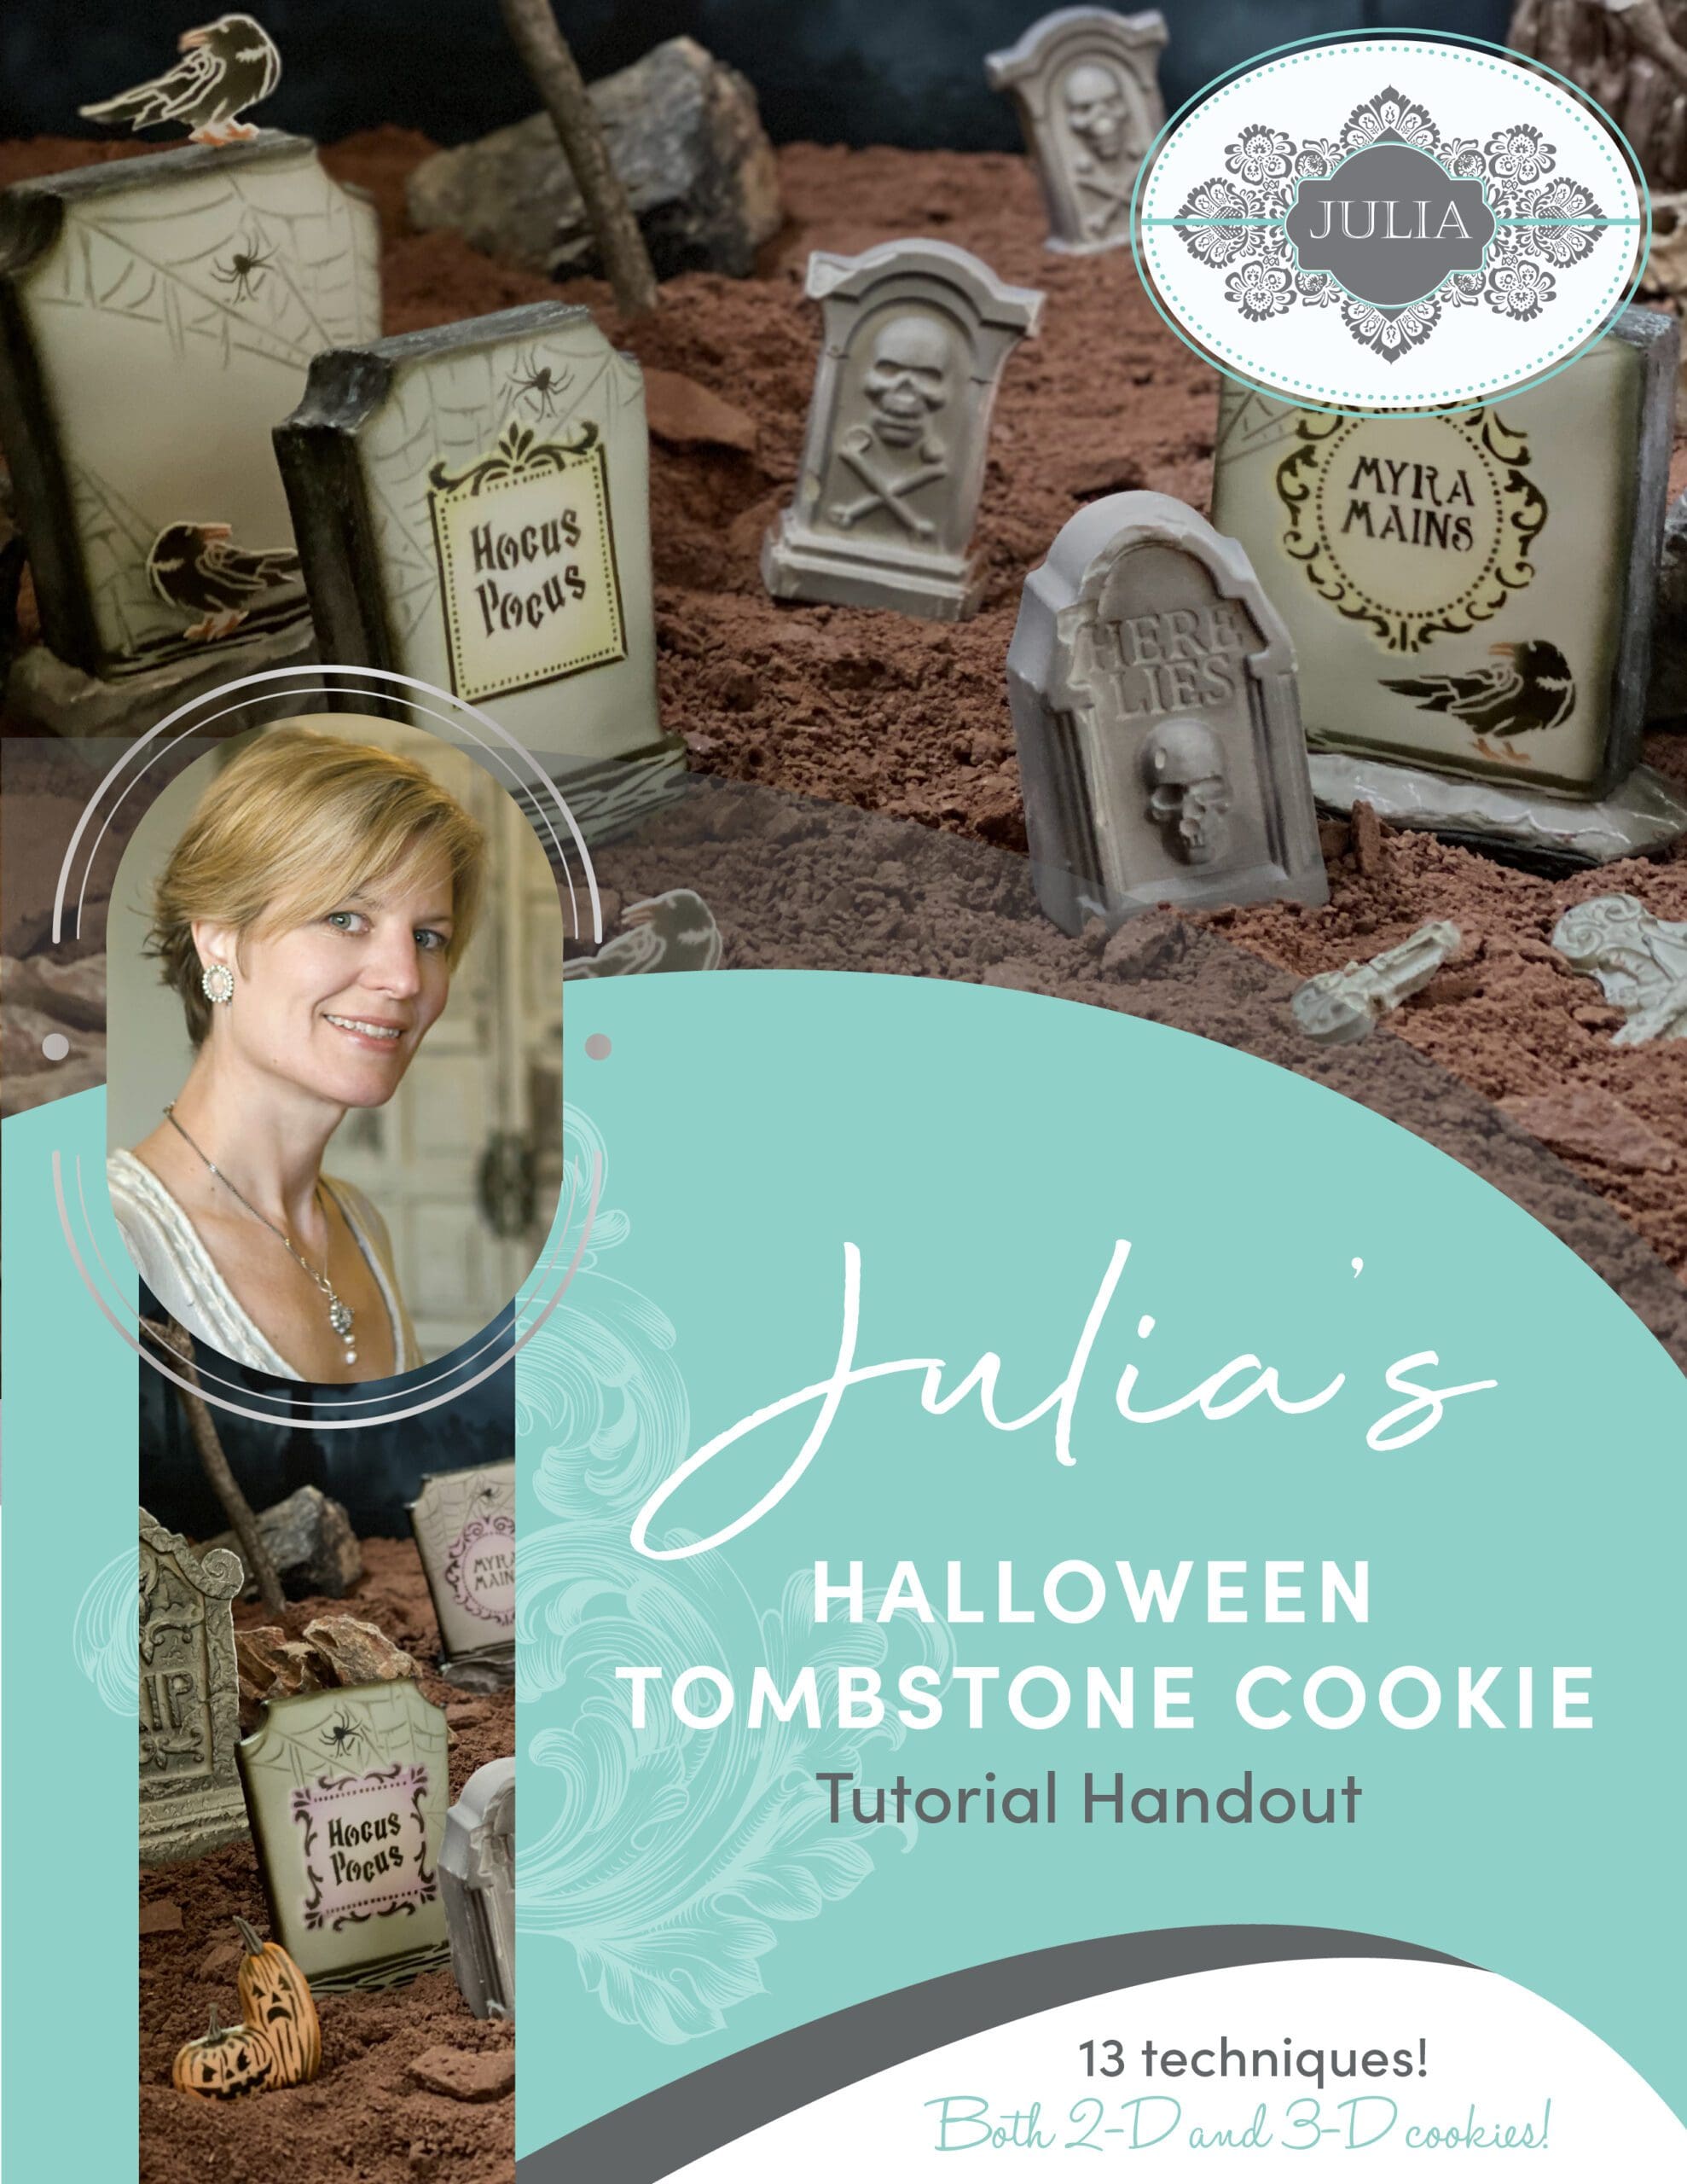
Oh, and let me not forget to mention that both the basic and deluxe kits come with the option of an added instructional video by yours truly. What this means is that you’ll never have to ponder how to use the various elements in each set. I know, the many kit pieces might leave you scratching your head at first glance, but my video is exhaustive, leaving no detail unaddressed! It covers every element in the deluxe kit and how to mix and match those elements to create many different designs. And that’s not all! It also explores 13 different decorating and construction techniques that can be used on these projects, and also on many other 2-D and 3-D designs. The following sneak peek will let you know exactly what to expect if you decide to purchase the full-length instructional video, which I hope you do!
I would be remiss if I didn’t mention that this video comes with a 36-page (!) handout including recipes, a supply list with online sources, inspiration images, and lots of technique tips that sometimes go beyond what’s covered in the video. Now, how’s that for added enticement? 😉 Here’s a glimpse of the cover page of that handout:
One last note on the kits: If you already have the stencils in the kit, have no fear. The cutters and my Epitaph stencil sheet are also sold separately on confectioncouturestencils.com.
With the kit contents now hopefully crystal clear, let’s talk about some of the myriad designs possible with these sets. One of the signature features of my kits is the interchangeability of their elements, which allows you to create a near-infinite number of designs with relatively few tools. Below, I’ll step through just a small subset of the possibilities, ranging from the easiest to the most complex. As you’ll hopefully see, it’s quite simple to tailor your approach to the kit depending on your available time. Either use a minimum of elements and colors, or go crazy and try to incorporate as many as you can – within reason, that is! 😉
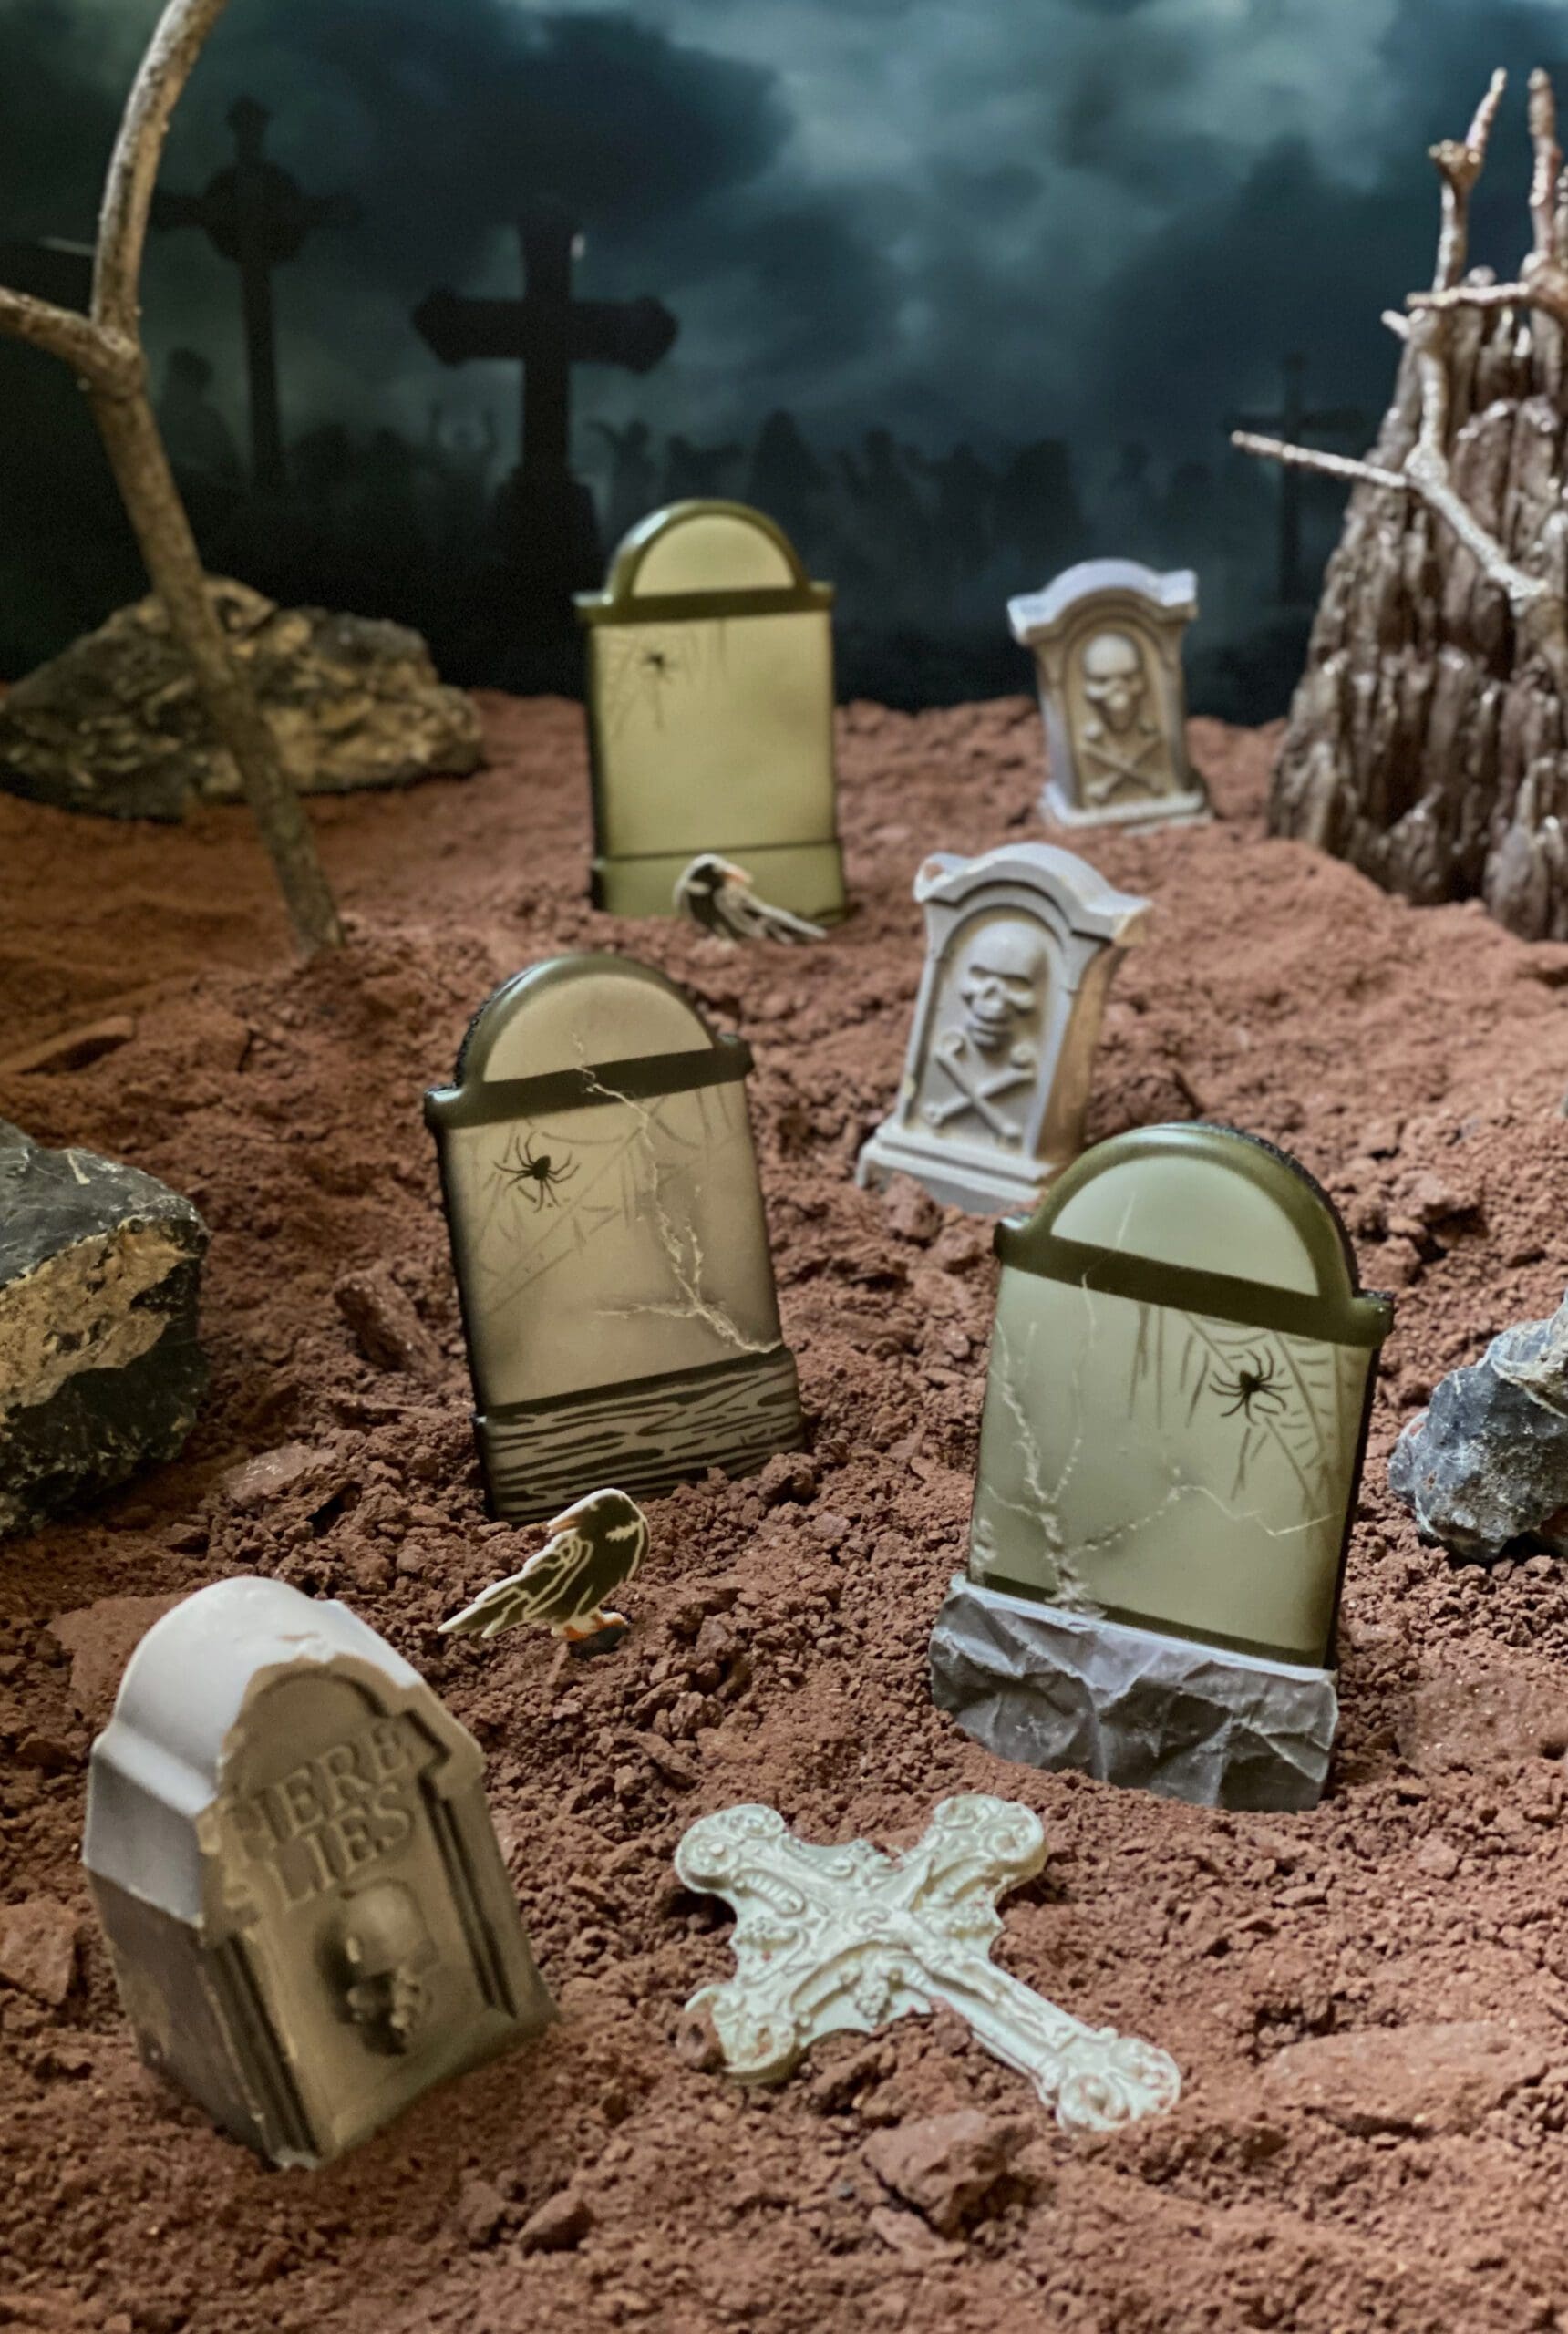
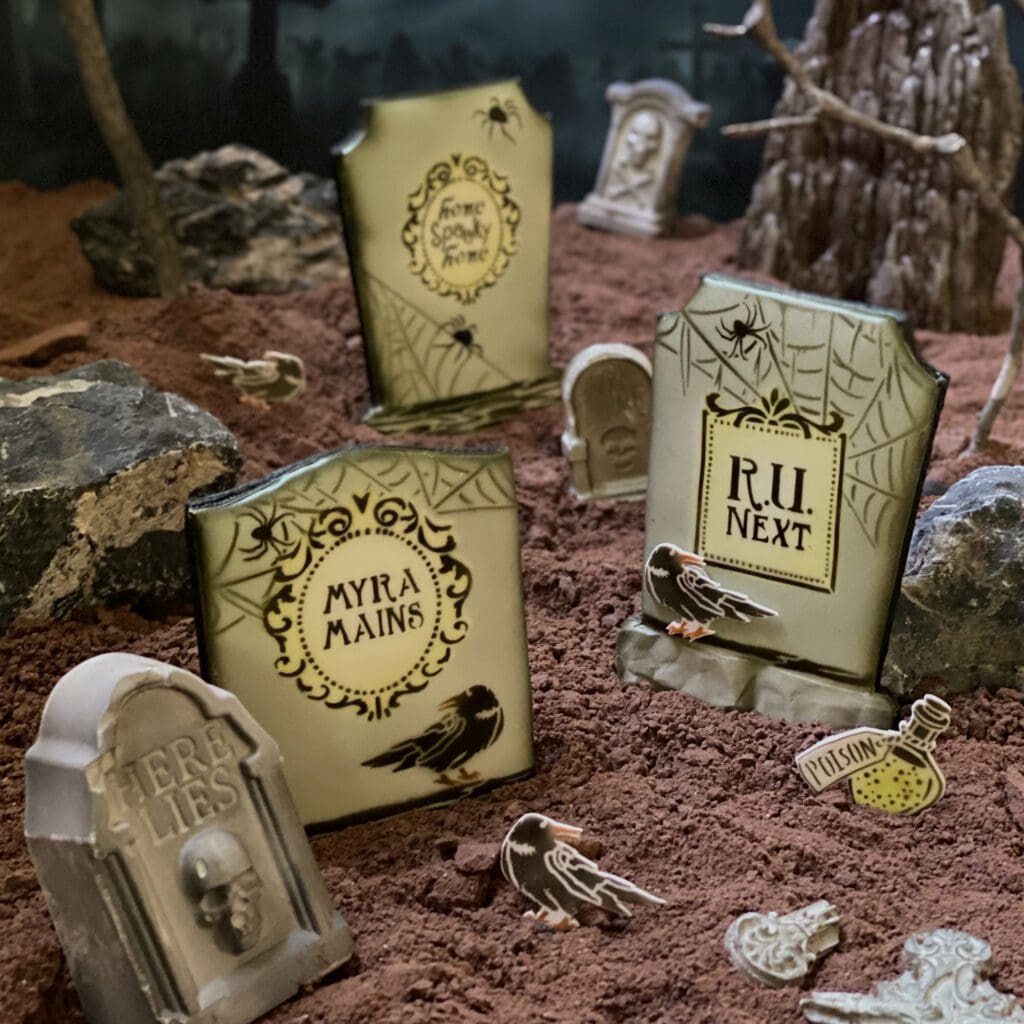
These message-less tombstones, perhaps the simplest of designs, make use of just the background stencil set (the one with all of the Halloween images) in my Home Spooky Home Dynamic Duos™ design.

Even sans epitaphs, these tombstones are interesting because of the various techniques I applied. At their tops, you’ll see black airbrushed details made with DIY conformable stencils. The base of the tombstone in the front was textured using crumpled parchment paper, and the faces of both cookies in front were engraved to give the appearance of cracks. These techniques are just three of the 13 discussed in detail in the companion video and handout.
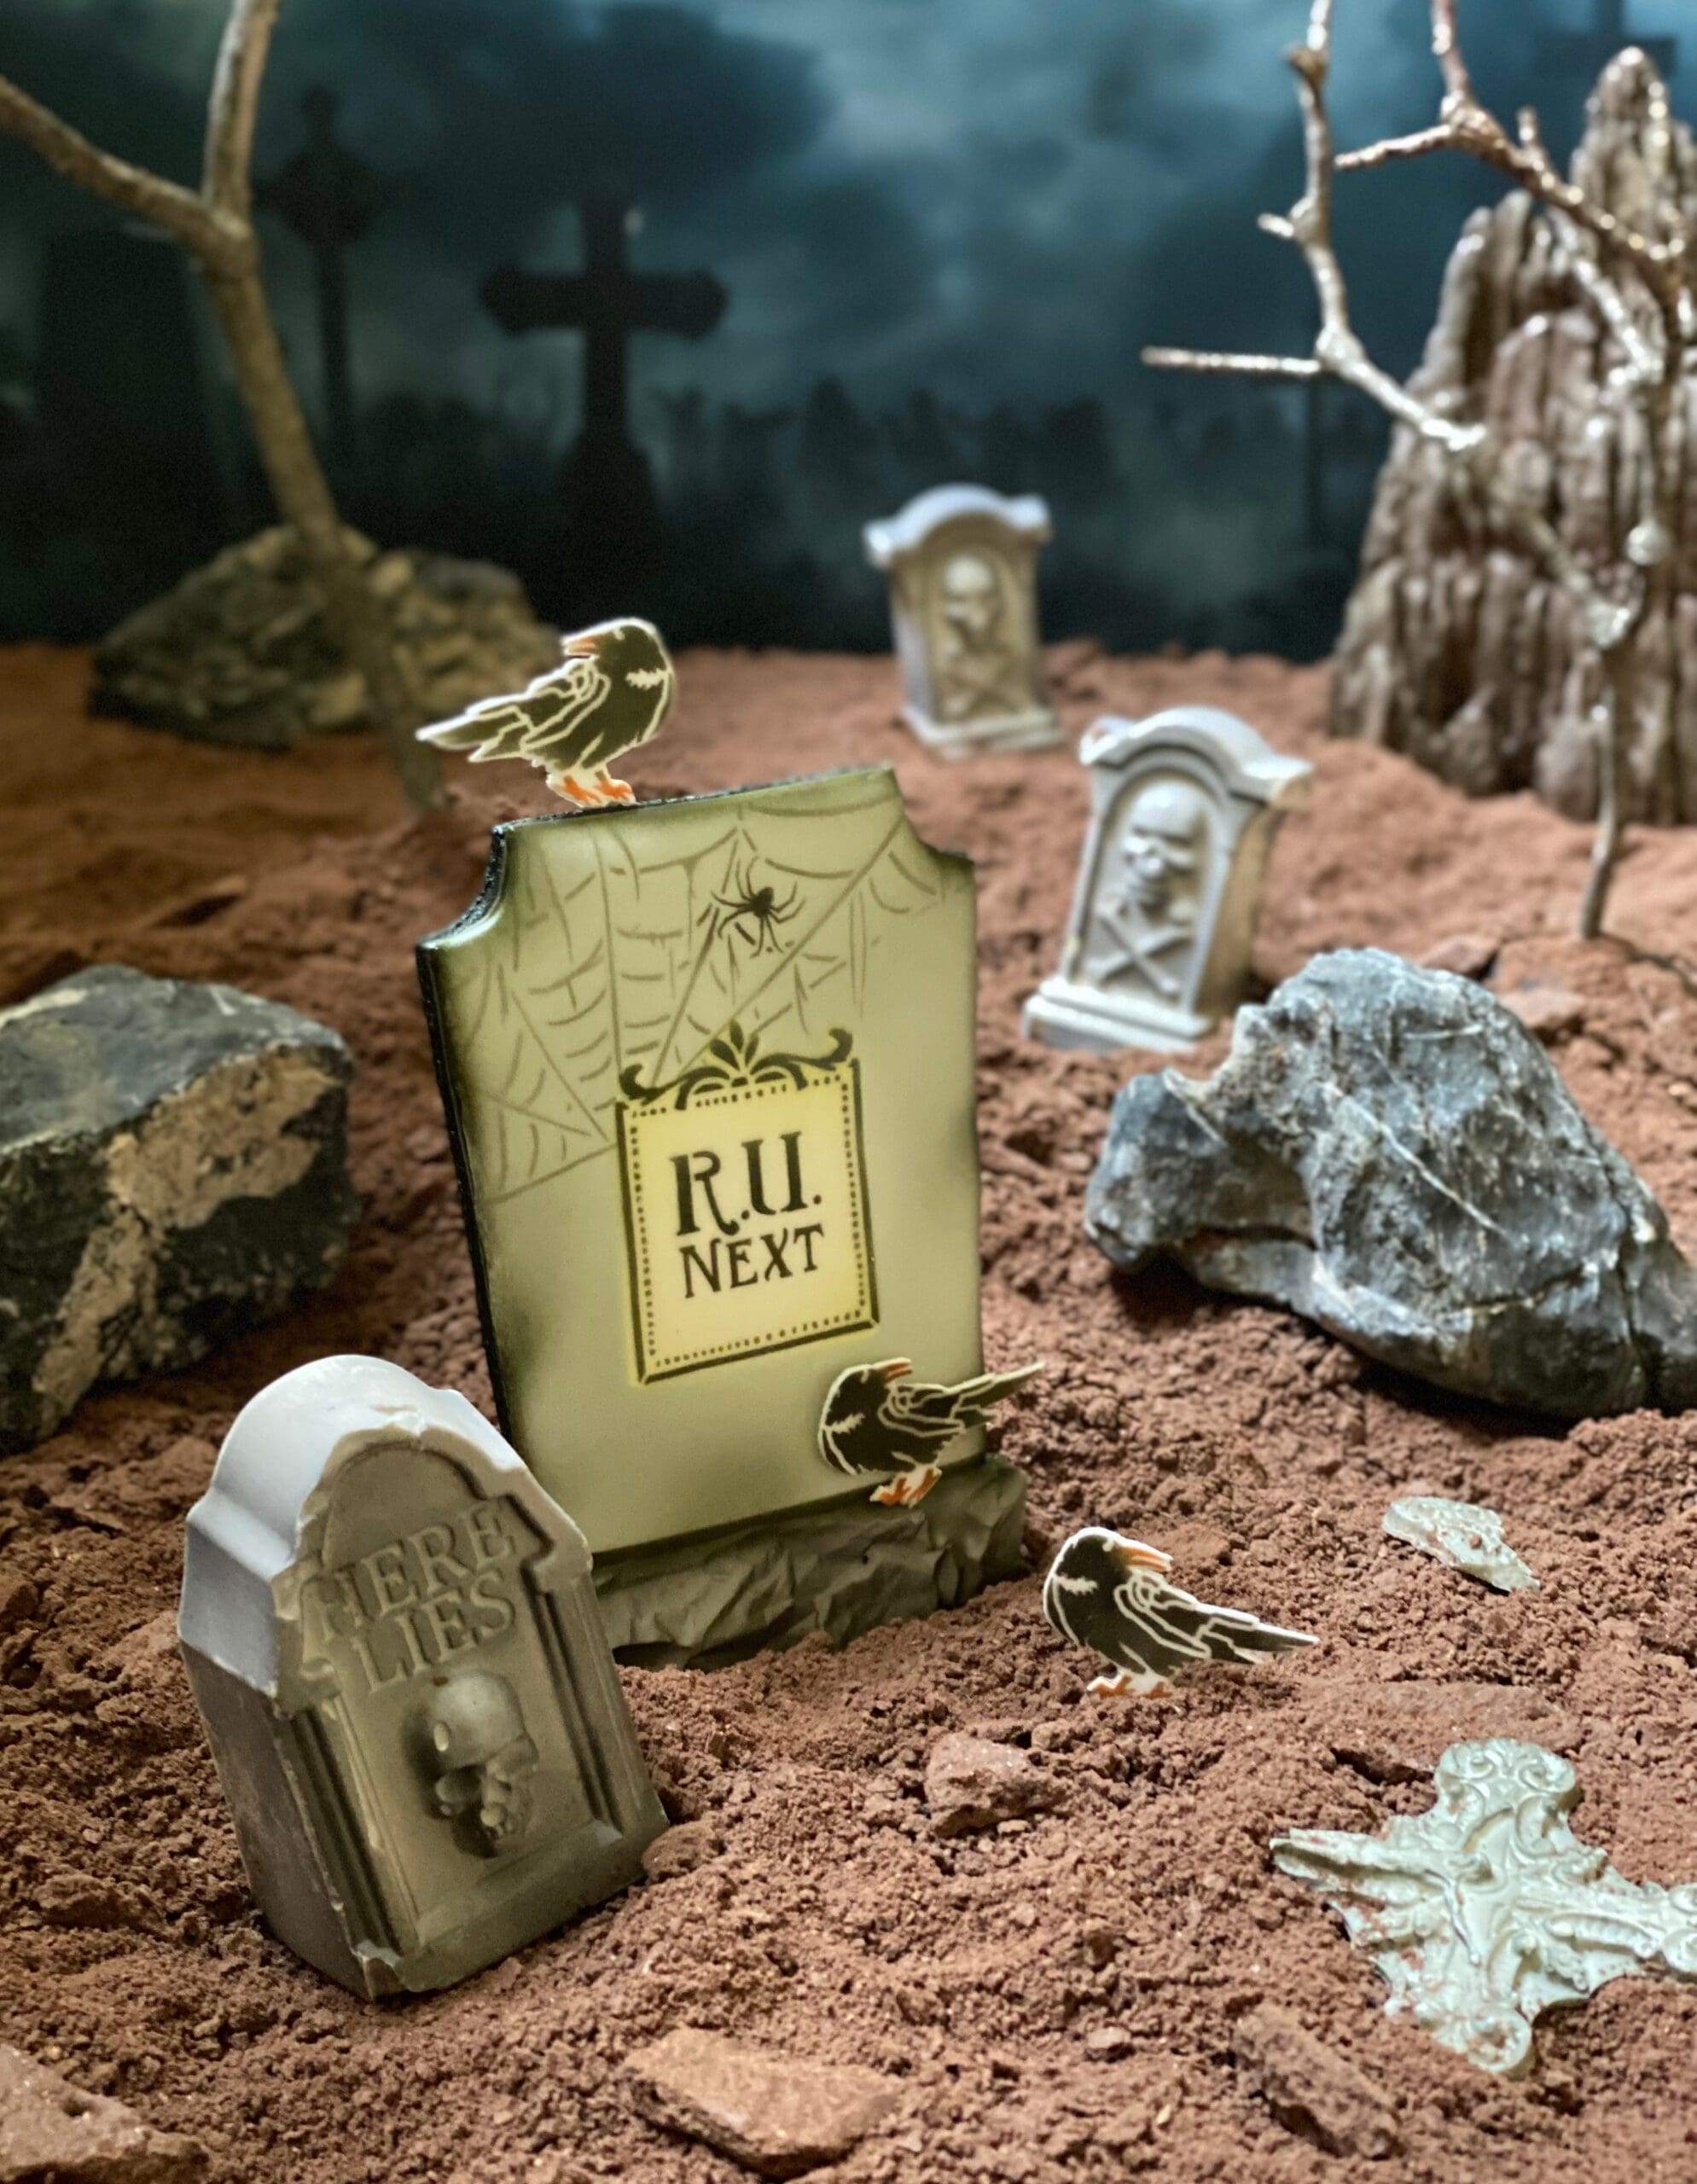
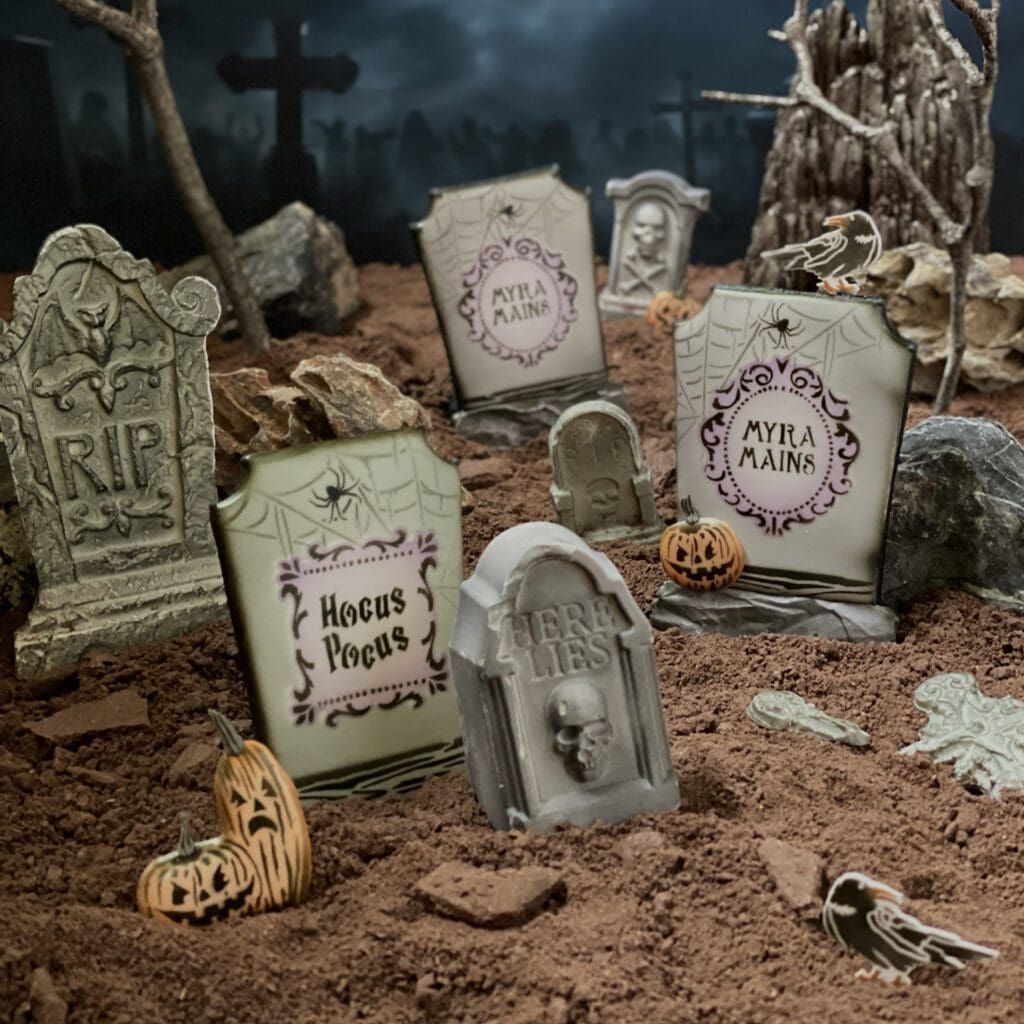
Now, we come to the next most challenging cookie type: 2-D ones that combine both stencil sets in my Home Spooky Home Dynamic Duos™ design (the background set and the message/frame set) along with my Epitaph stencil sheet.
Here, electric green was added for pops of color in this otherwise spooky black-and-gray vignette. Also to note: I made tiny raven and poison bottle fondant appliqués to add interest to the cookie crumb “dirt”. These appliqués also look cute mounted on tombstone pedestals (above and below) and/or perched on tombstone tops (below).
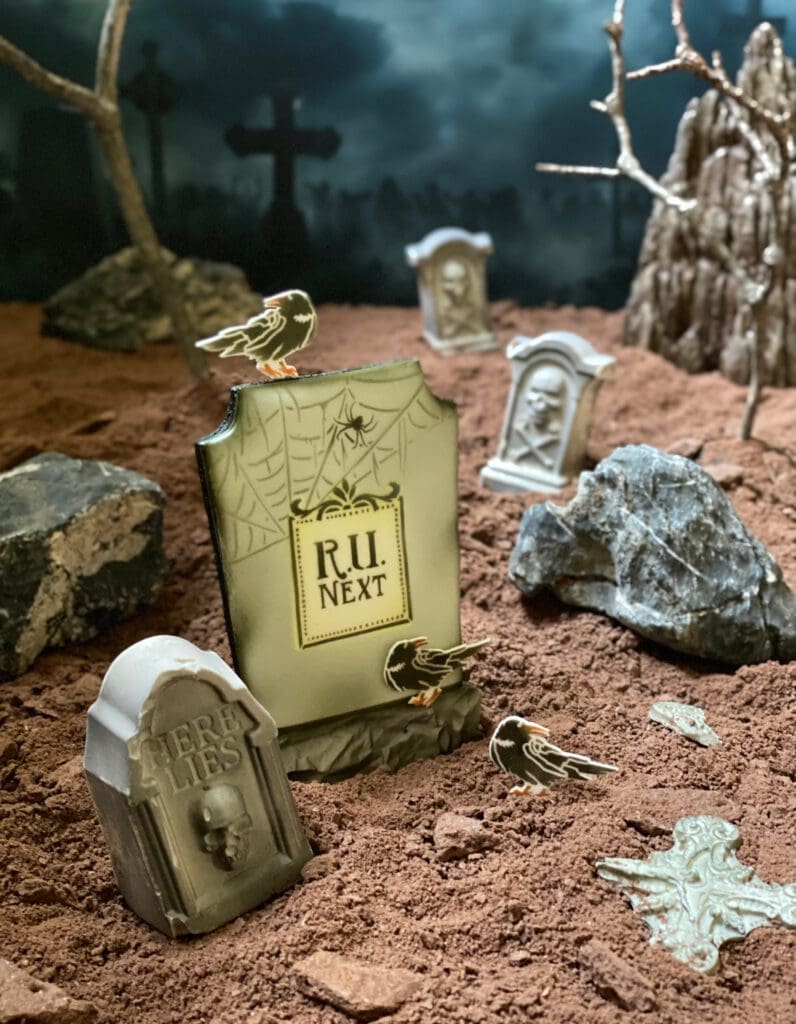
Tips for making appliqués and securing them in precarious tombstone-top positions 🙂 can also be found in the instructional video.
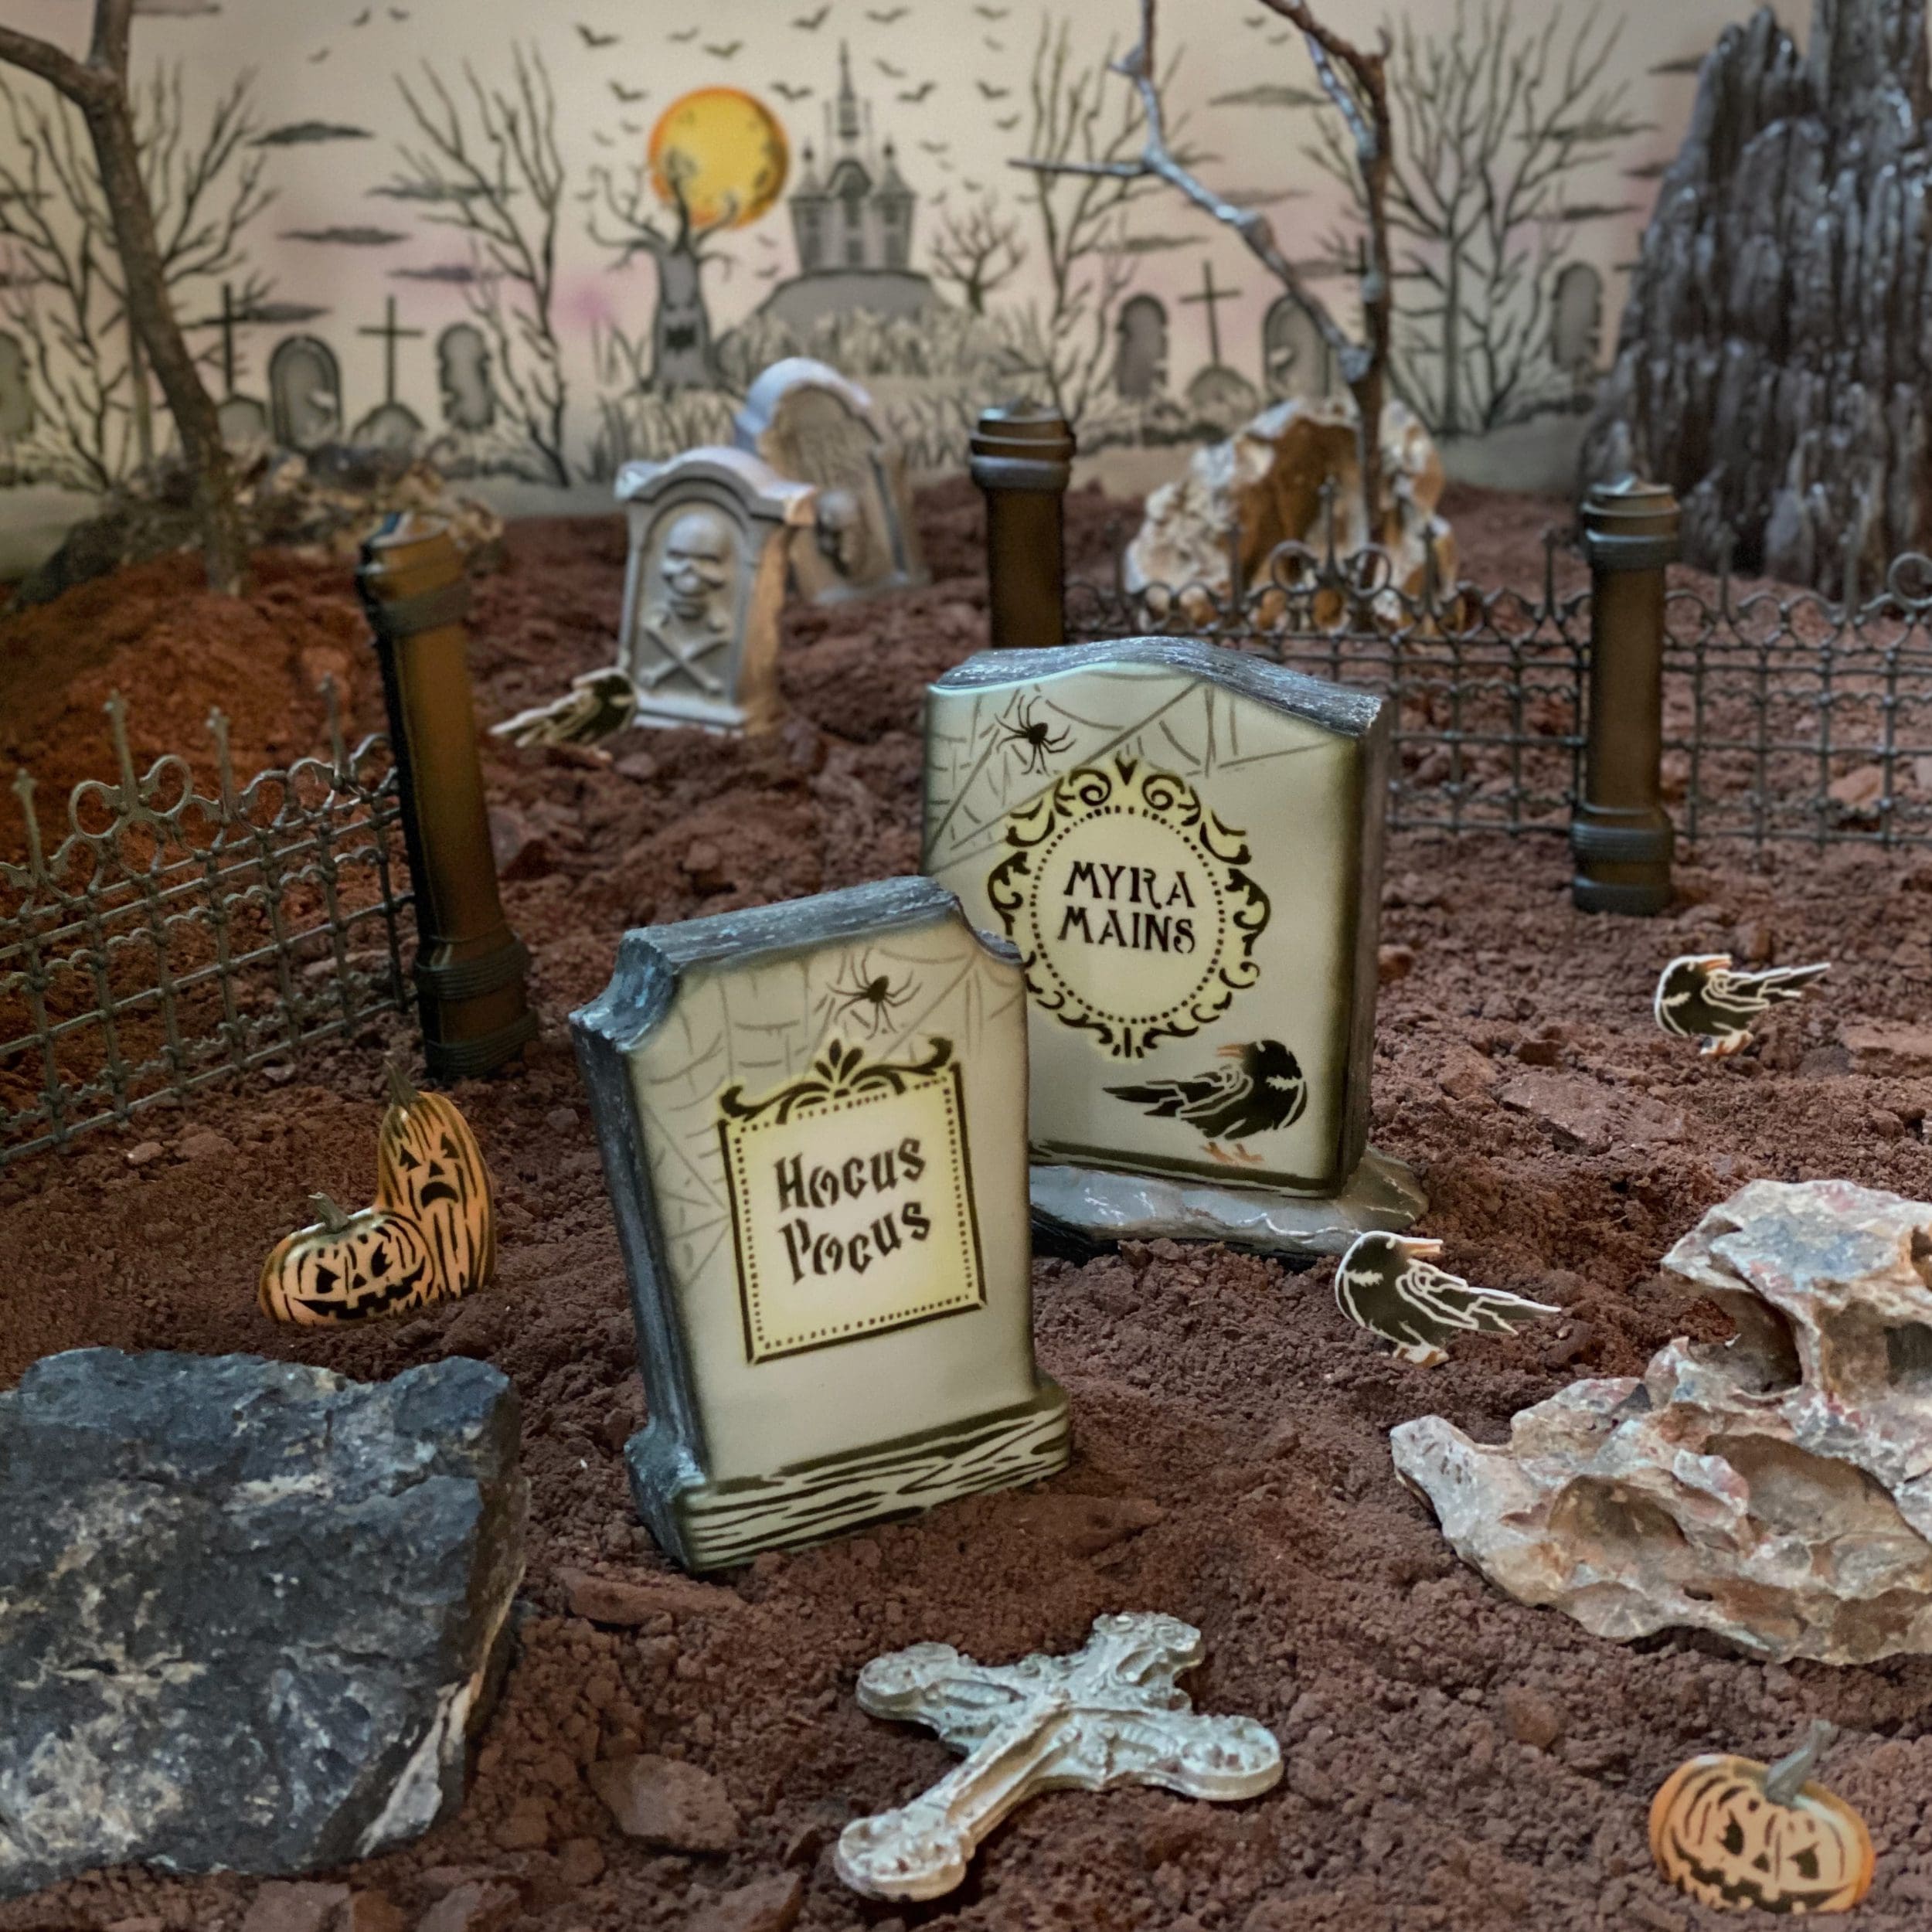
In the following scene, the complexity has been amped up a notch or two. Not only have the 2-D tombstones turned into 3-D ones (again, a complete how-to is in the video), but royal icing jack-o-lanterns and a fully edible airbrushed and stenciled fondant backdrop have been added. The transfers, which use kit stencils, are also demoed in the video, but the backdrop, which makes use of non-kit stencils, is only briefly discussed.
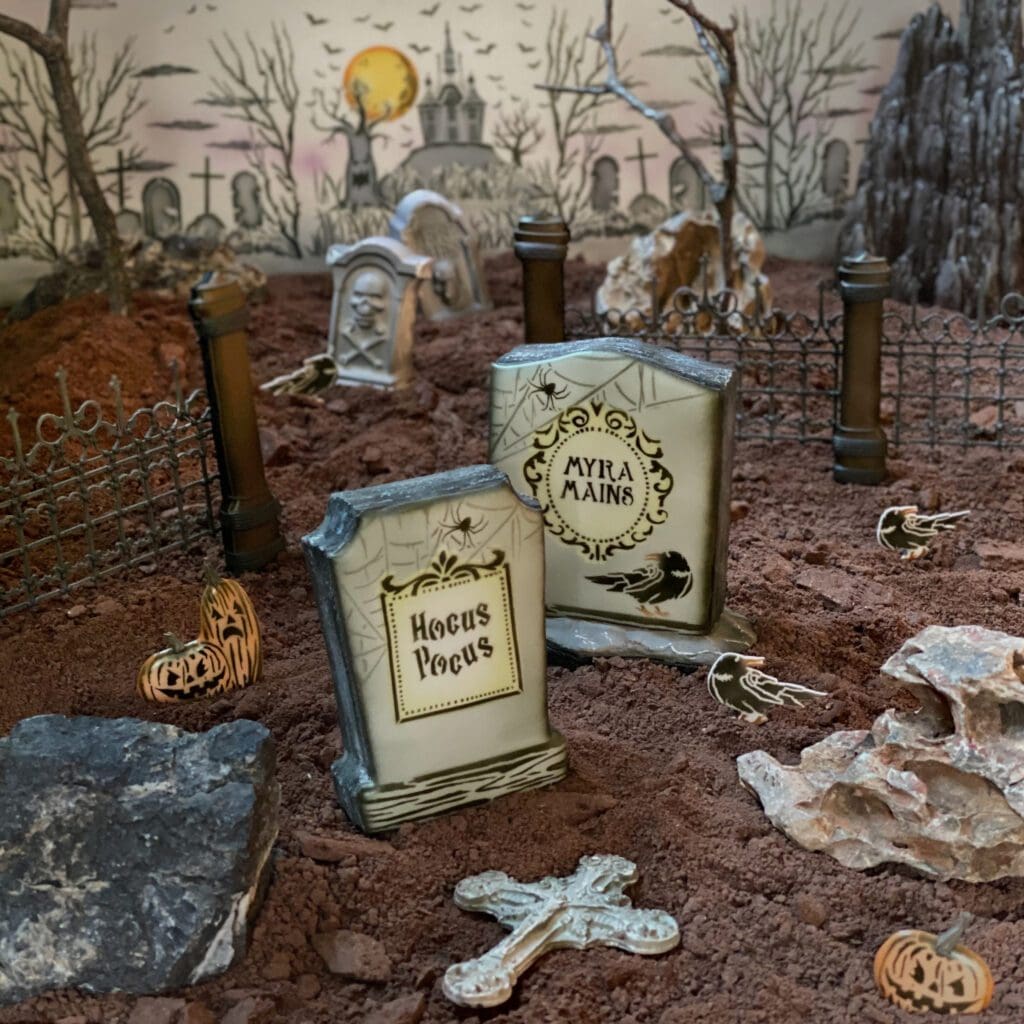
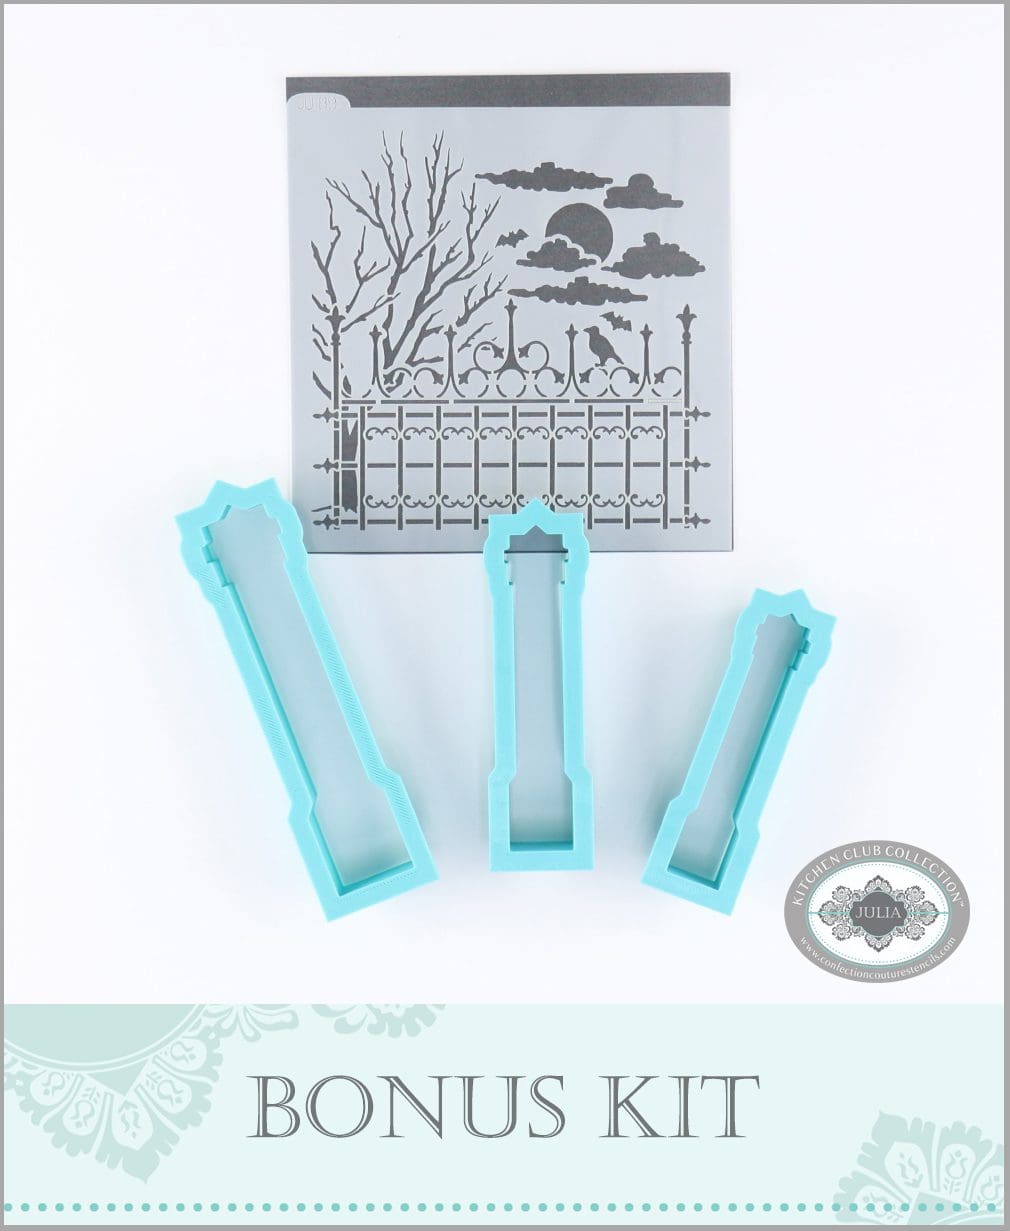
I want to turn to my Kitchen Club, its benefits, and how to become a member, but, first, I just have to say a few words about the fence in the photo above ! 🙂 It’s pretty special. Comprised solely of cookies (the posts) and royal icing transfers (the wrought iron rails), it’s edible too. And guess what?! You can make it with this month’s bonus Graveyard Fence kit (more below)!
This extra kit is comprised of three post cutters and the background stencil from a previously released stencil set, from which the fence rail is isolated, and it looks just like this:
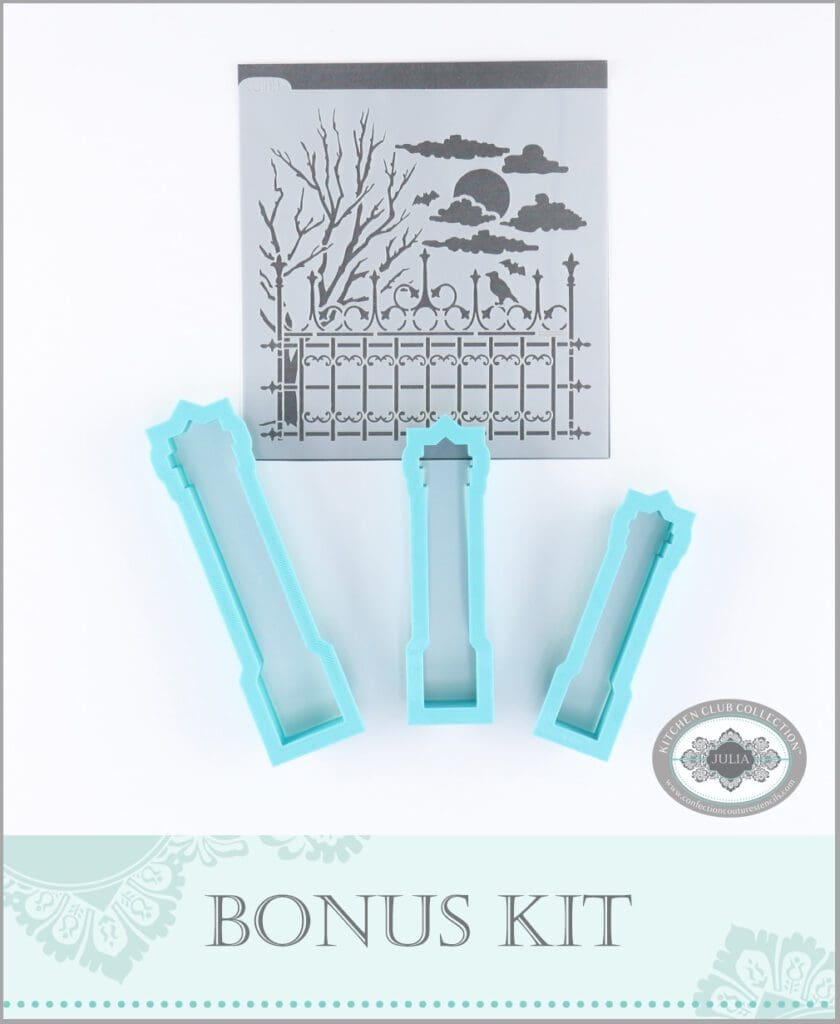
I like to use the largest or mid-size posts as “anchors” at the ends of long fence runs, and the smallest posts within the run, but there’s no right or wrong way to use these cutters. The fence rail itself is quite delicate, being just a thin layer of royal icing, and there are some tricks to making it a unified single piece and to attaching it to the posts. As I write this blog post, I am working on an instructional video to accompany this kit, which will clarify all of these details. My goal is to release the video in early October, in time for Halloween, so please stay tuned!
And, at long last, the details of my Kitchen Club . . . You can buy my kits like this one on occasion, or you can opt into my club to get great savings on my kits and other products on my partner’s site as long as you continue purchasing kits. Here’s how the club works:
As mentioned earlier, you can also unbundle the kits if you only want a subset of the items in them. For instance, the stencils and cutters can be bought separately on my partner’s site, and the instructional video can also be bought under the “VIDEO TUTORIALS” section of this site.
Please note that my partner Confection Couture Stencils handles all order fulfillment for my stencils, cutters, and kits, so all such questions should be directed to them at service@confectioncouturestencils.com.
I hope you’re dying to get the deluxe kit (sorry, it’s obvious I love silly puns). Or at the very least find these tombstones eerie-sistible (there I go again) and opt for some variant of that kit! Happy Halloween season!