
If it’s still hot in your hemisphere, fall may not be calling you just yet. But, I assure you, with the way time flies, it will be soon! So, to get you geared up for that active autumn cookie season, I’ve got a charming fall-themed stencil design to help make easy work of those upcoming orders. It features two of my favorite things – fall flora and fauna – and, as usual, it’s nearly infinitely adaptable. The bittersweet bramble-and-pumpkin patch background can be used on its own in several different exposures; the birds can be layered on top in countless arrangements; and framed messages can be added too! Here’s a quick overview:

To help you locate the tools that made these cookies, here are all of the quick links to these stencils on my partner Confection Couture Stencils‘ site:
Also, as you hopefully know by now: the bittersweet vine-and-pumpkin background stencil in this month’s background set (pictured to the far left in the image directly below) is also sold separately and can be found under Bittersweet Bramble Dynamic Duos™ Background Cookie Stencil on my partner’s site.
Now, let’s turn to my Stencil of the Month Club for a moment. If you don’t know about it already, you really should. If you join it, each month you’ll automatically get the current month’s background set along with my partner’s single companion stencil, all at a substantial (>15%) discount. For example, here’s what my club’s offering looks like this month:

With these four stencils (and four masks), you can set the birds in the vines or pumpkin patch; place them in or on the wreath; use them alone on a plain cookie or one with another background; or don’t use them at all (just use the vines or wreath on their own)! This flexibility, not to mention the super savings each month, ought to be reason enough to join my club now! ![]()
Enough with the sales pitch, you say?! Okay, let’s talk about how these stencils work, and look at some design options. We’ll do that first by reviewing the following two videos. The first one is a hyper-time-lapsed tutorial that shows how I airbrushed one design. Note how I can get five colors into small spaces in the same stencil without the use of any masks – just proper airbrush handling! The key is to operate quite close to the stencil (about one inch or so away) with very limited pullback on the trigger to minimize and control coloring flow. The second video is my so-called “style reel”, which includes a small sampling of the many designs possible with just the background set or with both sets used together.
Now, if you prefer photos and the written word, let’s carry on with more details. The details are always the fun part for me, being the more-is-more person that I am ![]() . . .
. . .
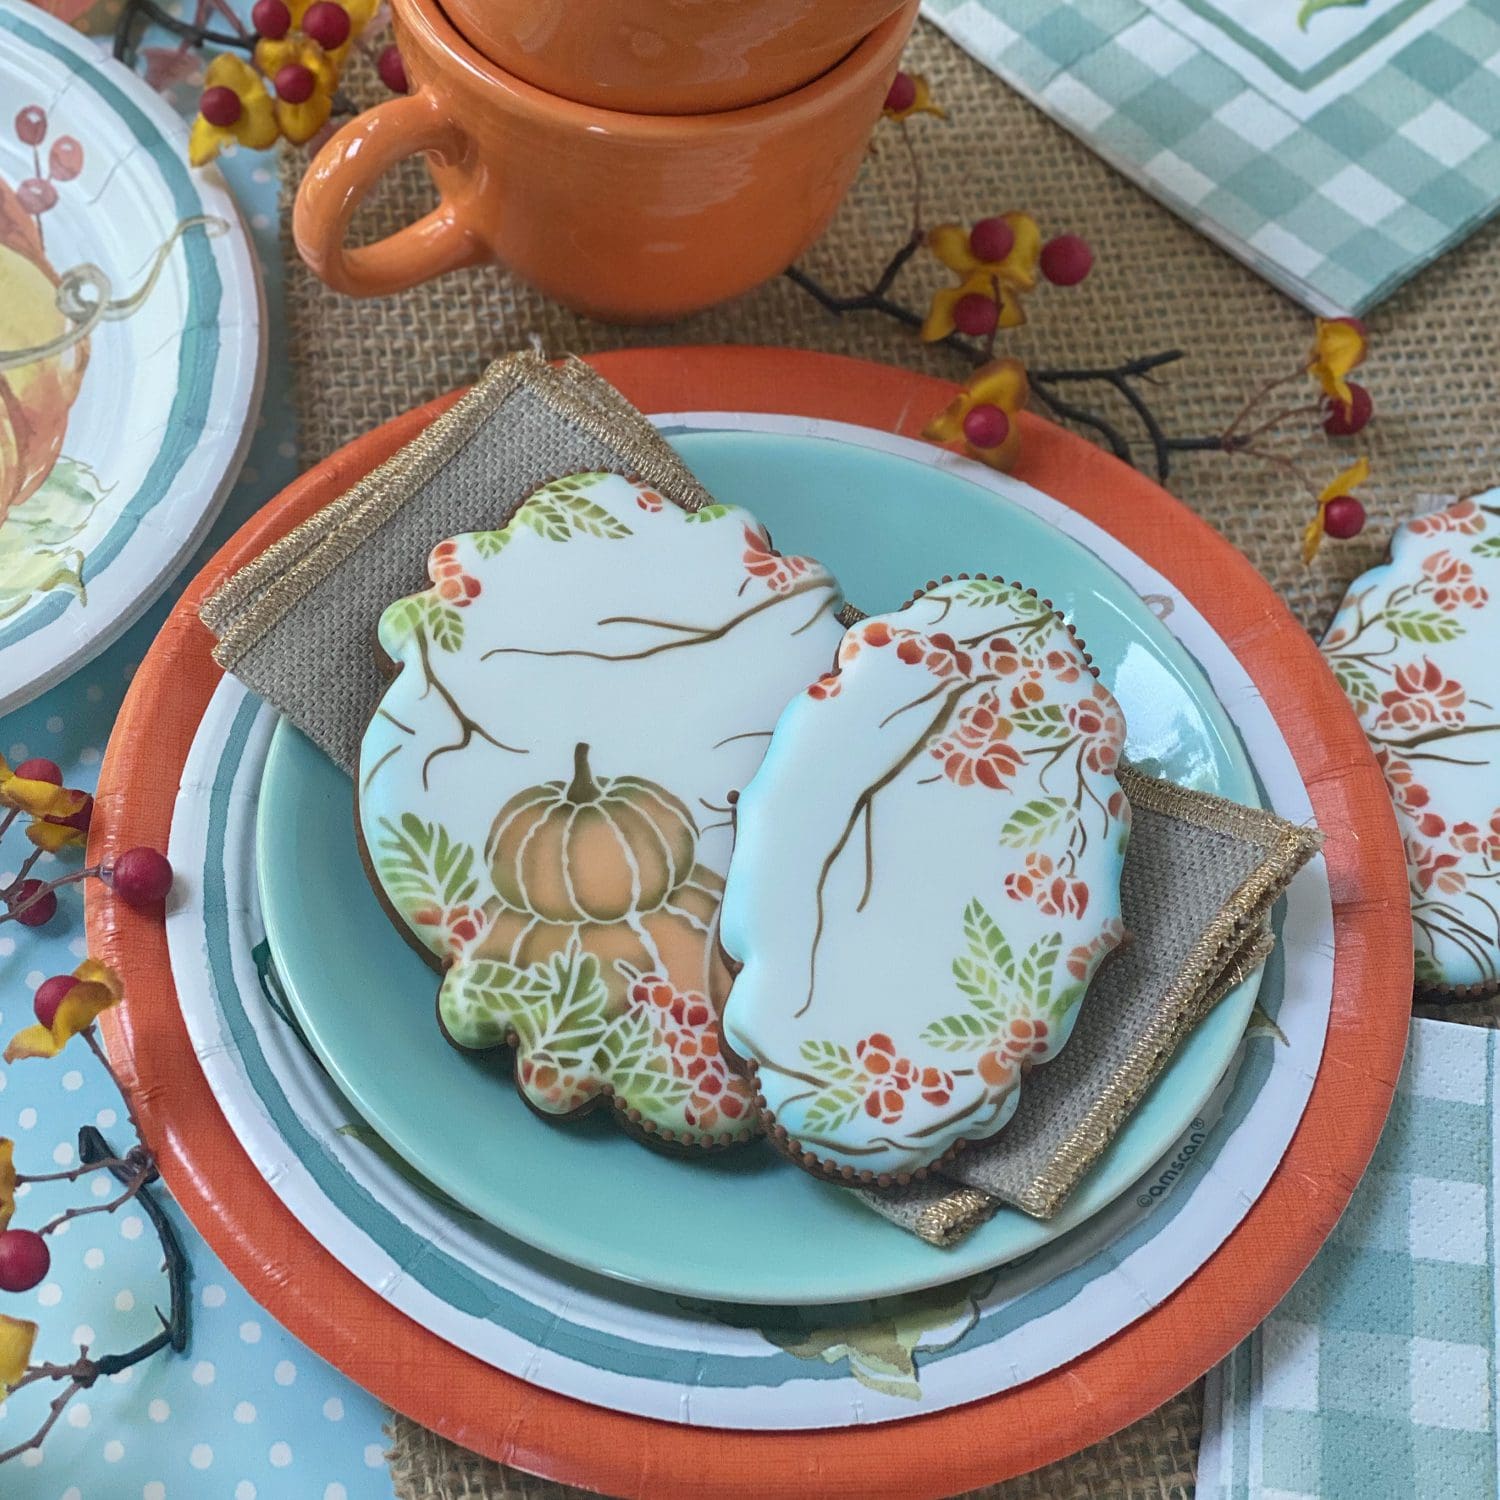
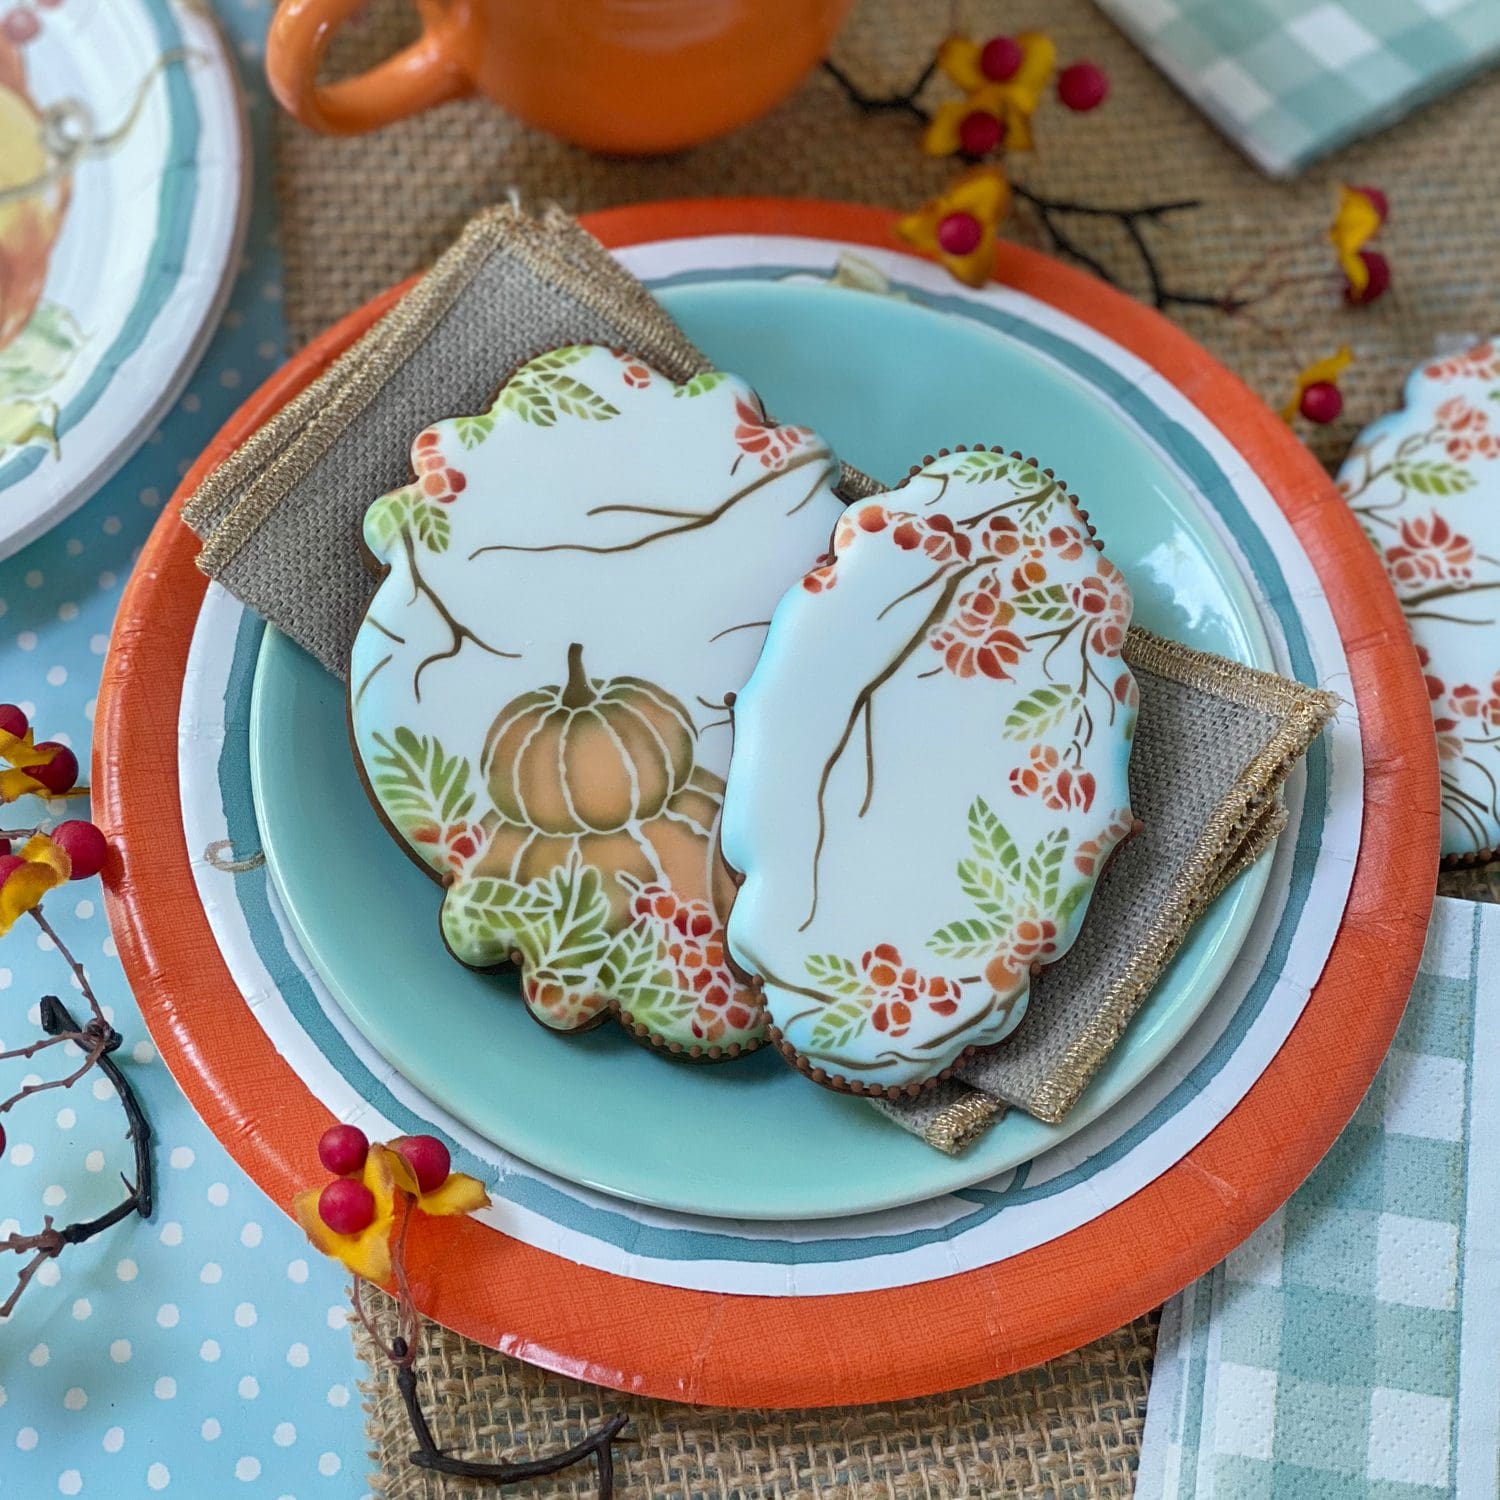
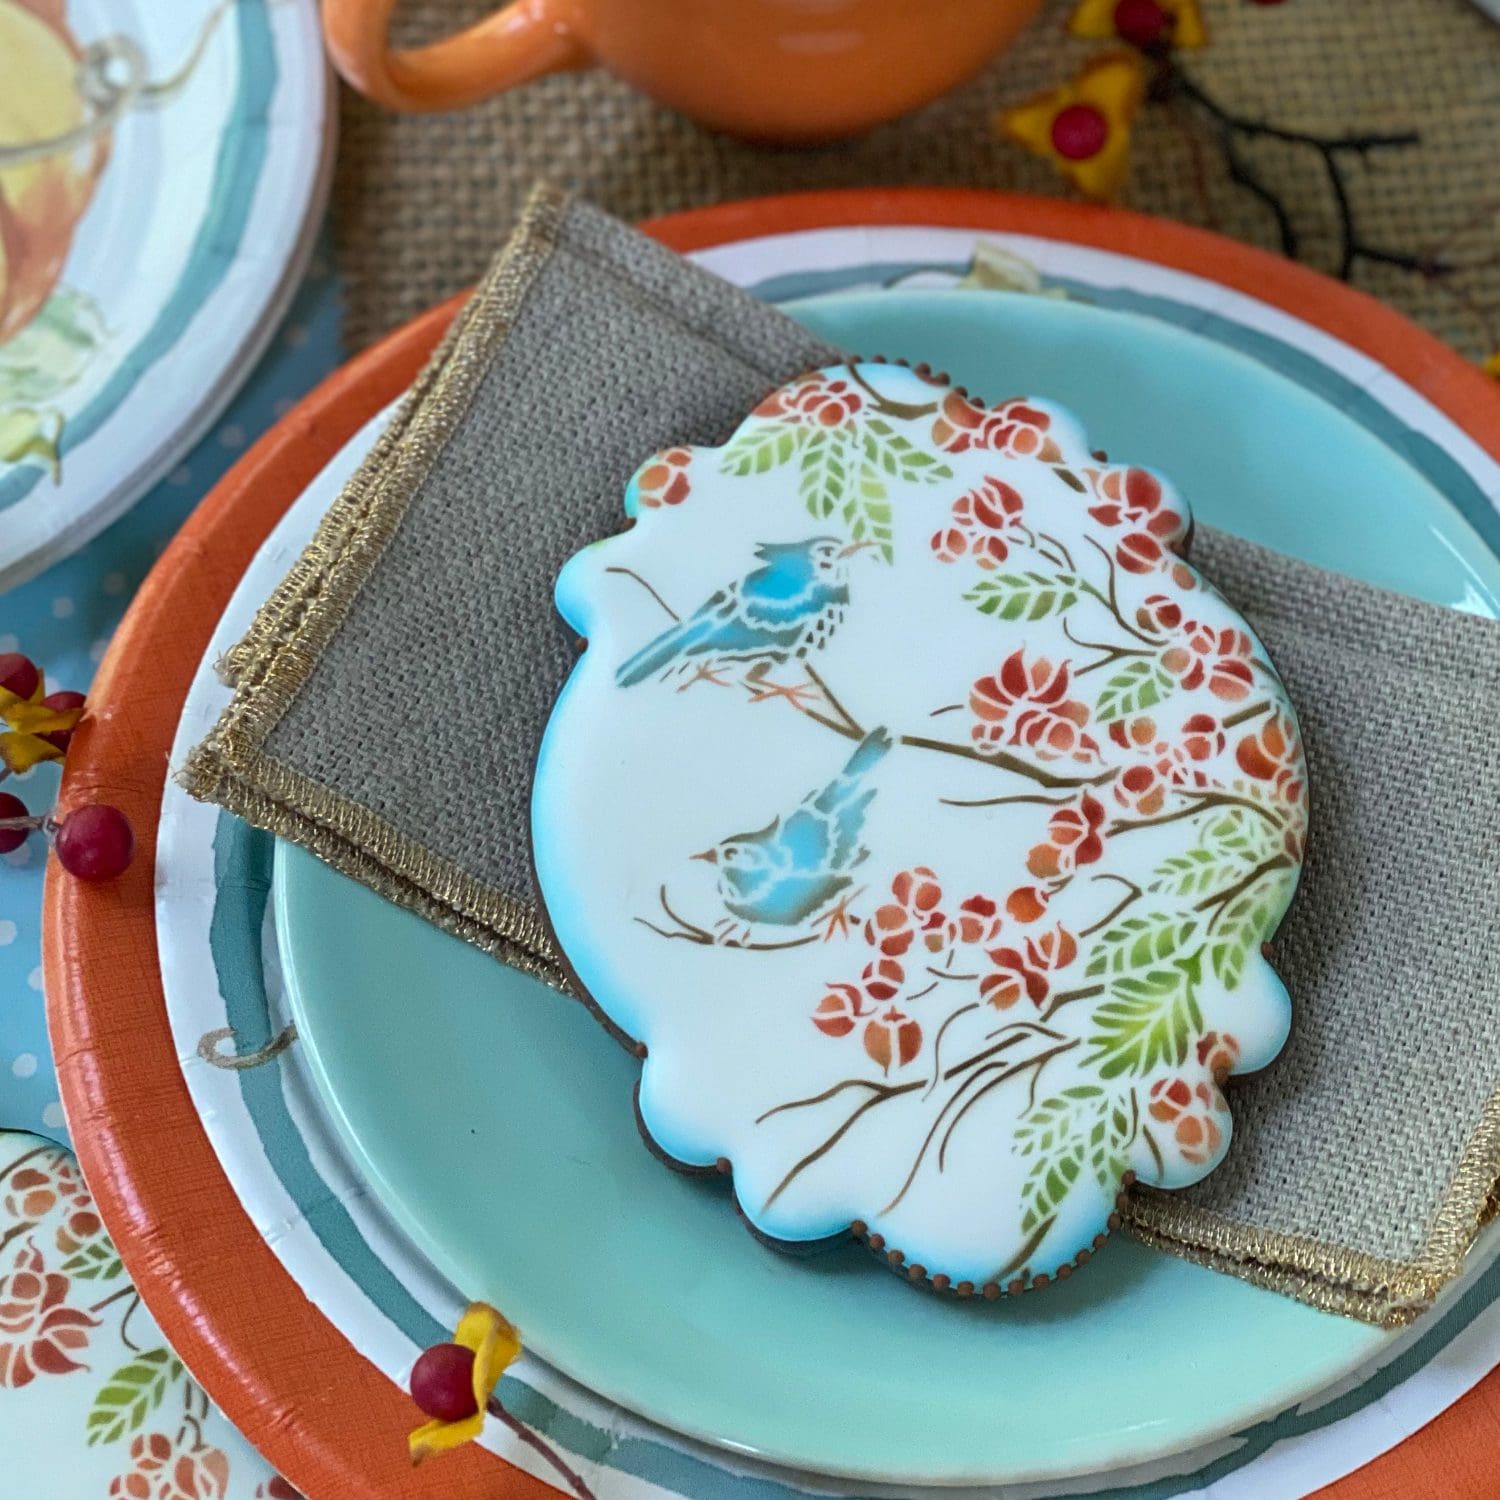
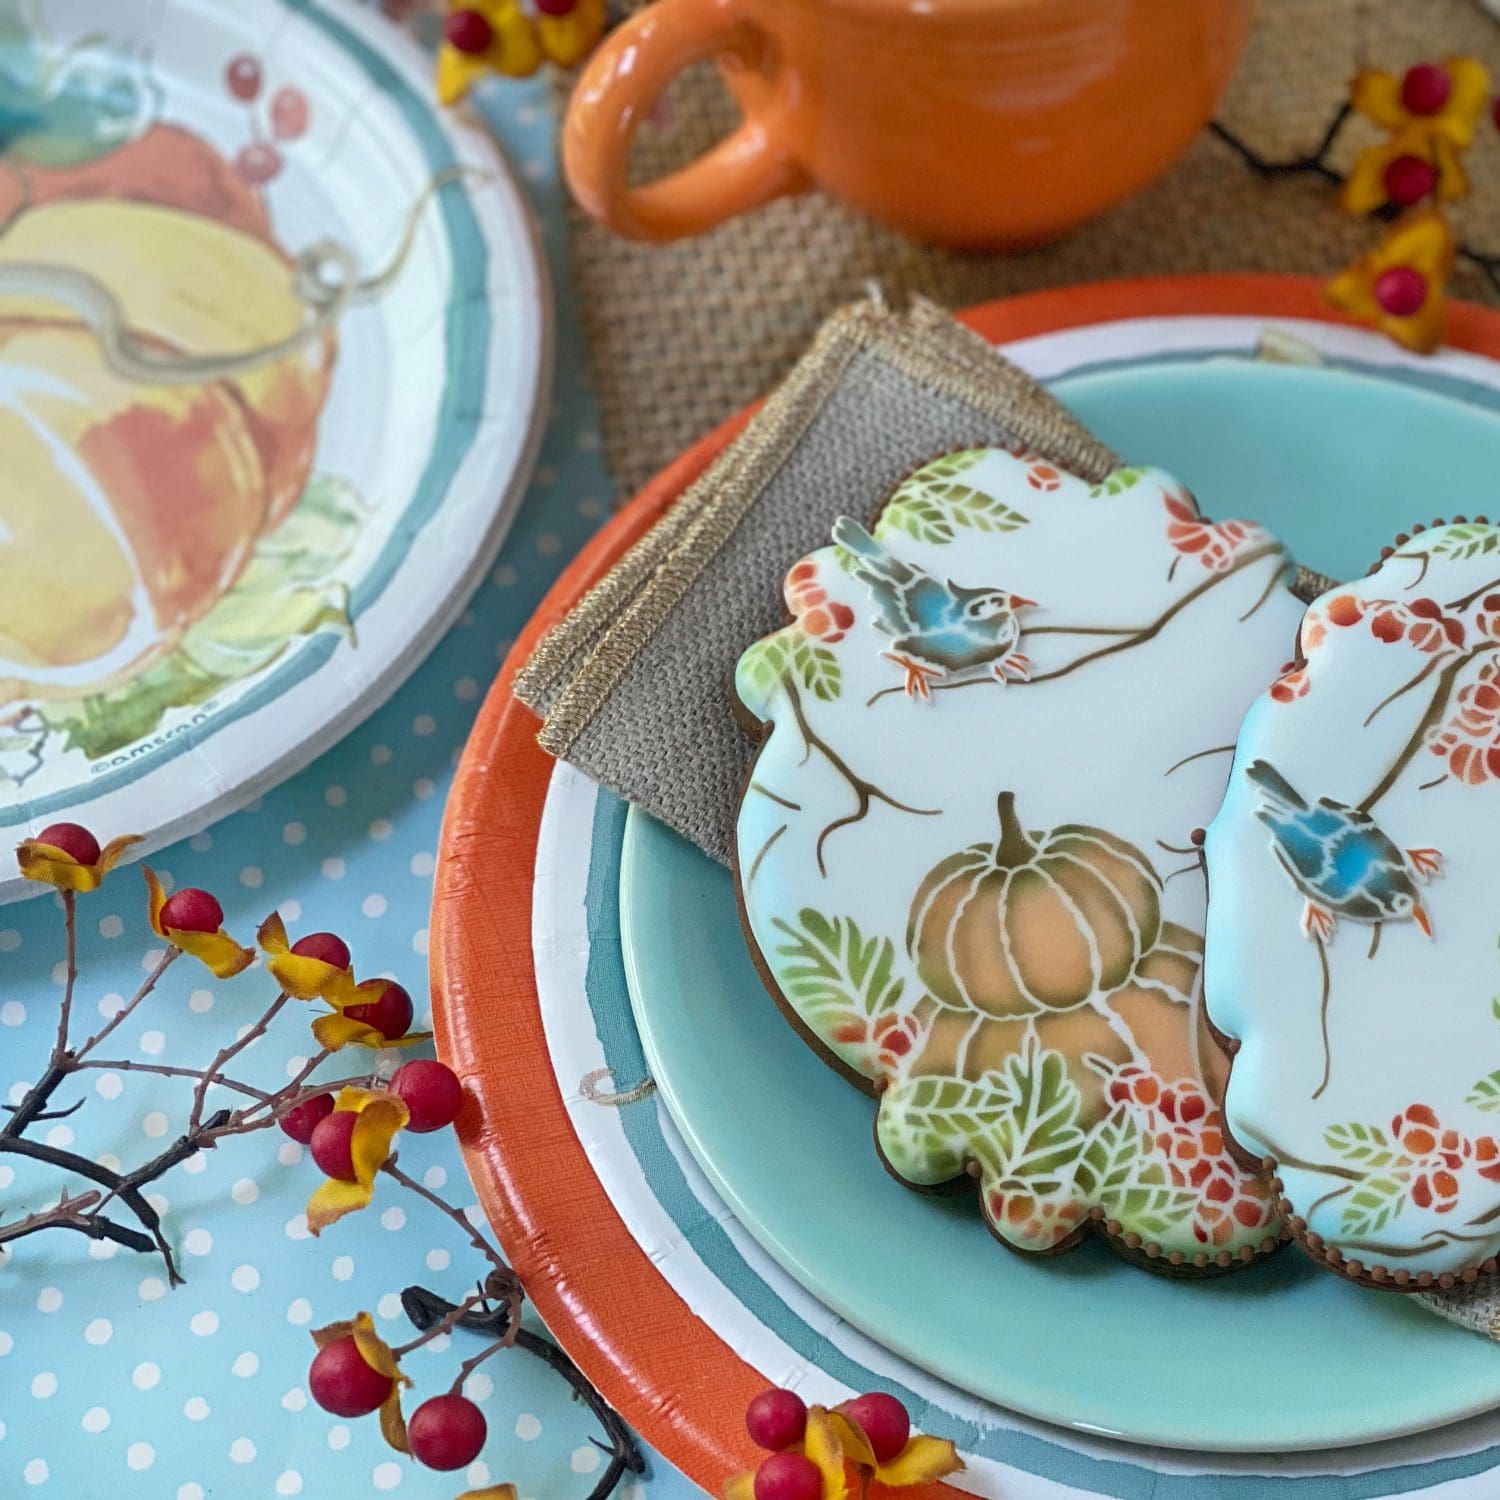
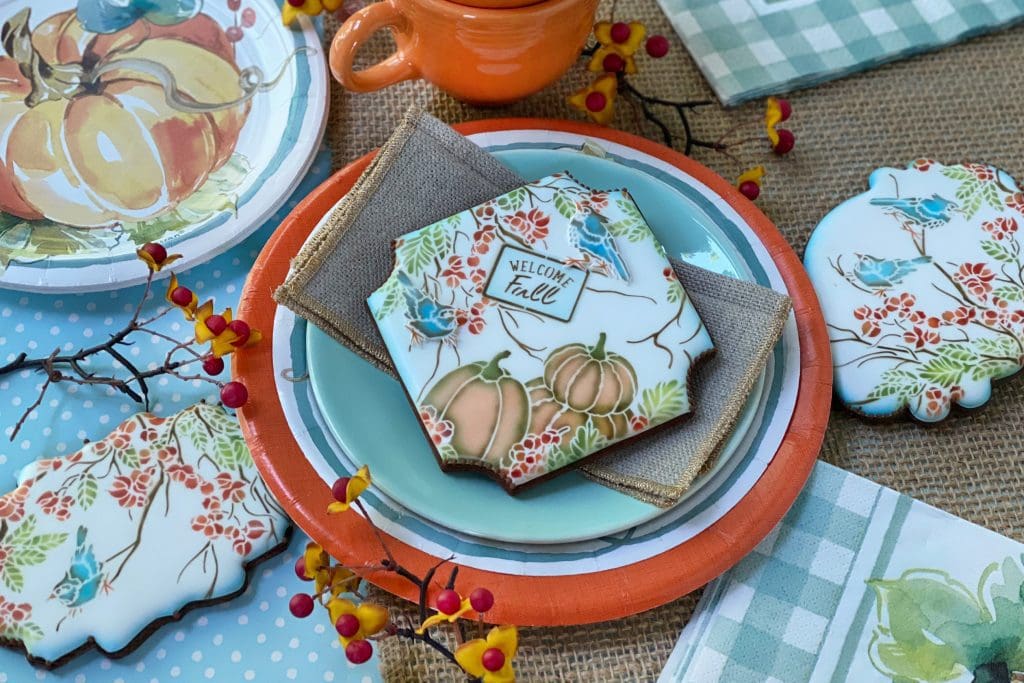
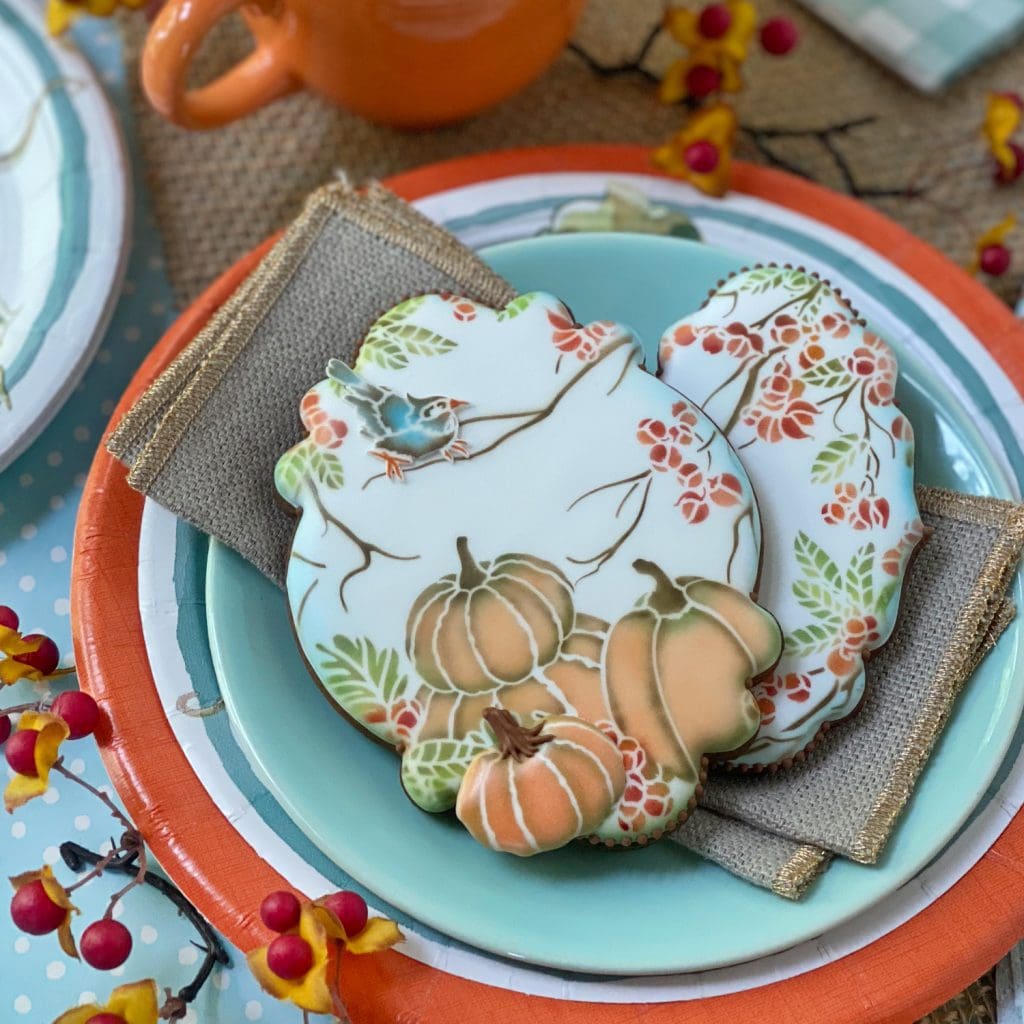
Oh-so much is possible with the background set alone! You can capture just bittersweet brambles on smaller cookies (as in the foreground), or, on larger cookies (as in the background), you can capture the pumpkin patch alongside the vines . . .
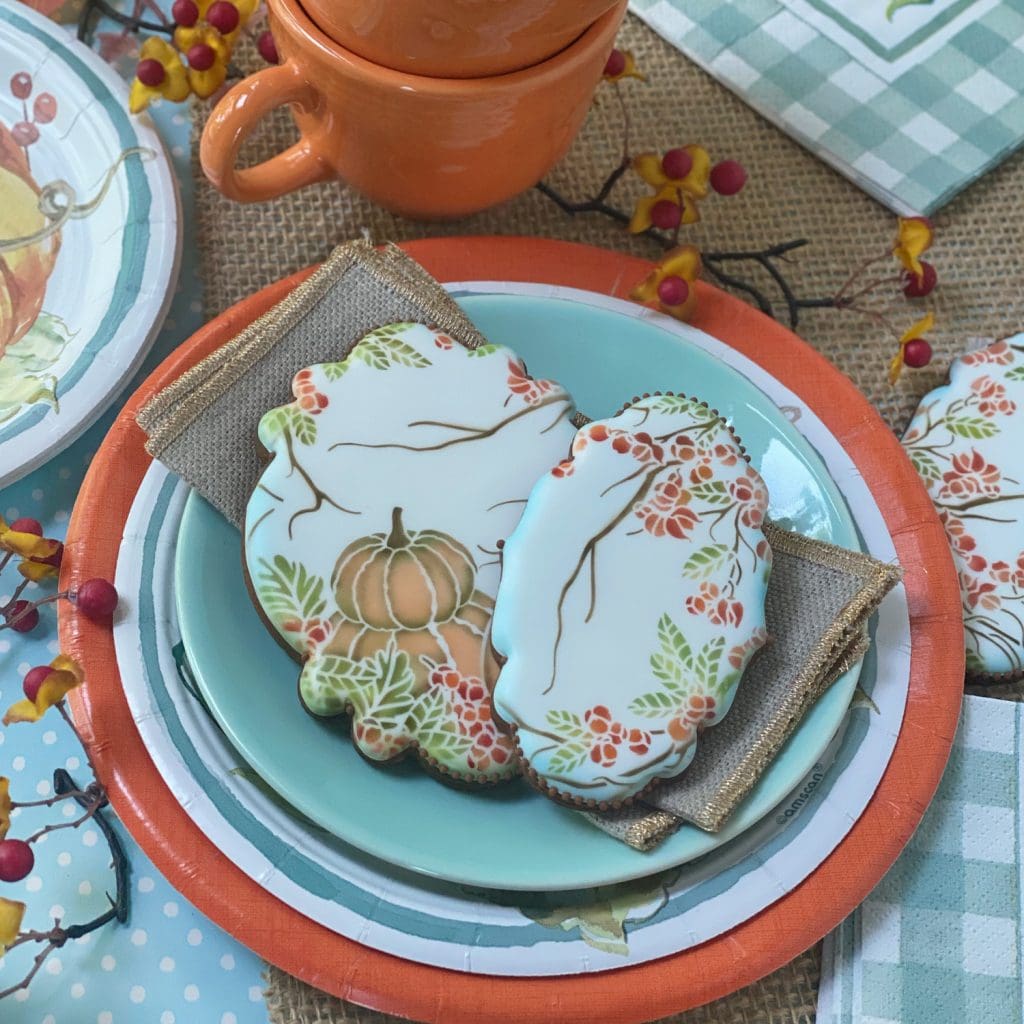
Here’s a closer view. Note that the larger cookie is an average size (about 3 1/2 x 4 1/2 inches), yet still allows for ample background stencil exposure . . .

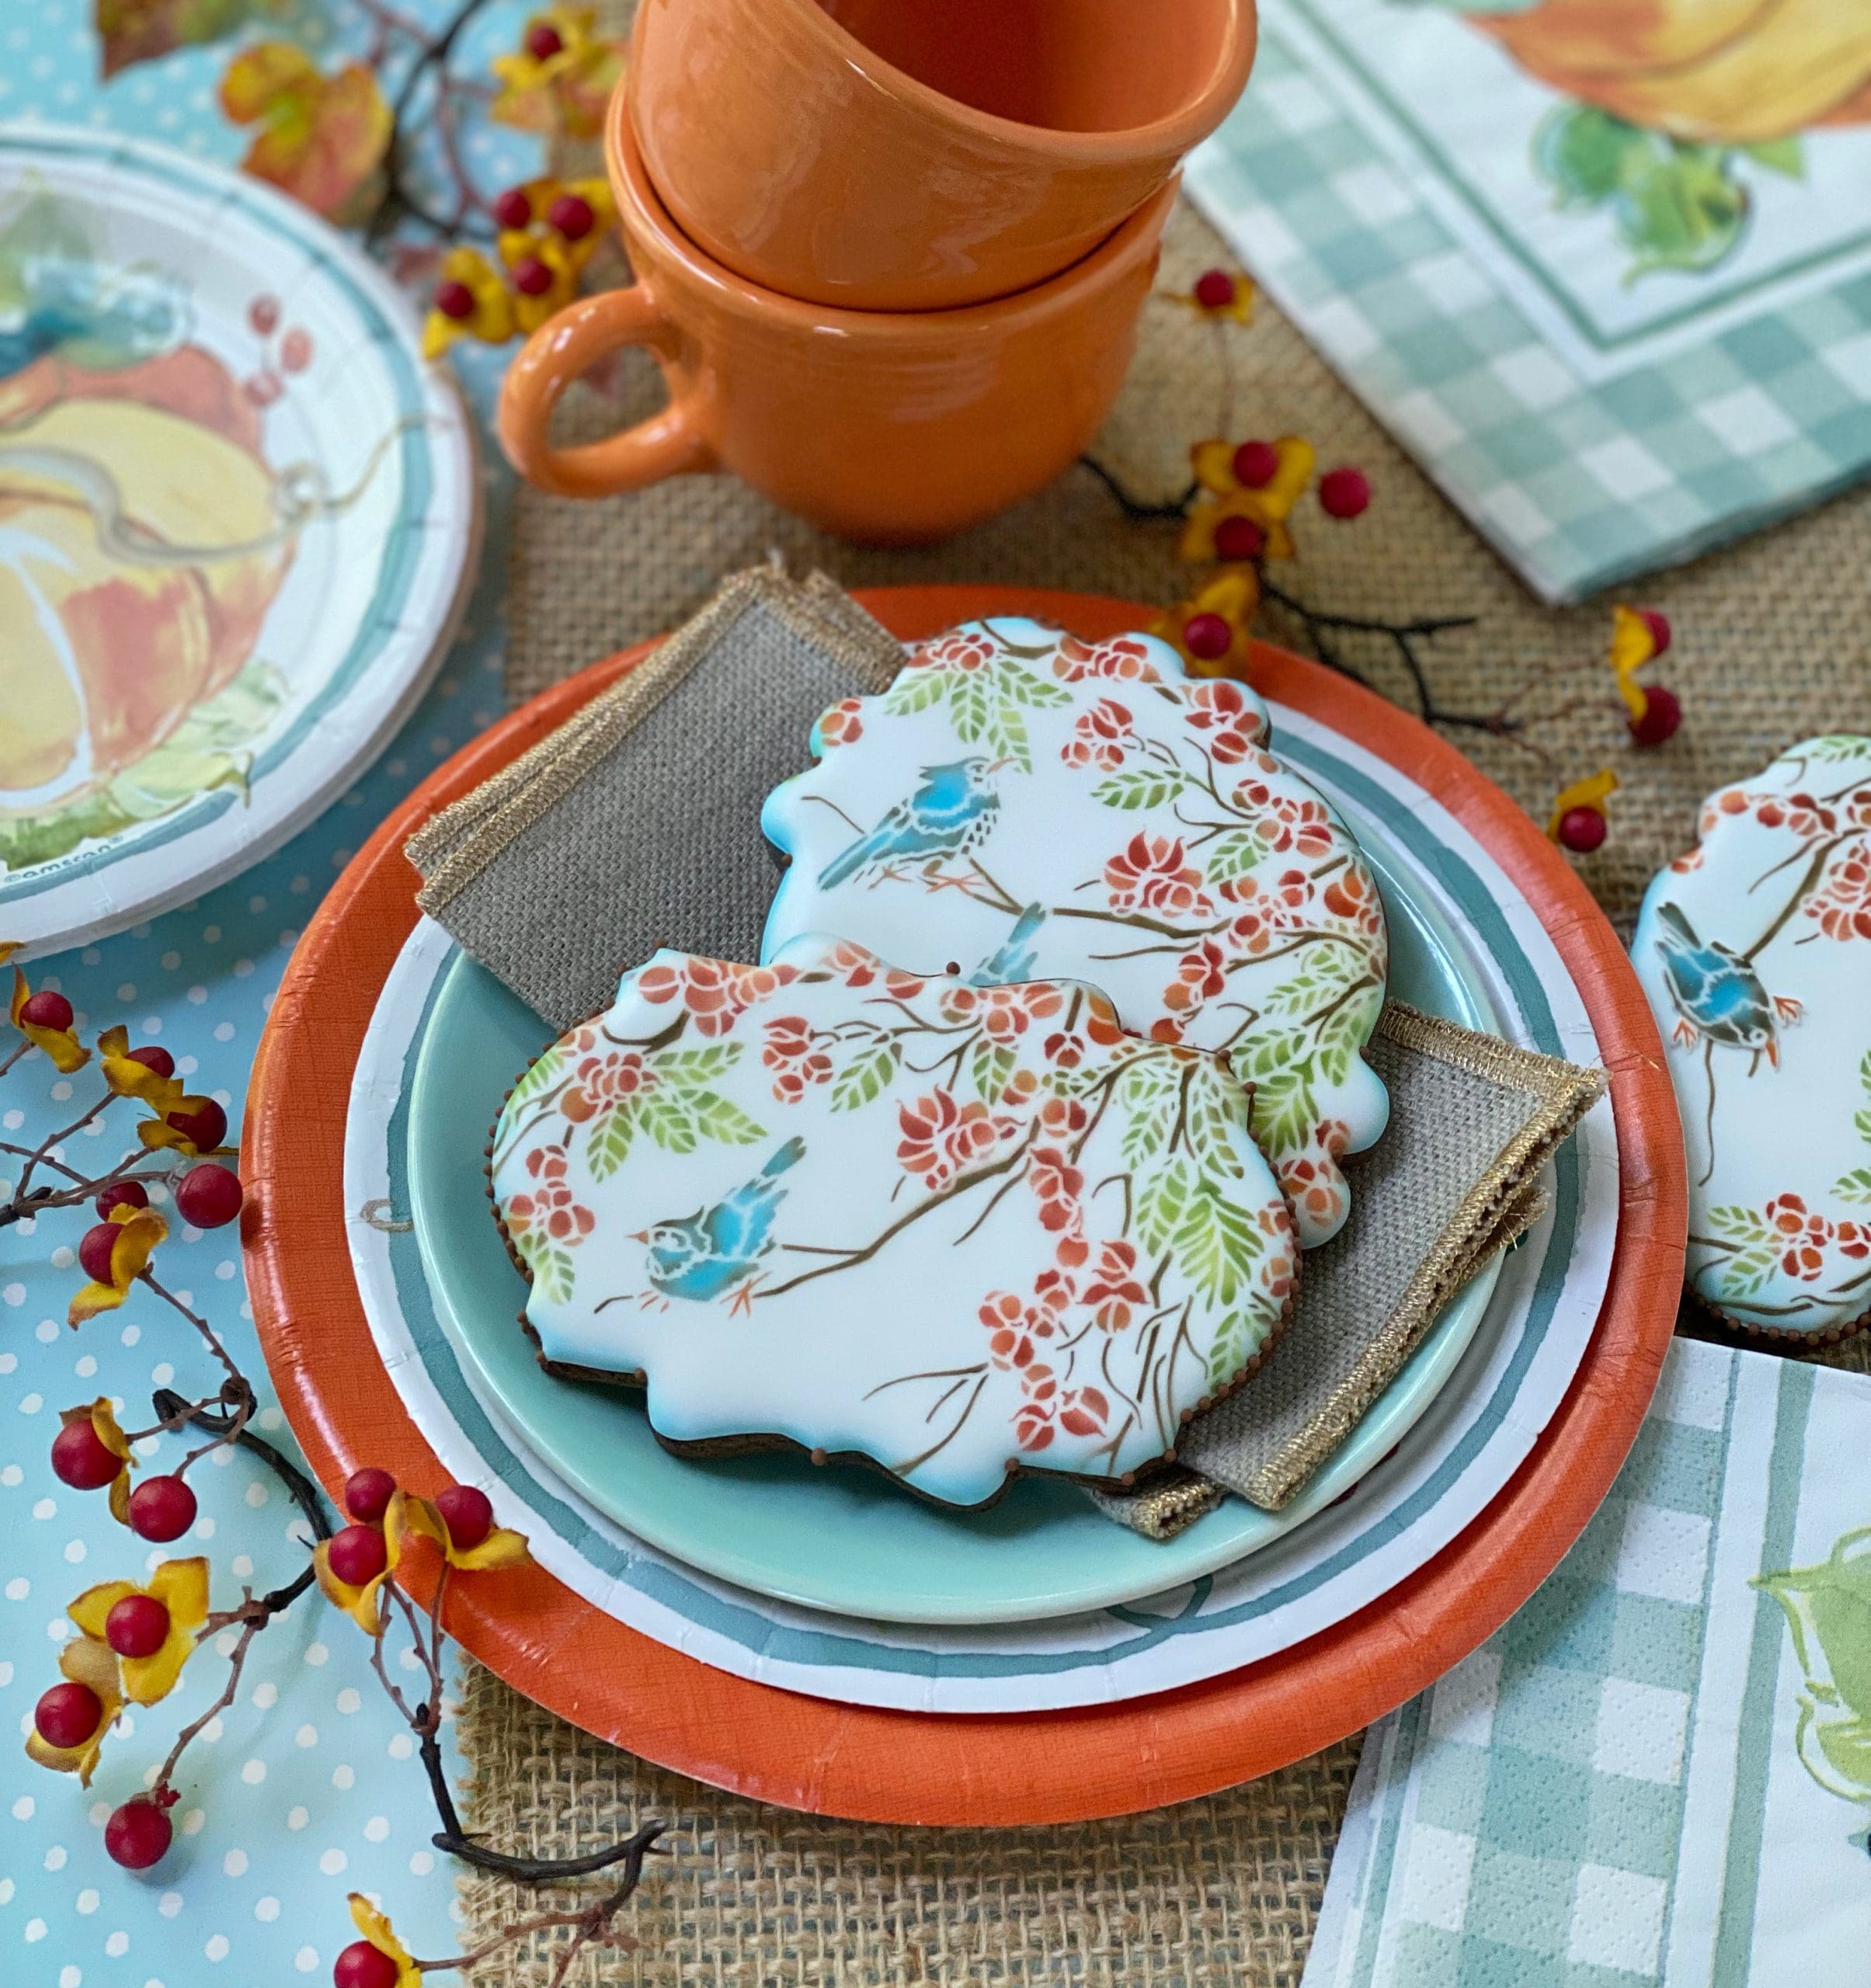
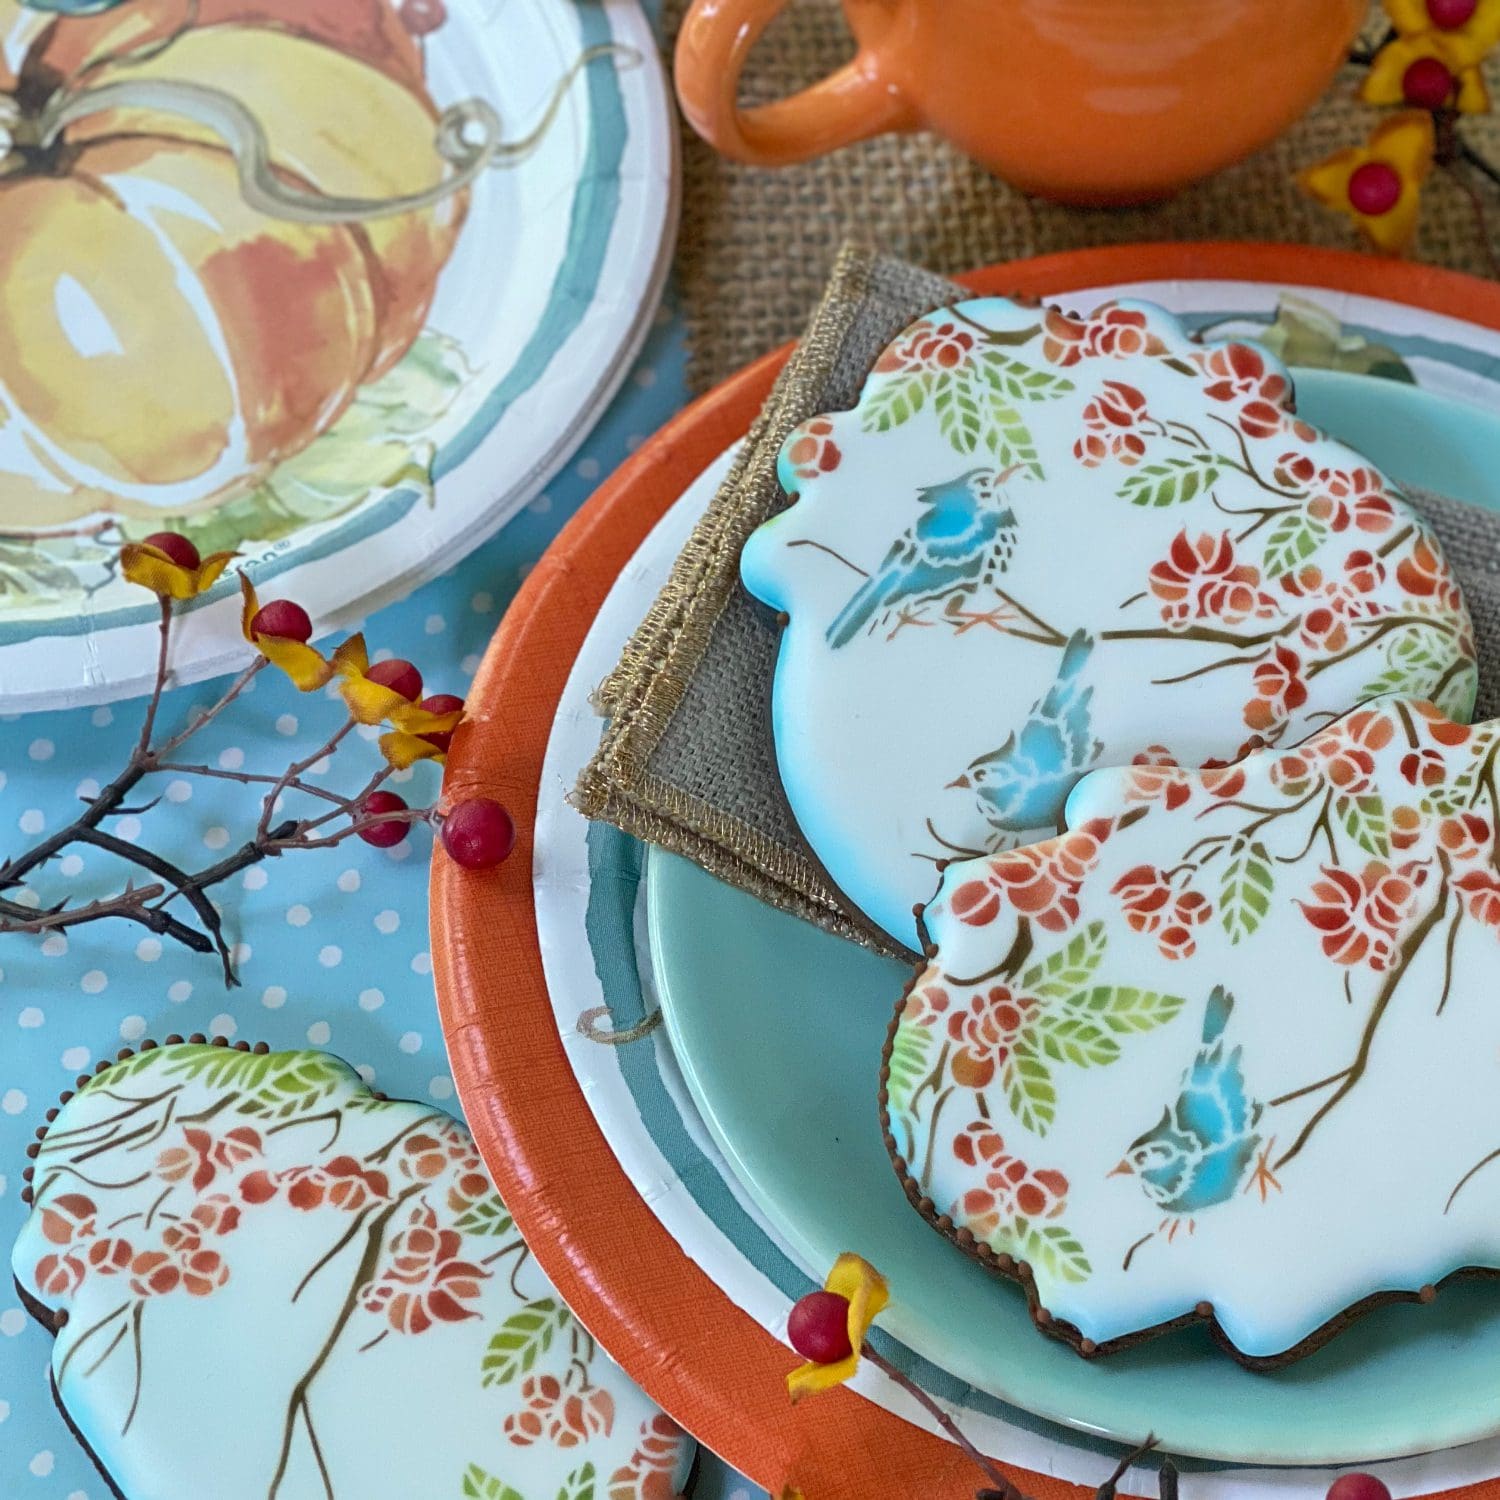
Then, there are those darling birds! They can be directly airbrushed and stenciled onto the cookies by using their corresponding masks to make room for them, as I’ve done below.

A bit closer (but less centered! ![]() ) . . .
) . . .

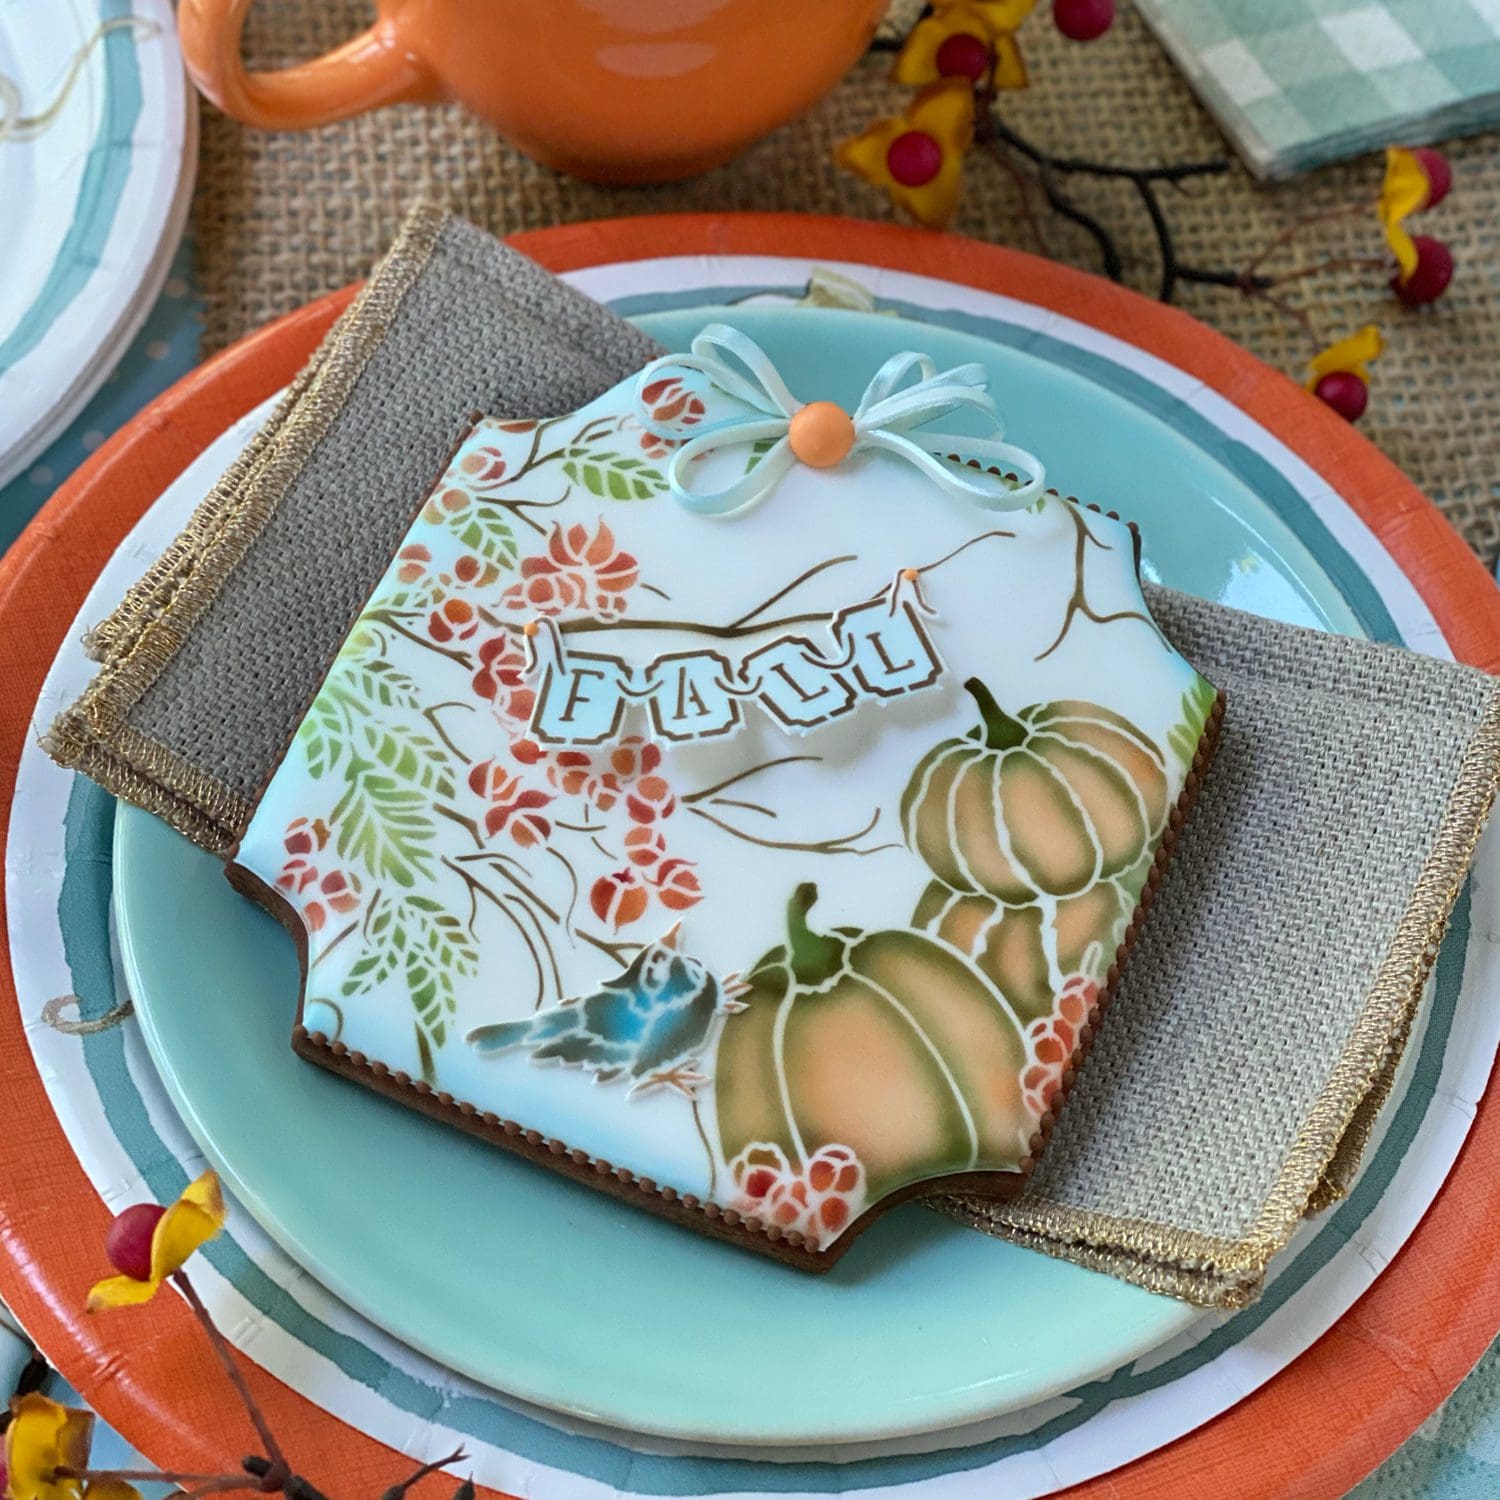
And, a solo cookie with two birds, both directly airbrushed on it . . .

Alternatively, the birds can be turned into fondant appliqués. Simply airbrush them onto thin sheets of fondant, trim them, and arrange them so they hover above or even hang off the cookie . . .

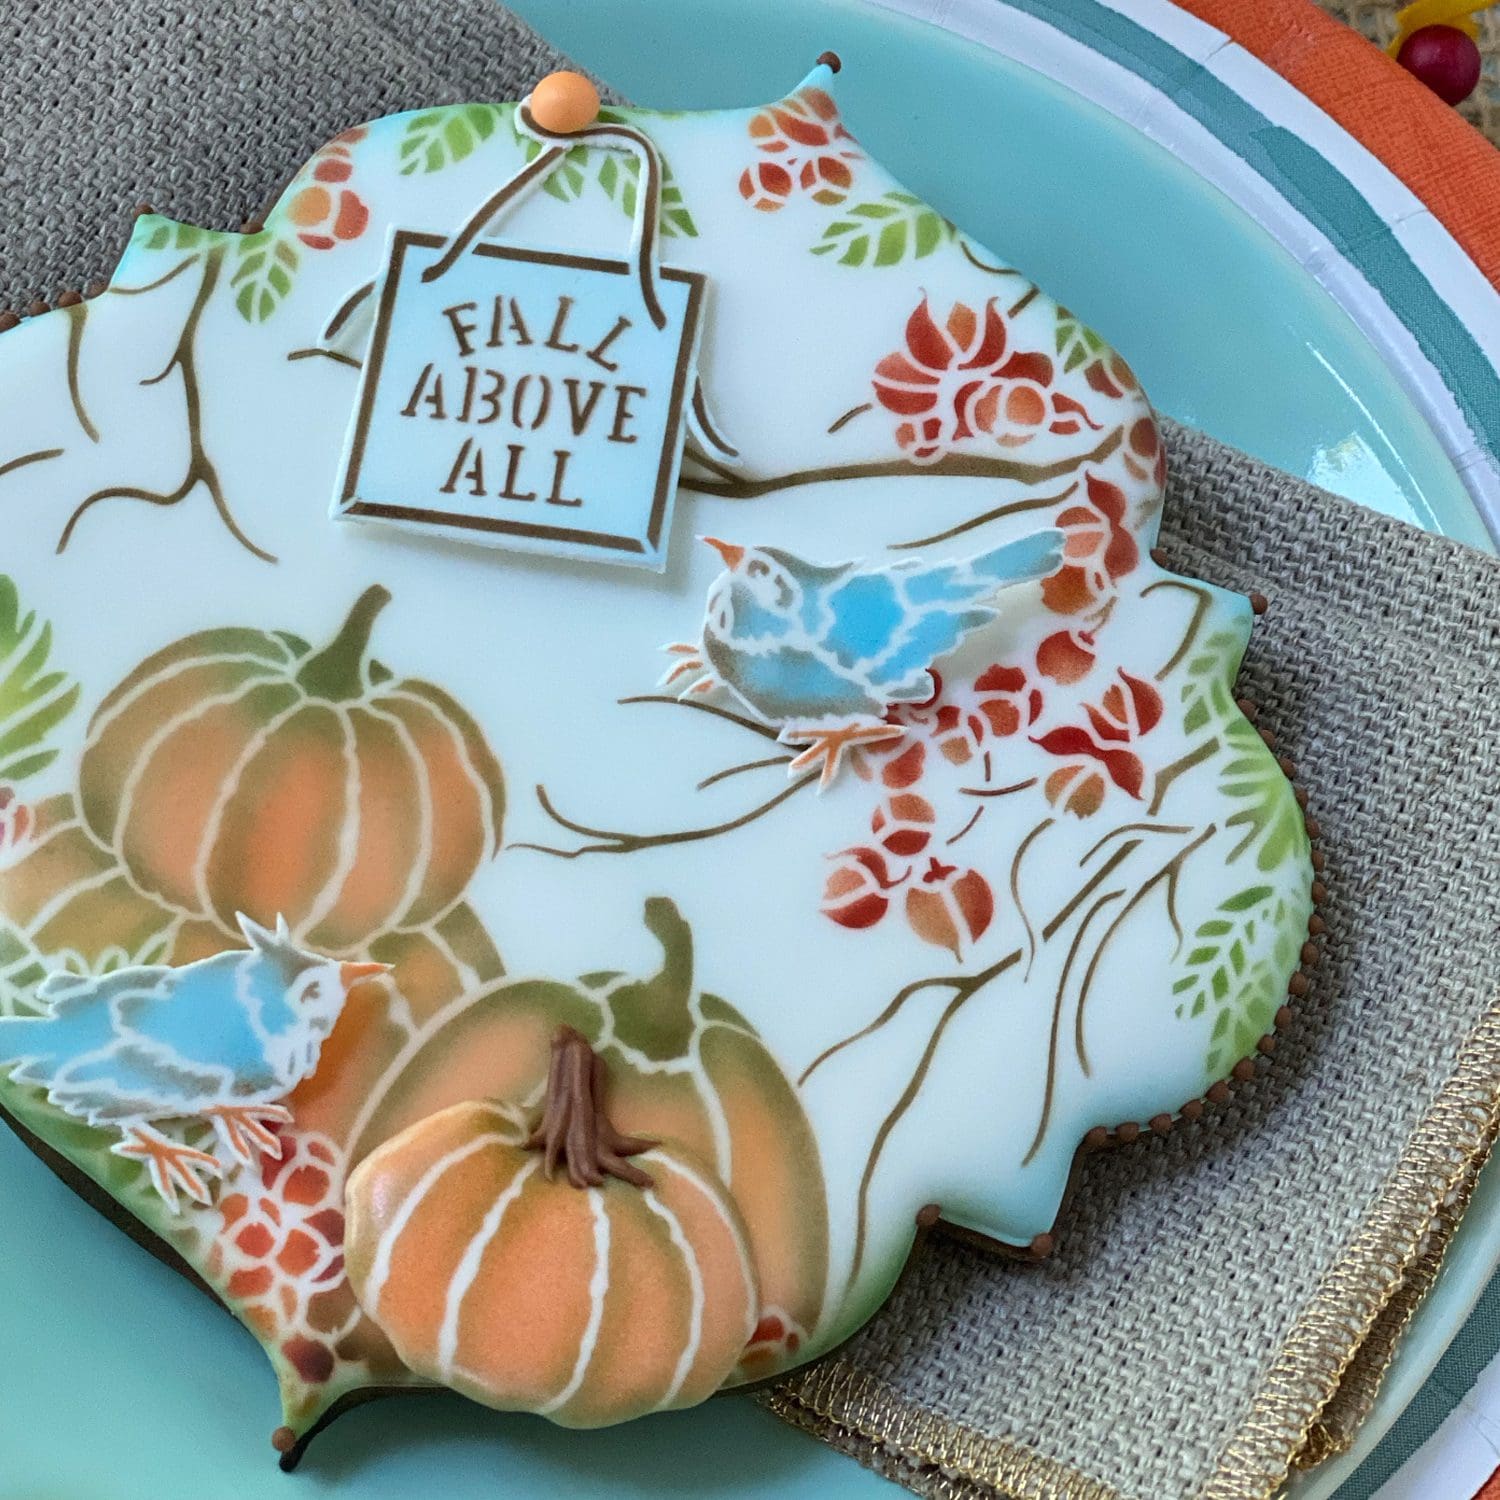
You can even turn some of the stencil elements into royal icing transfers to lend added dimension to your cookies. Check out the “raised” pumpkin on the right cookie, below. It’s a royal icing transfer!

And so is the pumpkin on the far left of the left cookie shown here . . .
How did I make these dimensional do-dads, you ask? First, I stenciled the topmost pumpkin on the background stencil onto paper to make a piping guide. Then I set a small piece of acetate on top of the paper, and piped over just the pumpkin (not the stem) with white thick flooding-consistency royal icing. Once the icing was set, I airbrushed over it, using the stencil, to give it color and definition. I used AmeriMist Orange (lightened quite a lot with Spectrum Flow White) for the “body”, and a combination of Chefmaster Harvest Brown and AmeriMist Avocado to trace over the stencil edges and dividing lines to create the definition. Lastly, I piped on a stem using piping-consistency brown royal icing and a PME #1 (or #0) tip.
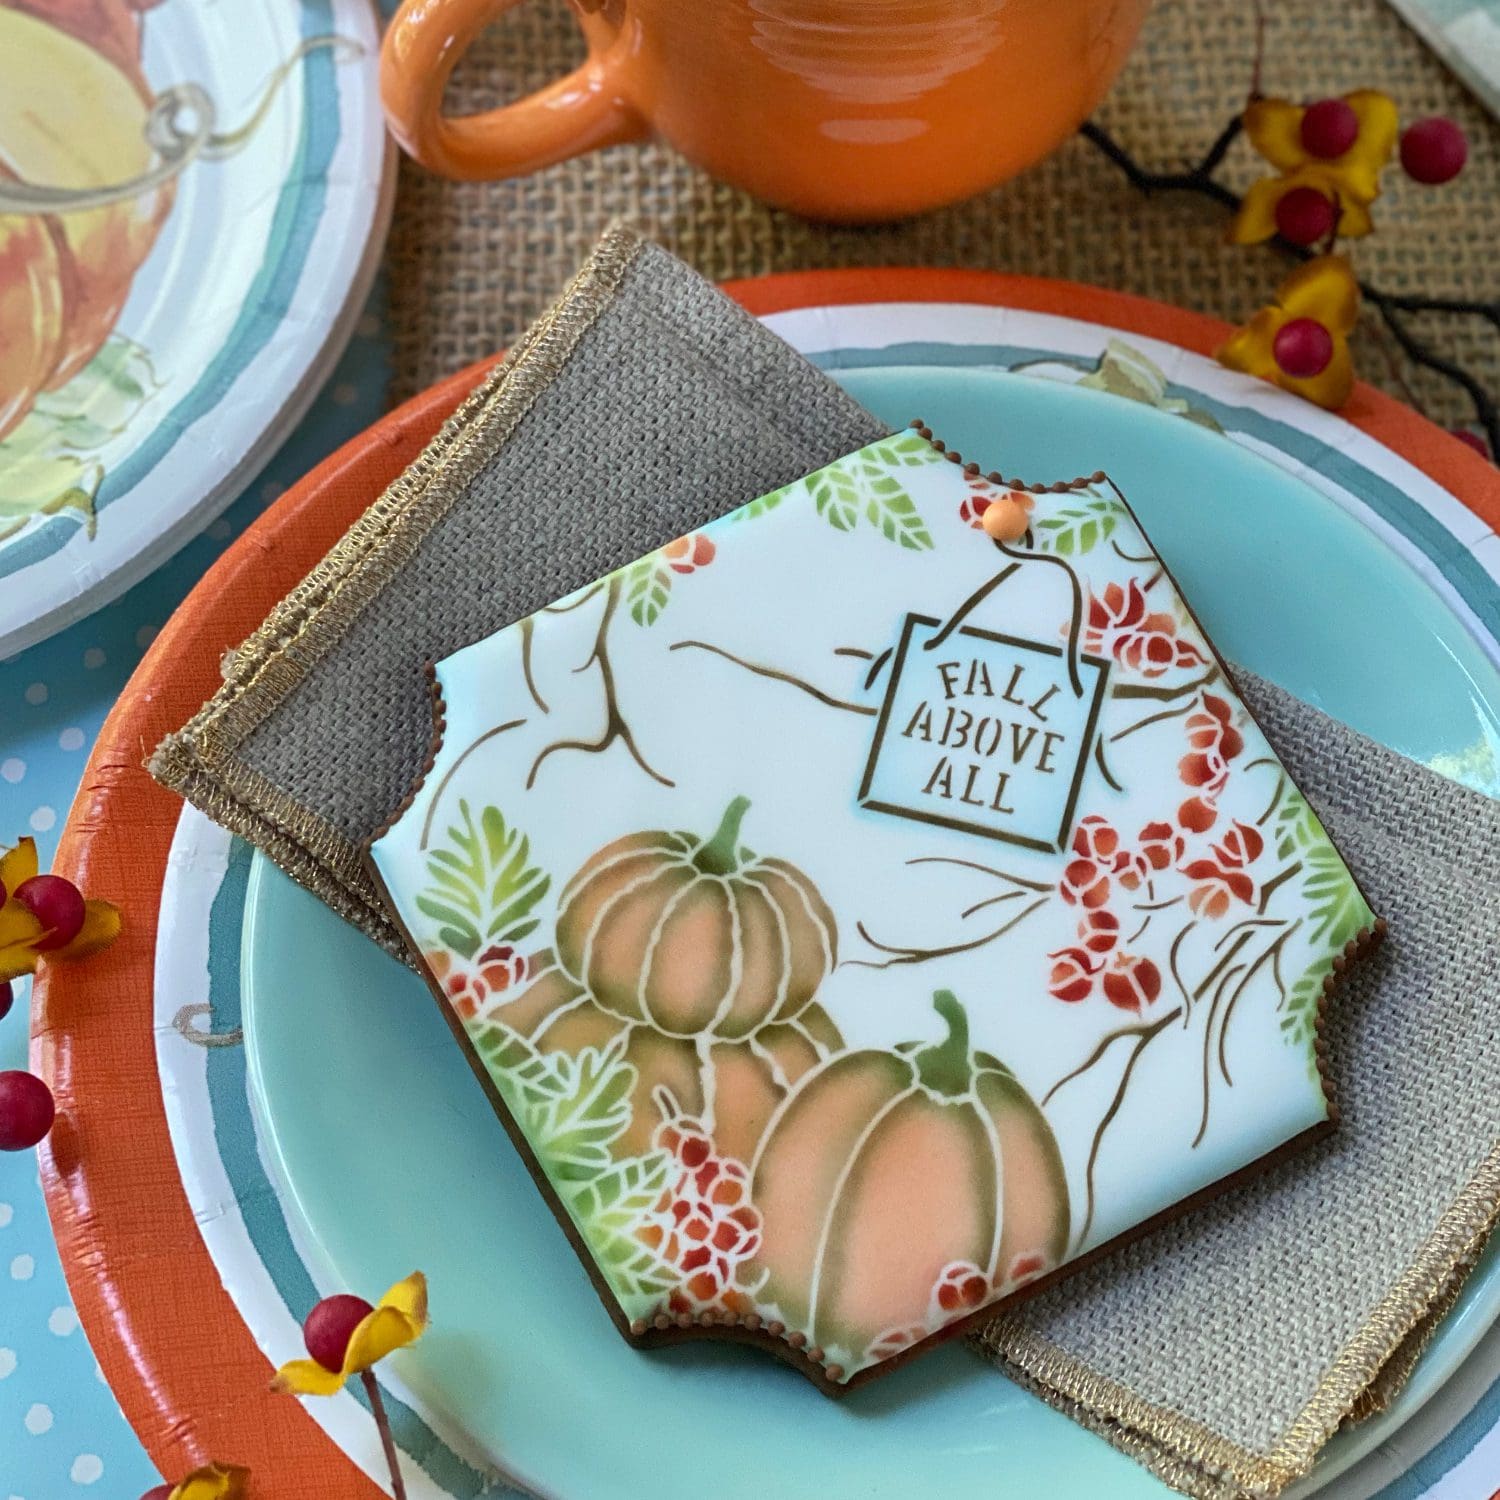
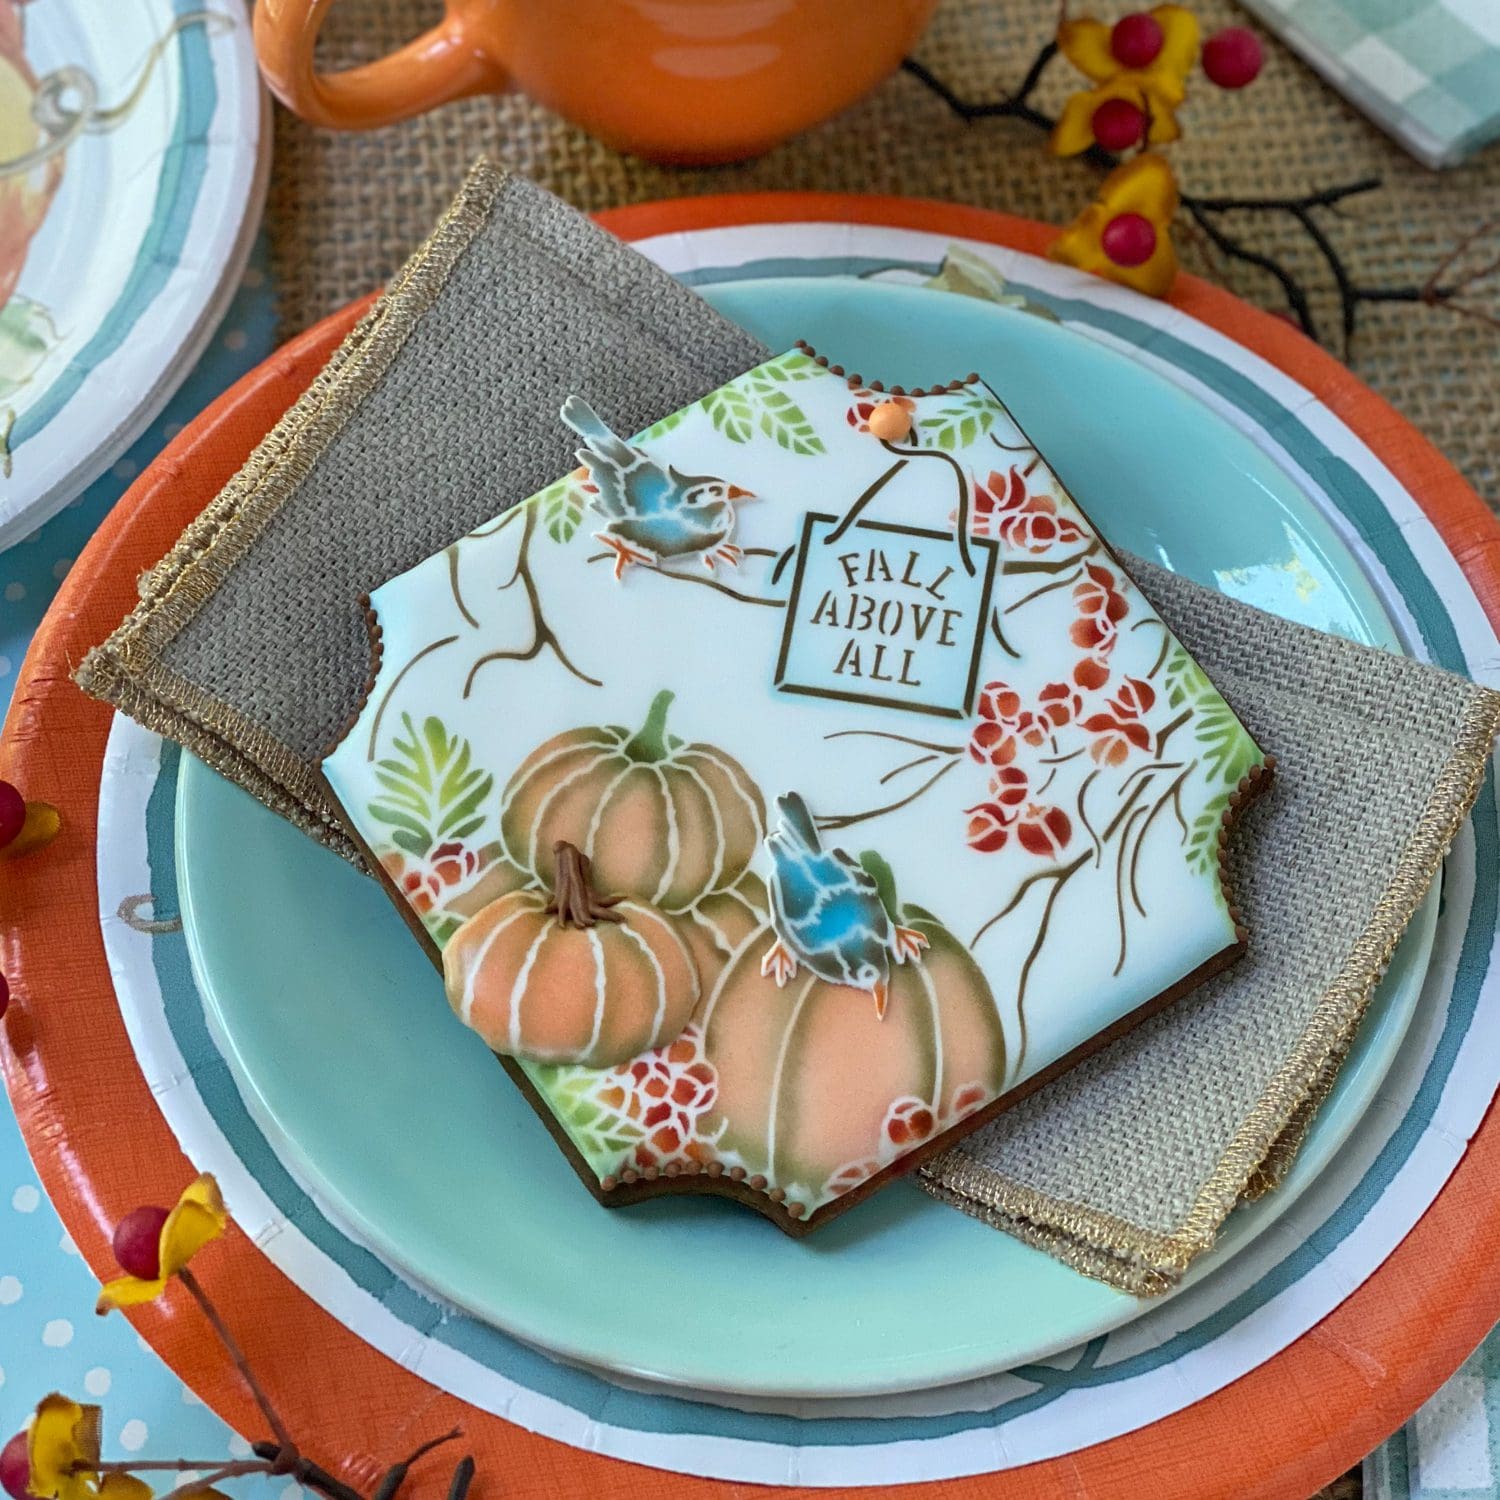
Now, let’s look at several more designs, all made possible by layering on the complementary message and frame set pictured below.
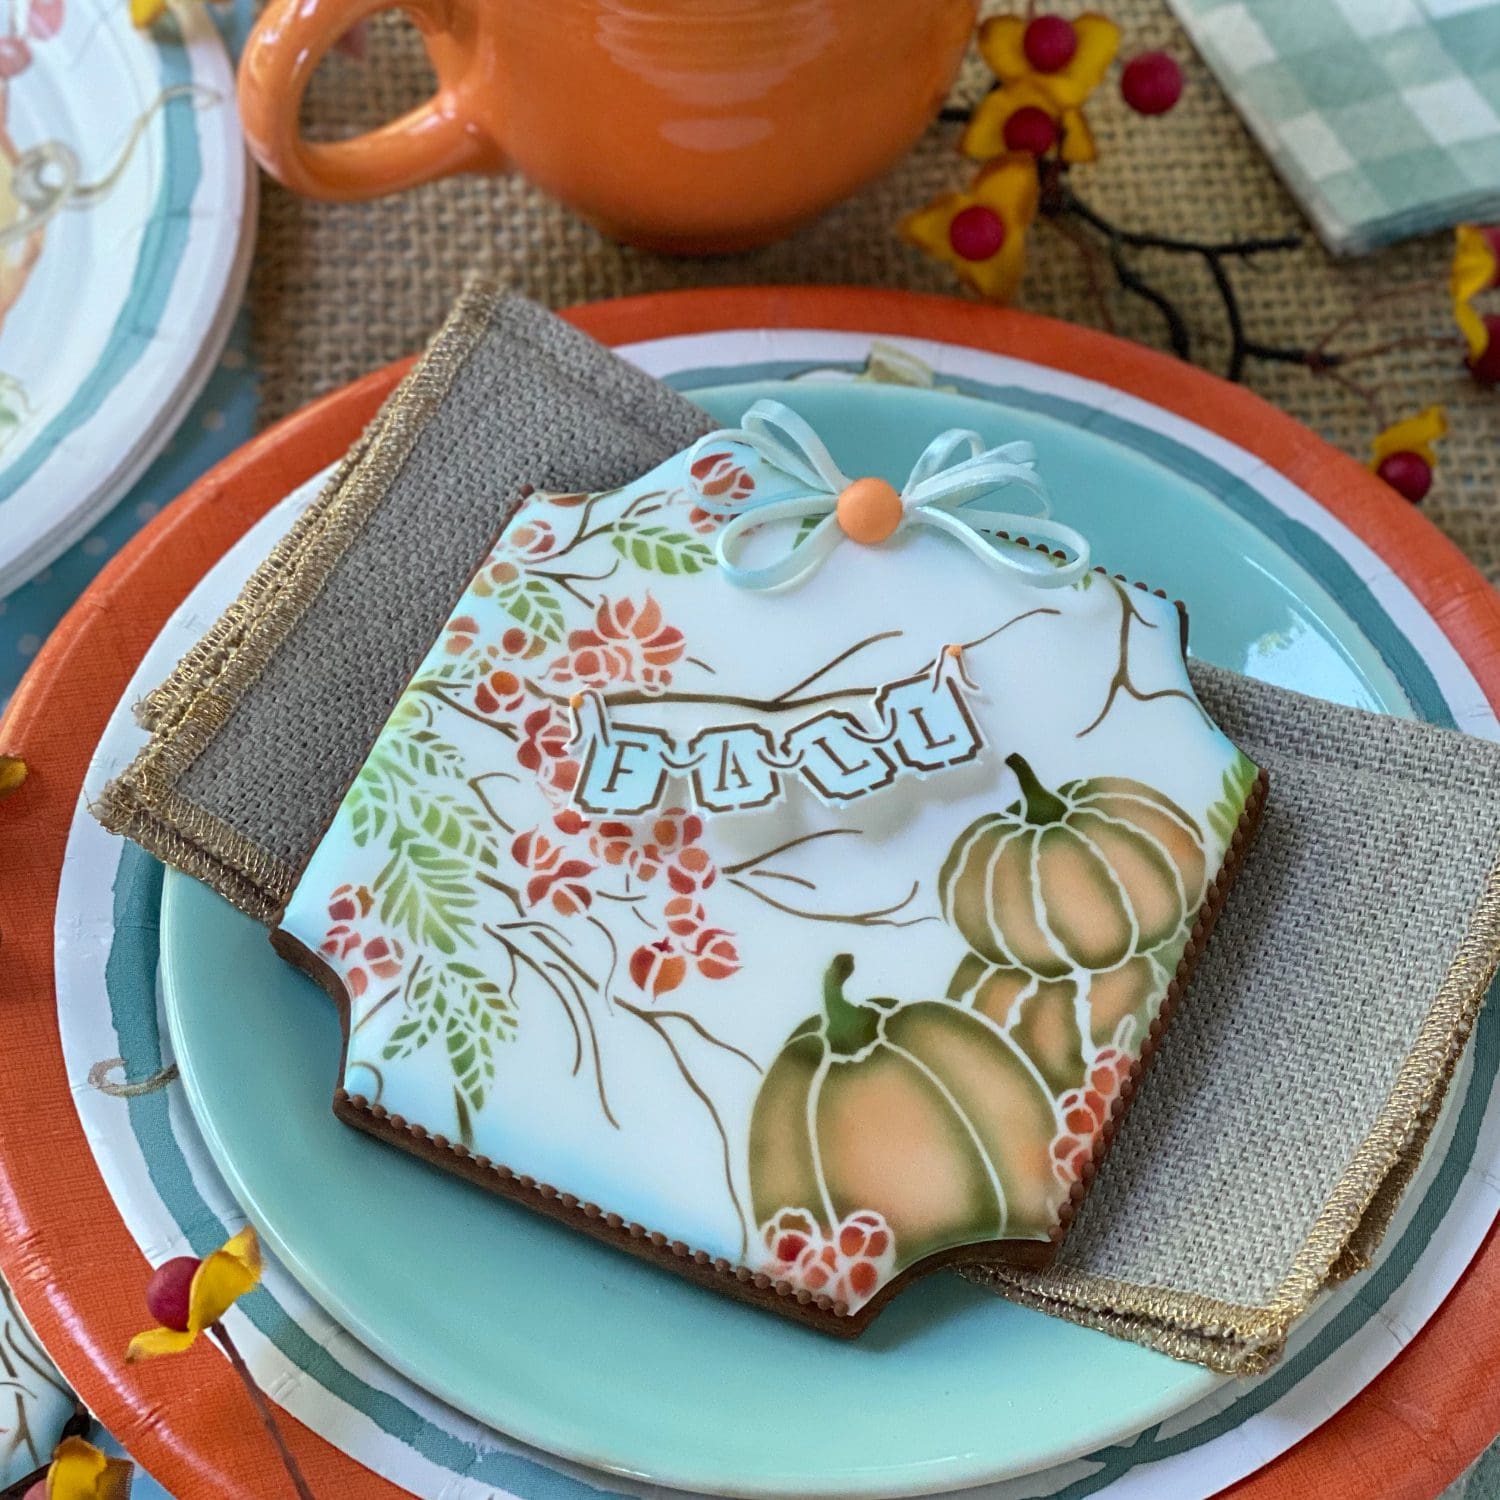
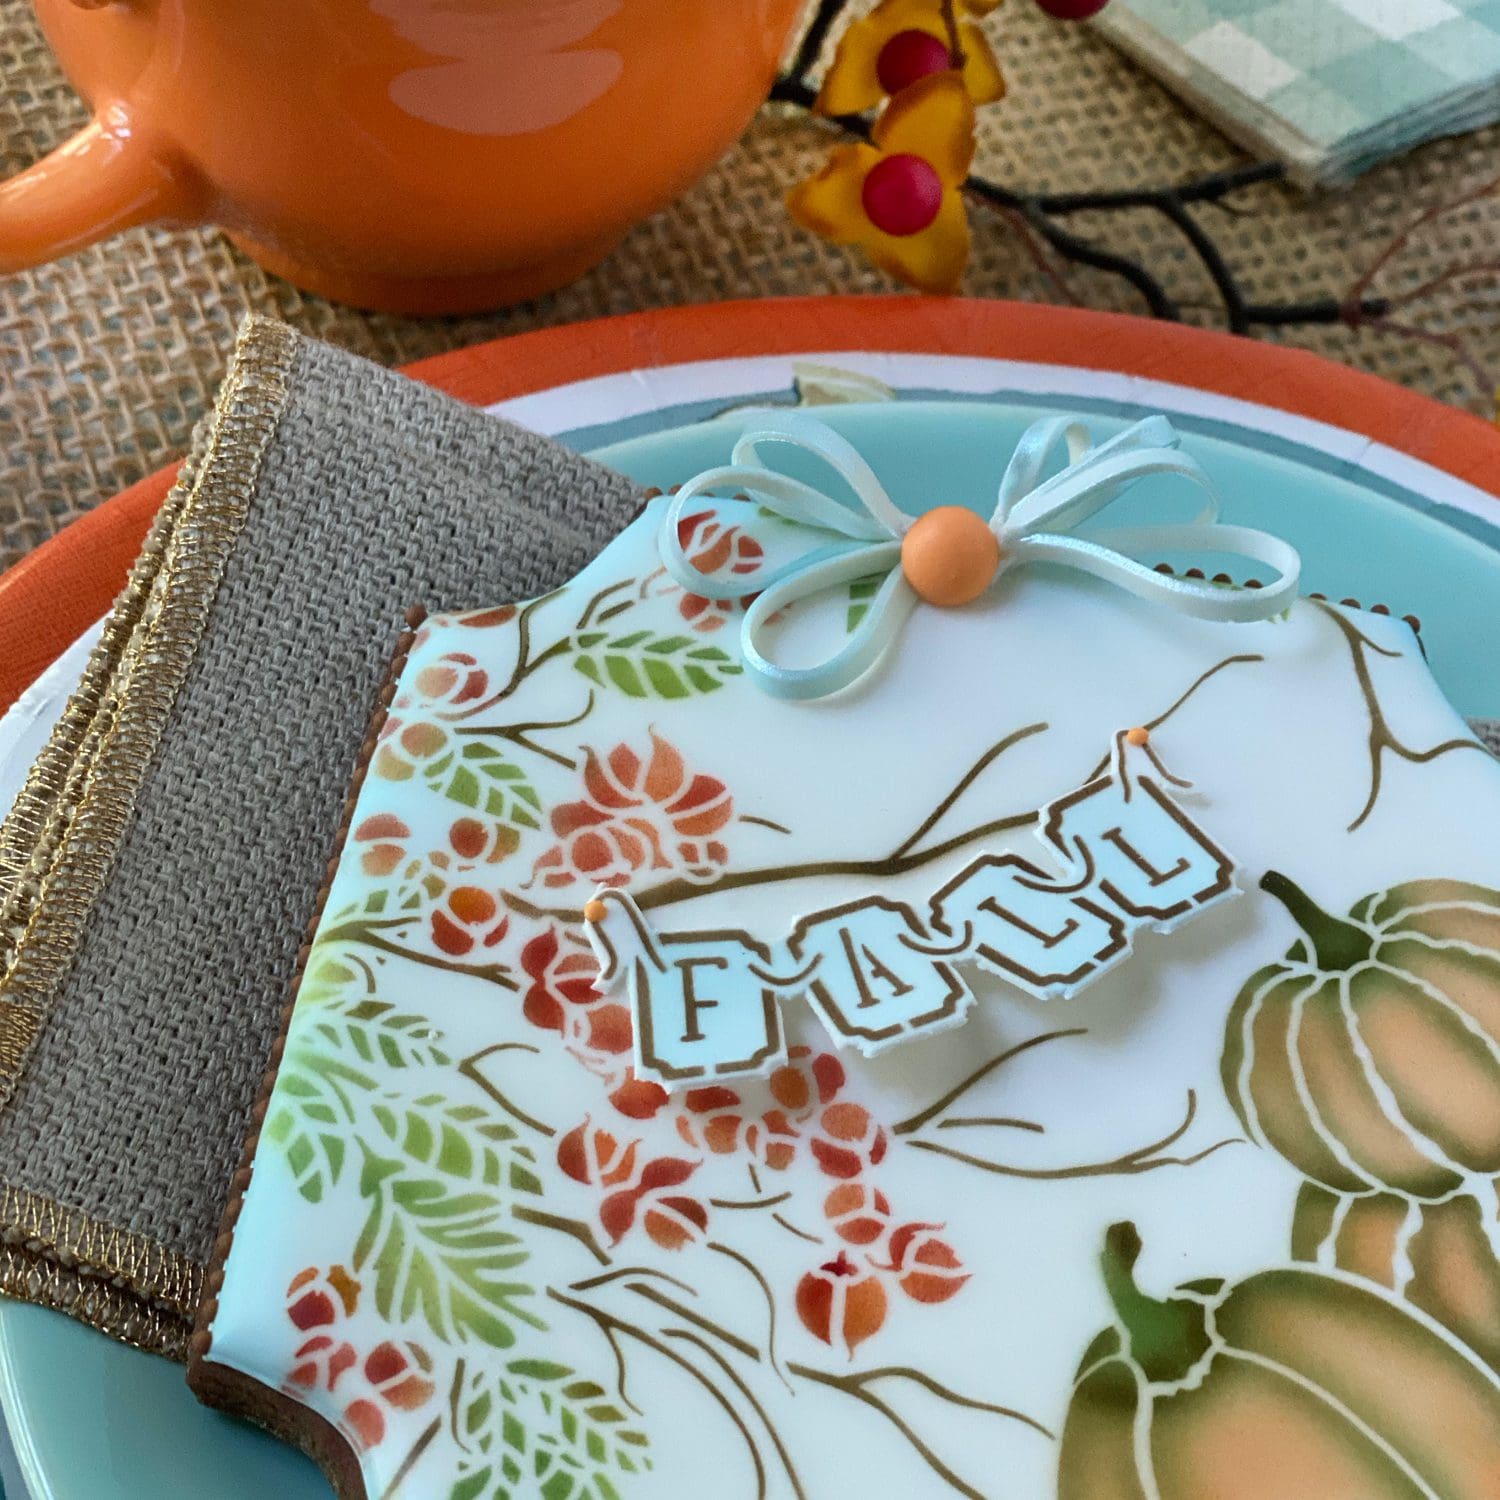
First, I’ve got several styles with messages and frames directly airbrushed on the cookie. The cookie directly below shows one of the simplest ways to use a message – just layered onto the background stencil . . .

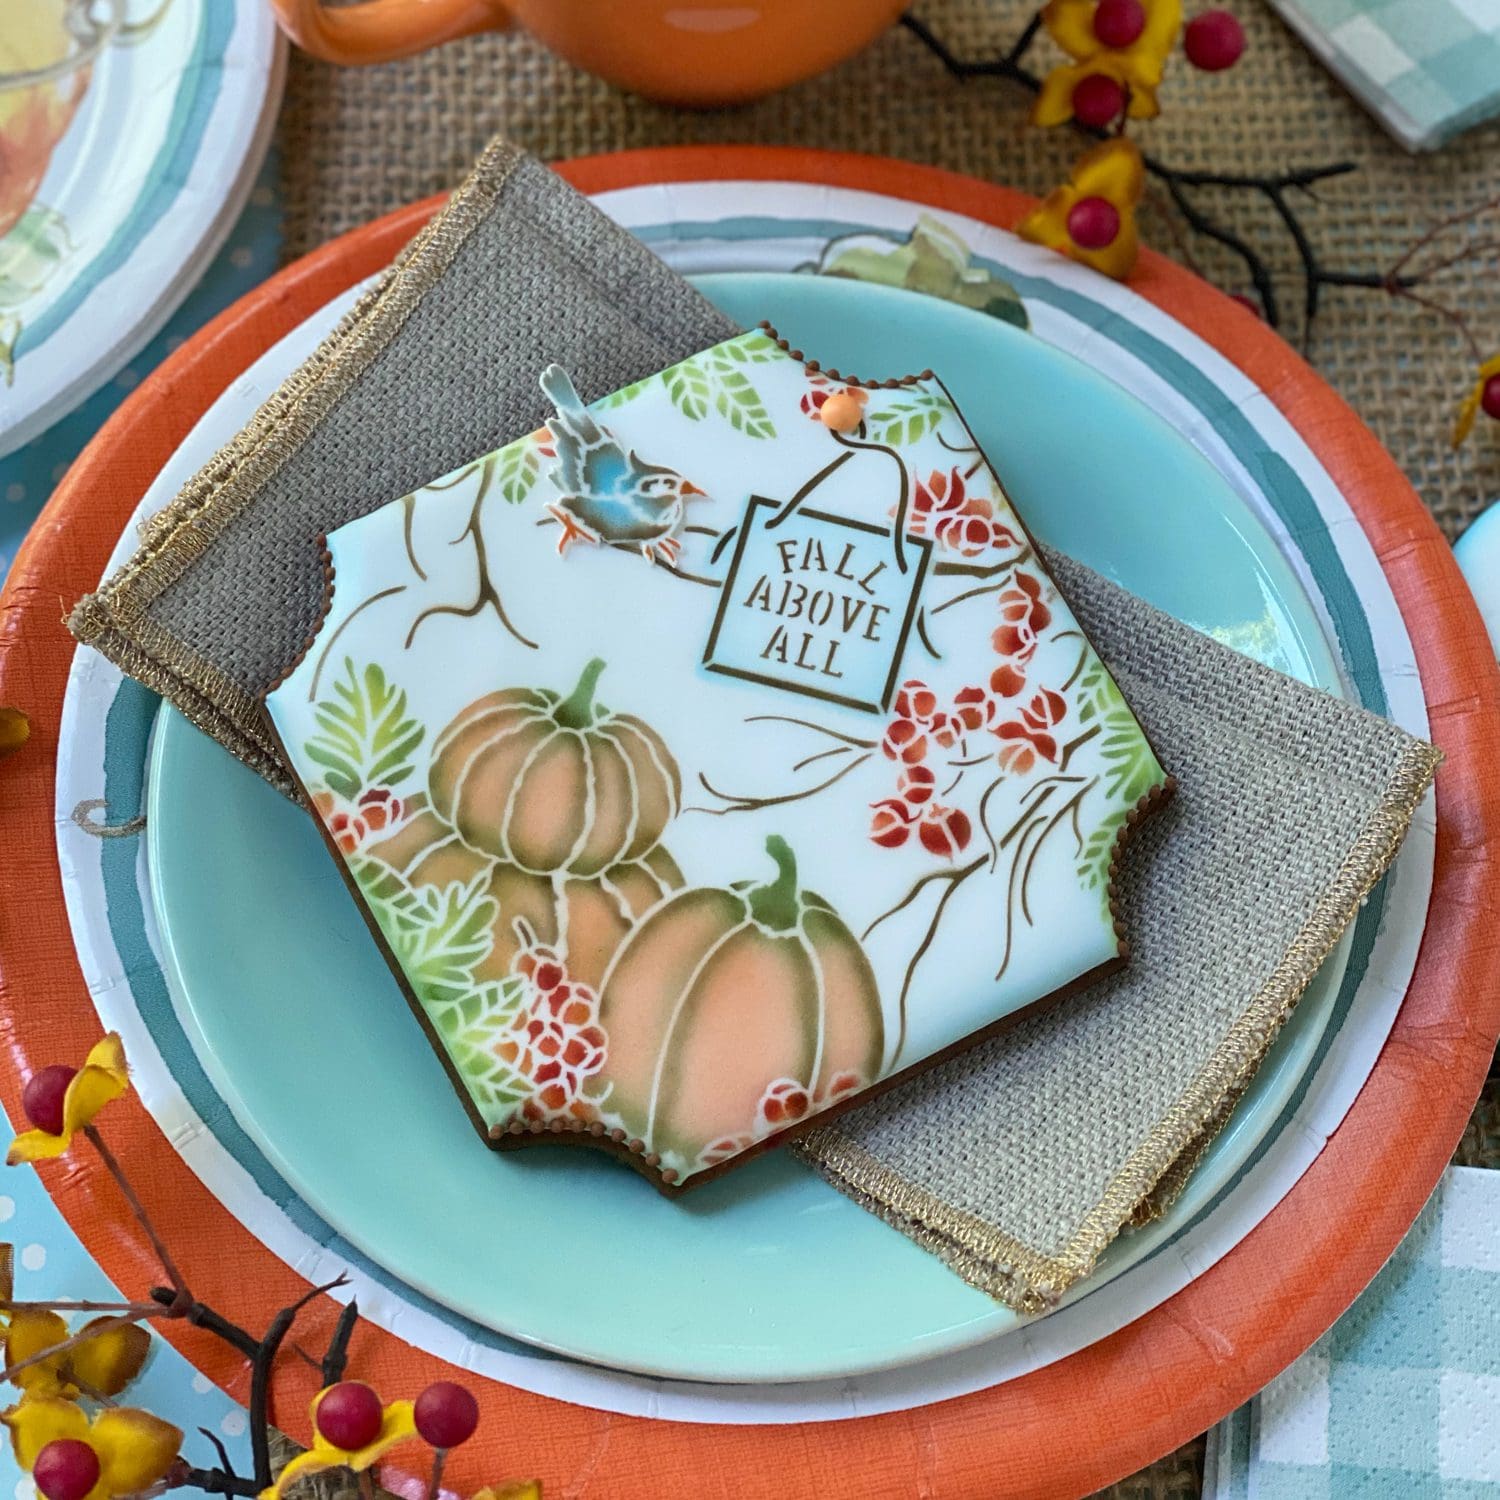
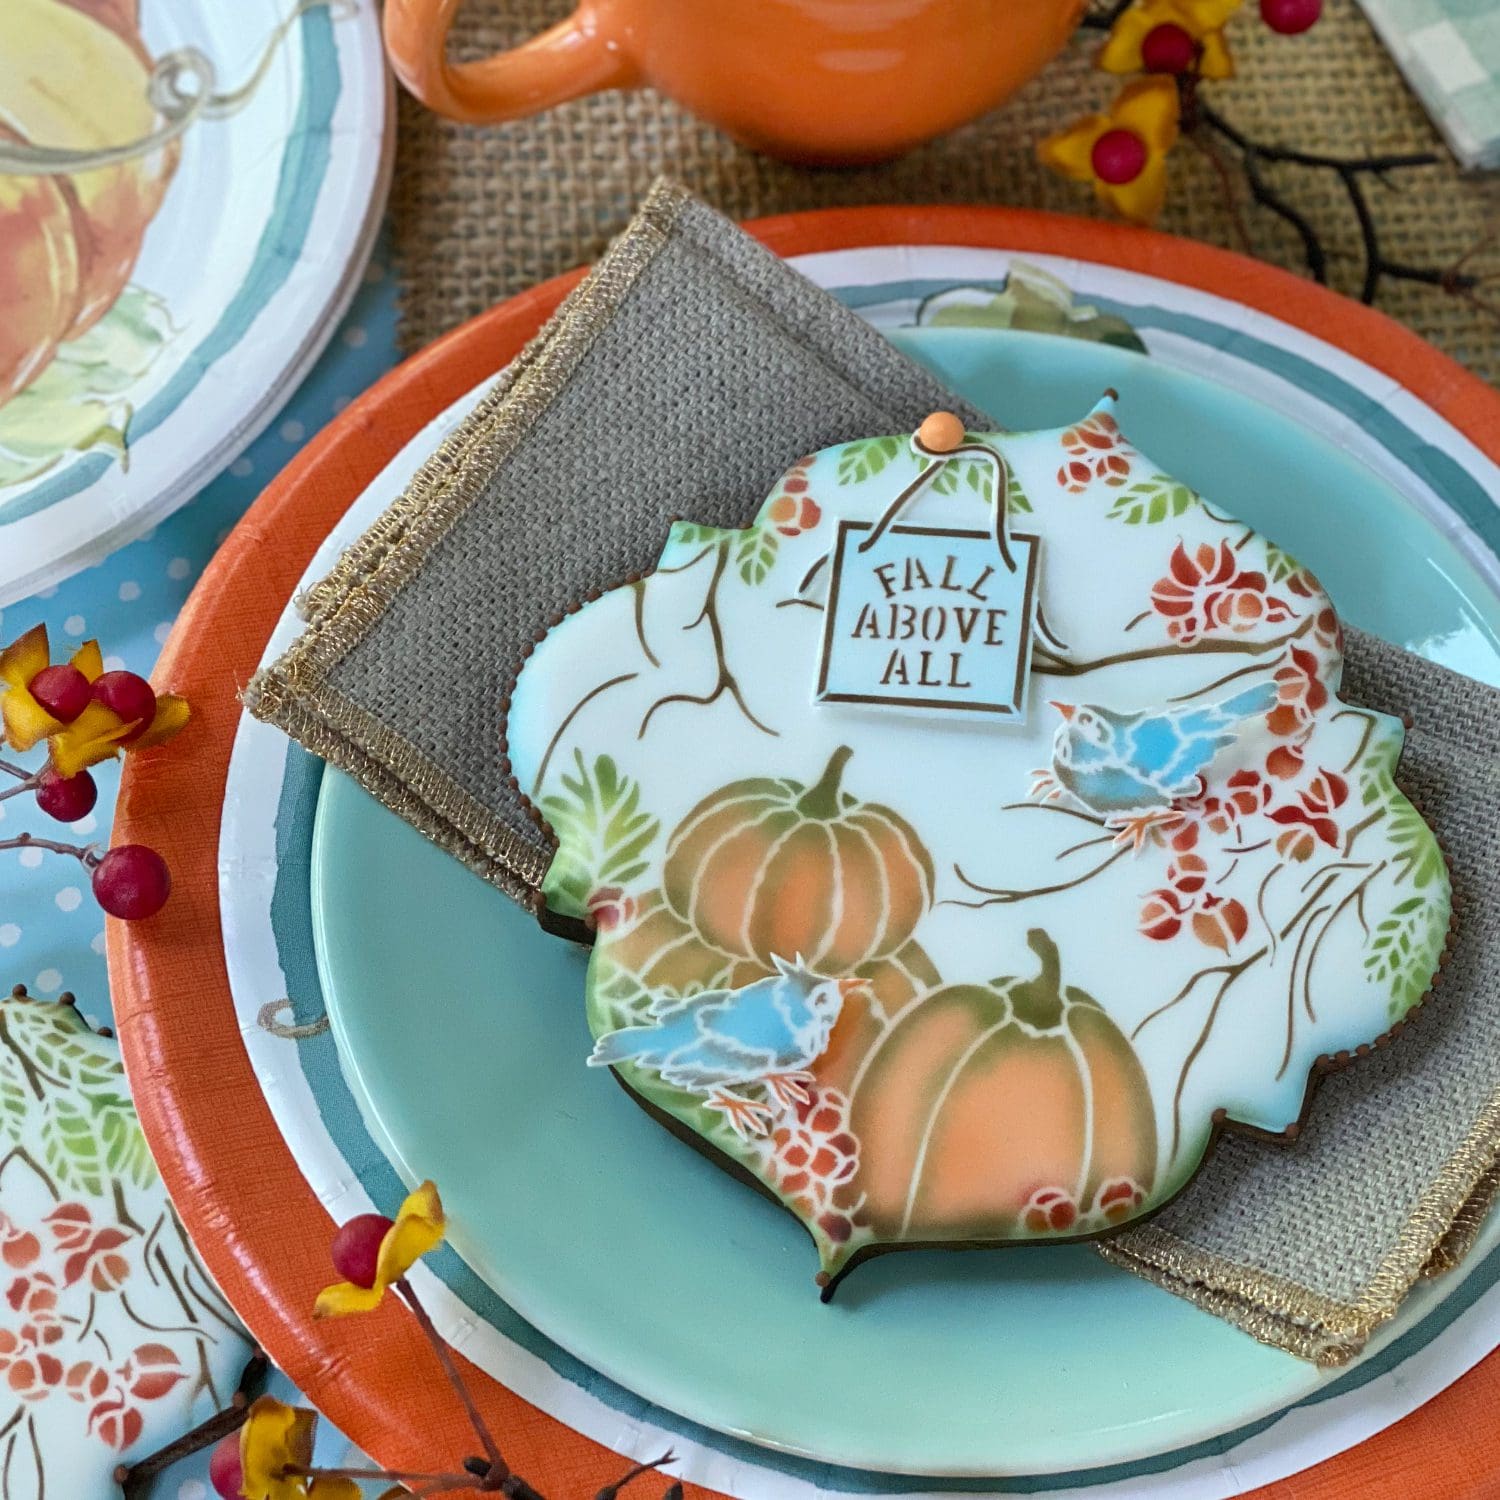
The following three images take this same cookie and make it increasingly jazzy by layering on other elements. For instance, the one below also makes use of a bird fondant appliqué and a pumpkin royal icing transfer. In fact, they’re the exact same embellishments that you saw on the cookie two photos up! That’s the beauty of these things – I can move them around nearly ad infinitum until I find the optimal design! Then and only then, do I commit them to cookies with icing.

Here’s a closer look . . .

And here it is again, now with a second bird appliqué atop a pumpkin . . .

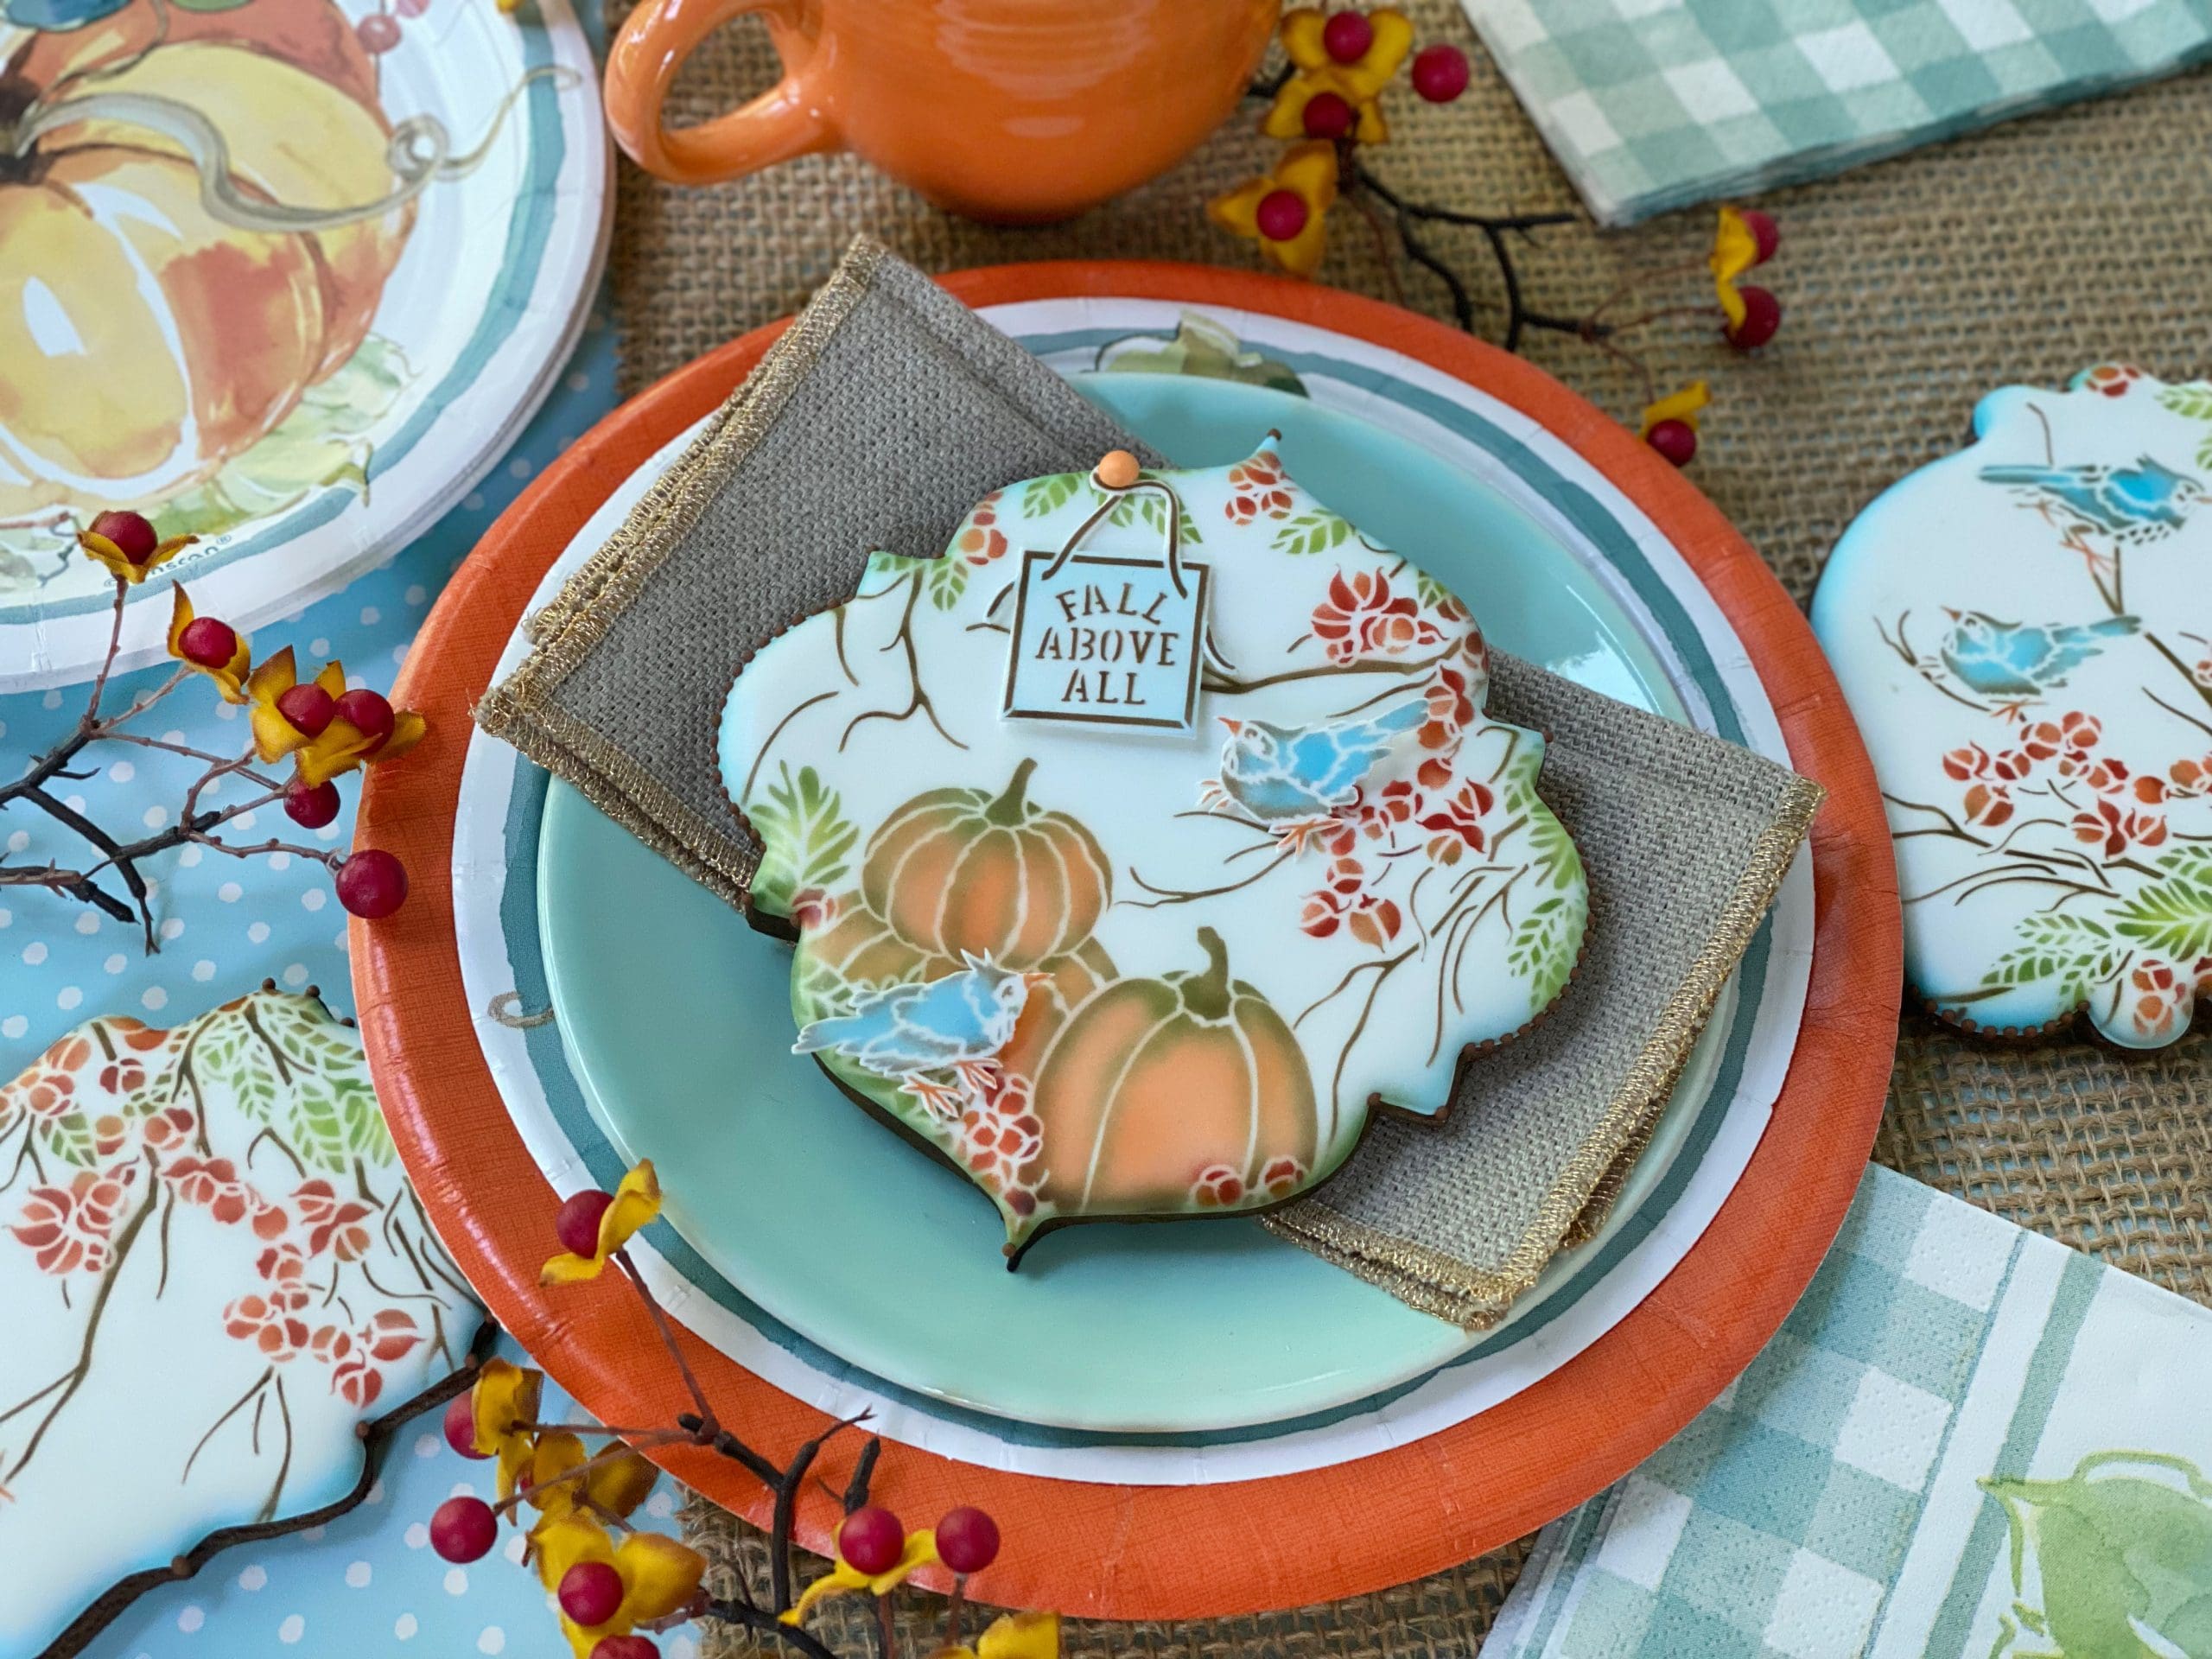
Of course, the messages and frames can also be turned into dimensional fondant appliqués, as shown on the cookie below . . .

I anchored the sign only at the very top, to give it some lift at the bottom. The birds are also hovering above the cookie this time, thanks to some small fondant props underneath.

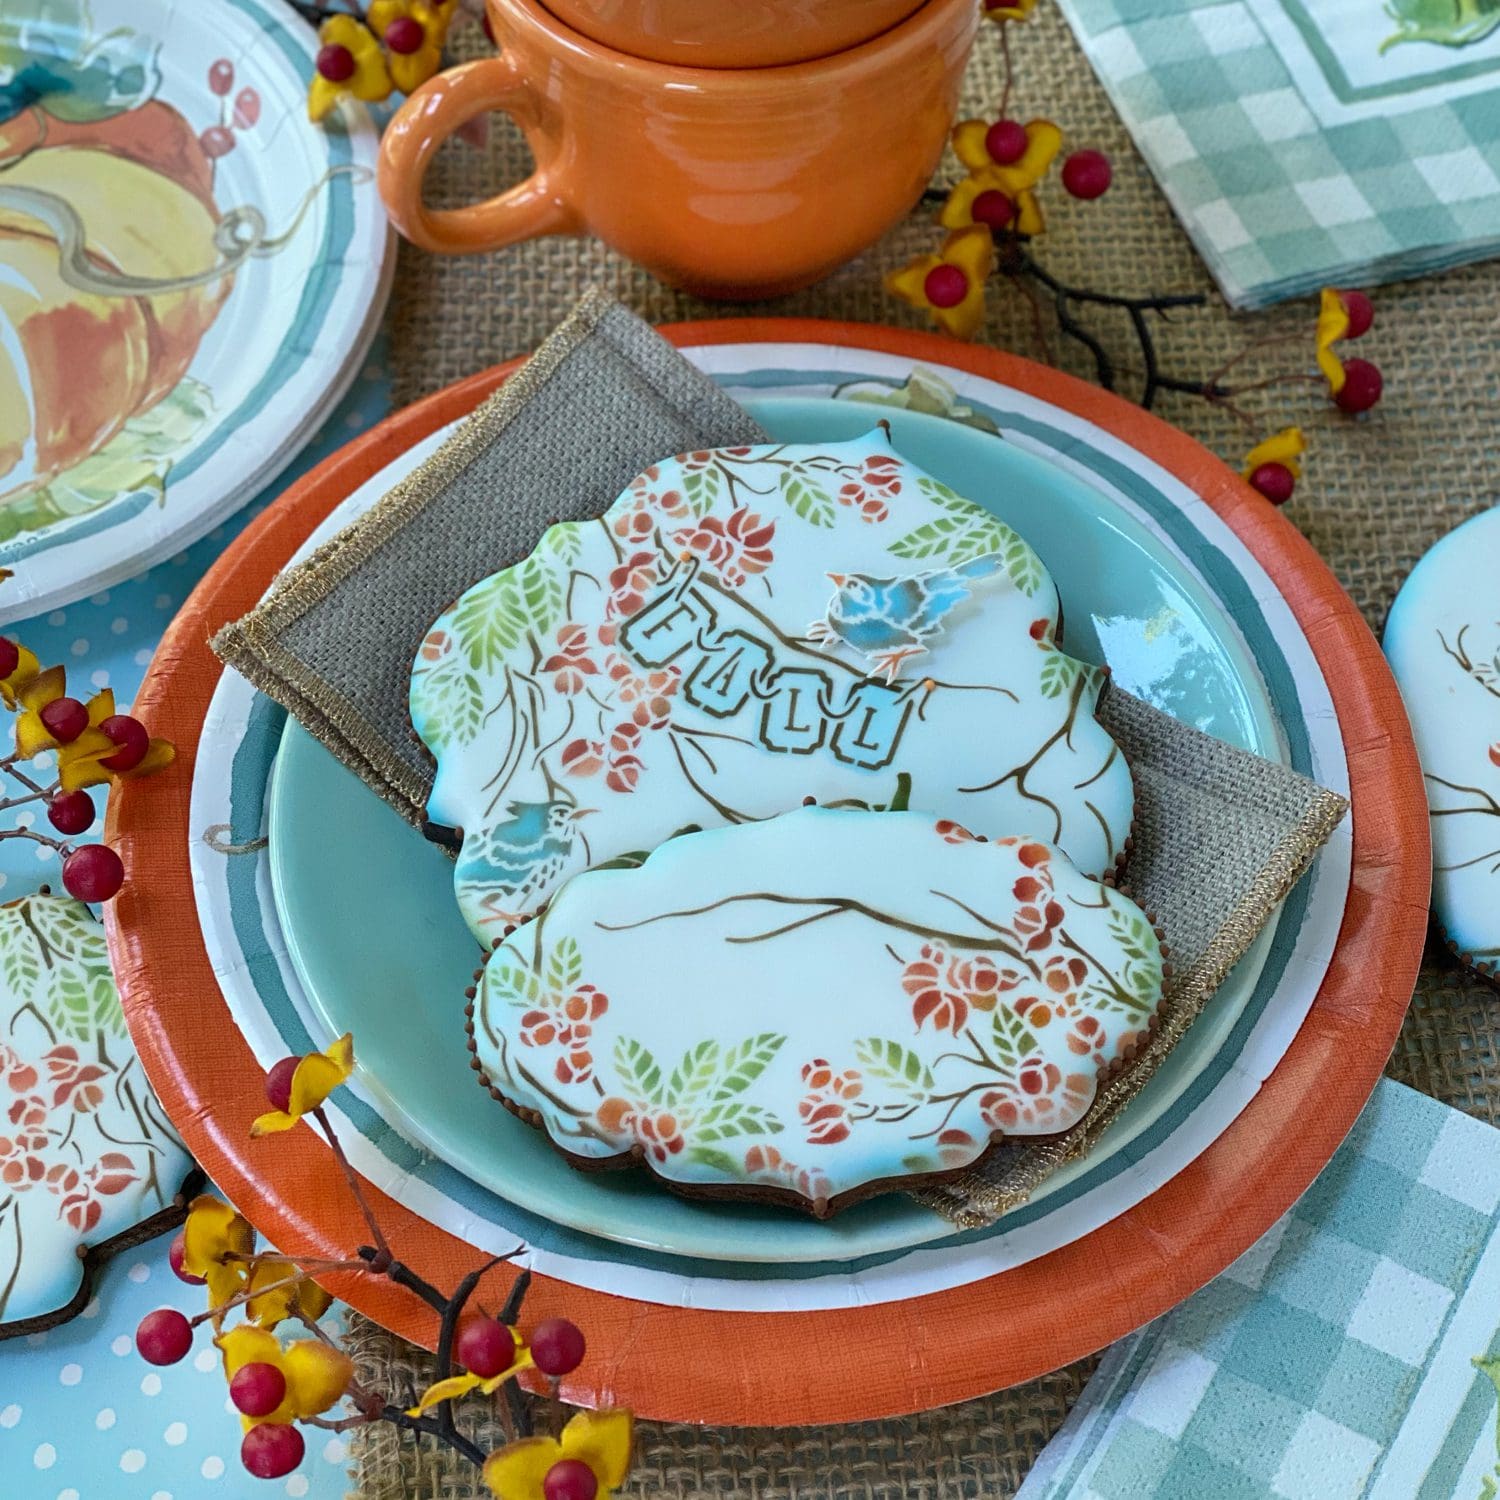
But the messages really look great either way – that is, directly applied to the cookie or hovering above as a fondant appliqué. The choice is yours. I usually mix up approaches in a set for added interest. For example, the “FALL” bunting is directly airbrushed on the cookie in the back, below.

Whereas, on this next cookie, it appears as a fondant appliqué – and not just any ol’ appliqué! I actually contoured this one inside a cardboard tube to give it extra dimension.

Other embellishments, like my signature modeling chocolate bows, always look sweet on cookies too . . .

And because I’m notorious for being a more-is-more person, why not toss in another bird appliqué?! ![]()

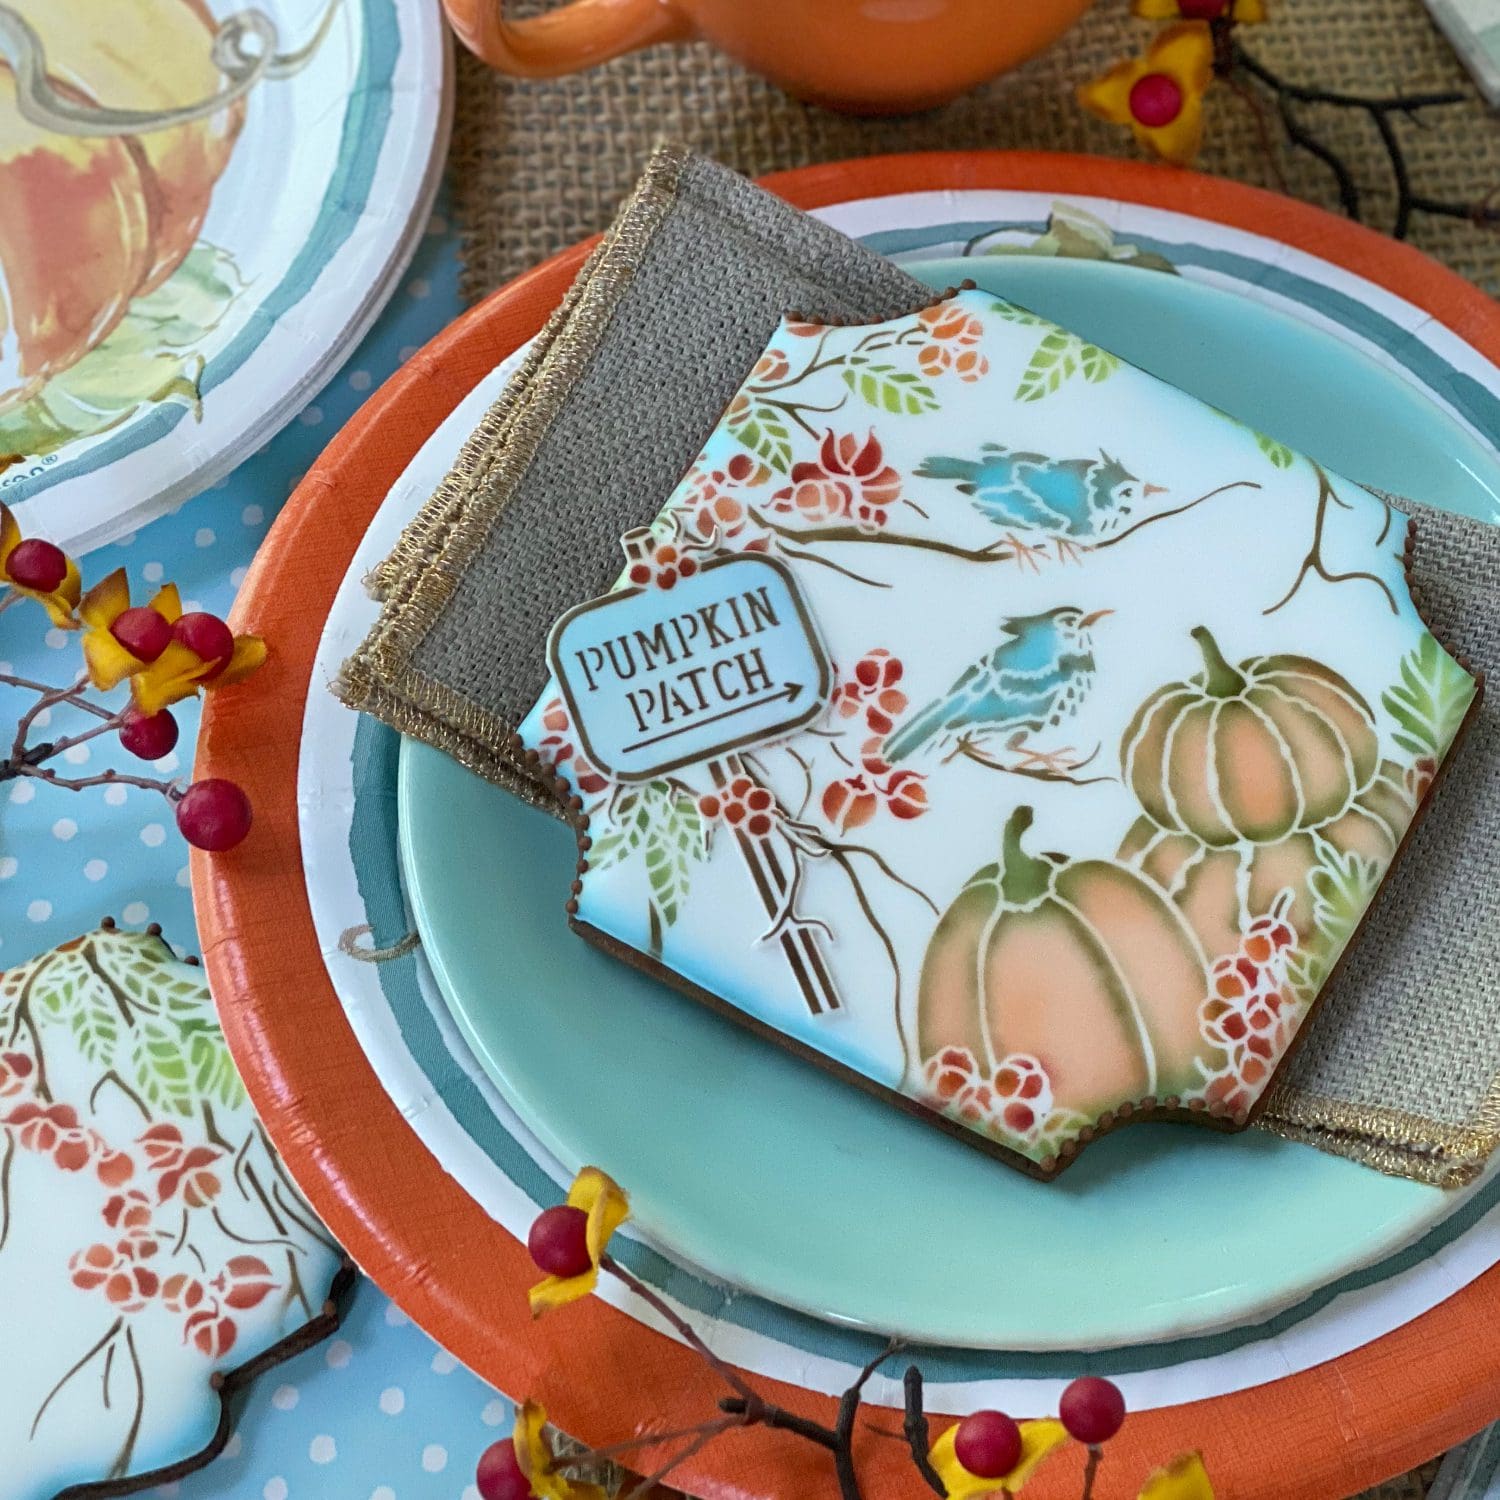
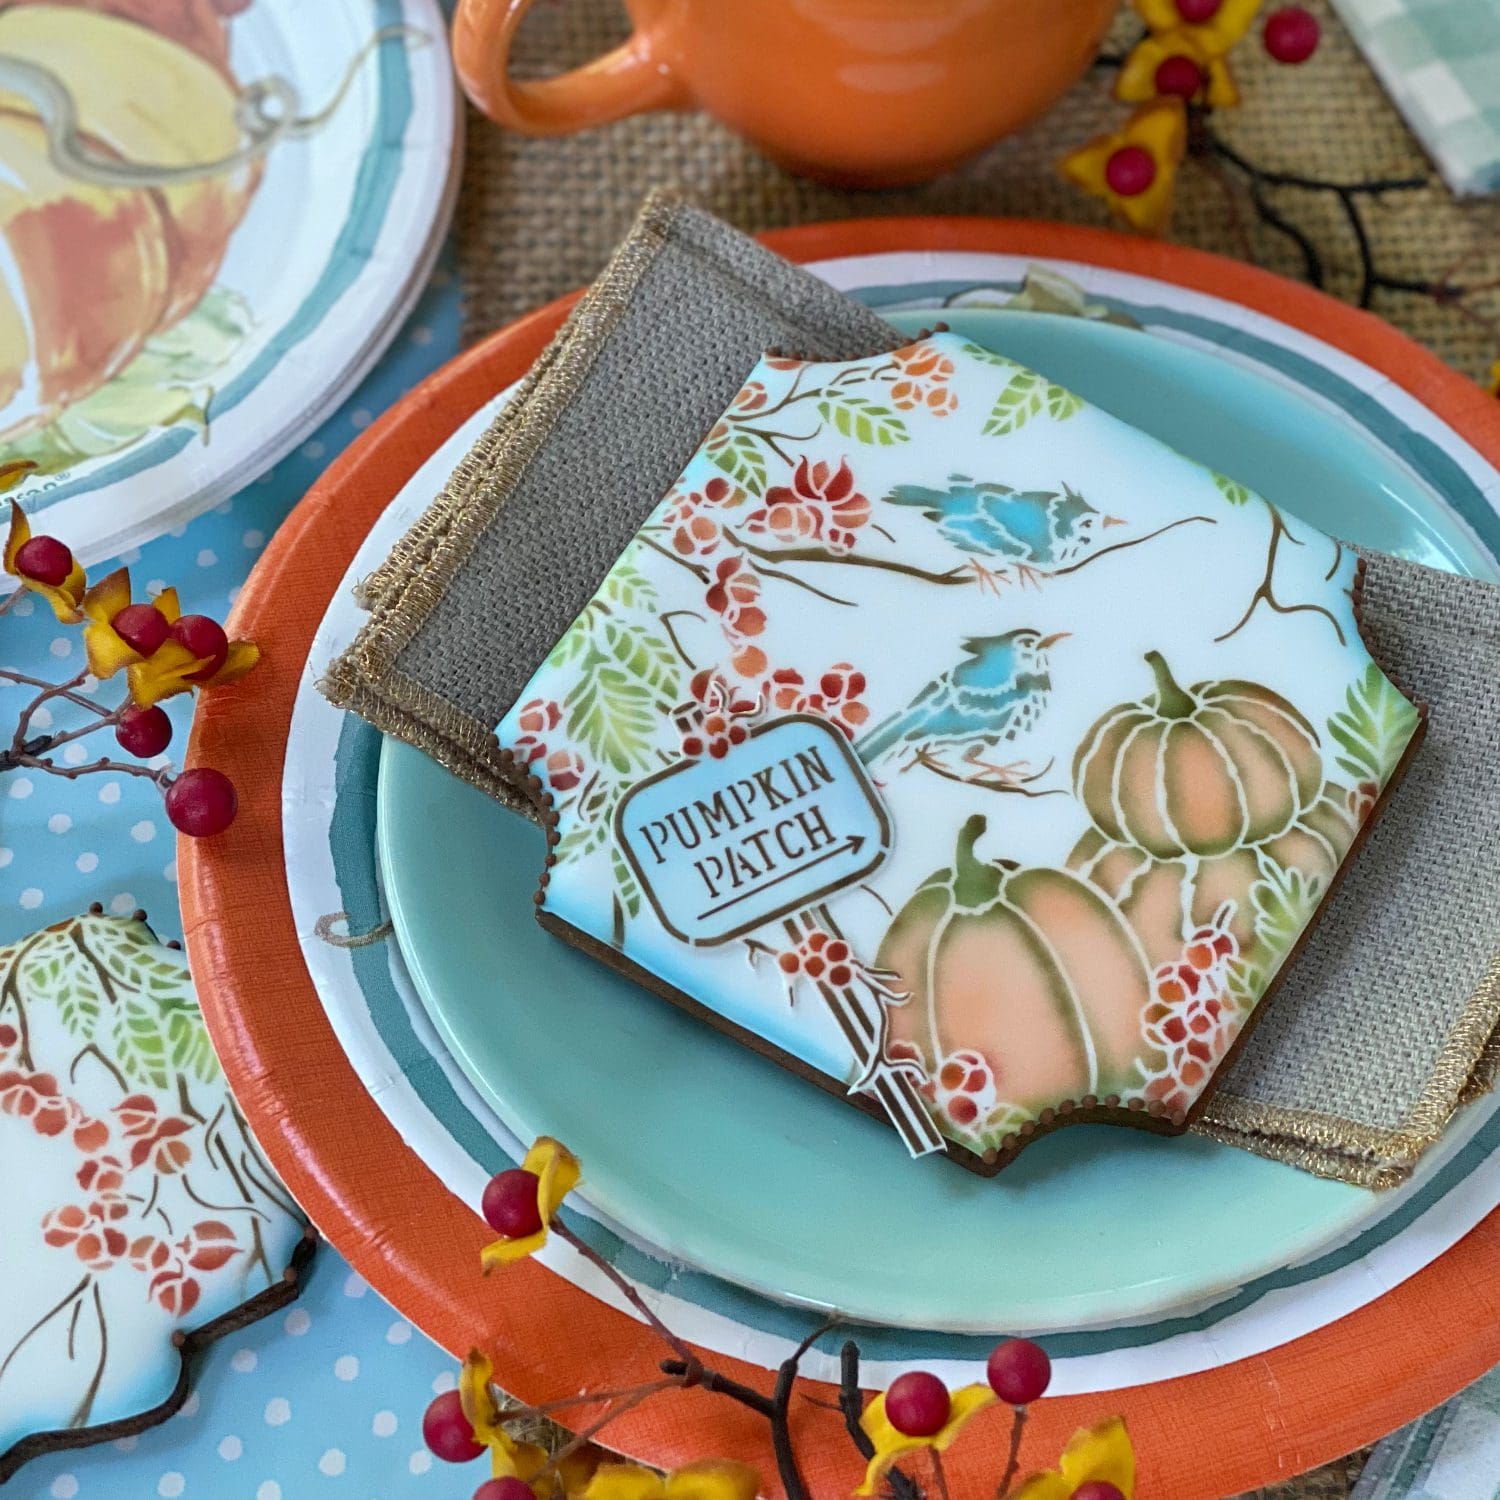
Now, for one final example that demonstrates the flexibility afforded by appliqués and transfers. In this case, the “PUMPKIN PATCH” sign is a fondant appliqué, but I couldn’t quite decide where to anchor it. High? Or . . .

. . . low?

I ultimately decided on the latter, but I liked having the opportunity to second-guess for a while!
And that brings me to the end of this month’s post! I leave you with a pretty fall cookie collection that uses many of the approaches just described – and also a reminder of the key links related to this release. Enjoy, and please savor the rest of your summer!

If you have any technical questions about these stencils, just email me at sweetlife@juliausher.com or leave a comment below. Please, however, direct all ordering and Stencil of the Month Club questions to my stencil partner, Confection Couture Stencils, at service@confectioncouturestencils.com. Thank you!