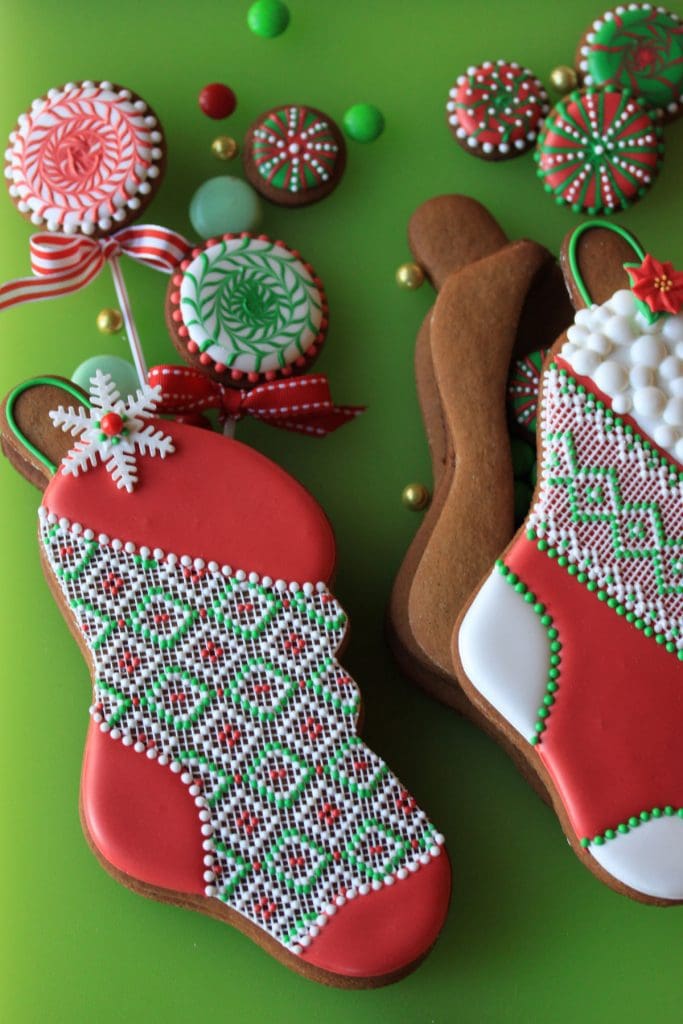
Think out of the box – and off the plate! I love the element of surprise that comes from cookies presented in new and different ways, like these 3-D Christmas stockings filled with cookie lollipops, candies, and other treats. Inspiration from Glorious Treats’ stuffed pumpkins from earlier this season. And cookie cutter from my NEW cookie decorating video series sponsor, CopperGifts.com.

Brief pause for shameless self-promotion: About those videos I just mentioned . . . they were recently released on DVD and can be purchased here on Amazon/Createspace. Whether you’re just beginning to dabble in royal icing or an expert hoping to hone your skills, you’ll find them a helpful addition to your Christmas list (hint, hint)! Oh, and to see a free video version of this tutorial, just click here or on the link at the end of this post.
What you’ll need for one stocking:
To make:
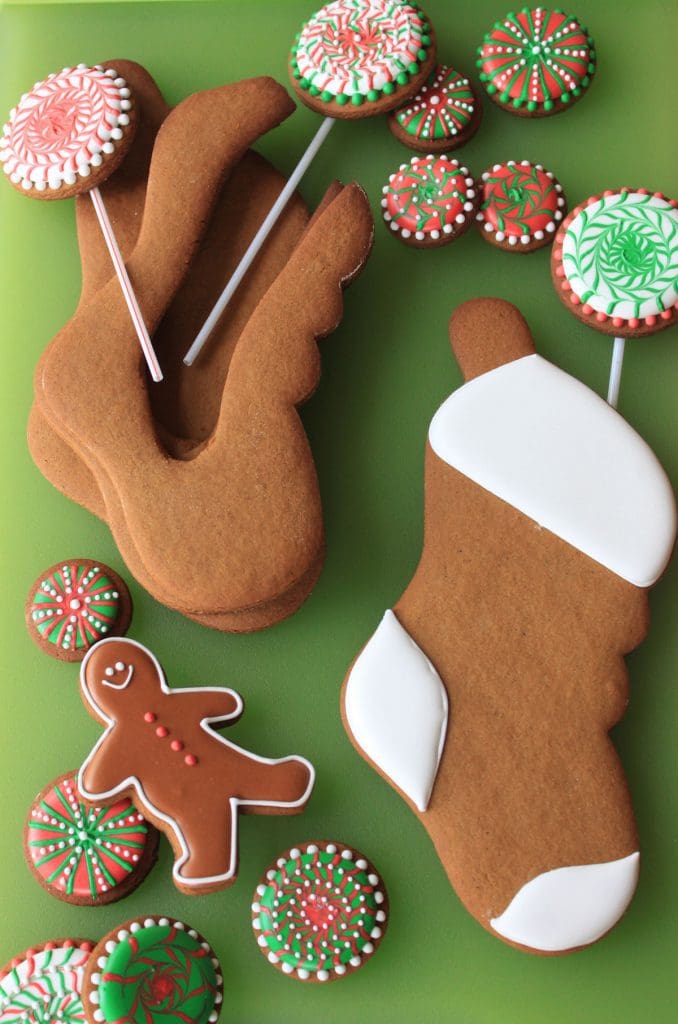
1 | Make the stocking pieces. Choose your favorite sugar cookie or gingerbread dough and stocking cutter, and proceed to cut out 3 to 4 stockings, all in the same direction, for each stuffed stocking. I generally prefer to cut 4 stocking pieces per stuffed stocking, 2 for outer panels and 2 for “inserts,” to allow enough space for stuffing with other smaller iced cookies. If you cut back and use only 1 insert, that’s fine too, but recognize that you may only be able to fit very slender or flat candies (i.e., taffy, gum, tiny candy canes, etc.) in the stocking once assembled. The cutter that I used here (a gorgeous copper number from CopperGifts.com) is quite large, but any size cutter can work.
Just remember, it’s best to cut out the cookie shapes directly on either parchment paper liners or silicone baking mats, rather than transfer them from your work surface. This way, you’ll avoid distorting the shapes during transfer, and ensure that all the pieces line up nicely in the end. For this same reason, I like to cut the openings in the inserts only after they’re on the cookie sheets. After cutting, I also push in their sides a bit, just to make sure they don’t extend beyond the outer panels in the final assembly. The exact shape and size of the openings doesn’t much matter since they won’t be seen; just be sure to cut them big enough to accommodate any cookies or candies that you want to fit inside. A simple paring knife is all that’s needed to cut out these parts. Bake as directed and cool completely before decorating.
Note: Next time, I’ll also cut a small hole in the stocking loop, so that I can actually tie these stockings at the top with ribbon, and then attach them to a garland or my mantel.
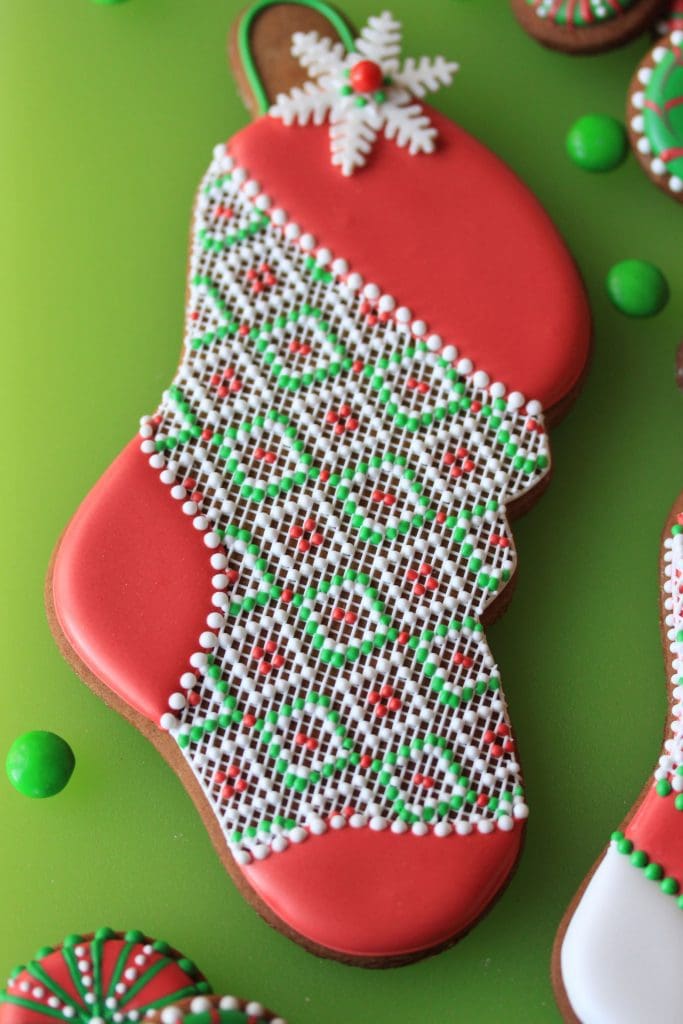
2 | Deck out the pieces. Just as you can work with a stocking cutter of any size, you can also decorate the stockings in any way. For a stocking that views well from all sides, be sure to decorate both outer pieces – and the underside of the back-facing outer piece! I only decorated the front-facing outer piece, but that’s because I chose to use needlepoint, a relatively time-consuming decorating technique, and wanted to save time another way. Basically, this technique involves piping a tiny grid of relatively thick Royal Icing onto the body of the cookie, and then piping a looser consistency of icing, in contrasting color(s), into the holes of the grid to create a pattern. You can either top-coat the cookie first or not. I love the look of the white grid against dark gingerbread, so I chose to skip the top-coating on most of these cookies (third and fourth photos from top).
For more details on the needlepoint technique, visit my YouTube video and/or download the argyle pattern used on the stocking at the very top. Also to consider: inscribed stockings make unique place cards or personalized gifts!
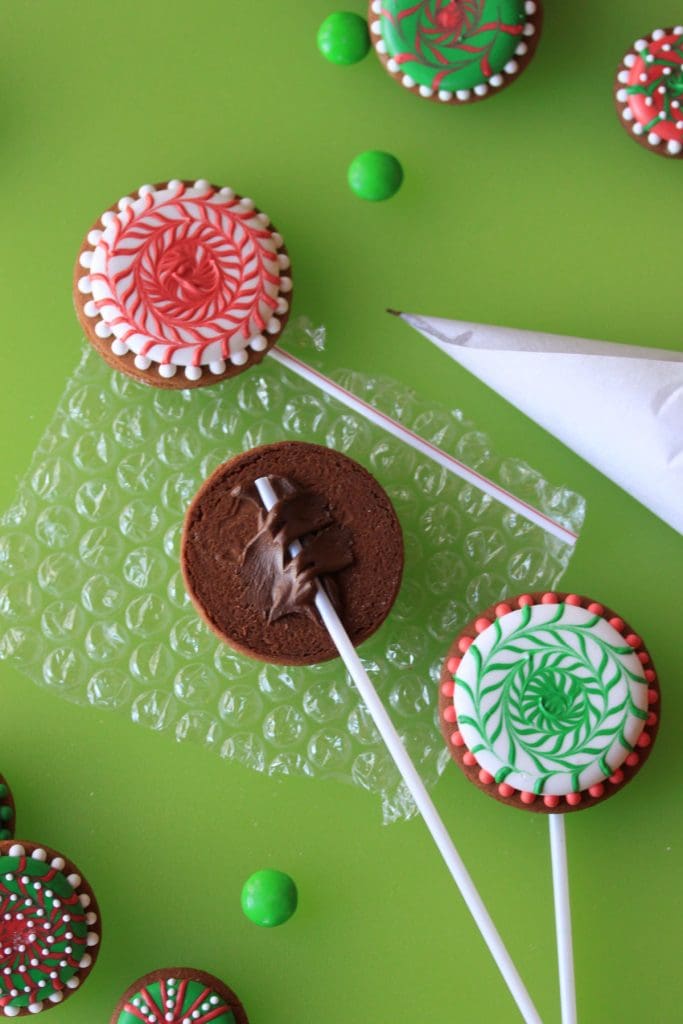
3 | Stuff with other cookies. Again, you could stuff with just about any cookie shape (think: mini gingerbread men, candy canes, etc.) as long as the shape fits in the openings cut in Step 1. I love to use cookies that look like candies and lollipops, and so I often rely on the marbling technique, and in particular my Lollypalooza pattern from Ultimate Cookies, to make swirly patterns evocative of those things (fifth photo from top). For more info about the marbling technique and my special pattern, click here for some quick tips, or here for a full-fledged video course.
Cookie rounds can be simply swirled, or they can be converted into lollipops after the icing has completely dried. To do the latter, turn the cookies over onto bubble wrap (so as not to mess up the decorations on top) and glue each cookie to a coffee stirrer with some thick Royal Icing “glue.” Red striped stirrers are the bomb, if I can find them, because of their Christmas-y candy cane-effect! Let the icing set completely before picking up the sticks.
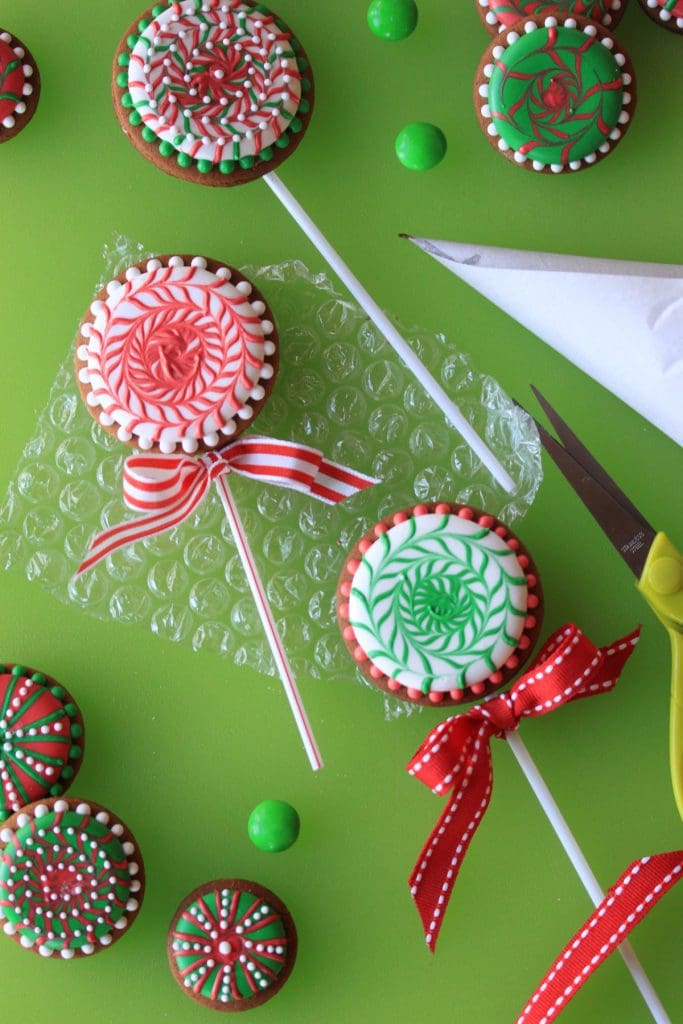
4 | Tie ‘em up and otherwise embellish! I’m a big fan of layering textures and patterns (such as marbling and needlepoint shown here) in my cookie designs, as long as the various elements are tied together with a coordinating color palette. This layering concept extends to the embellishments I use, such as the ribbons on the lollipop sticks (sixth photo from top) and the readymade fondant snowflakes and royal icing poinsettia from fancyflours.com (fourth photo from top). To attach these relatively large sugar elements most easily, use thick Royal Icing piped through a parchment cone (or disposable plastic piping bag) as your “glue.” While looser icing will work, the thicker the icing, the faster it will set the pieces in place.
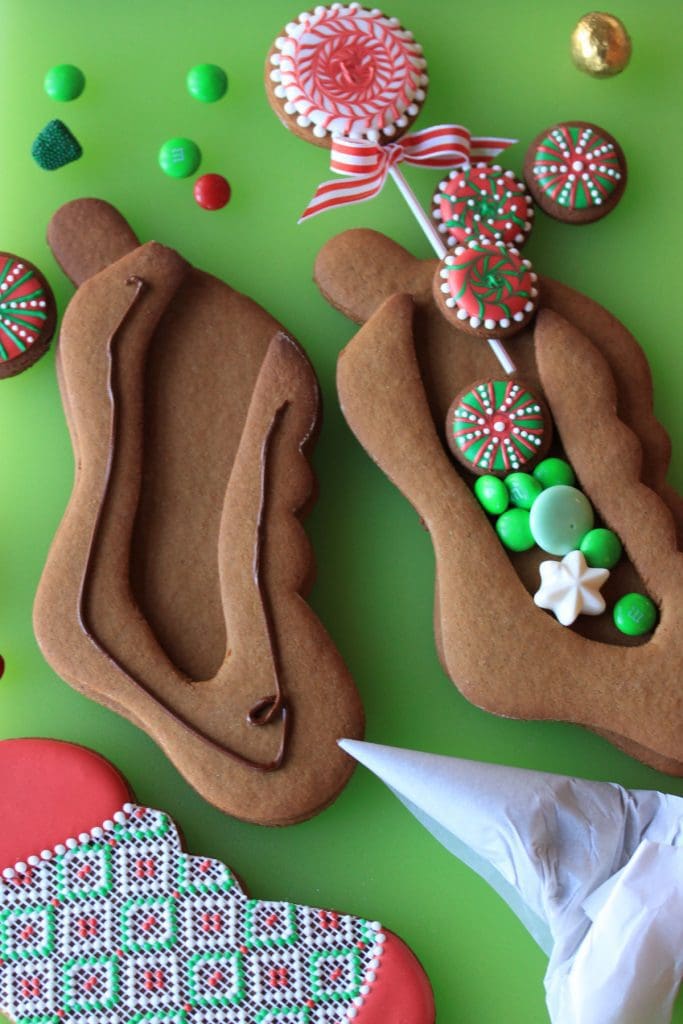
5 | Assemble the stocking pieces, and stuff! After you’ve completed Steps 1 to 4, assembling is nothing more than a simple gluing exercise (bottom photo). Fill a parchment pastry cone with Royal Icing “glue” and use it to fix 1 or 2 cookie inserts to a back-facing stocking, taking care to line up all of the pieces. I usually tint my “glue” to match my cookies, so that if any should squeeze out the stocking sides, it will be less likely to show. Also, before you do the final gluing, put some of your desired stocking stuffers into the opening to see if you’ll need 1 or 2 inserts to fit them. Lastly, glue a decorated front-facing stocking on top. Let the icing dry completely before attempting to lift up or fill the stocking – that is, if you can wait to sneak a bite!



Be the first to hear about my latest events, tutorials, and product announcements by subscribing to my newsletter!
Schedule willing, I release one each month, roughly mid-month. And, guess what else?! Once you subscribe, you’ll receive a special one-time coupon code for 20% off my online tutorials. The code will be delivered in your subscription confirmation email, so keep your eyes peeled (as it cannot be resent). Thanks in advance for subscribing!
Live sweetly, Julia