
We’ve definitely turned the corner from winter to spring here in my hometown of St. Louis, Missouri. Yay! My crocuses are long gone, but my daffodils are in their glory! And it won’t be long before my tulips burst open and start working their magic on those strolling through the neighborhood.
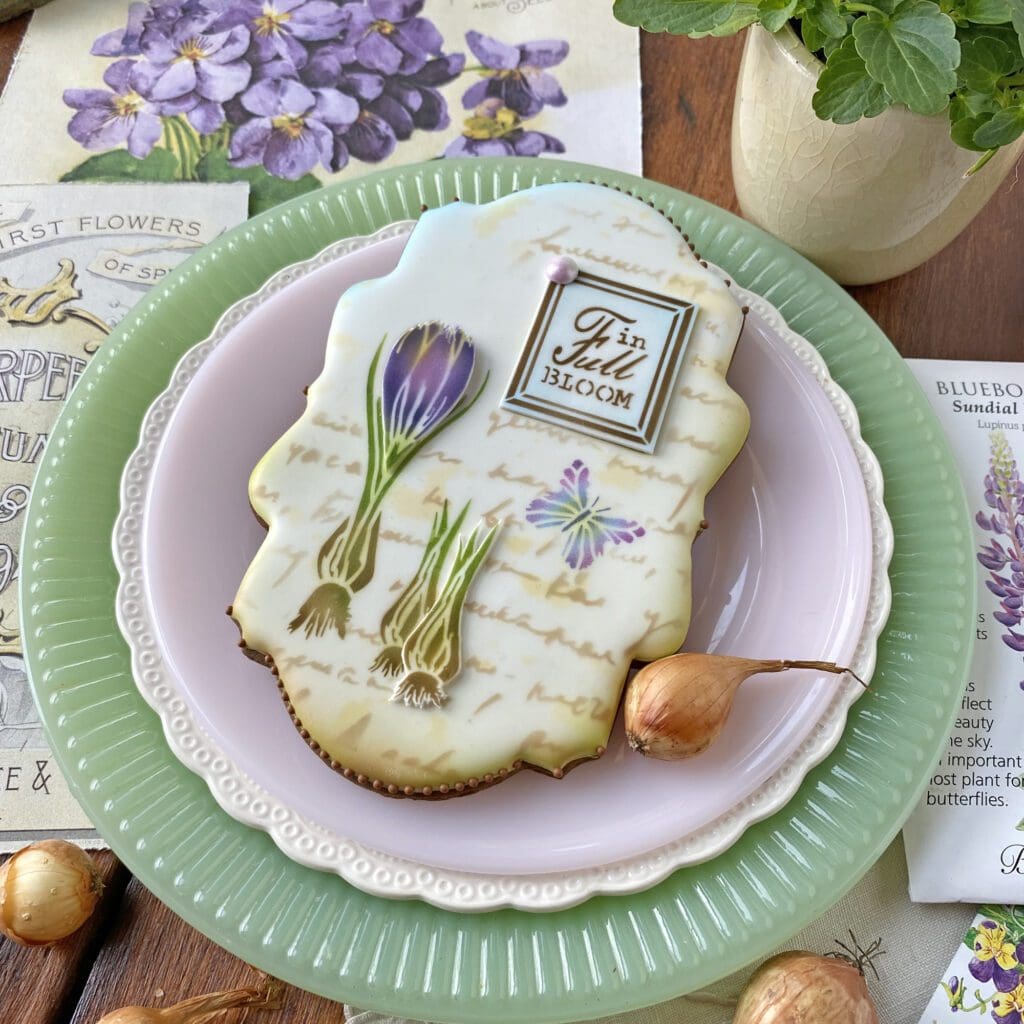
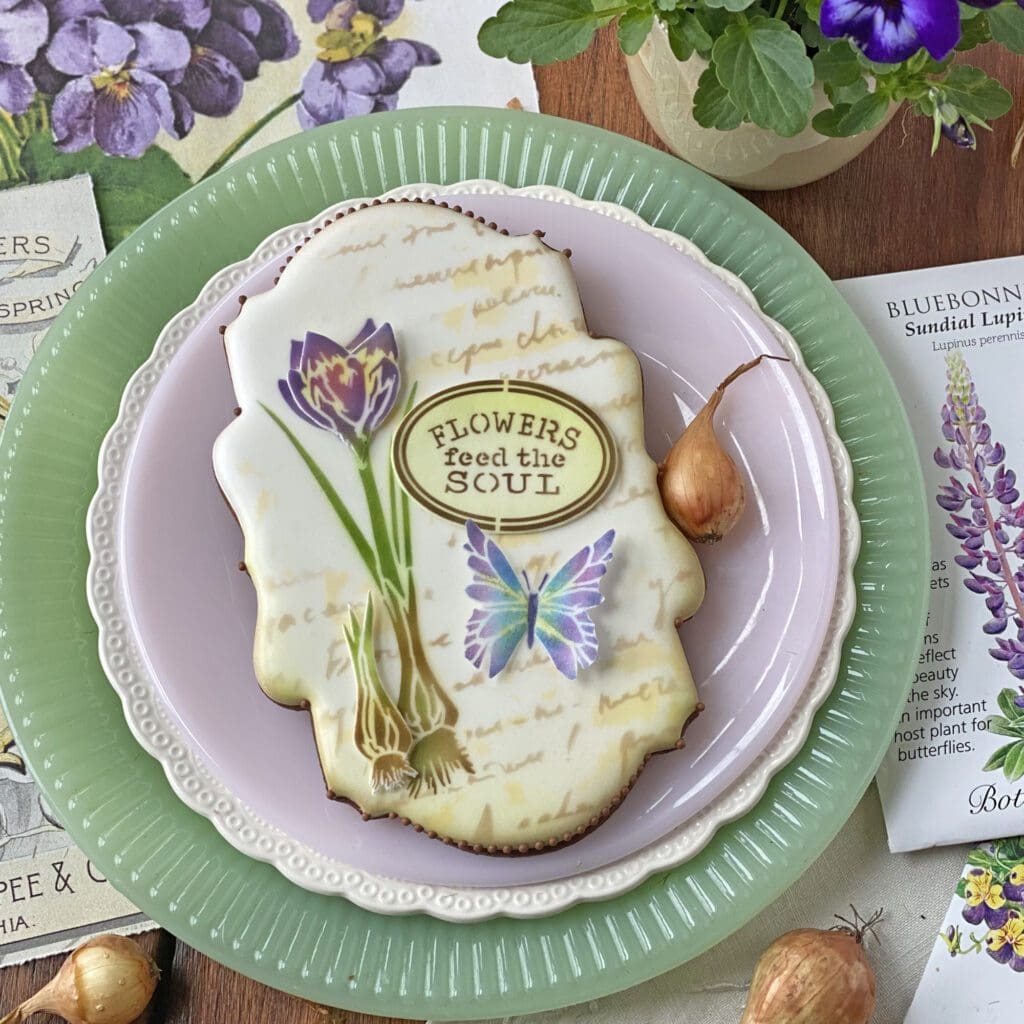
As you probably know by now, I love gardening almost as much as cookie-ing, so it should probably come as no surprise that I often draw inspiration from the outdoors when creating my stencil sets. In fact, this month’s release is a perfect example of how I take cues from Mother Nature. Its background set was designed to look like a vintage botanical print complete with butterflies and a progression of growing spring bulbs that can be set atop weathered gardening notes. And the release’s messages, like “in Full BLOOM” and “FLOWERS feed the SOUL”, certainly complement the overall design aesthetic. Taken together, these sets will allow you to create countless cookies, perfect for Easter, Mother’s Day, springtime birthdays, and garden parties.
I’ll show you some of these designs in a sec, but, first, an important heads-up! Please don’t leave this post before reading my announcement at the very end. I’m changing up my stencil offering over the next few months to reflect customer feedback gathered over the last year or so, and I wanted you to be the first to know what to expect. (Hint: You’ll be getting more variety!)
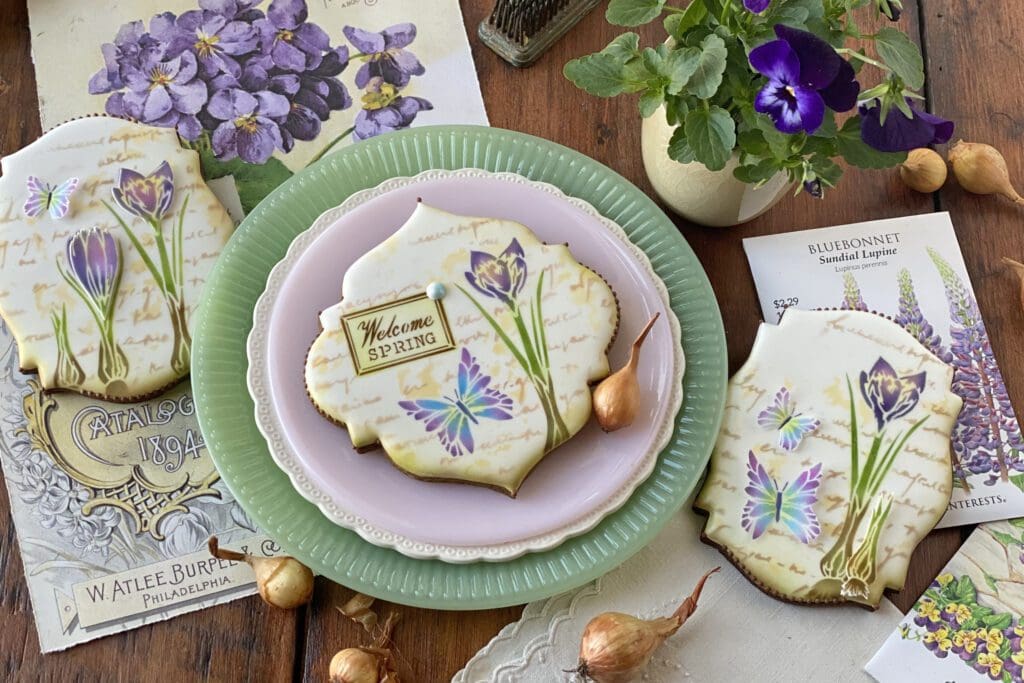
Now back to my previously scheduled programming! ![]() Let’s take a look at this month’s release in a single, super pretty view . . .
Let’s take a look at this month’s release in a single, super pretty view . . .
Itching to get shopping? Good, because here’s where you can get all of these lovelies on my partner Confection Couture Stencils’ site:
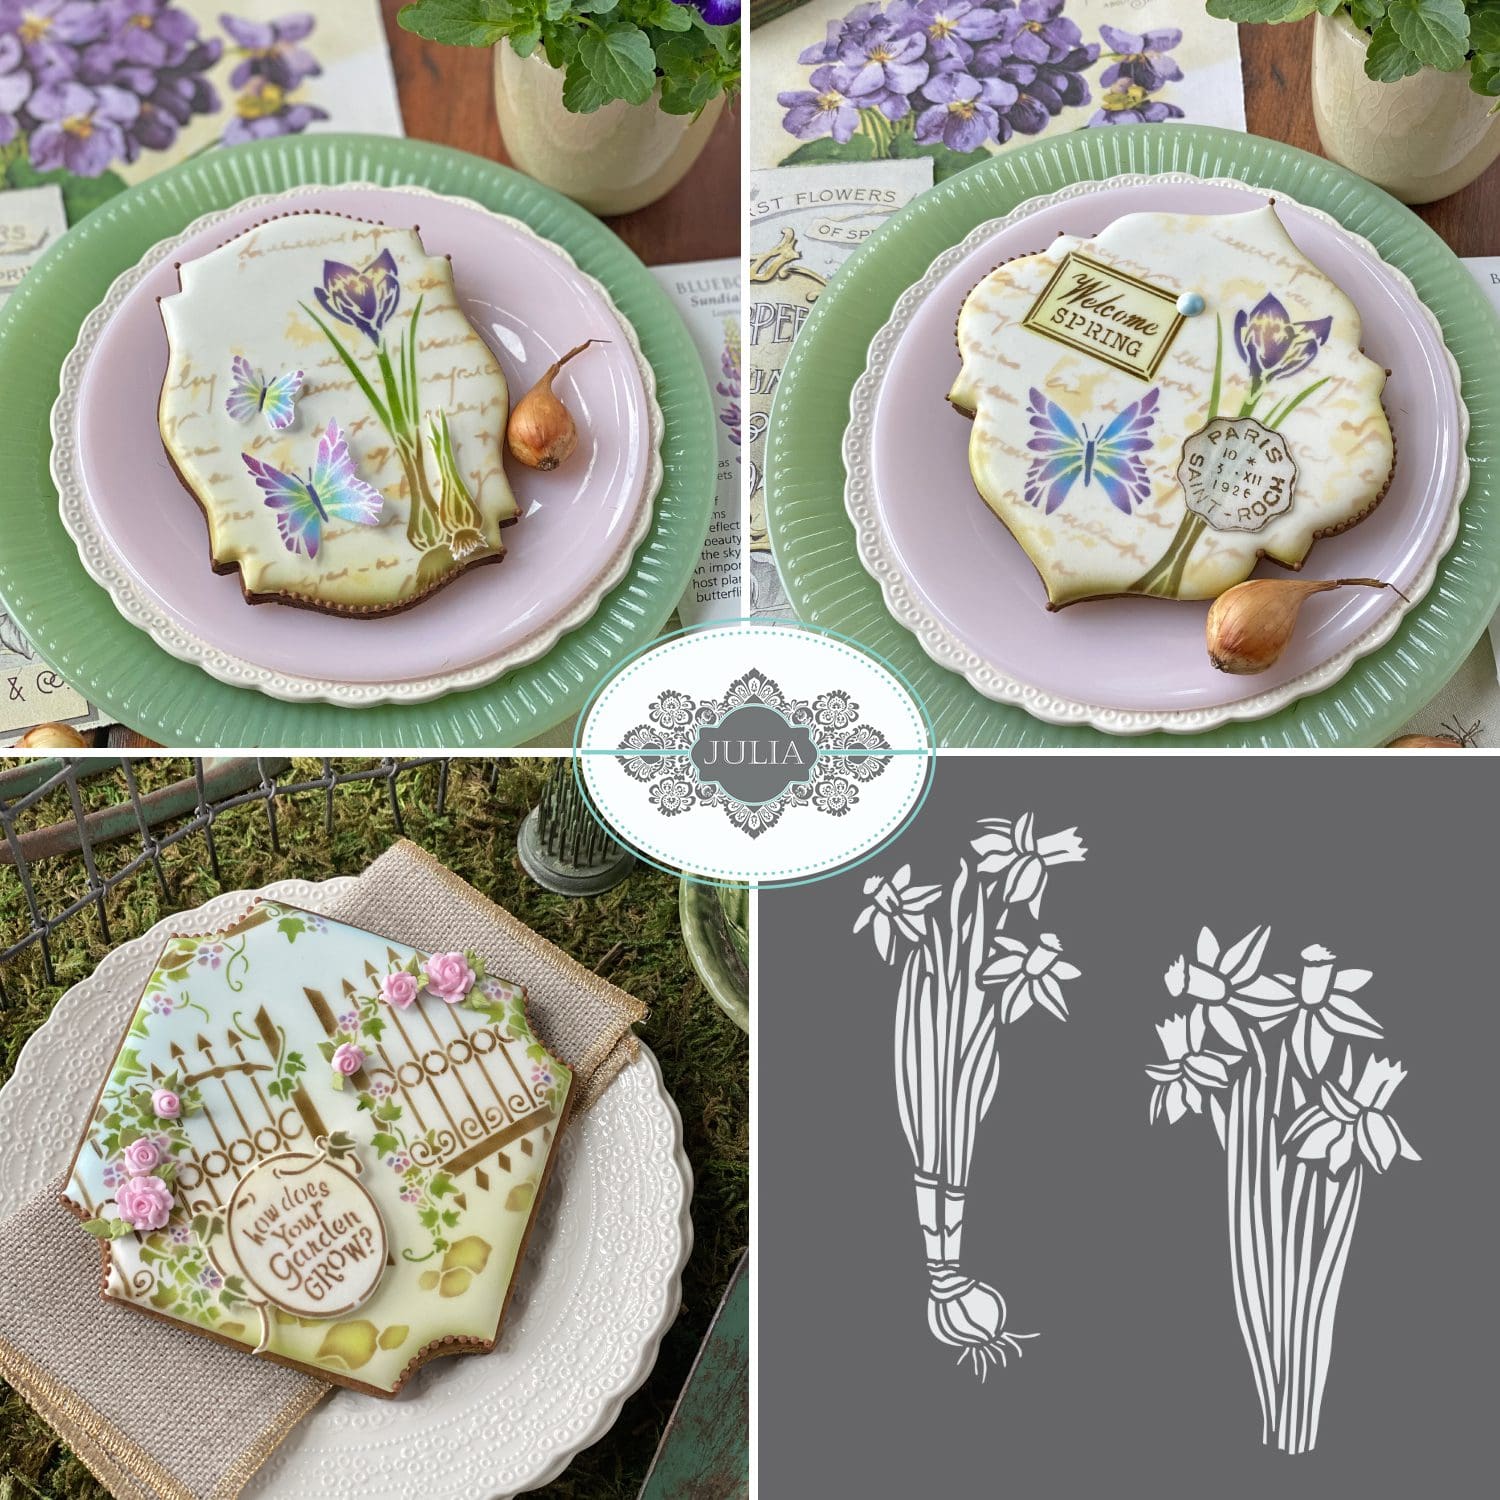
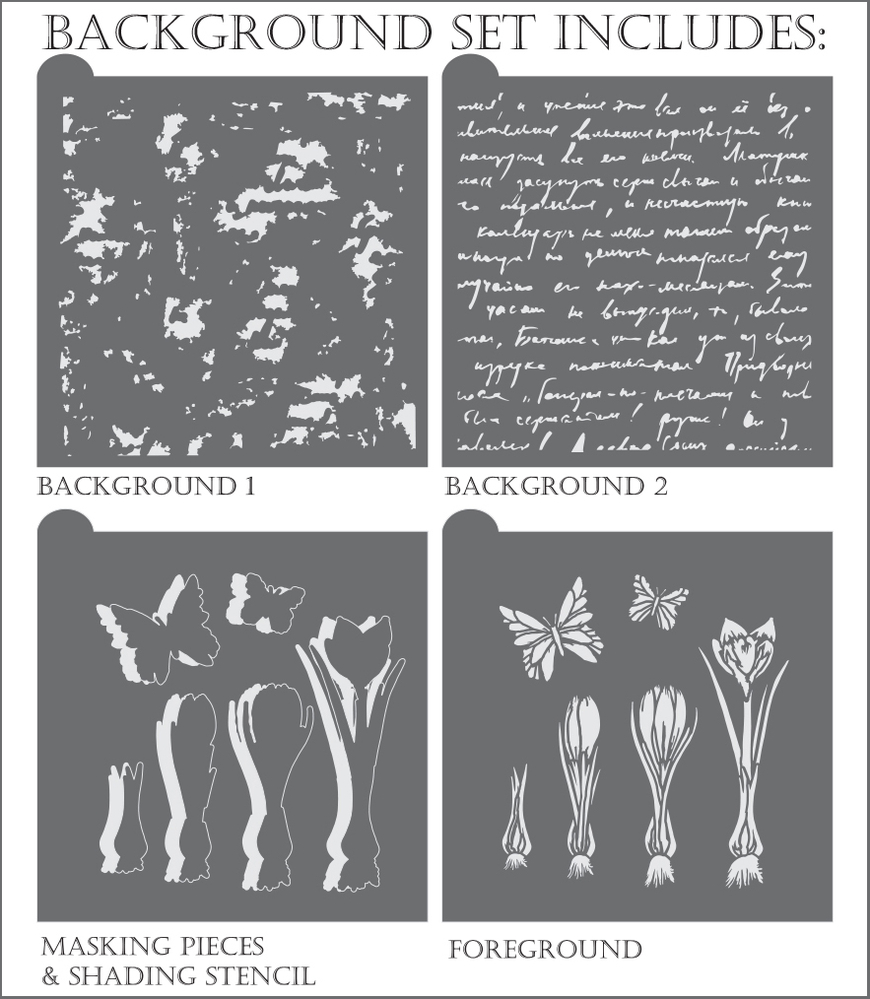
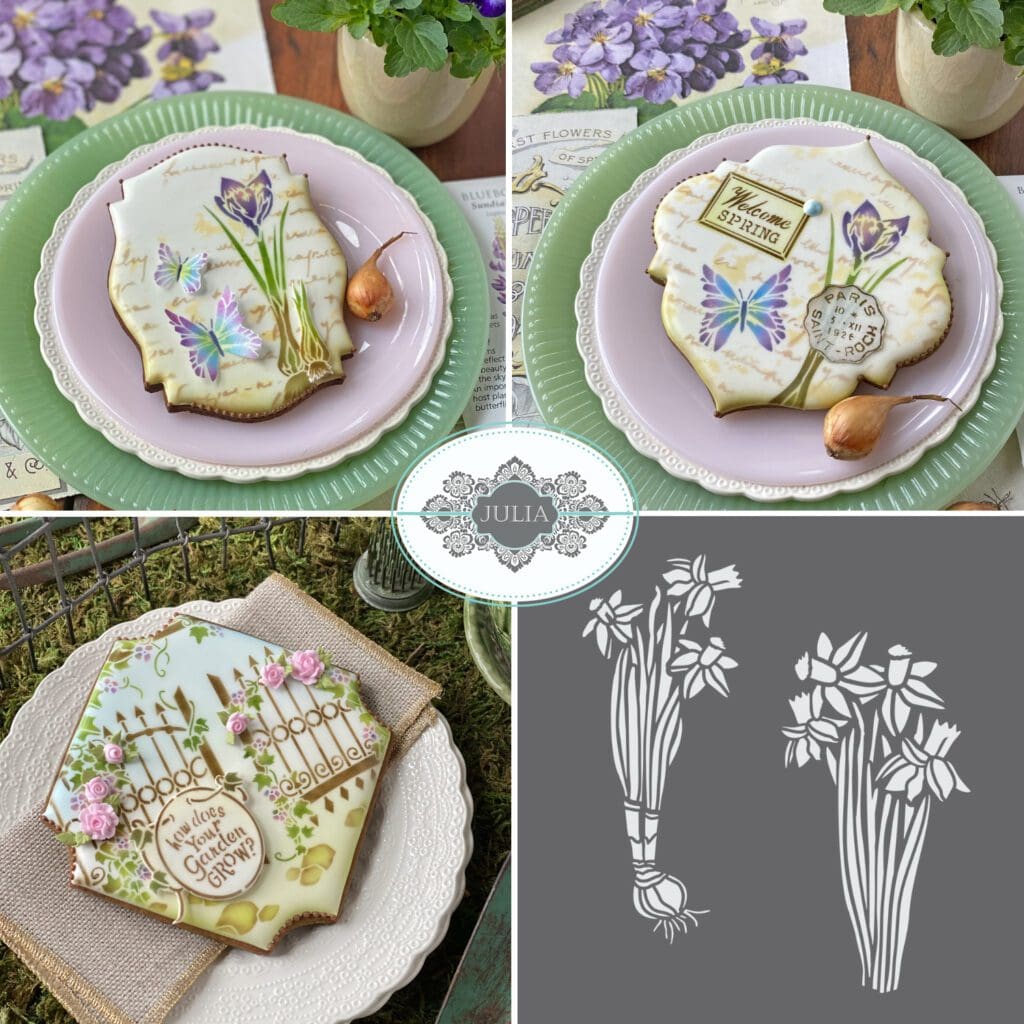
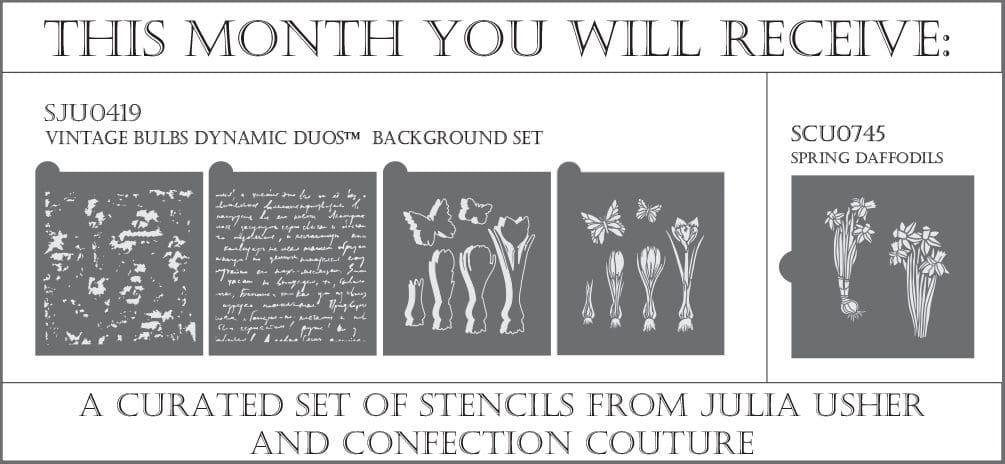
As always, the background stencil in the background set (which, this time, consists of two sheets: the spots/stains and the script wording, pictured lower left) is sold separately. This two-part set can be found under Vintage Script Dynamic Duos™ Background Cookie Stencil on my partner’s site.
Also, if you’re a lucky Stencil of the Month Club member, you’ll automatically get this curated bundle that includes my Vintage Bulbs background set and my partner’s Spring Daffodils stencil, all at about 15% off usual prices:
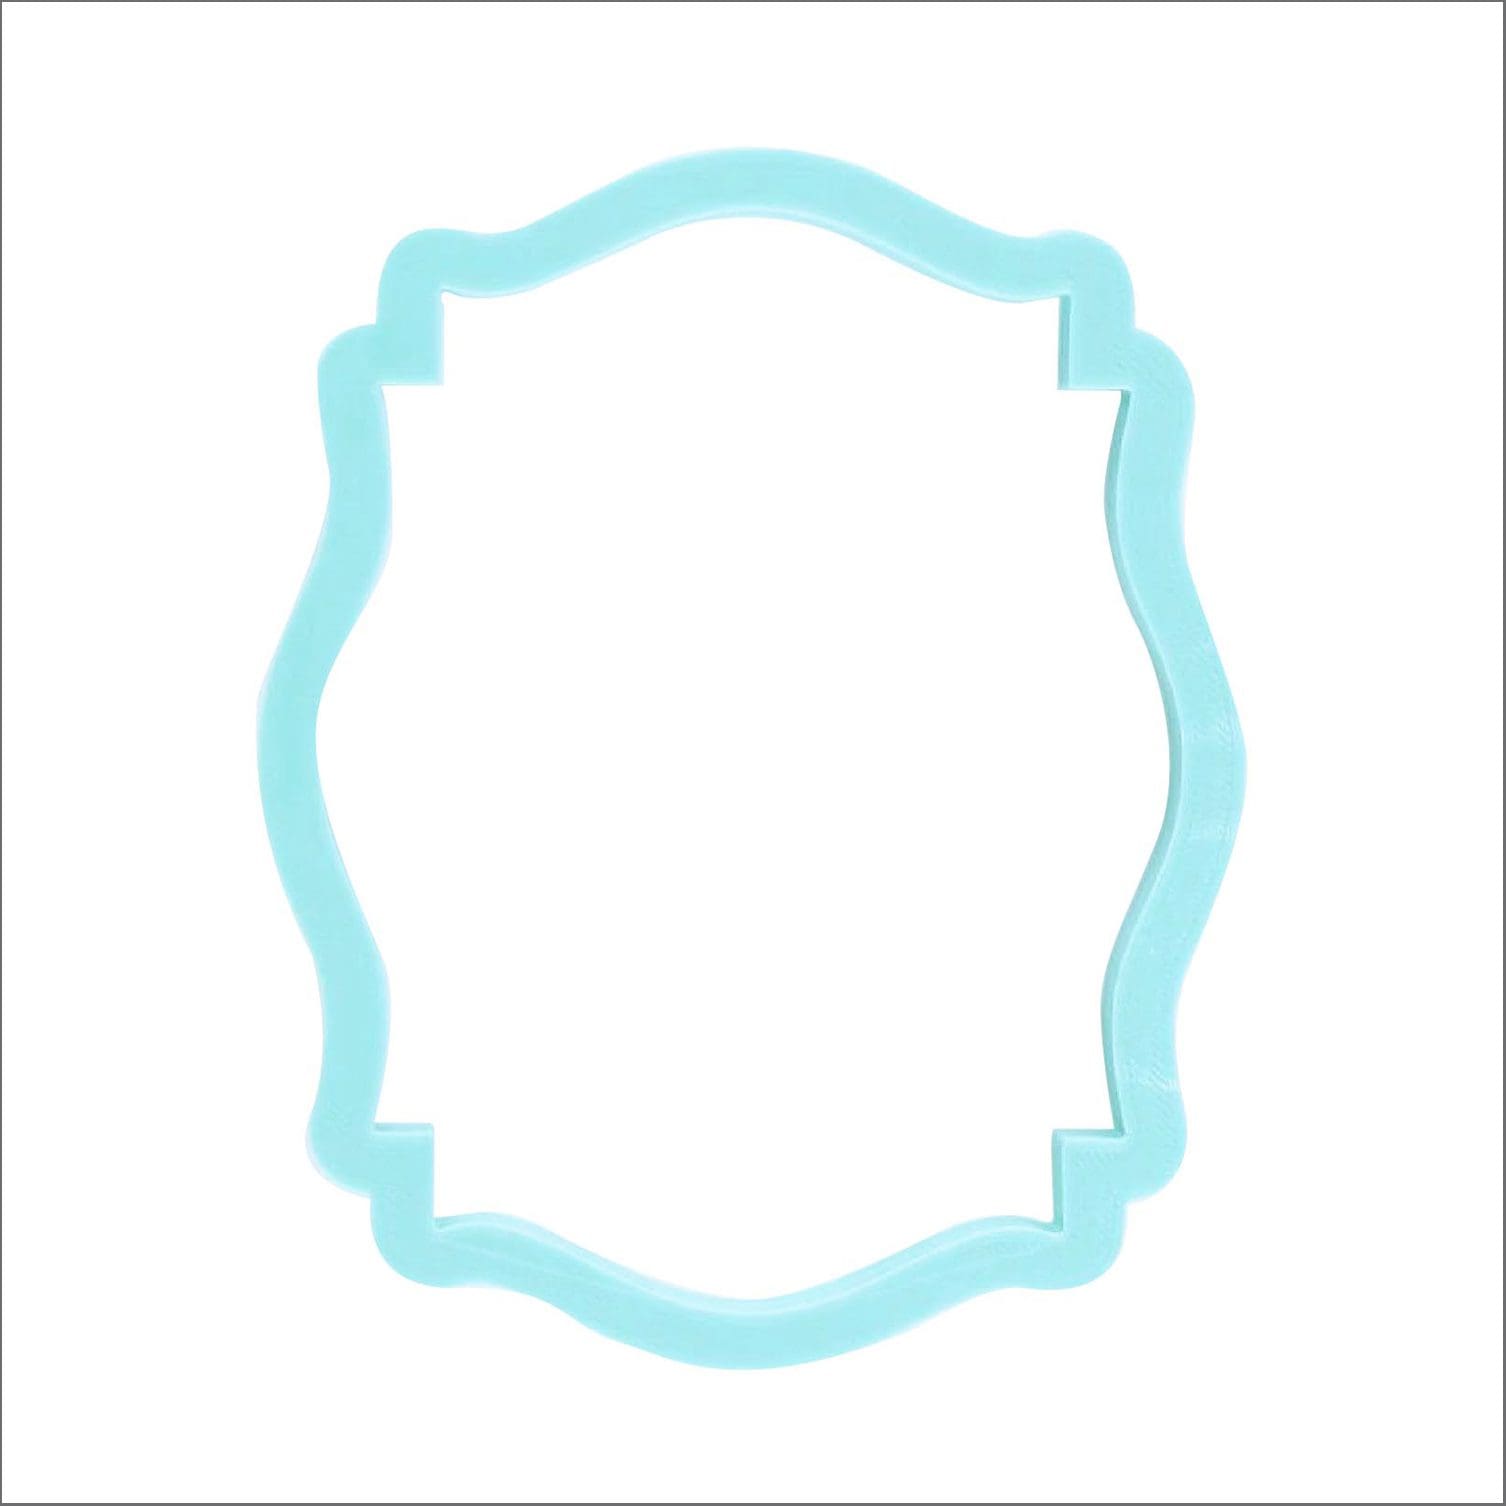
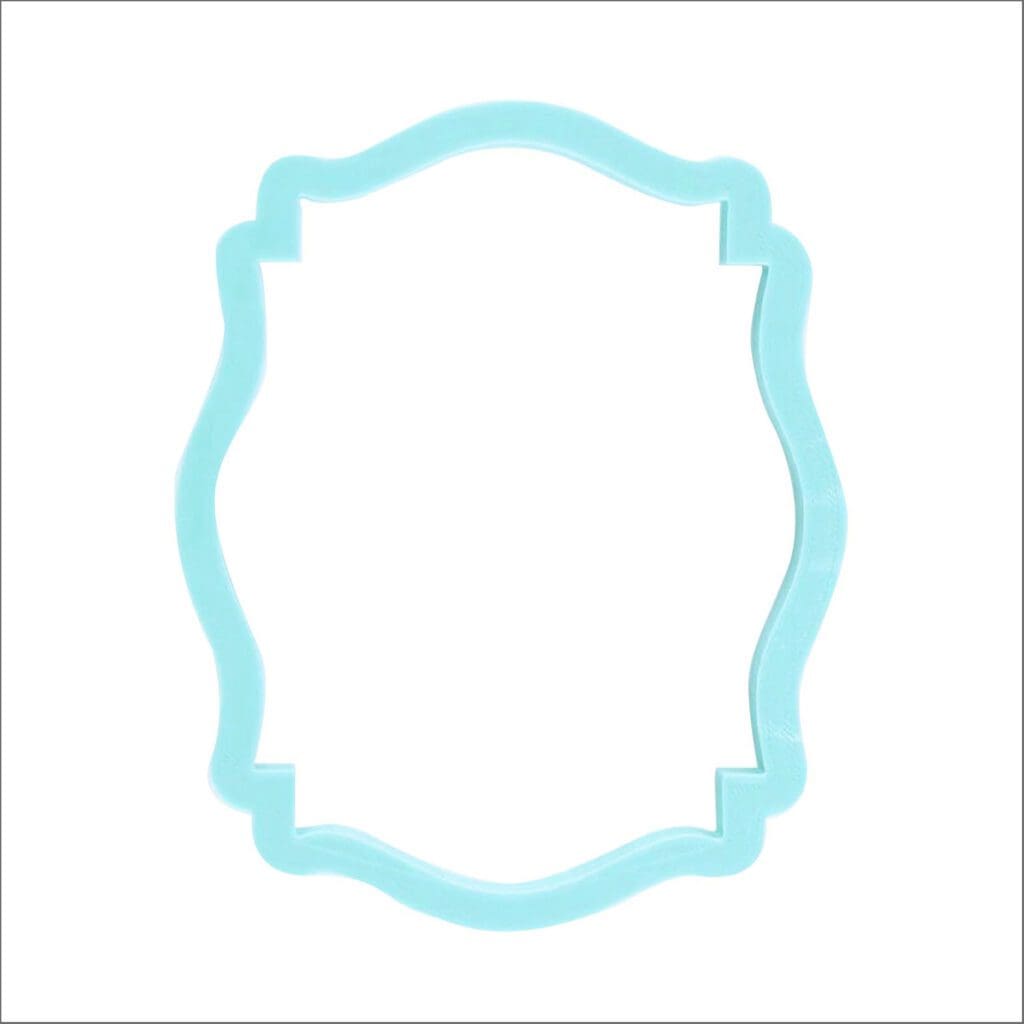
How exciting! And this month gets even more exciting because I also have a cutter release – one that is very near and dear to my heart. Called the Theron Plaque, it is named after my late father. It is uncomplicated and classically handsome – two characteristics that also applied to my dad. I paired this cutter with this release because the crocuses reminded me of the many years my father cultivated spring bulbs in the field next to our house, primarily because he knew they would bring my mom a crazy amount of joy. He was an always-present family man who was forever ready to lend a hand without ever expecting anything in return. He acted out of sheer generosity, time and time again. This cutter is but a tiny tribute to the great man that he was.
Anyway, I digress. Back to business! Naturally, this cutter frames my Vintage Bulbs Dynamic Duos™ sets perfectly, yet is also quite versatile and works wonderfully with sets of any season. It’s available in three sizes (2 3/4″, 3 1/8″, and 3 1/2″ wide); I used the largest one in the pictures throughout this post.
Before I launch into background set details and sample design photos, I am pausing here to share a time-lapsed tutorial (that shows how I airbrushed one design) and a style reel (that is loaded with other design possibilities). If you’re seeking more info about how these designs were put together, then continue reading after the videos. I share many more photos and decorating tips.
Now on to background set details!

Whoa! Is this set ever fully loaded?! I think it’s got a record number of pieces, coming in at 10! As noted earlier, the first novel thing about this set is that the background stencil is actually a two-part set consisting of some splotches on one sheet (to look like water stains on paper) and old-fashioned script lettering on a second sheet. Then, the foreground elements (four stages of emerging crocus bulbs and two butterflies) total six, which is larger than the usual number! And, you all know what more design elements mean . . . more possible cookie variations!
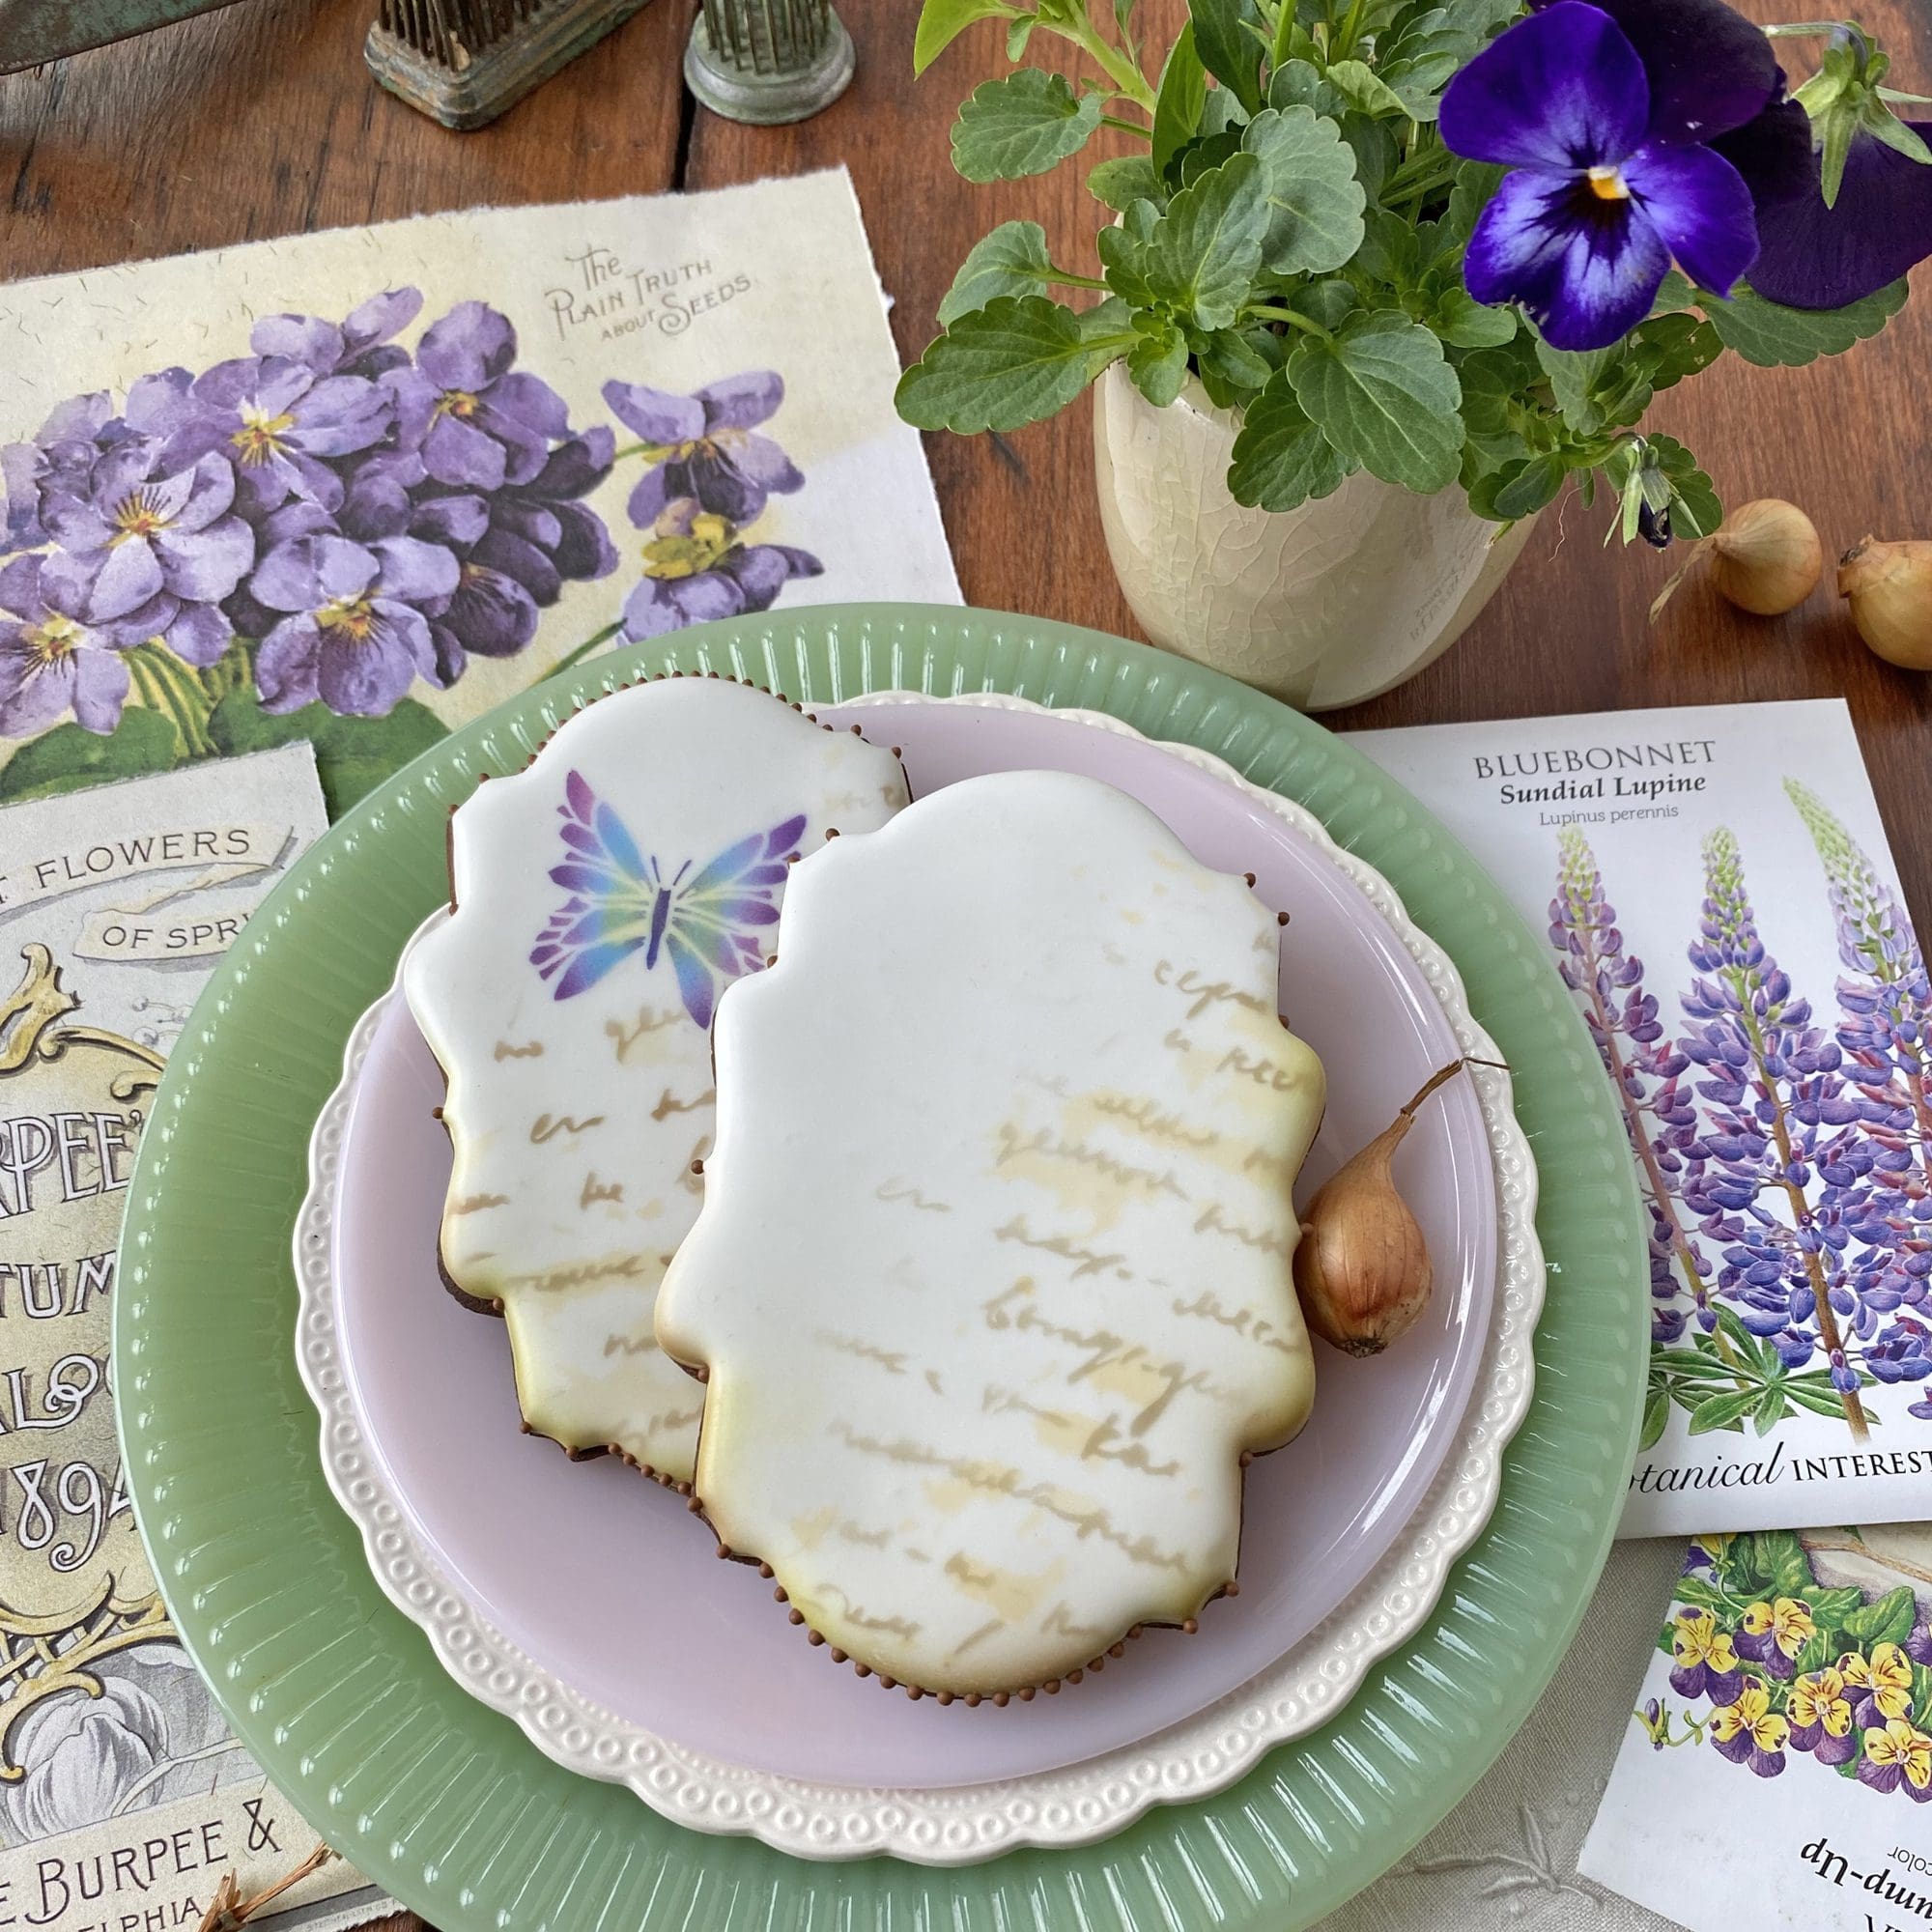
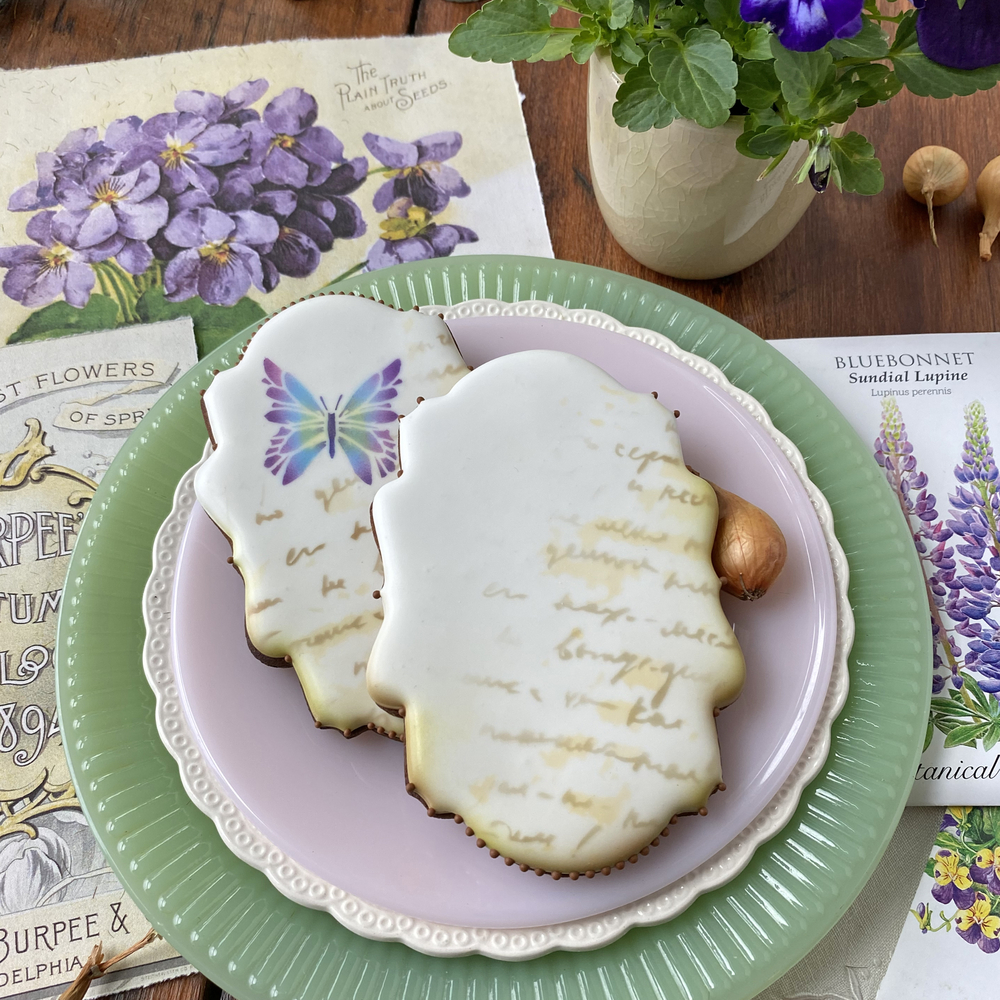
Let’s turn now to one of the simplest design possibilities, which involves using only the two-part background stencil:
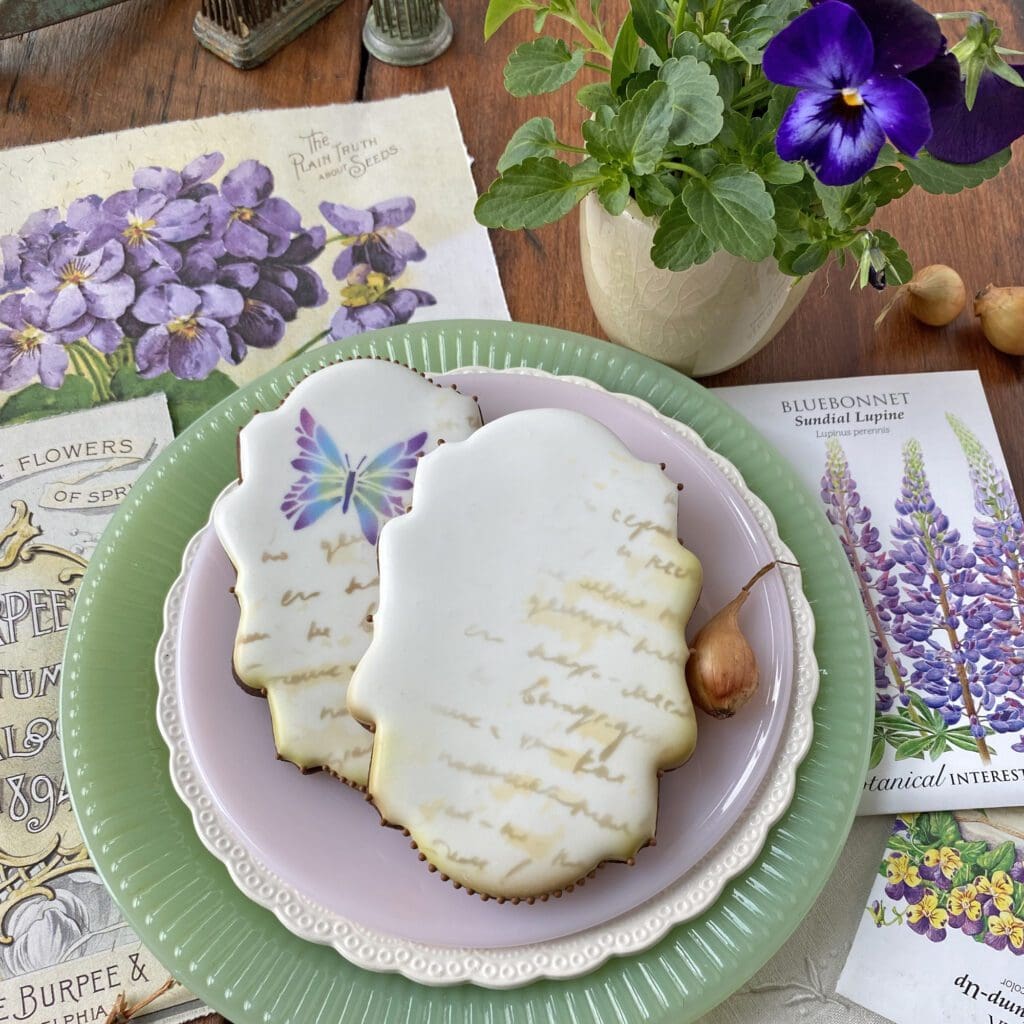
And a closer look . . .
The lettering is purposely soft-edged and curvy to remain visually distinct from the more defined lettering in the message and frame set. I also airbrushed in very light shades of AmeriMist Gold (for the splotches) and Chefmaster Harvest Brown (for the lettering), as I knew I’d be laying crocuses and butterflies on top. While I wanted the look to be eclectic, like the pages of an old gardening catalog or the Farmers’ Almanac, I didn’t want the foreground elements to compete with the background script (hence the soft colors here).
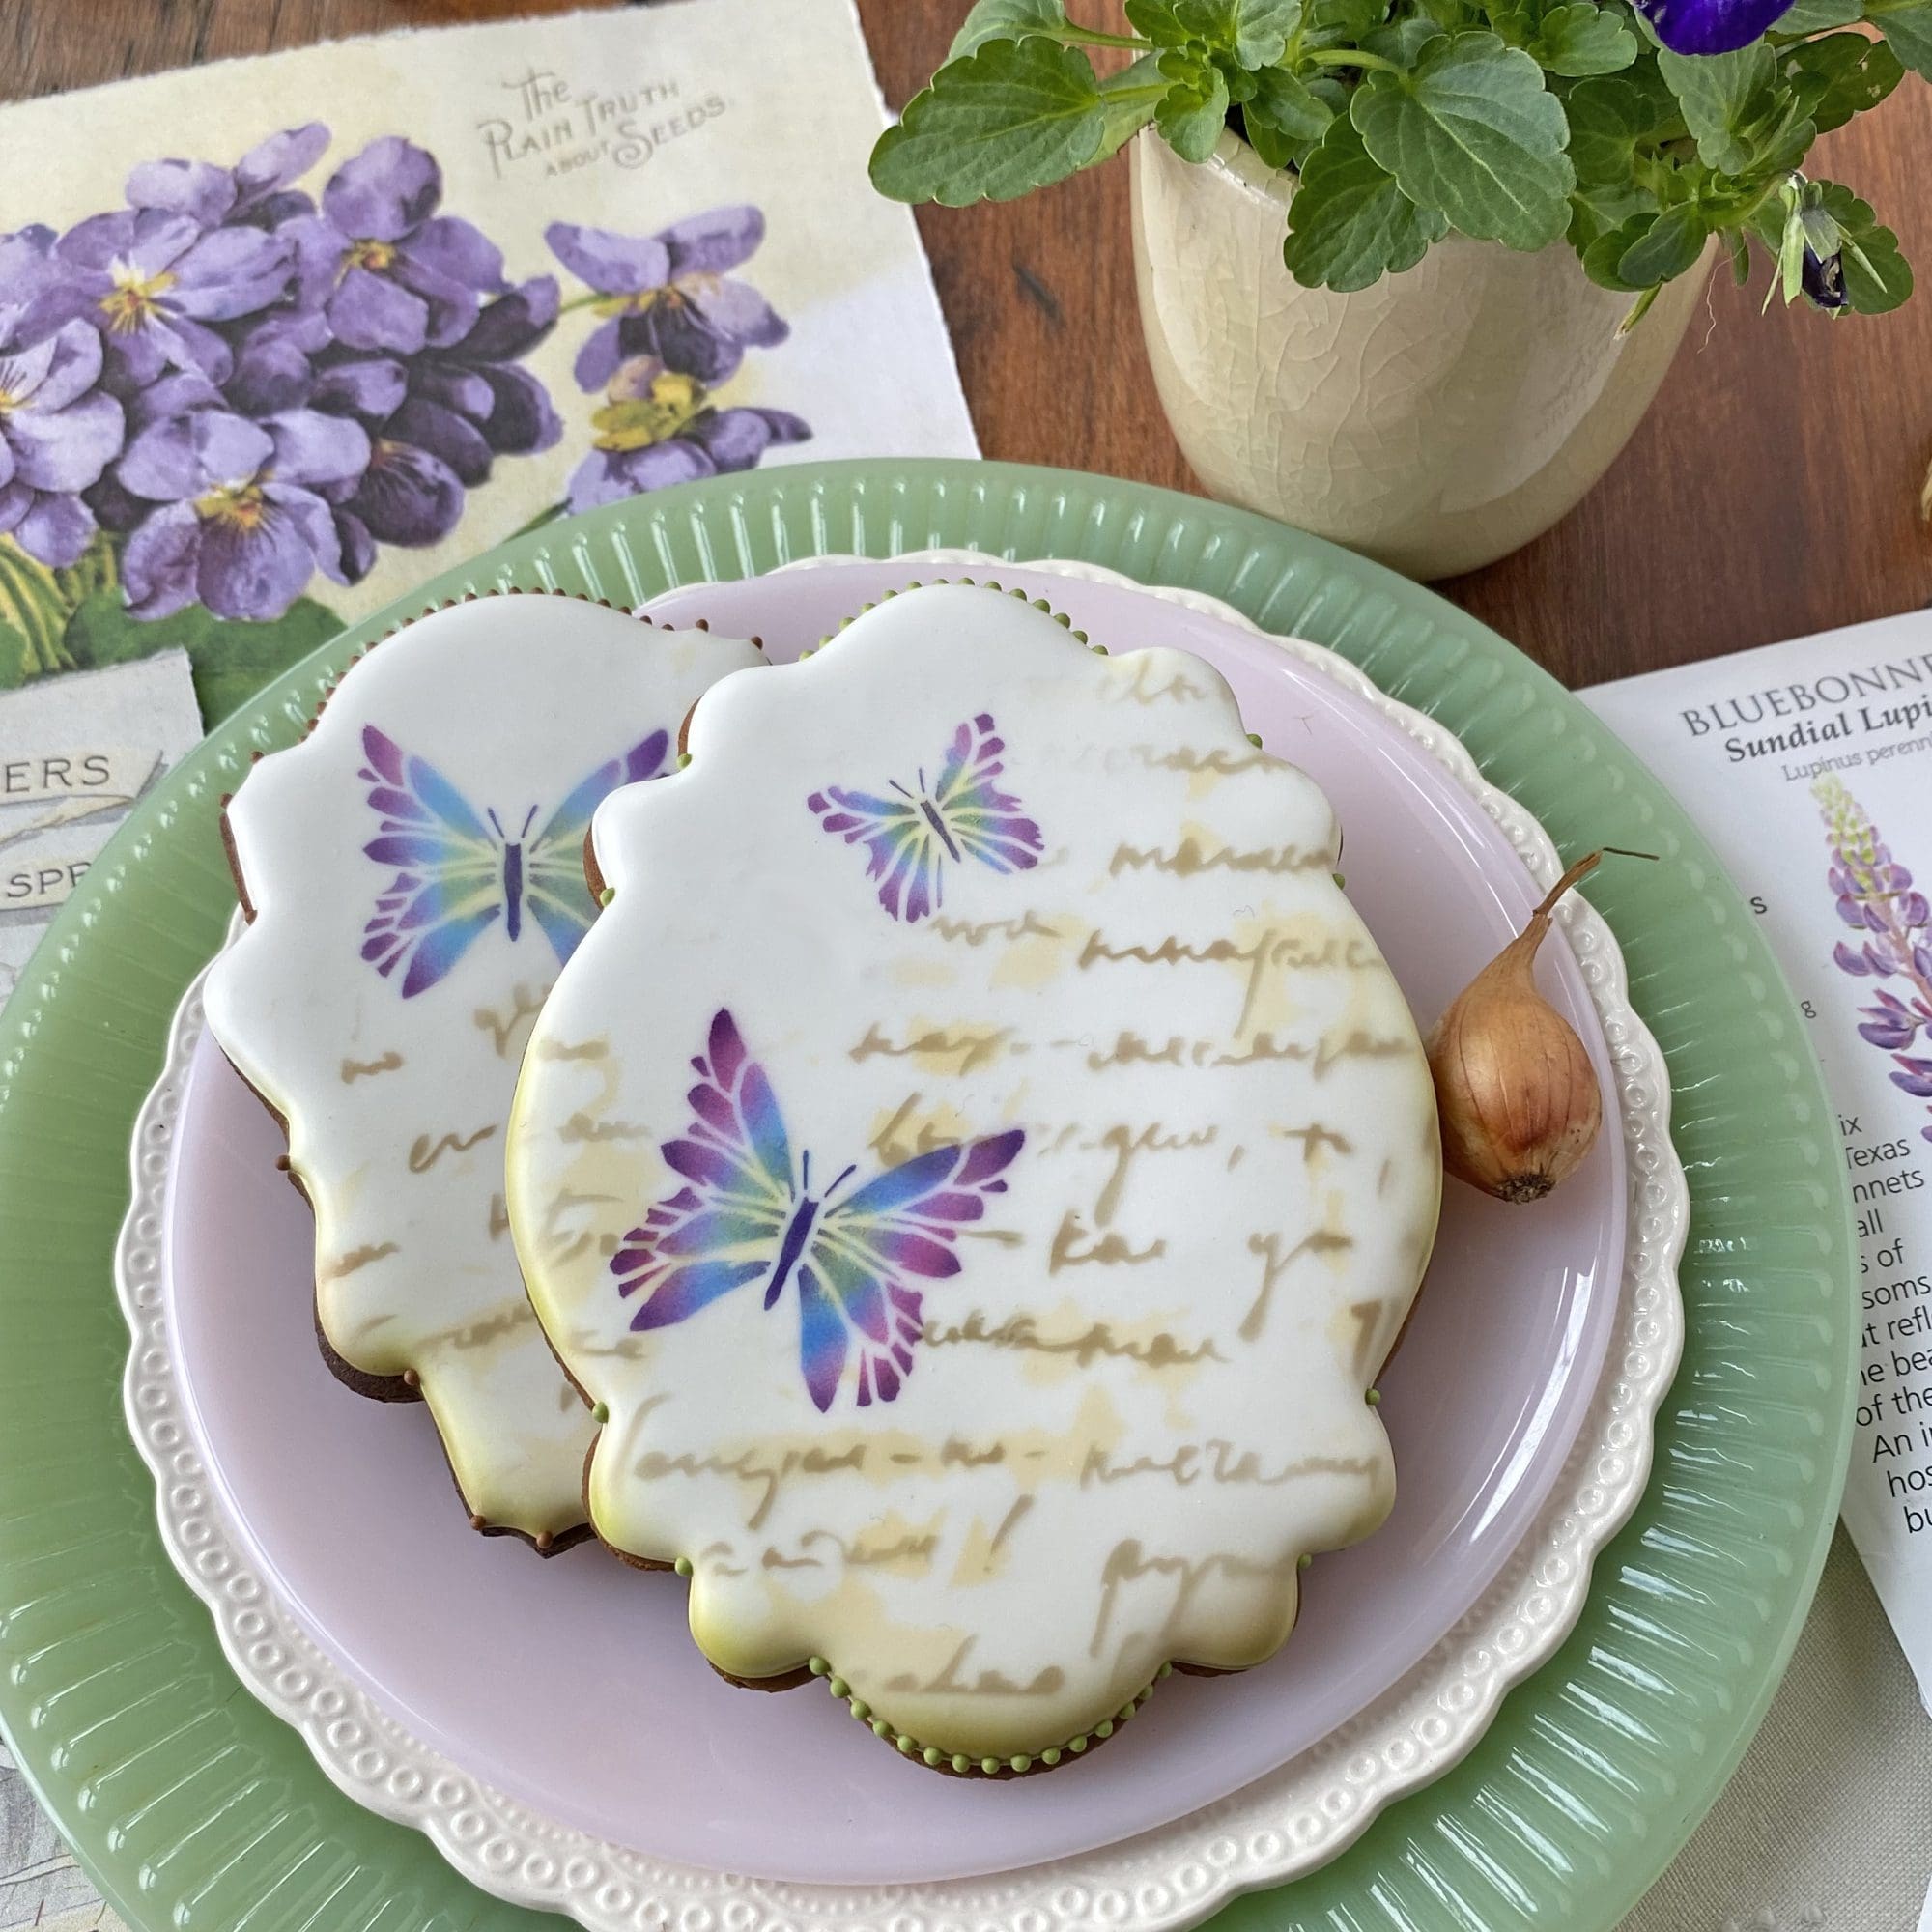
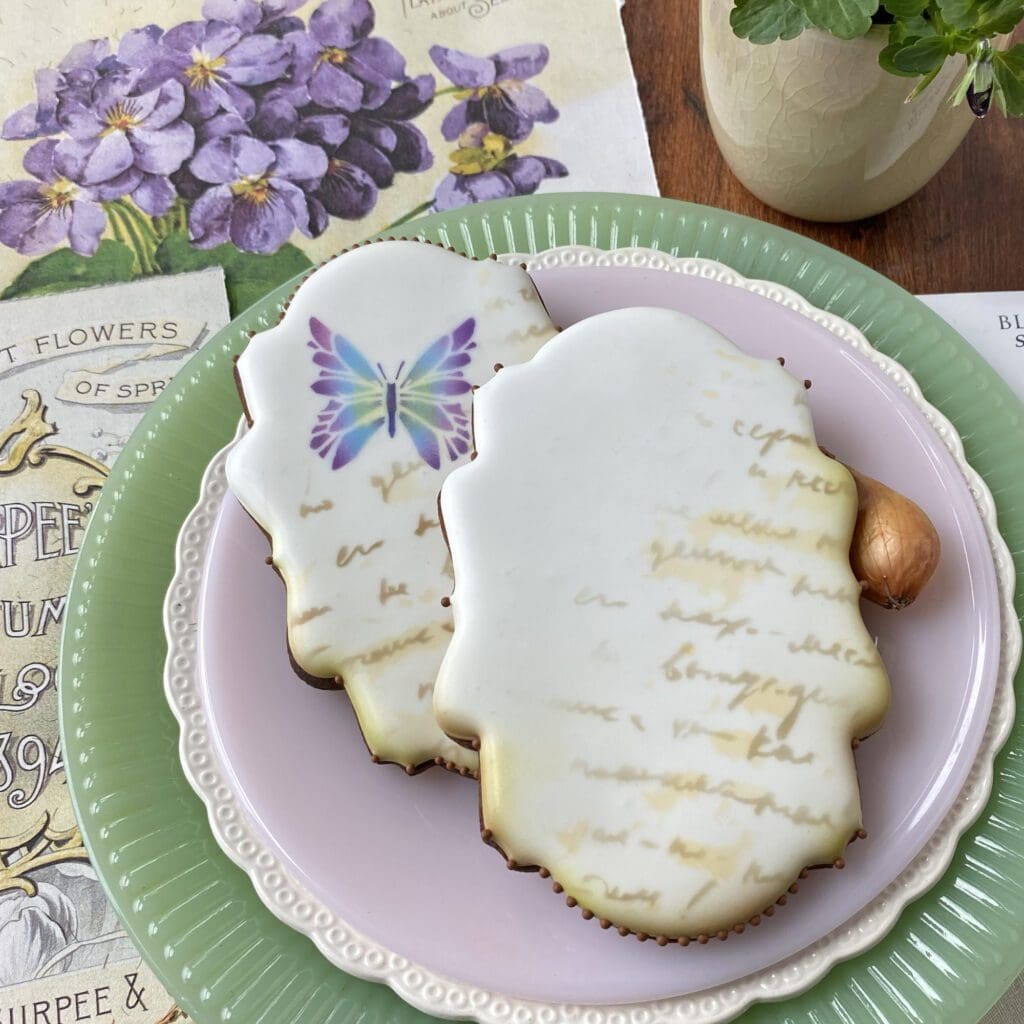
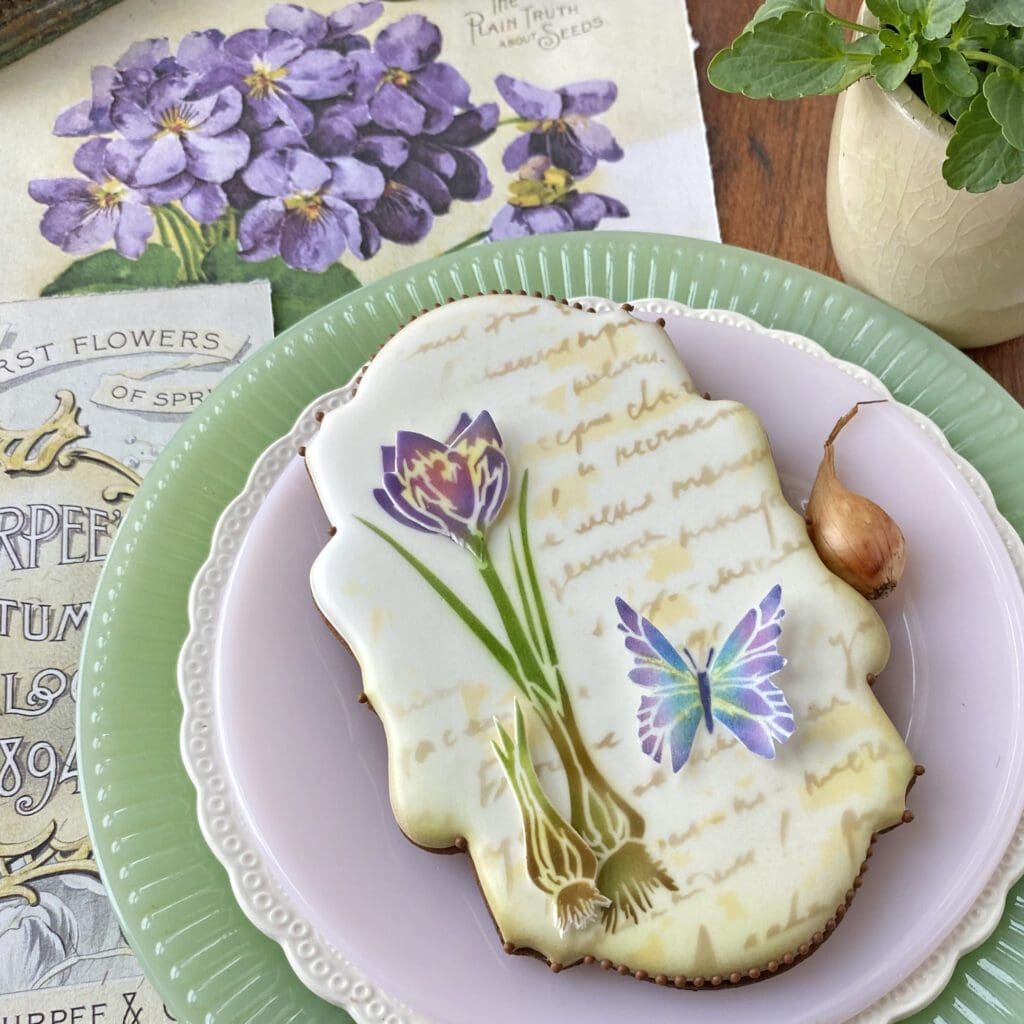
Okay, you all know I’m a more-is-more person, so let’s start layering on the foreground elements, starting first with a big butterfly . . .
And because two butterflies are better than one . . .

Note that the butterflies were airbrushed in three colors (Spectrum Flow Sky Blue and AmeriMist Electric Purple and Violet). The yellow in their centers is compressed petal dust, applied with a dry paintbrush. I could have airbrushed the yellow, freestyle without a stencil, but it’s hard to control color saturation when airbrushing at close range, which would need to be done in that small area.
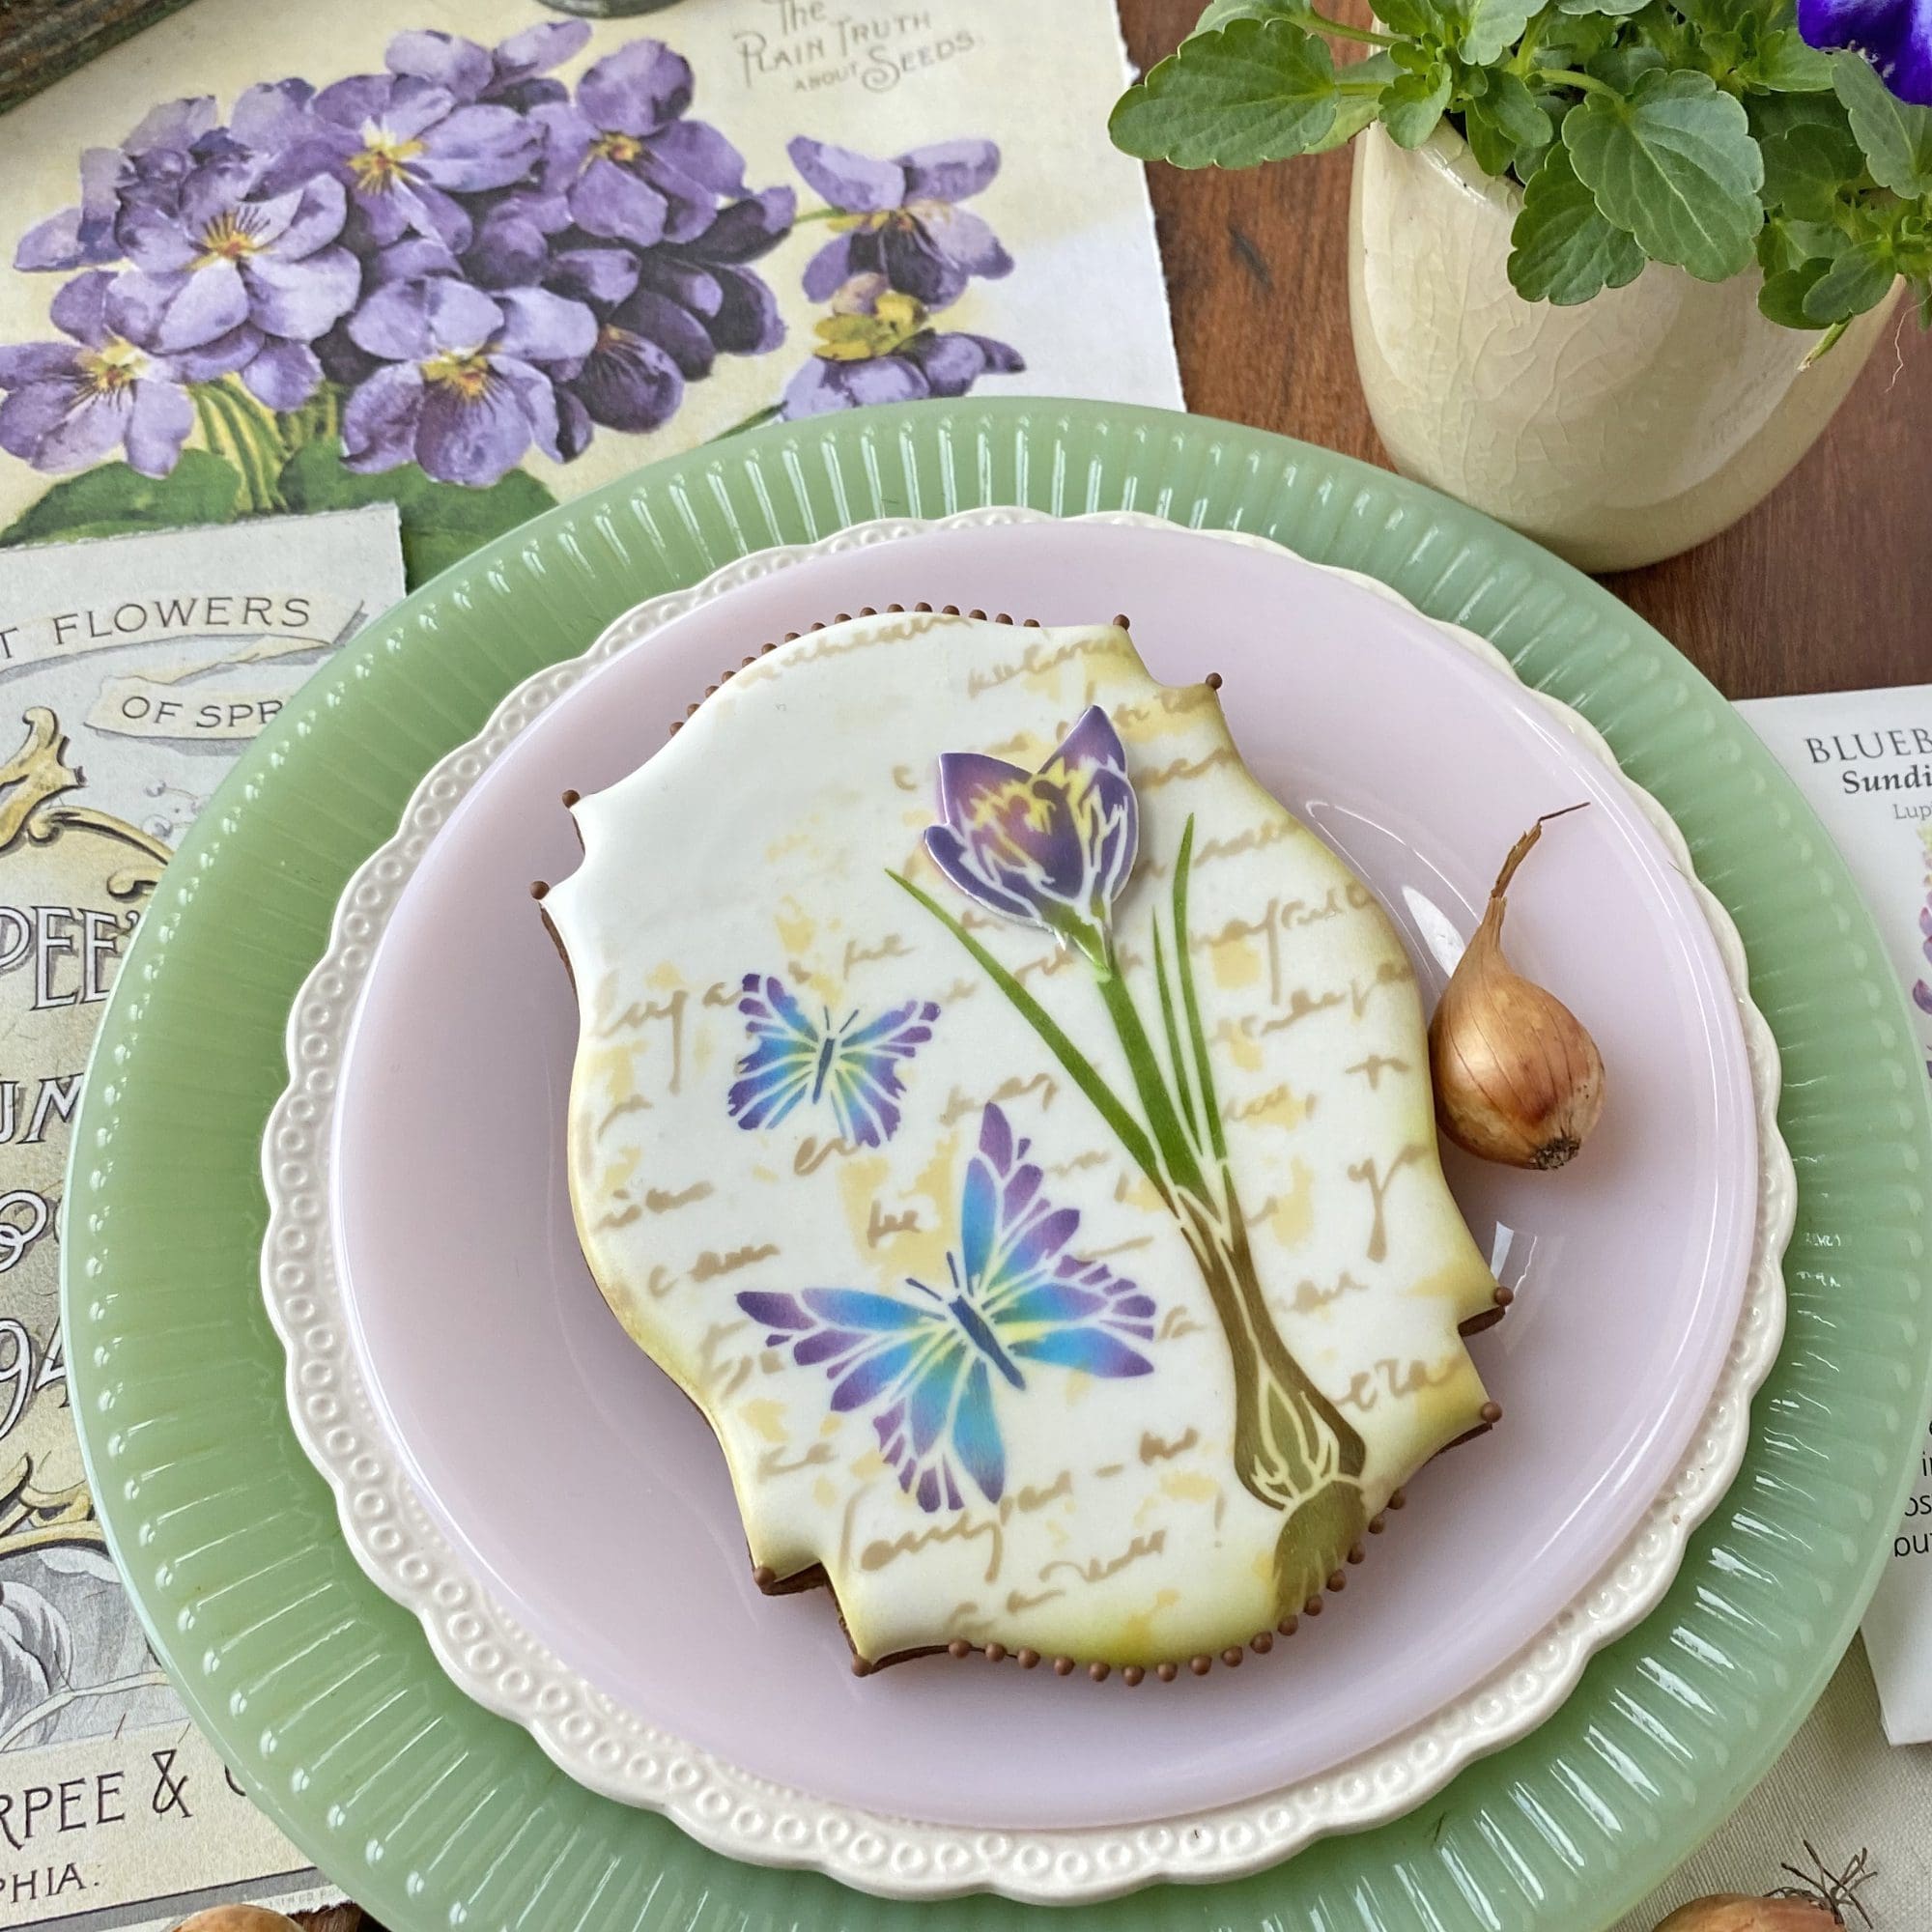
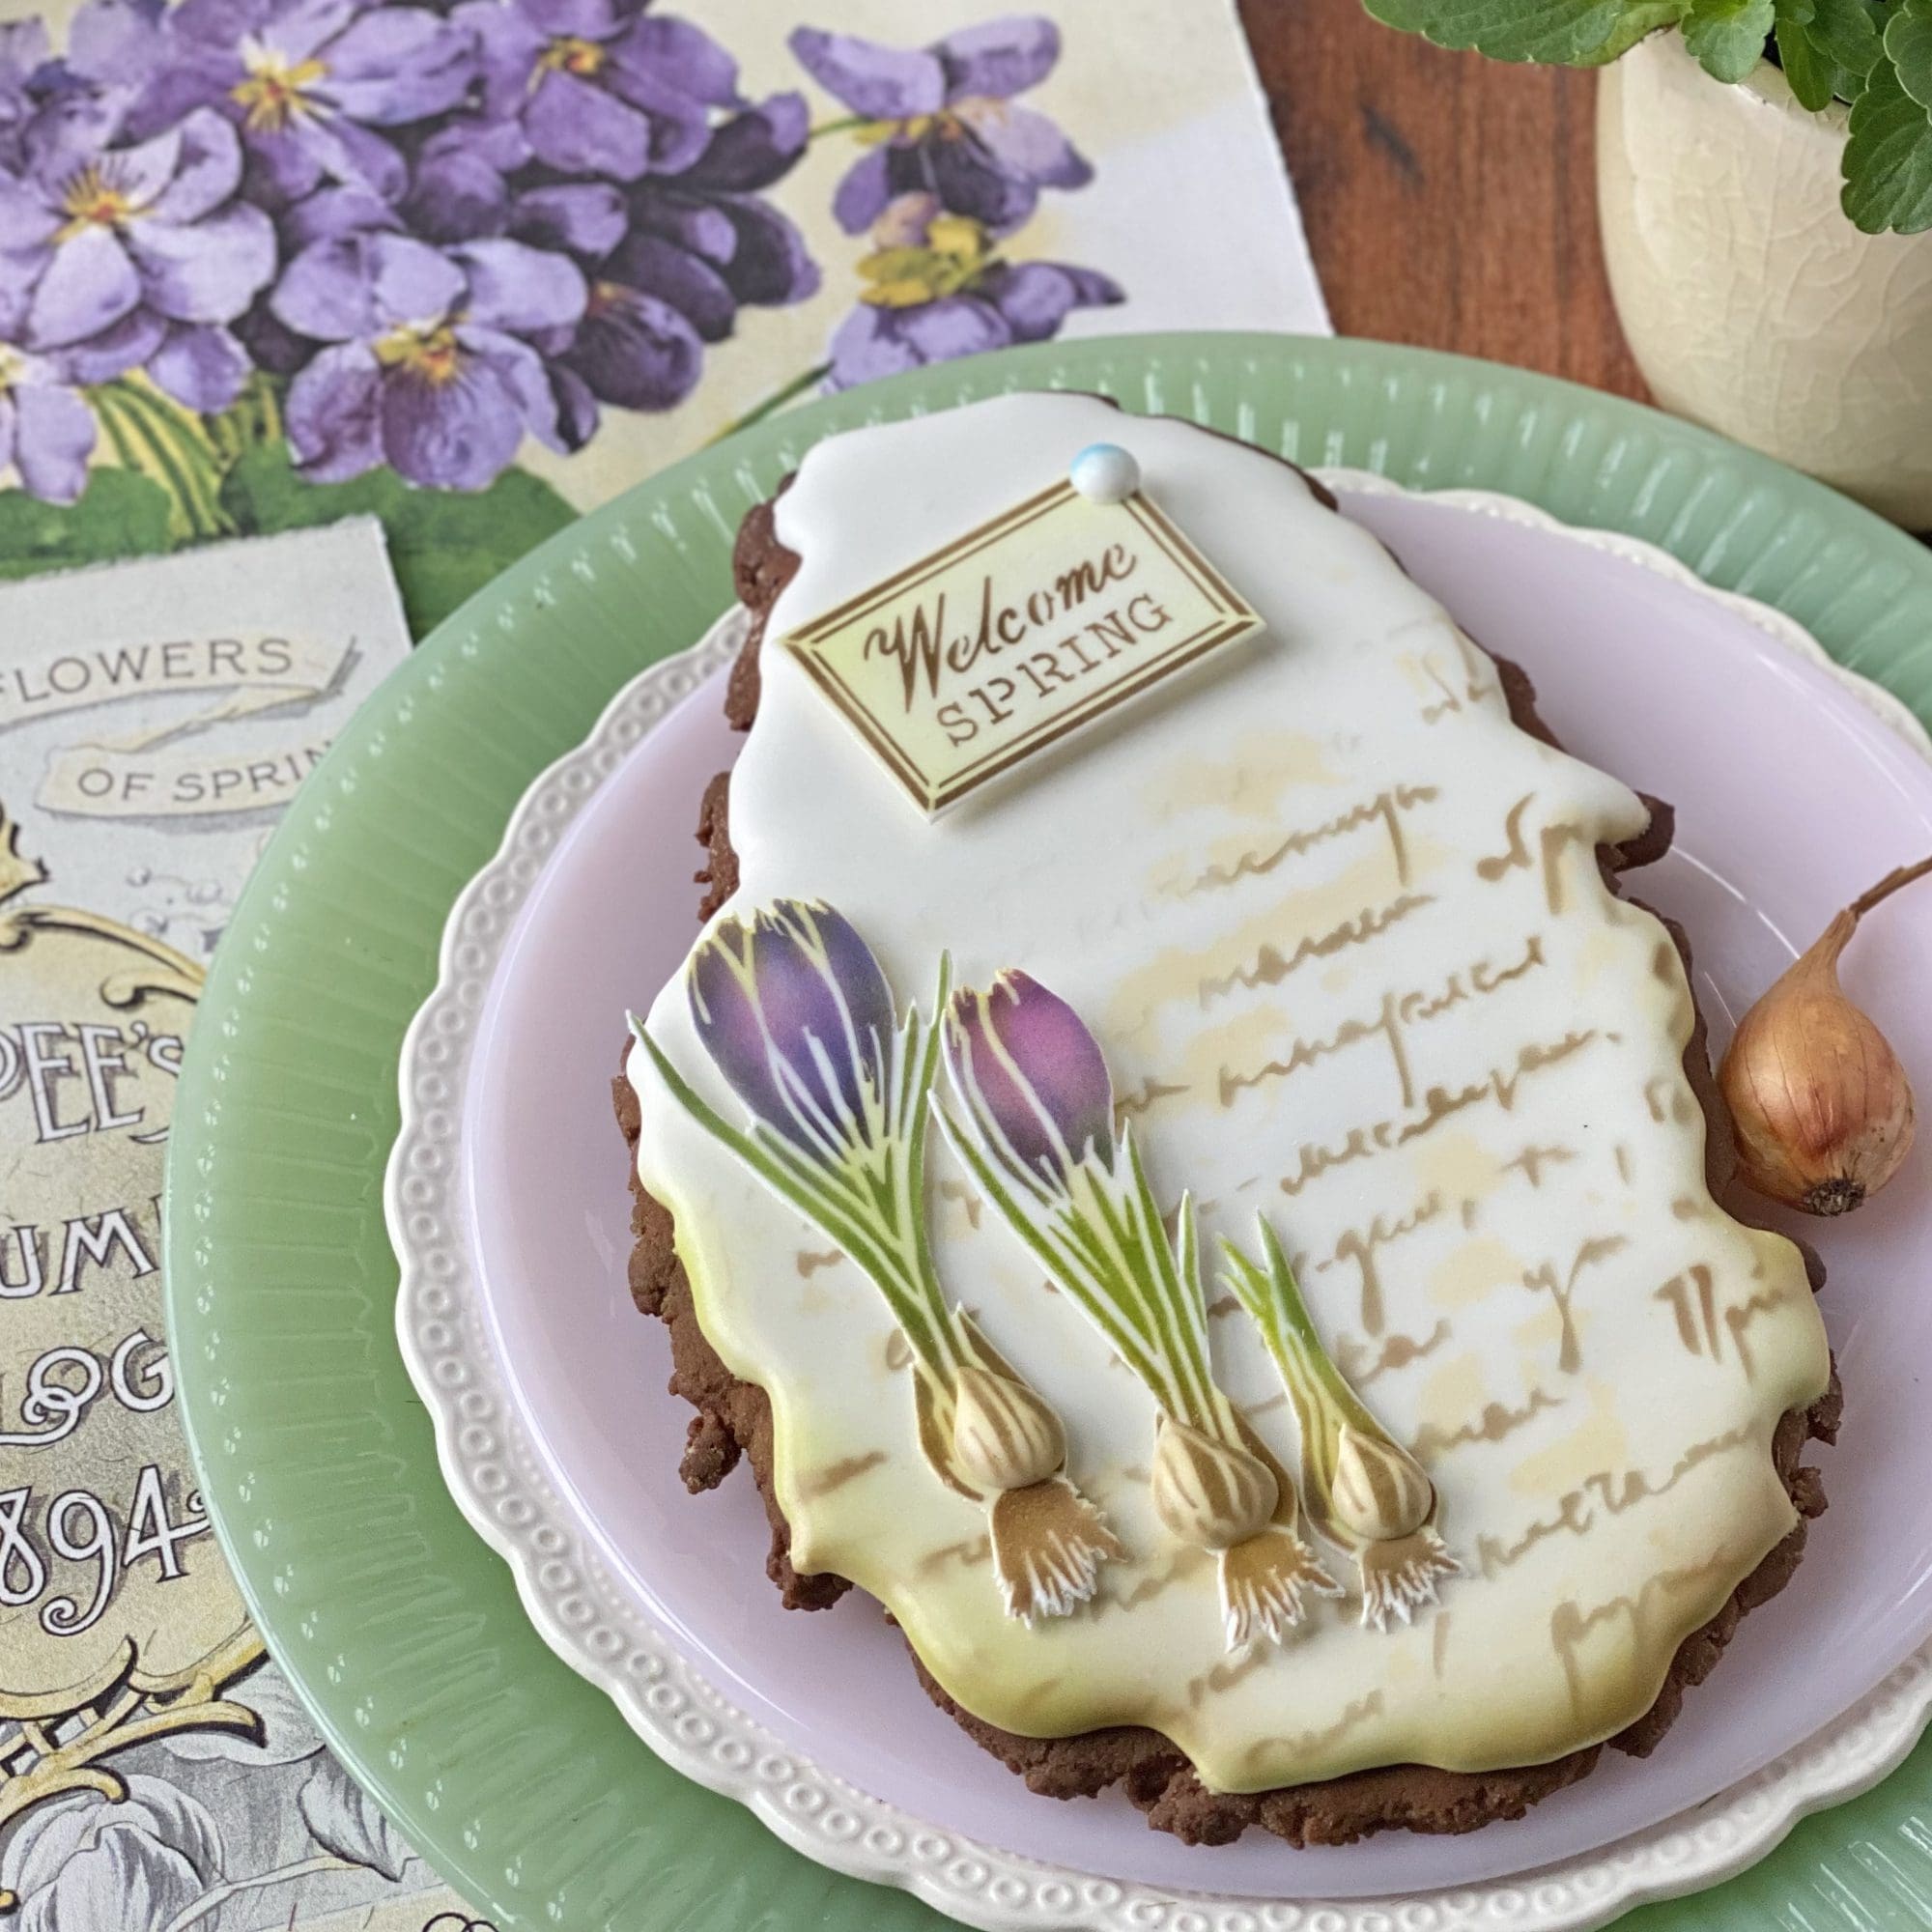
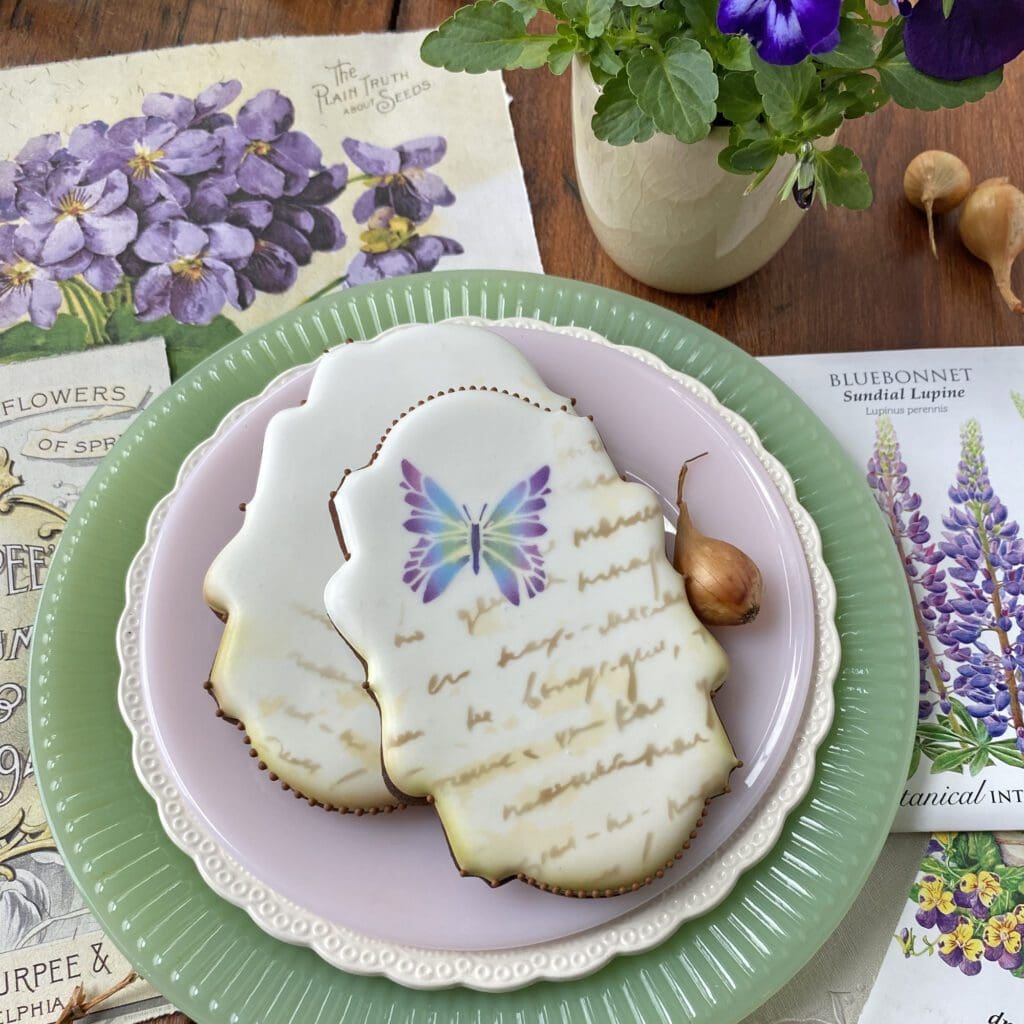
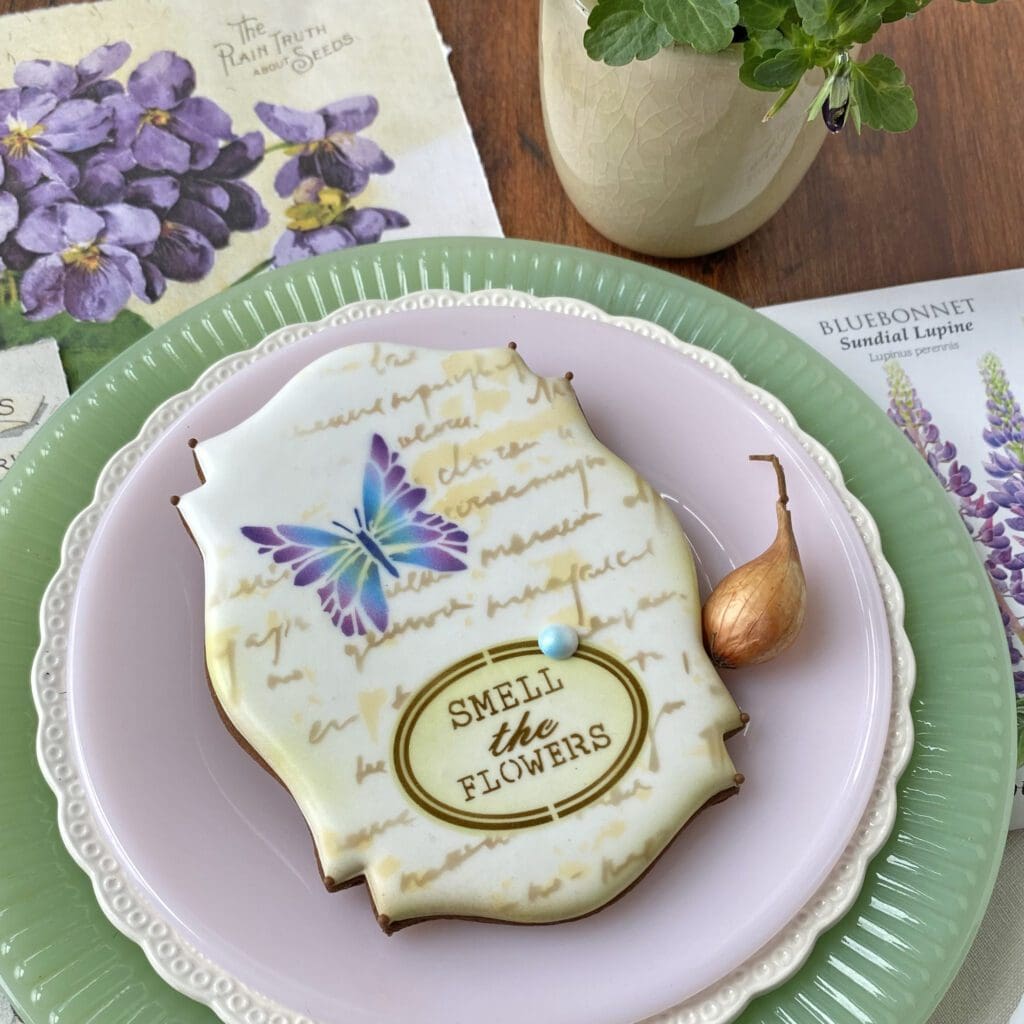
Okay, enough airbrushing details for now. It’s time to toss a crocus into the mix, and to do so on a cookie made with my new Theron Plaque cutter!
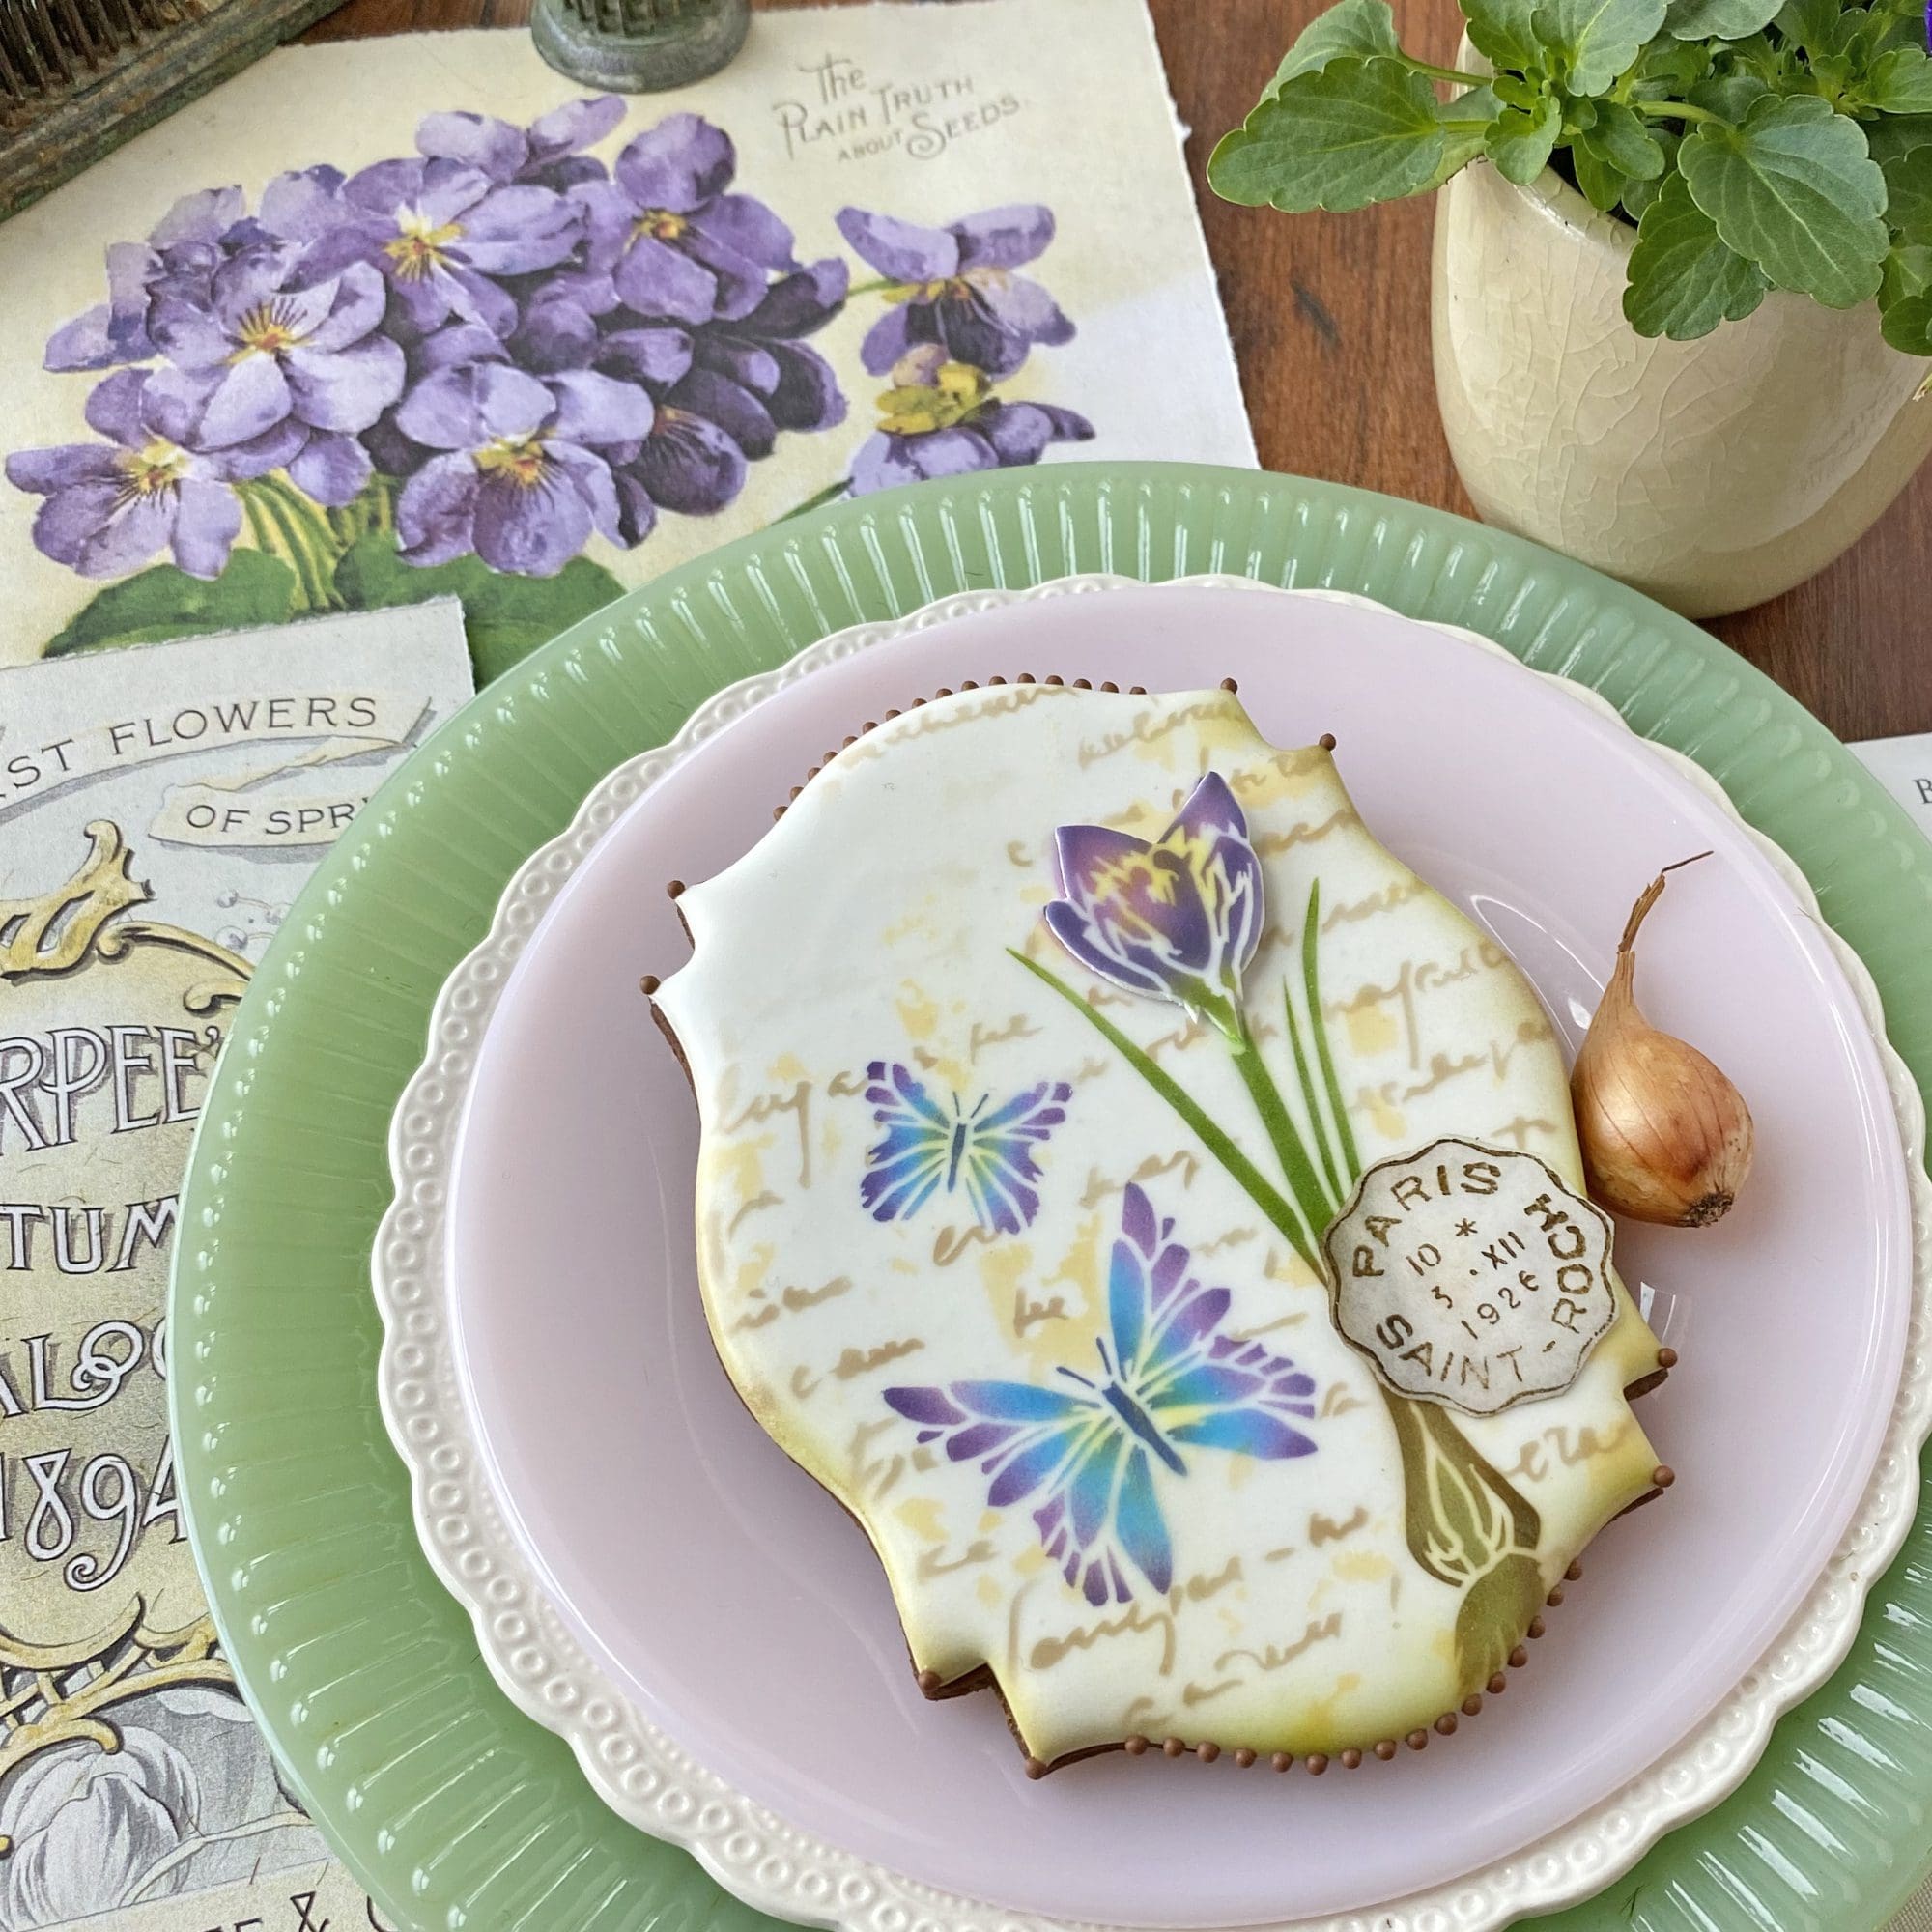
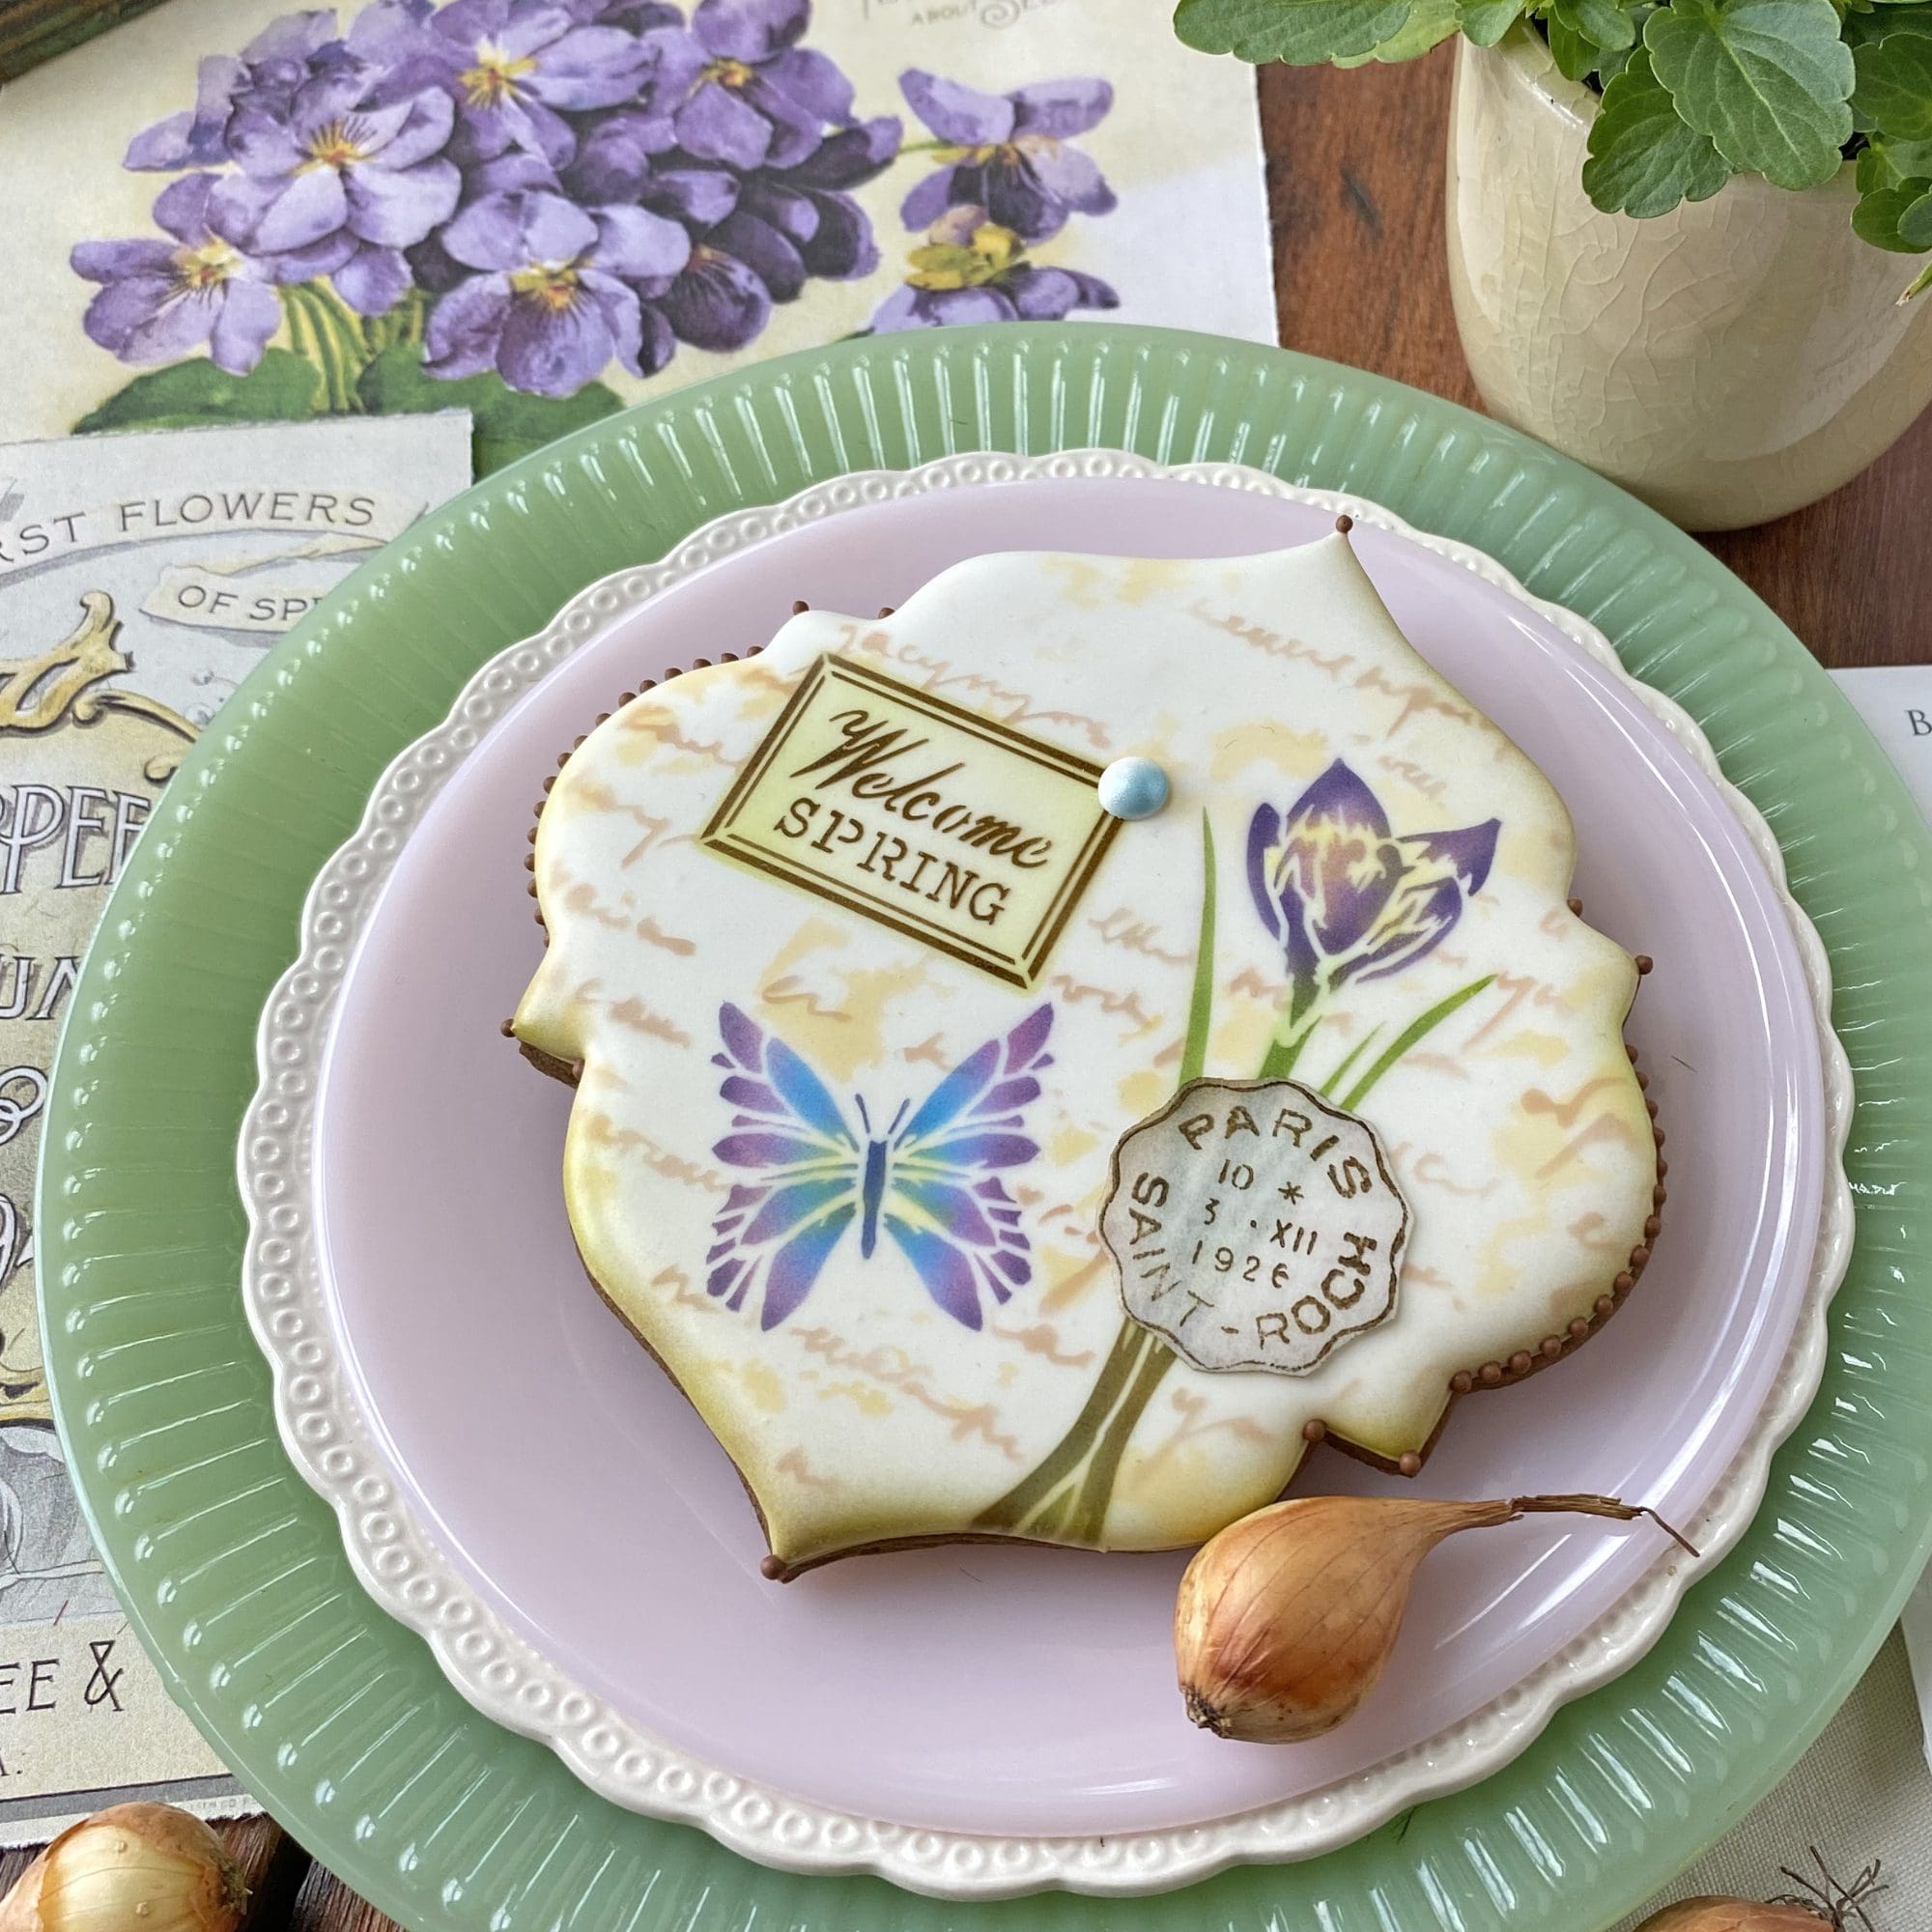
A rubber-stamped wafer paper postage stamp looks cool on it too!

Note that this stamp is not part of this month’s stencil sets, though, in retrospect, my Vintage Bon Voyage Prettier Plaques™ set has some very similar elements that I could have used.
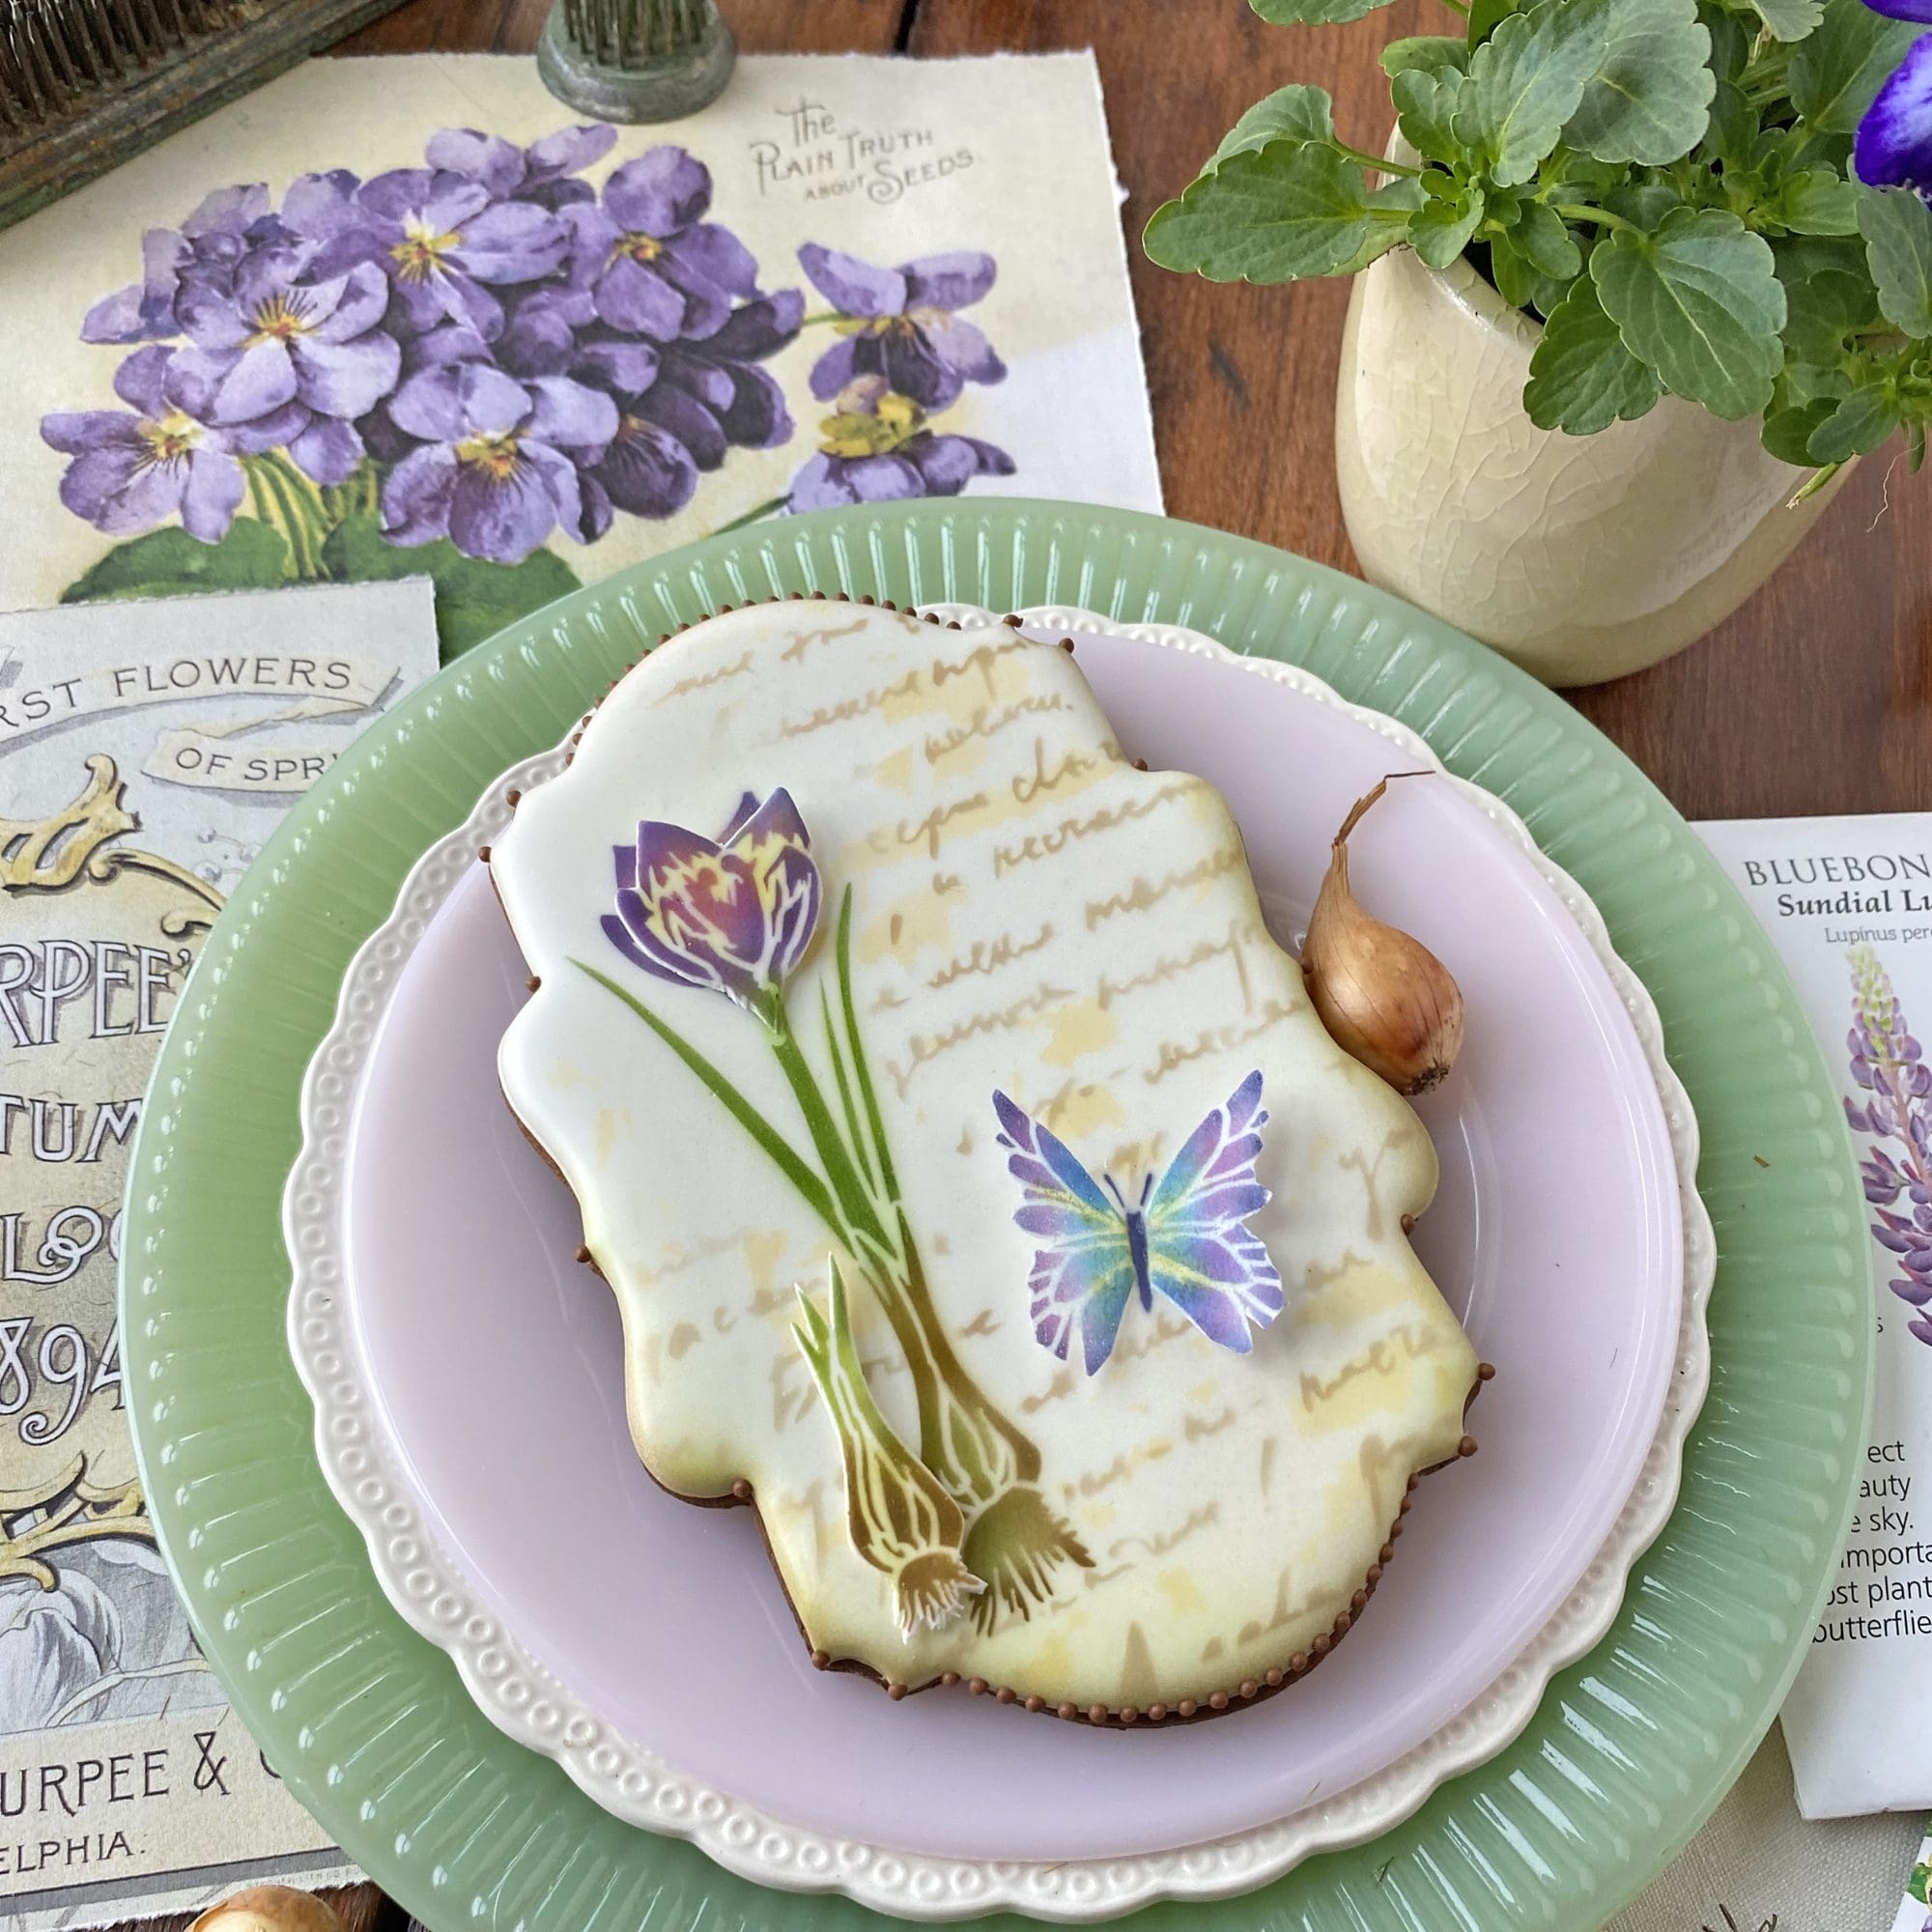
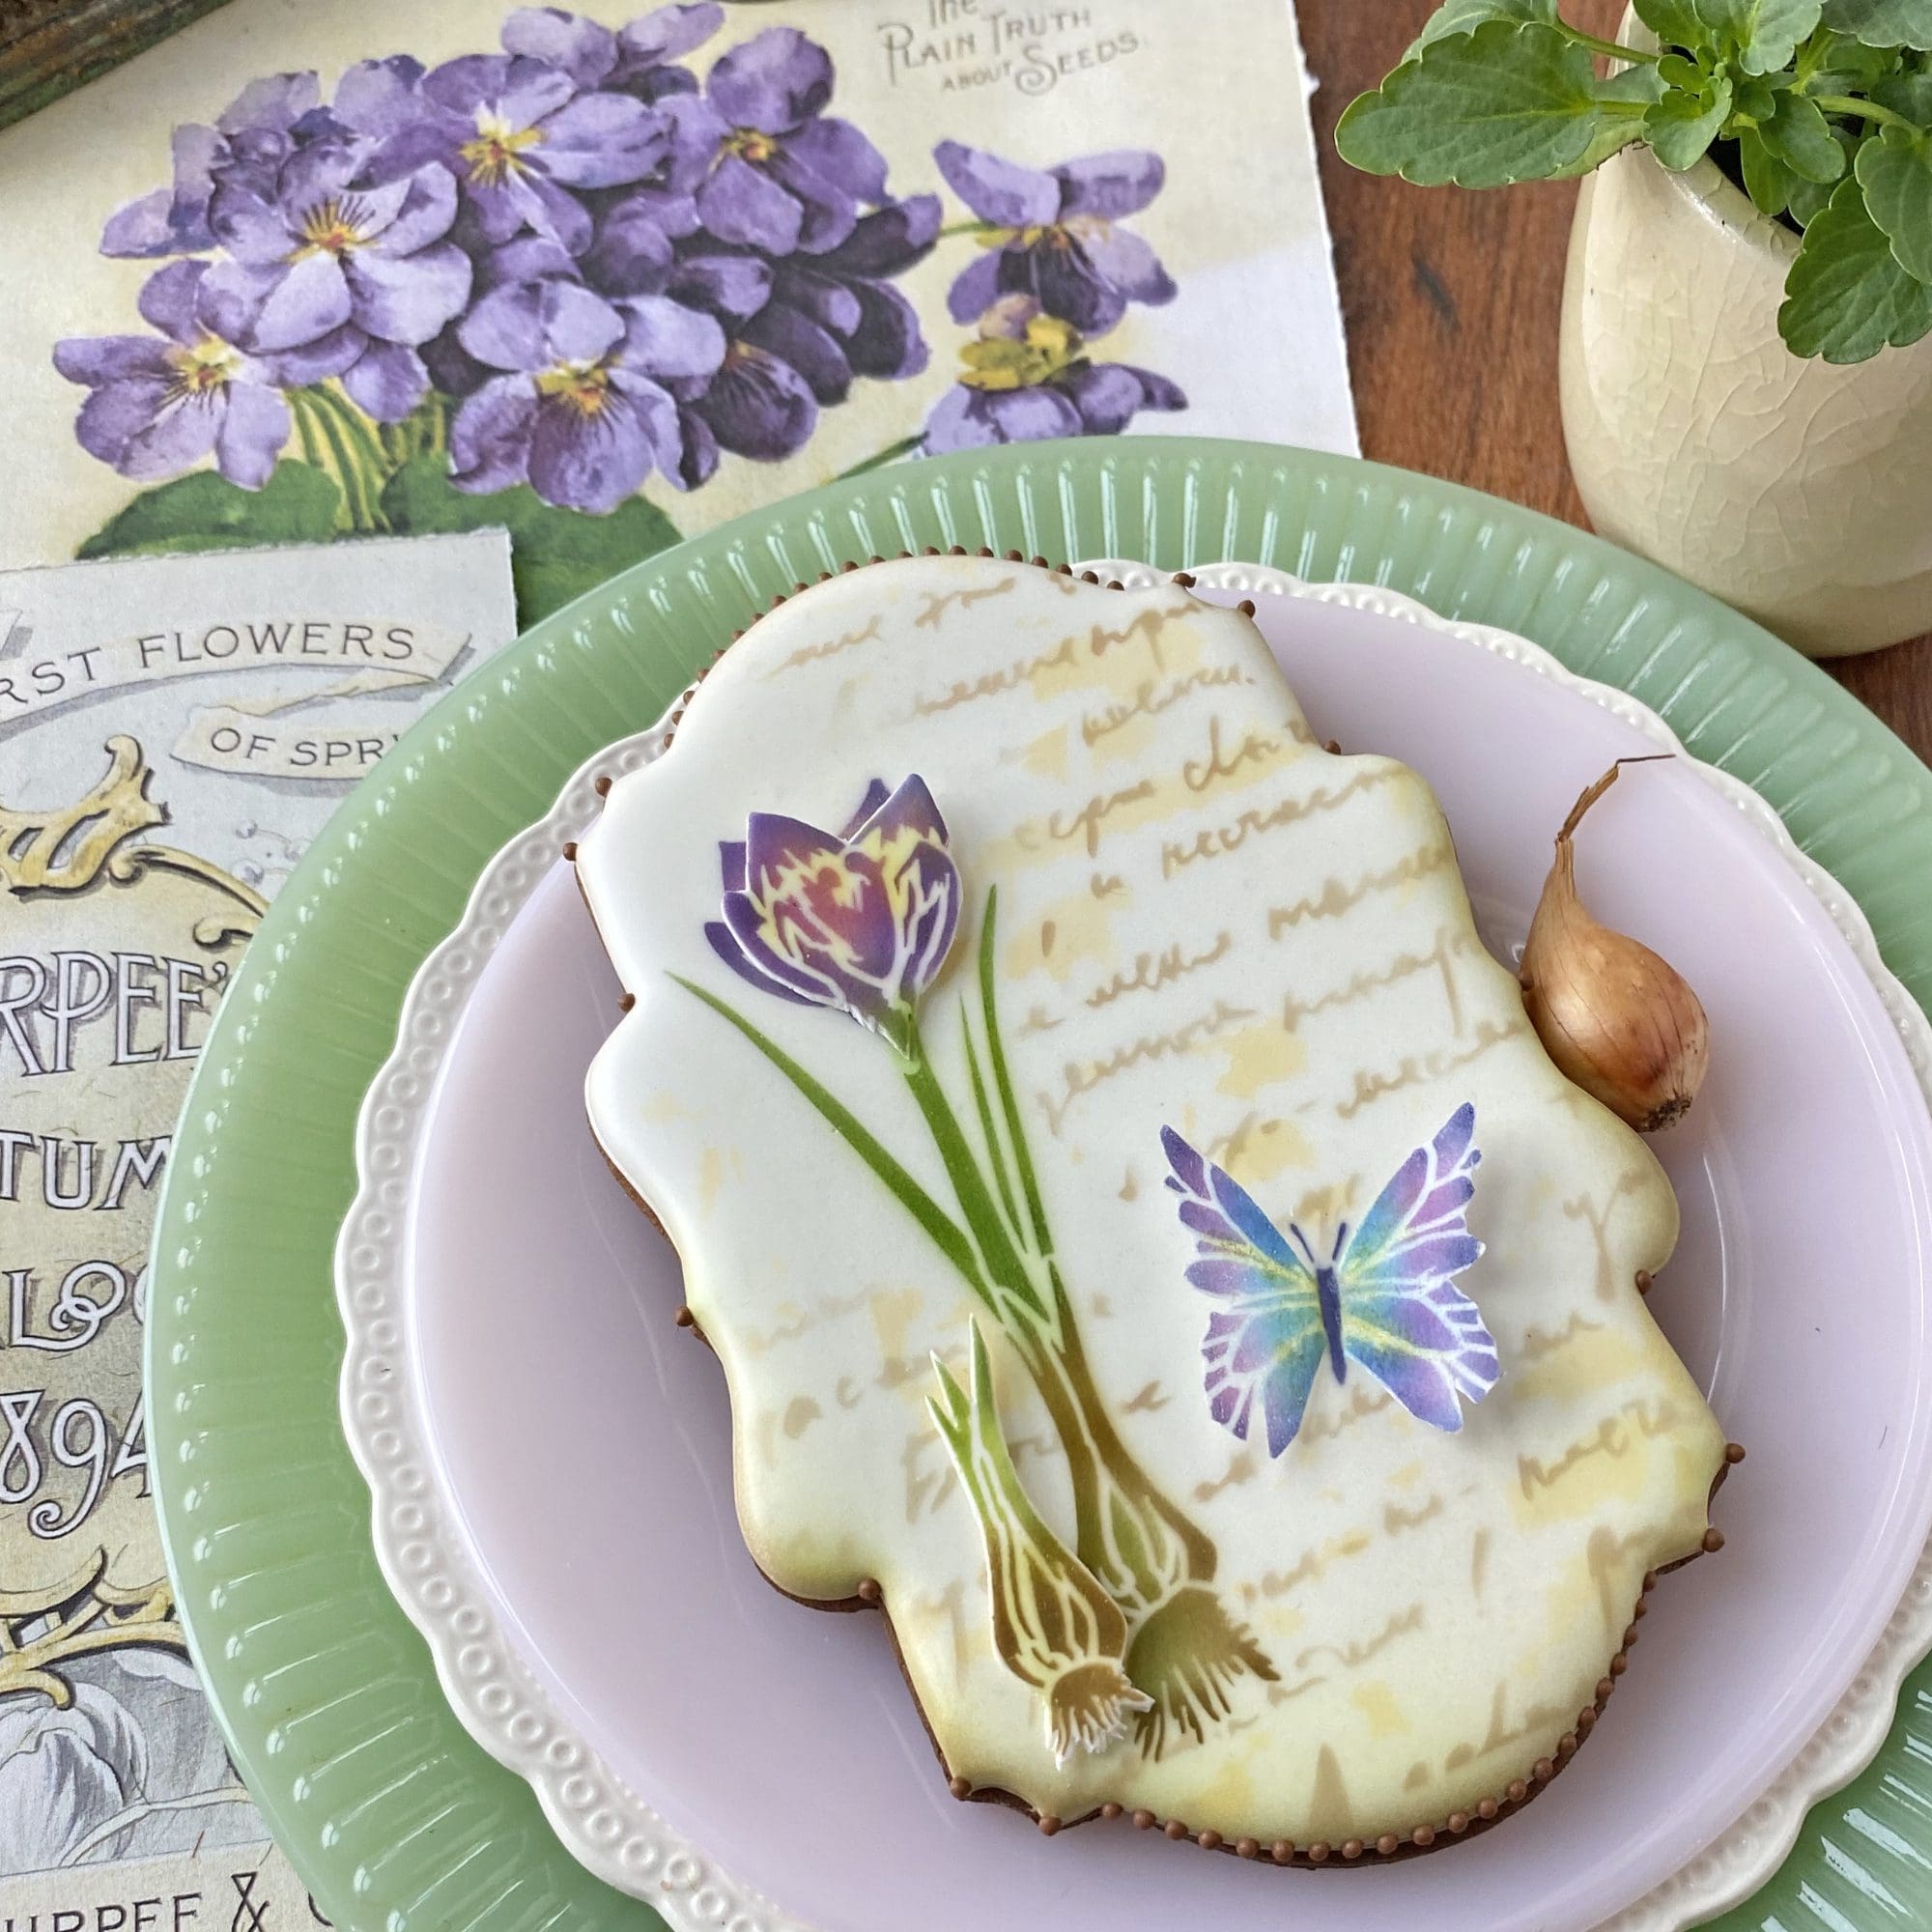
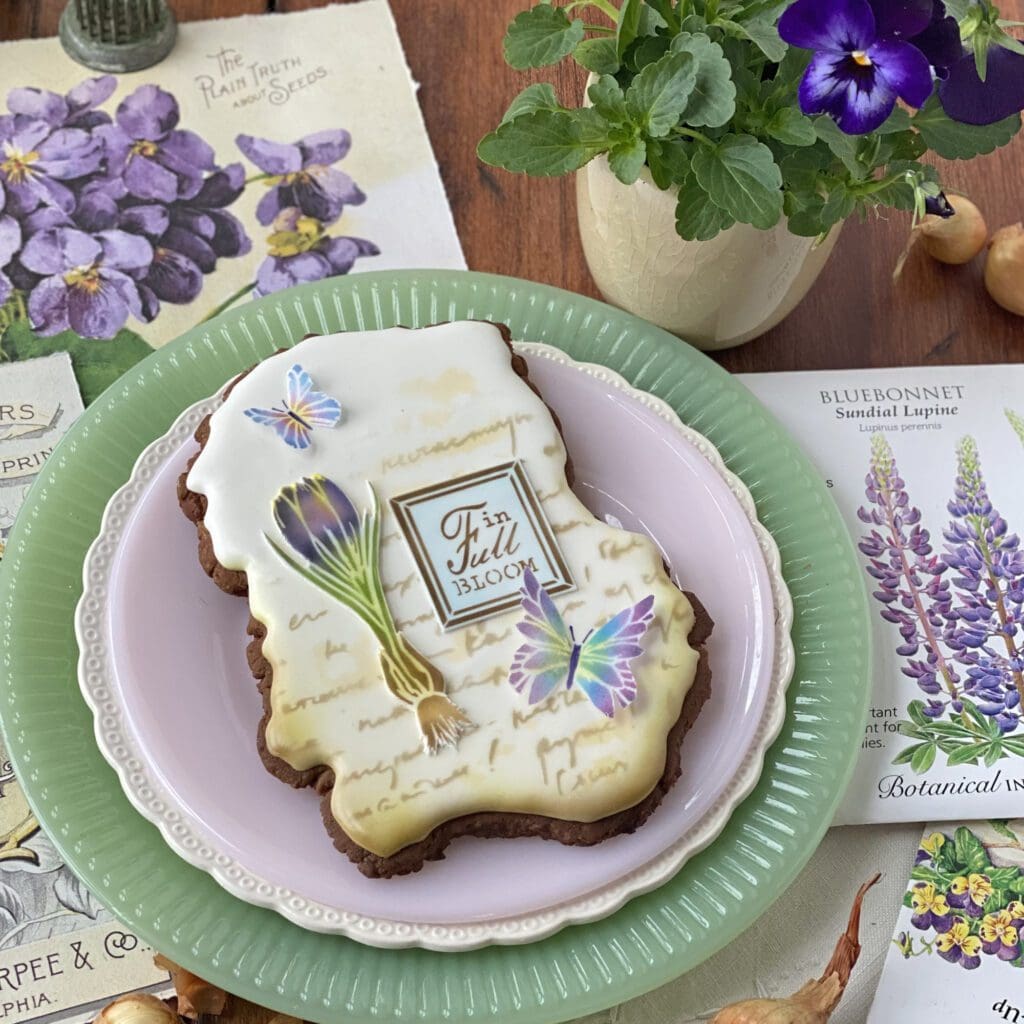
Zooming in, you can hopefully see the construction of the crocus a bit more clearly. I airbrushed it directly on the cookie, but to add more dimension, I also created a fondant appliqué of just the flower and attached it to the top of the stem. Again, the yellow in between the stenciled areas is dusted. And, I would be remiss if I didn’t point out how stunning it all looks on my new cutter. ![]()

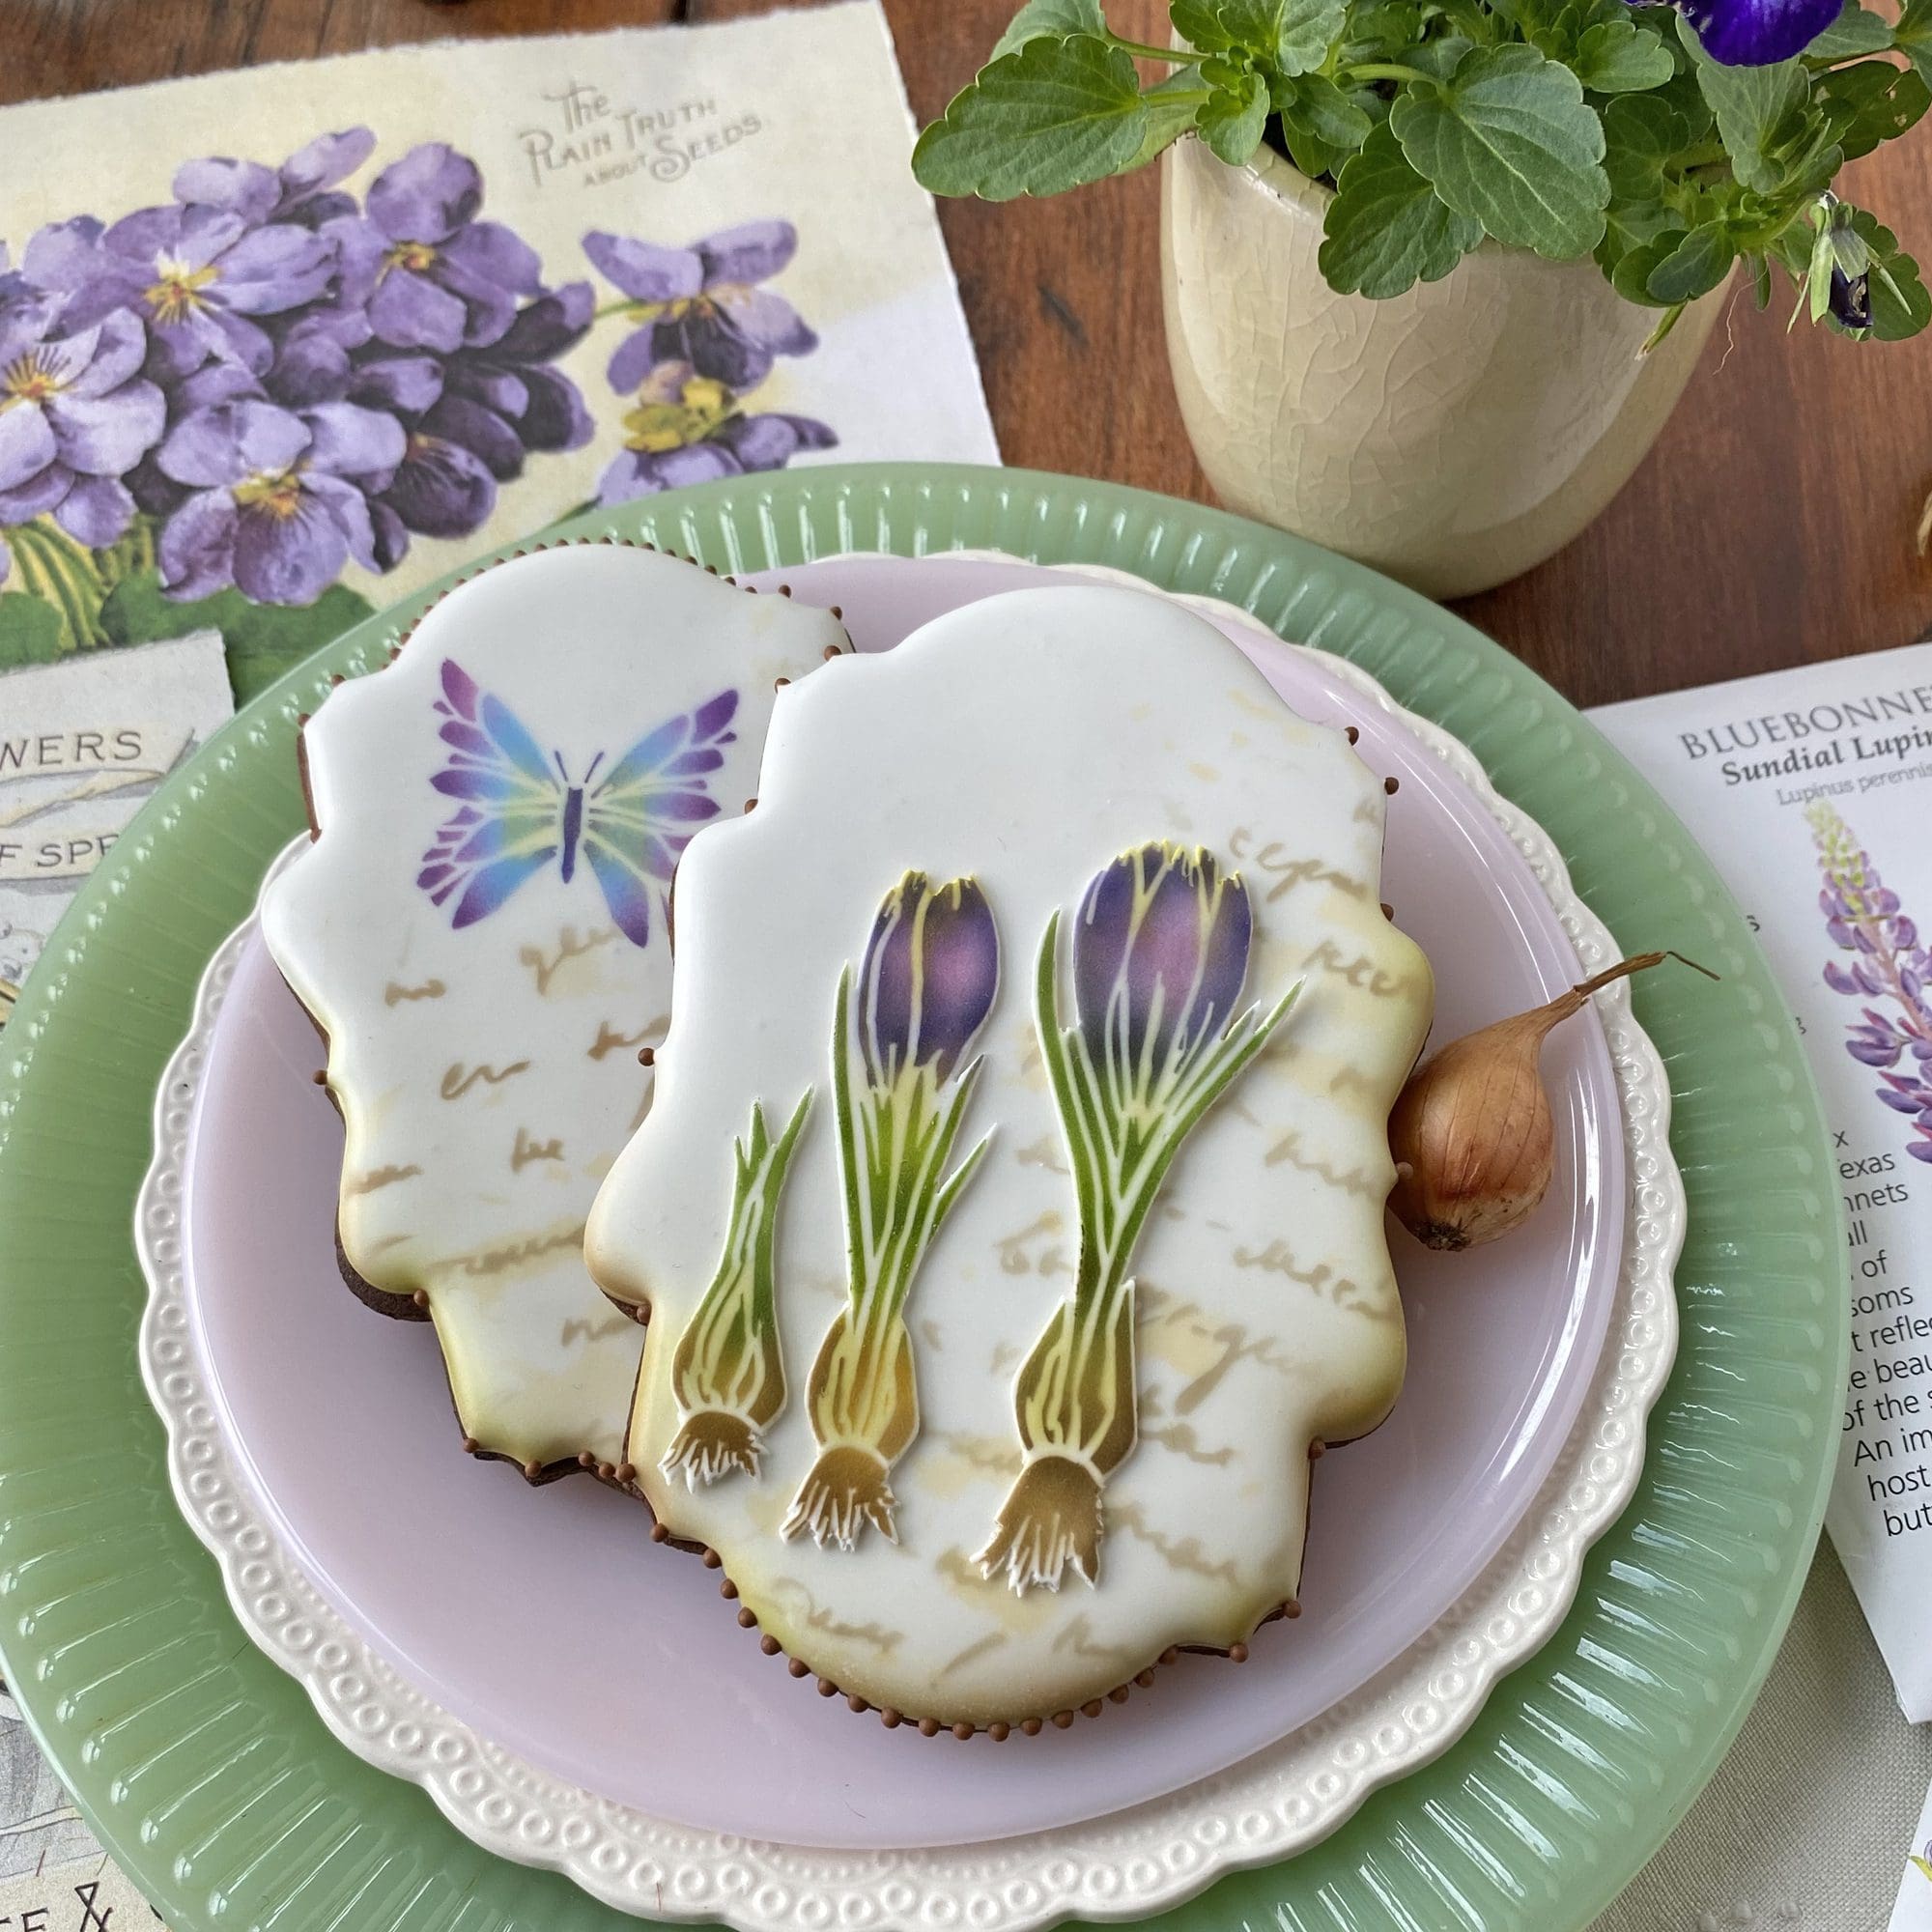
Below is a cookie with a smaller crocus that was directly airbrushed from bottom to top, and which has no added fondant. I provide this example as a contrast to the more dimensional look directly above.
Of course, the entirety of any of the crocuses (not just their flowers) can be made as a fondant appliqué, which is precisely what I did to create this progression of growing bulbs. Once cut out of the fondant, the appliqués were allowed to dry and then attached to the script-only cookie that I shared at the very start of this section.

Here’s another directly airbrushed number with no dimensional elements . . .

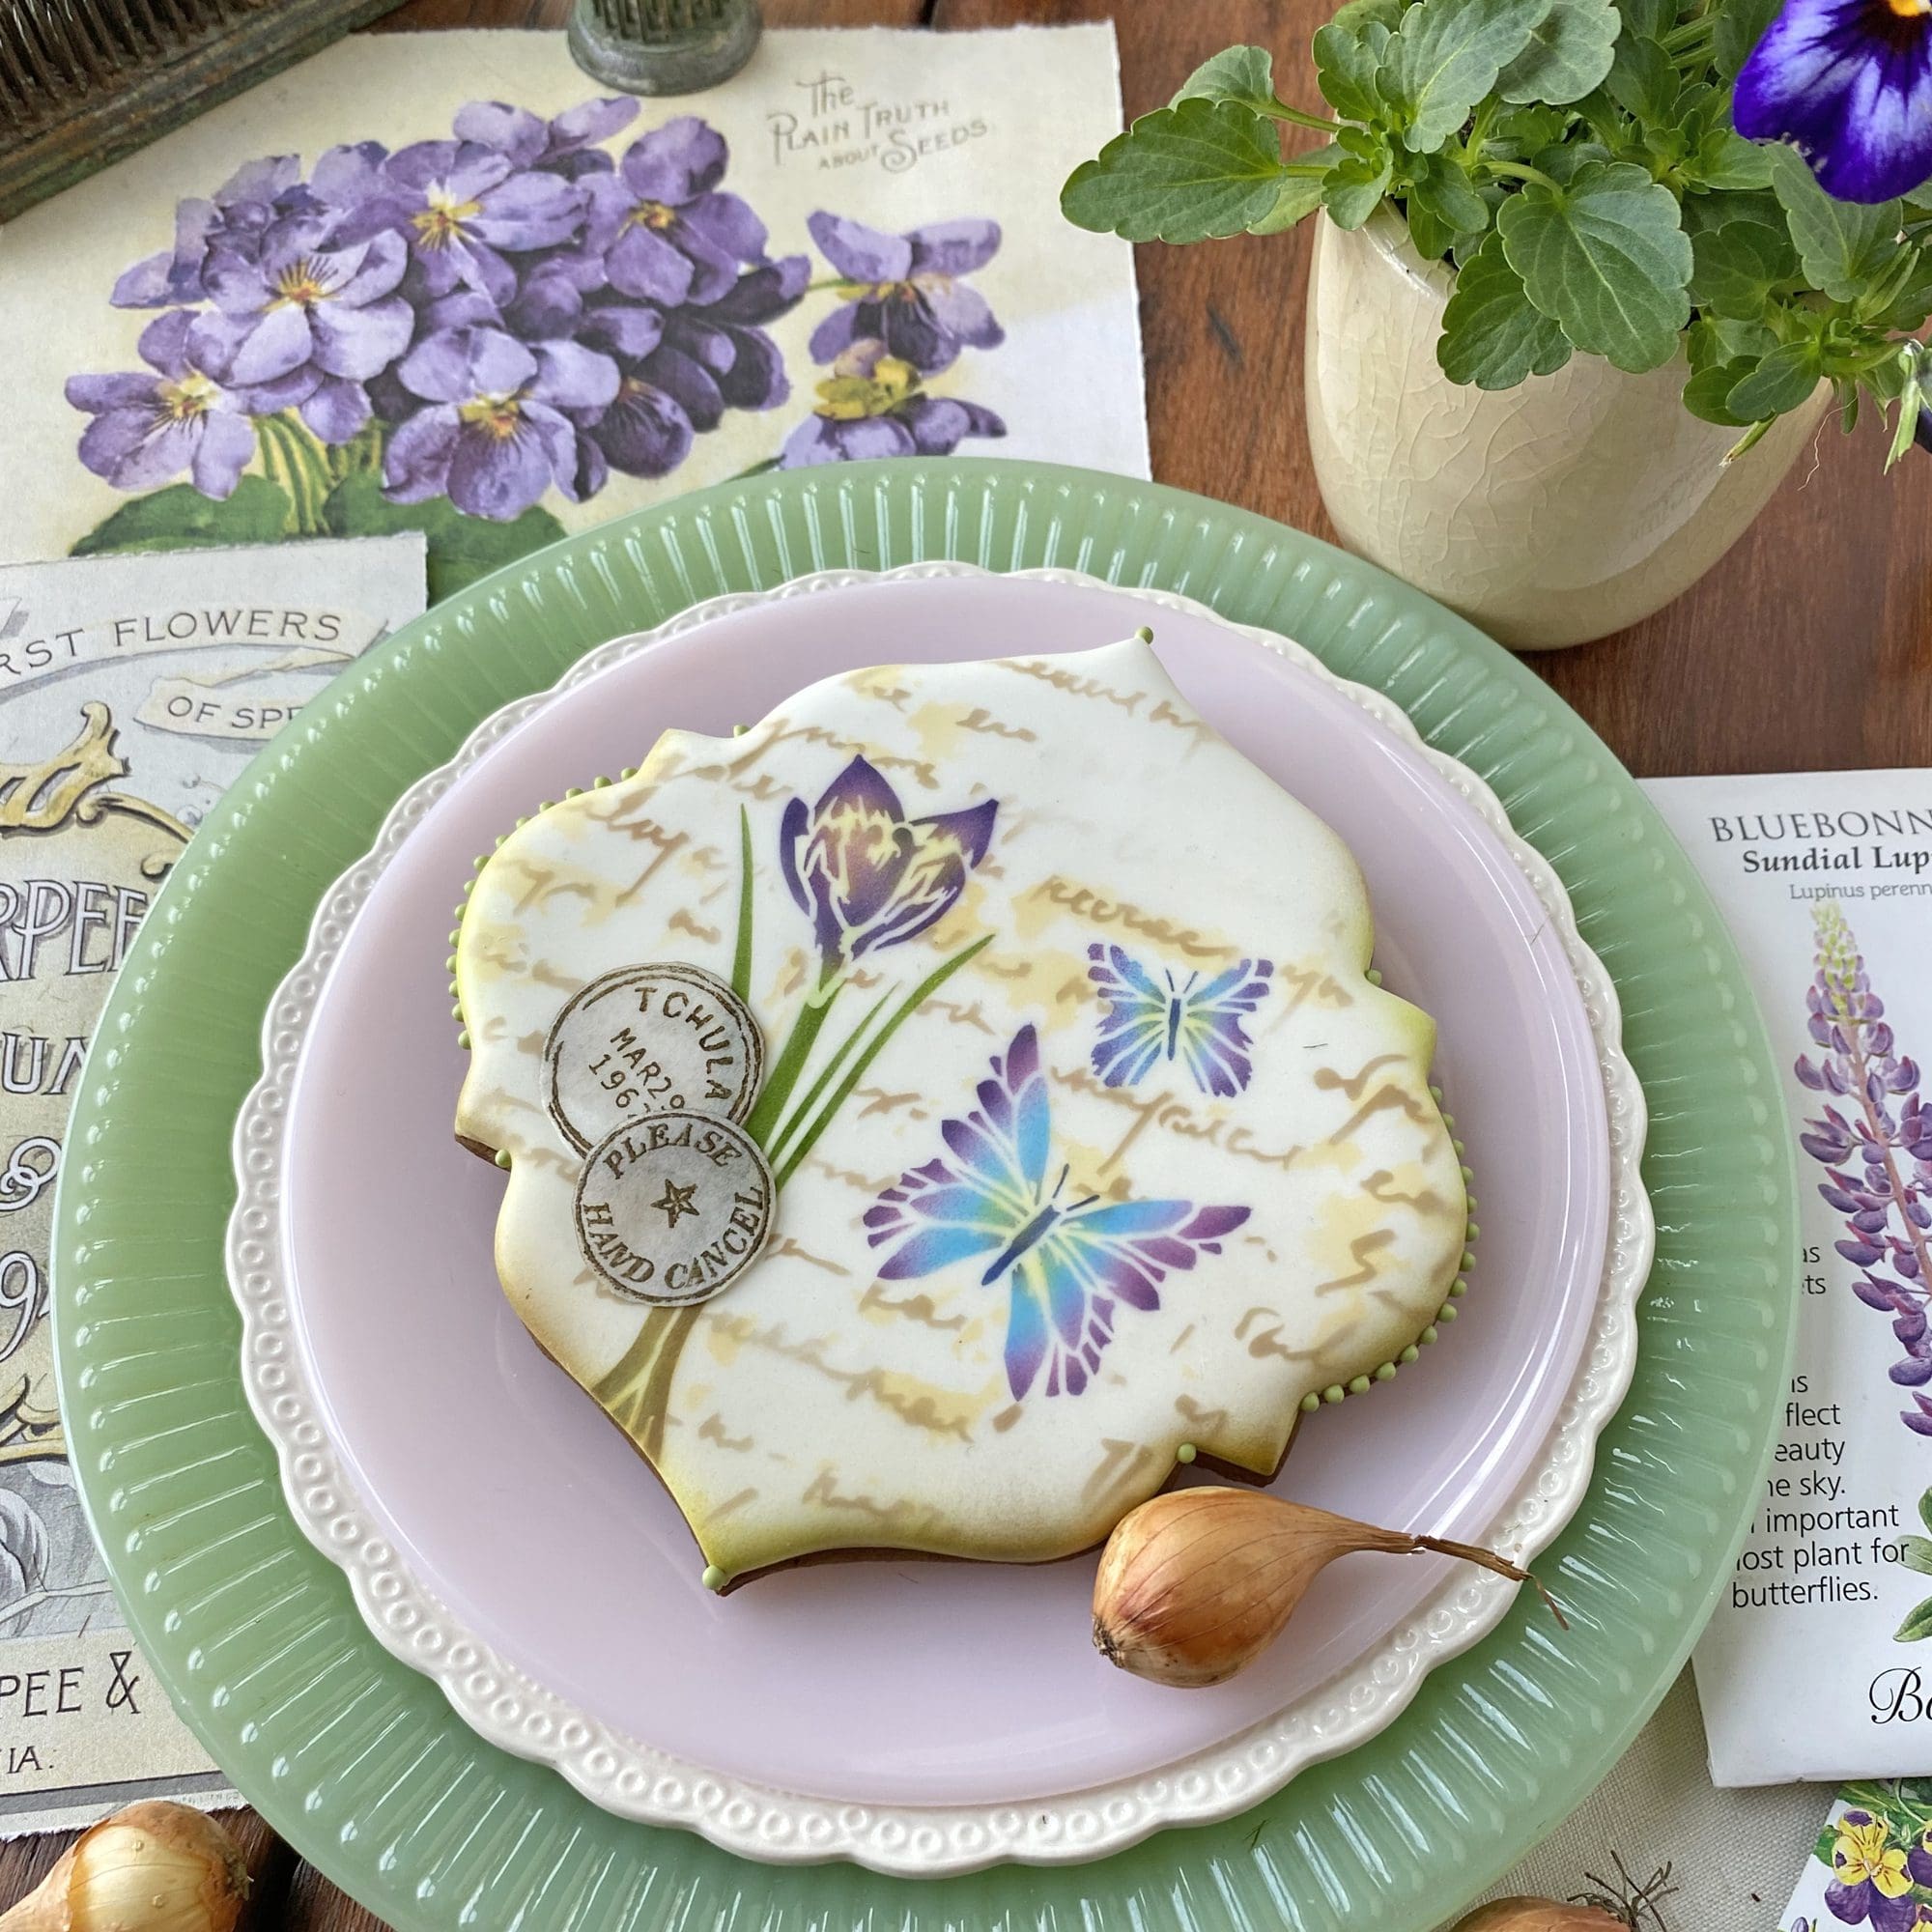
As pretty as it is, I just couldn’t leave it alone (LOL). To up the eclecticism, I added another wafer paper postage stamp . . .

And because two stamps are better than one ![]() . . .
. . .

Ahh, here’s the cookie you saw five photos ago, now with a partial flower fondant appliqué on top, just for a little lift . . .

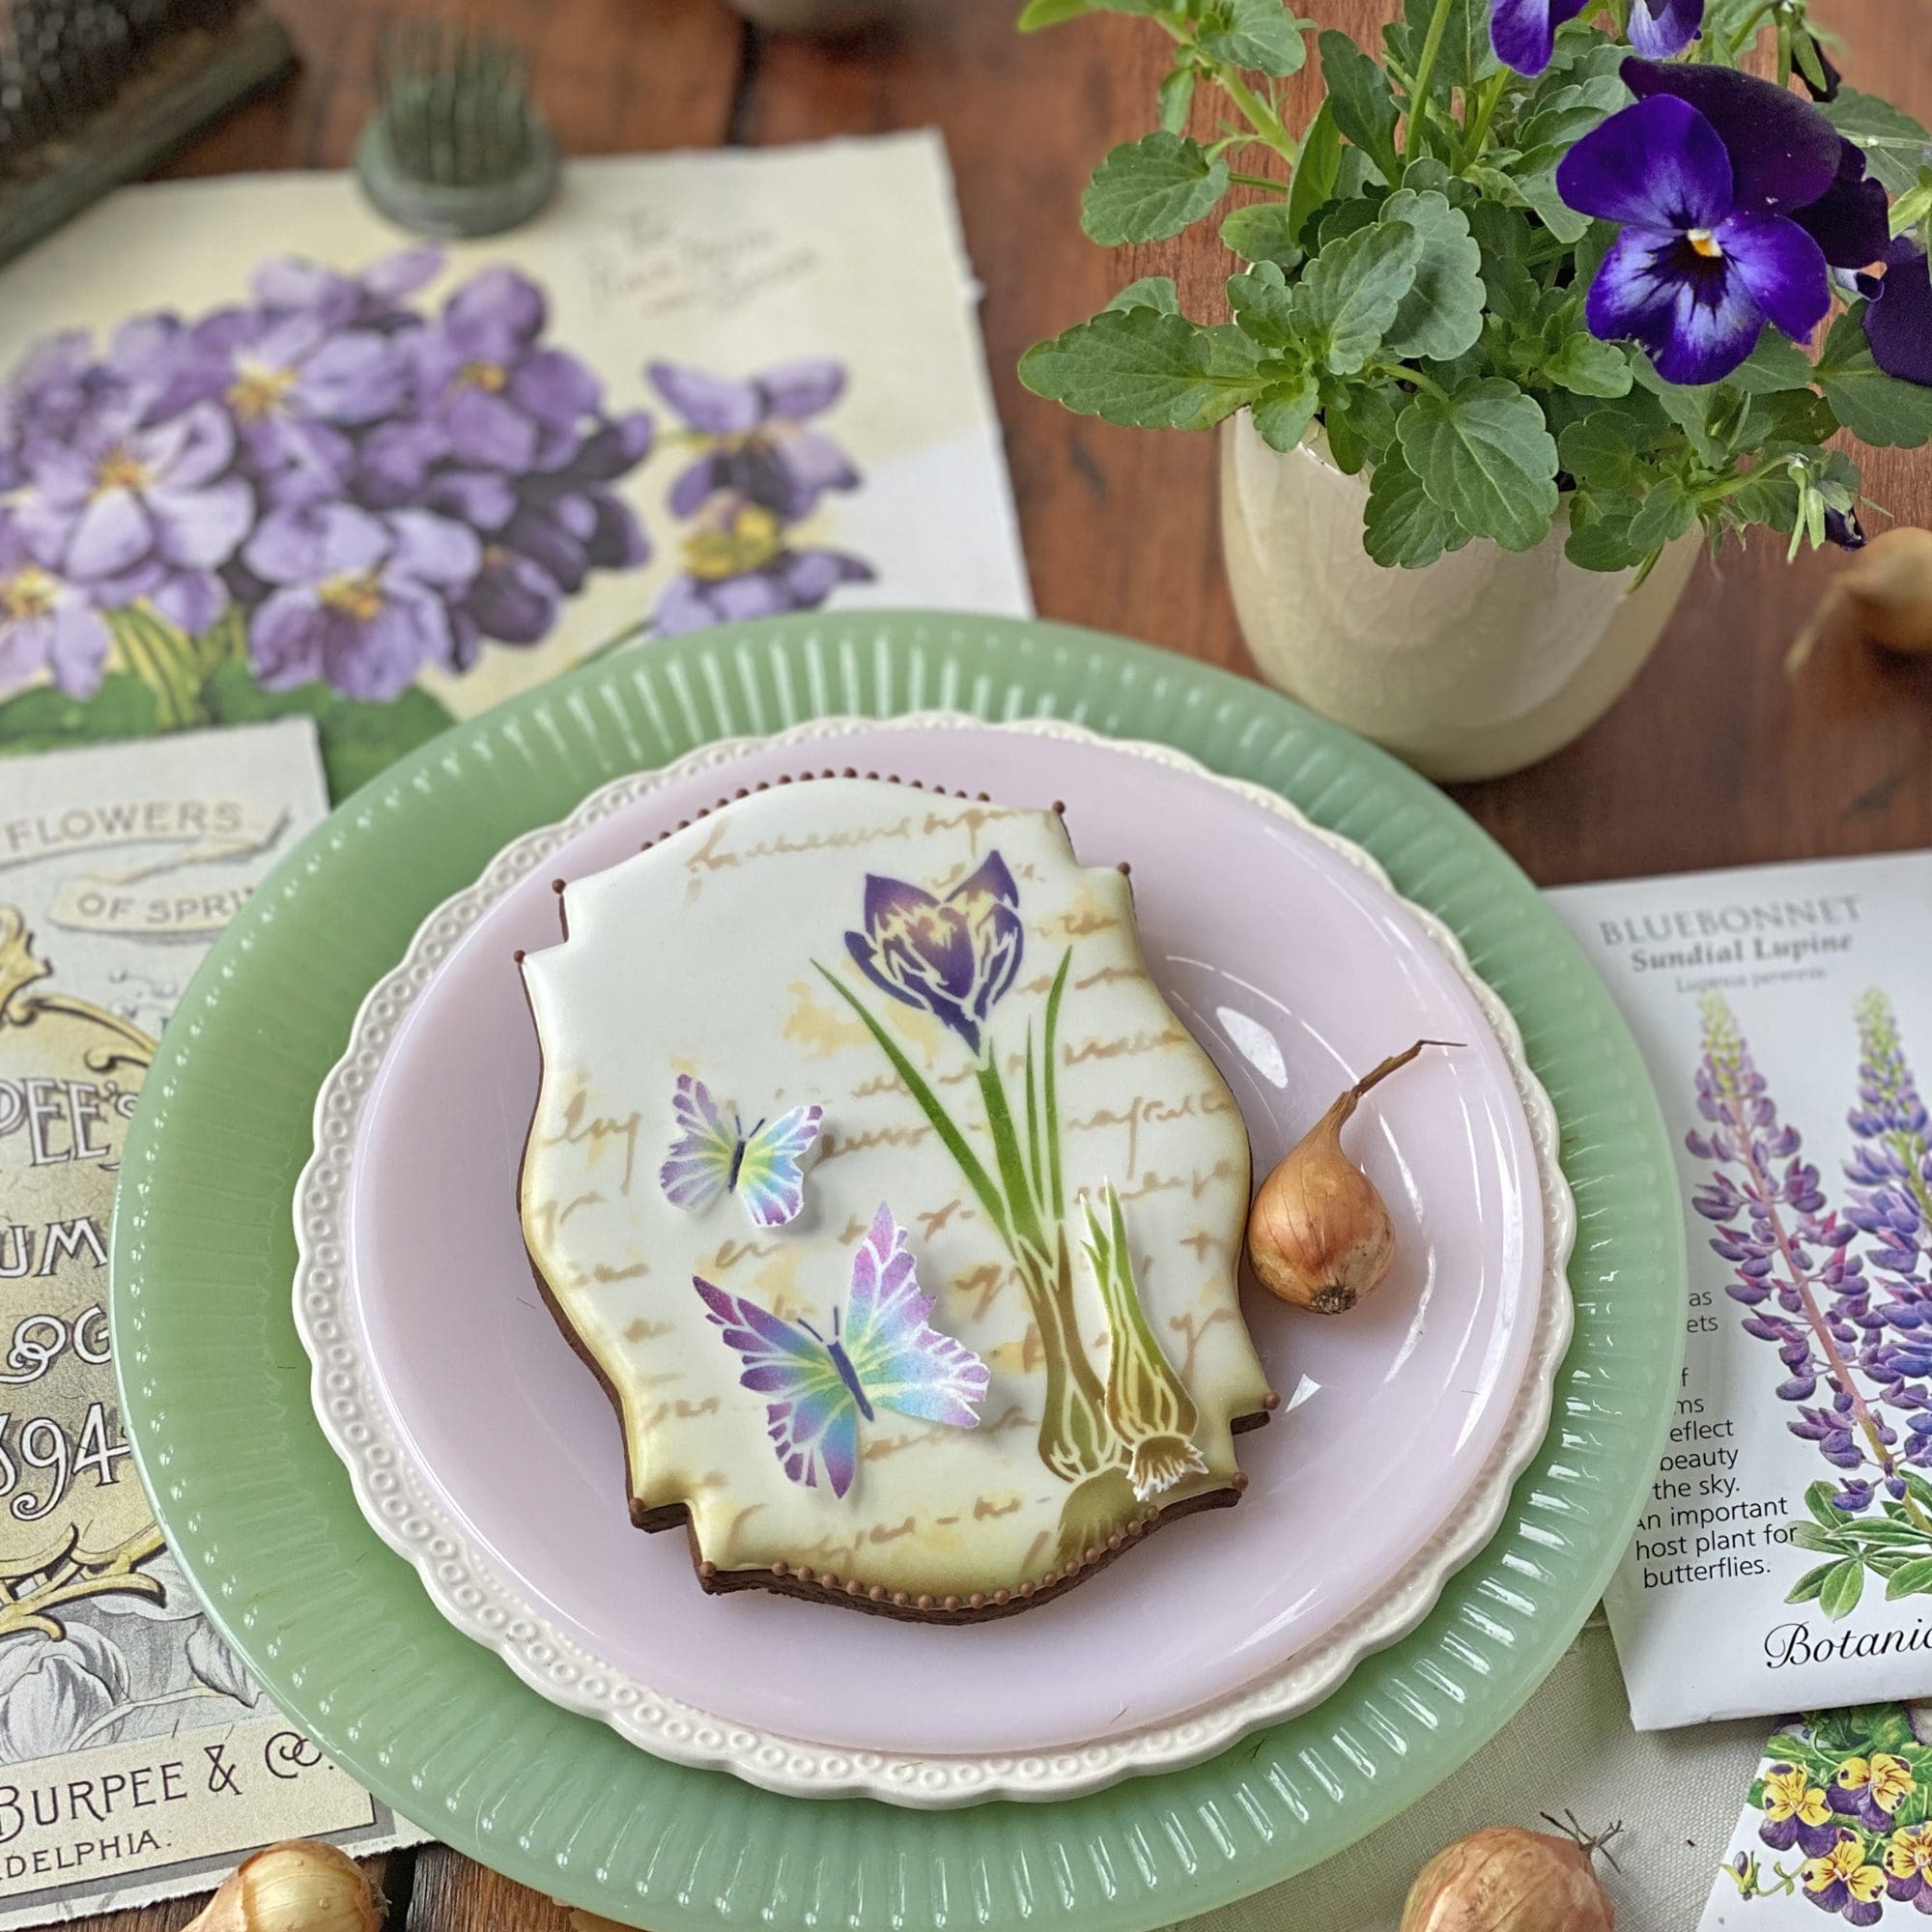
And here’s another crocus progression that relies on two floral fondant appliqués and one wafer paper butterfly for added dimension . . .
Of course, all of these elements fit my Theron Plaque cutter splendidly – I made sure of that when I designed the cutter!
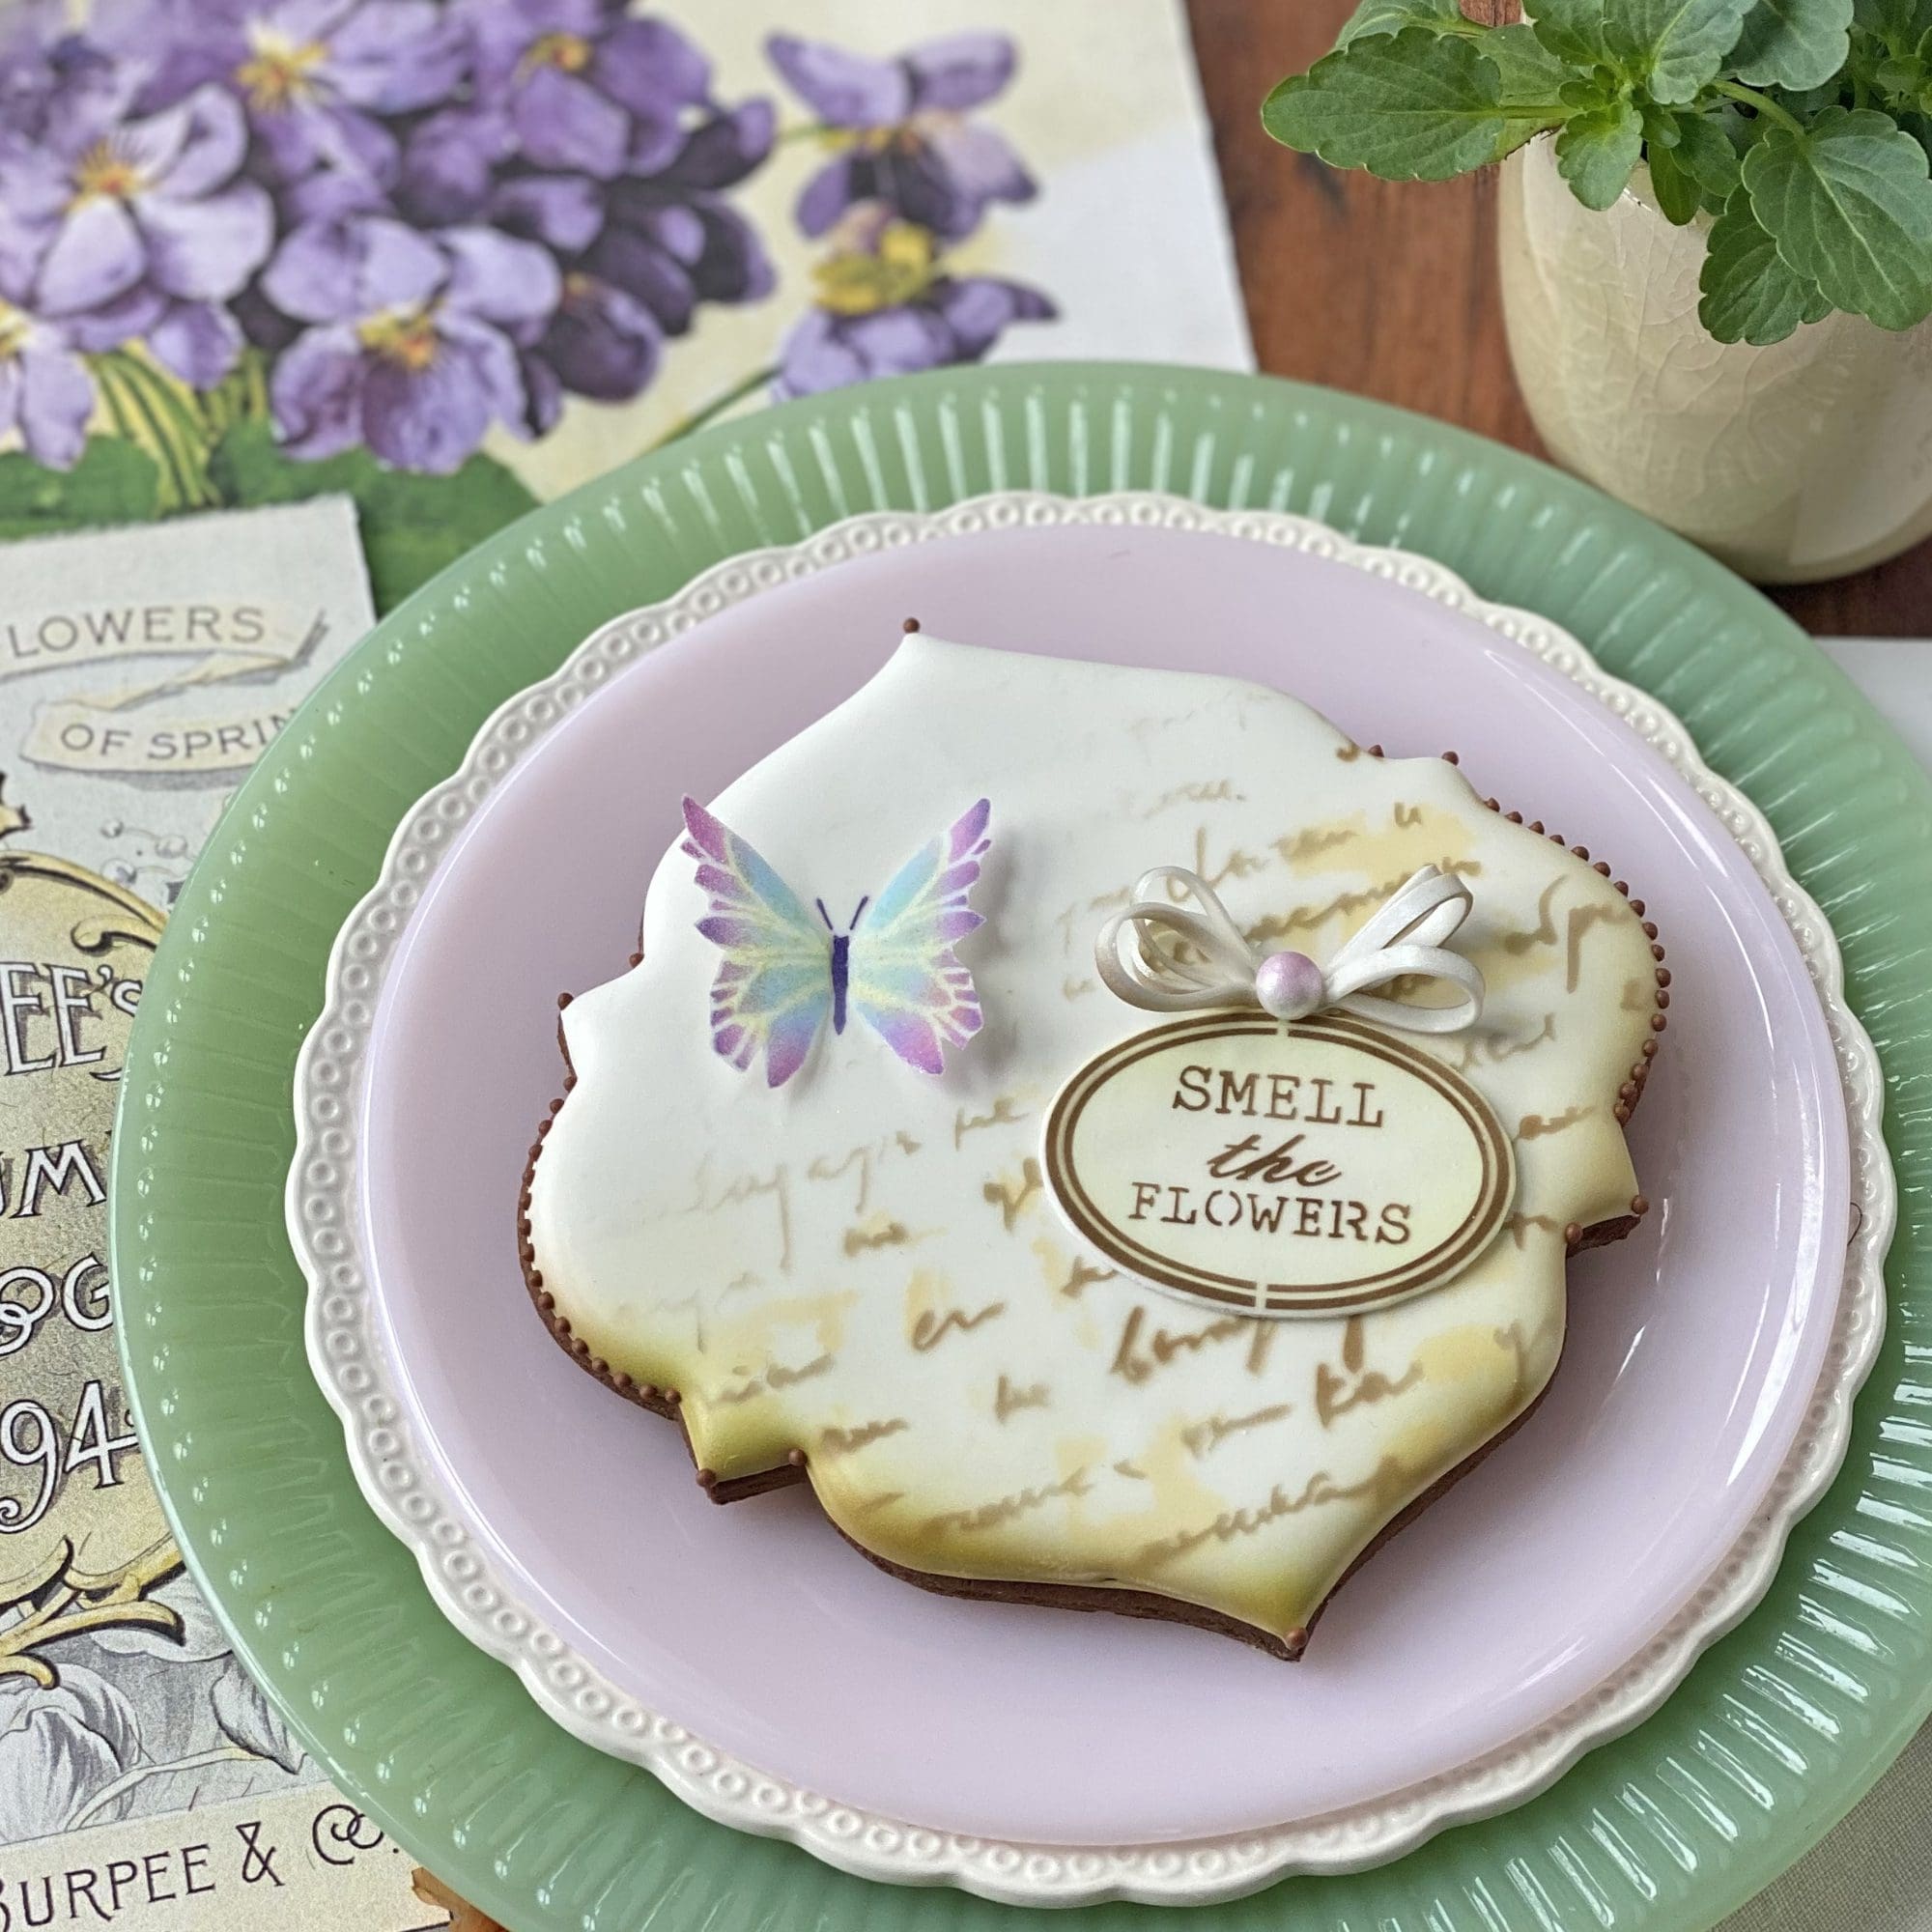
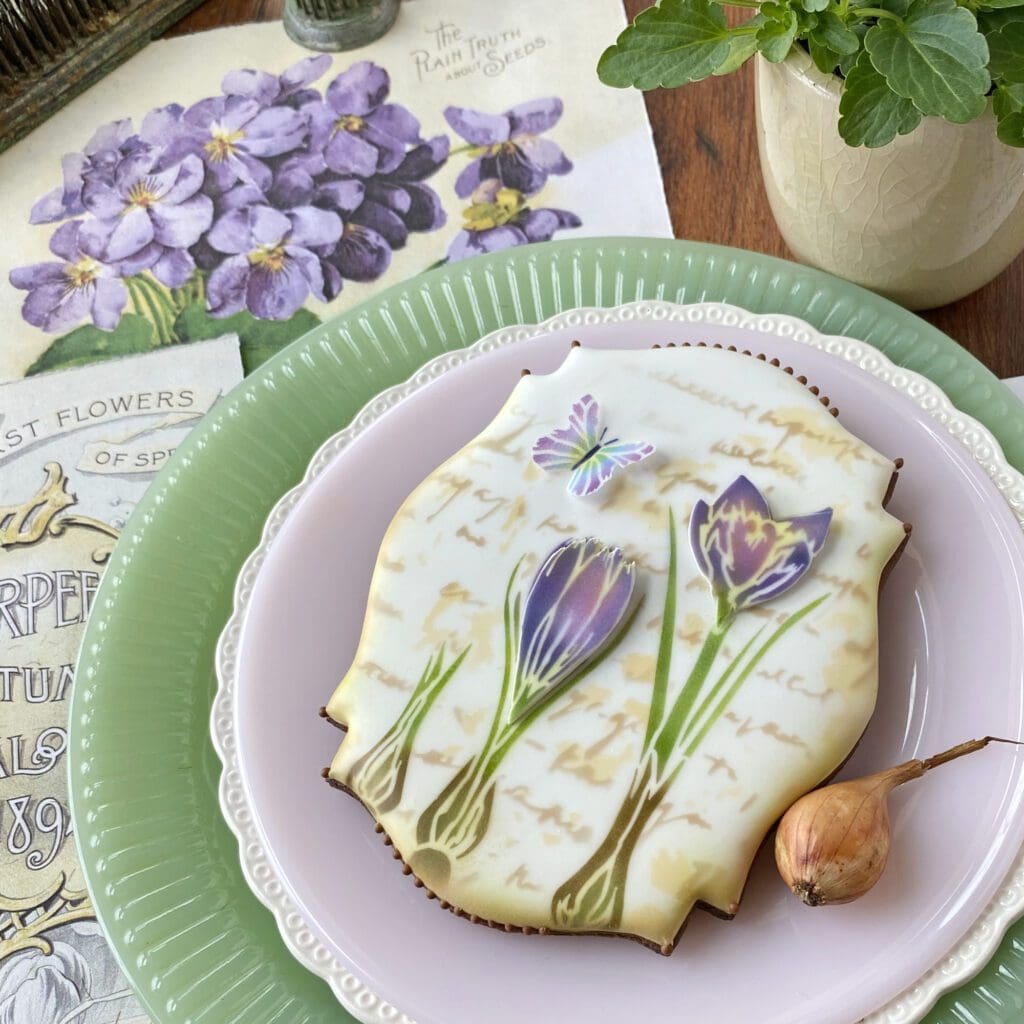
BTW, I just love wafer paper butterflies! Here’s a big one, literally taking off from the cookie surface . . .

And a closer look . . .
How did I make that beauty, you ask?! Easy! I started by masking off the wings and airbrushing the body (in AmeriMist Violet) directly on the cookie icing. Then I airbrushed the wings in three colors (the same as before) on wafer paper, cut out the wings, dusted them in the center with yellow, and then attached them to the cookie with smidges of piping gel. I also propped the wings with small bits of paper towel until the piping gel was dry. Otherwise, they would have quickly fallen flat.
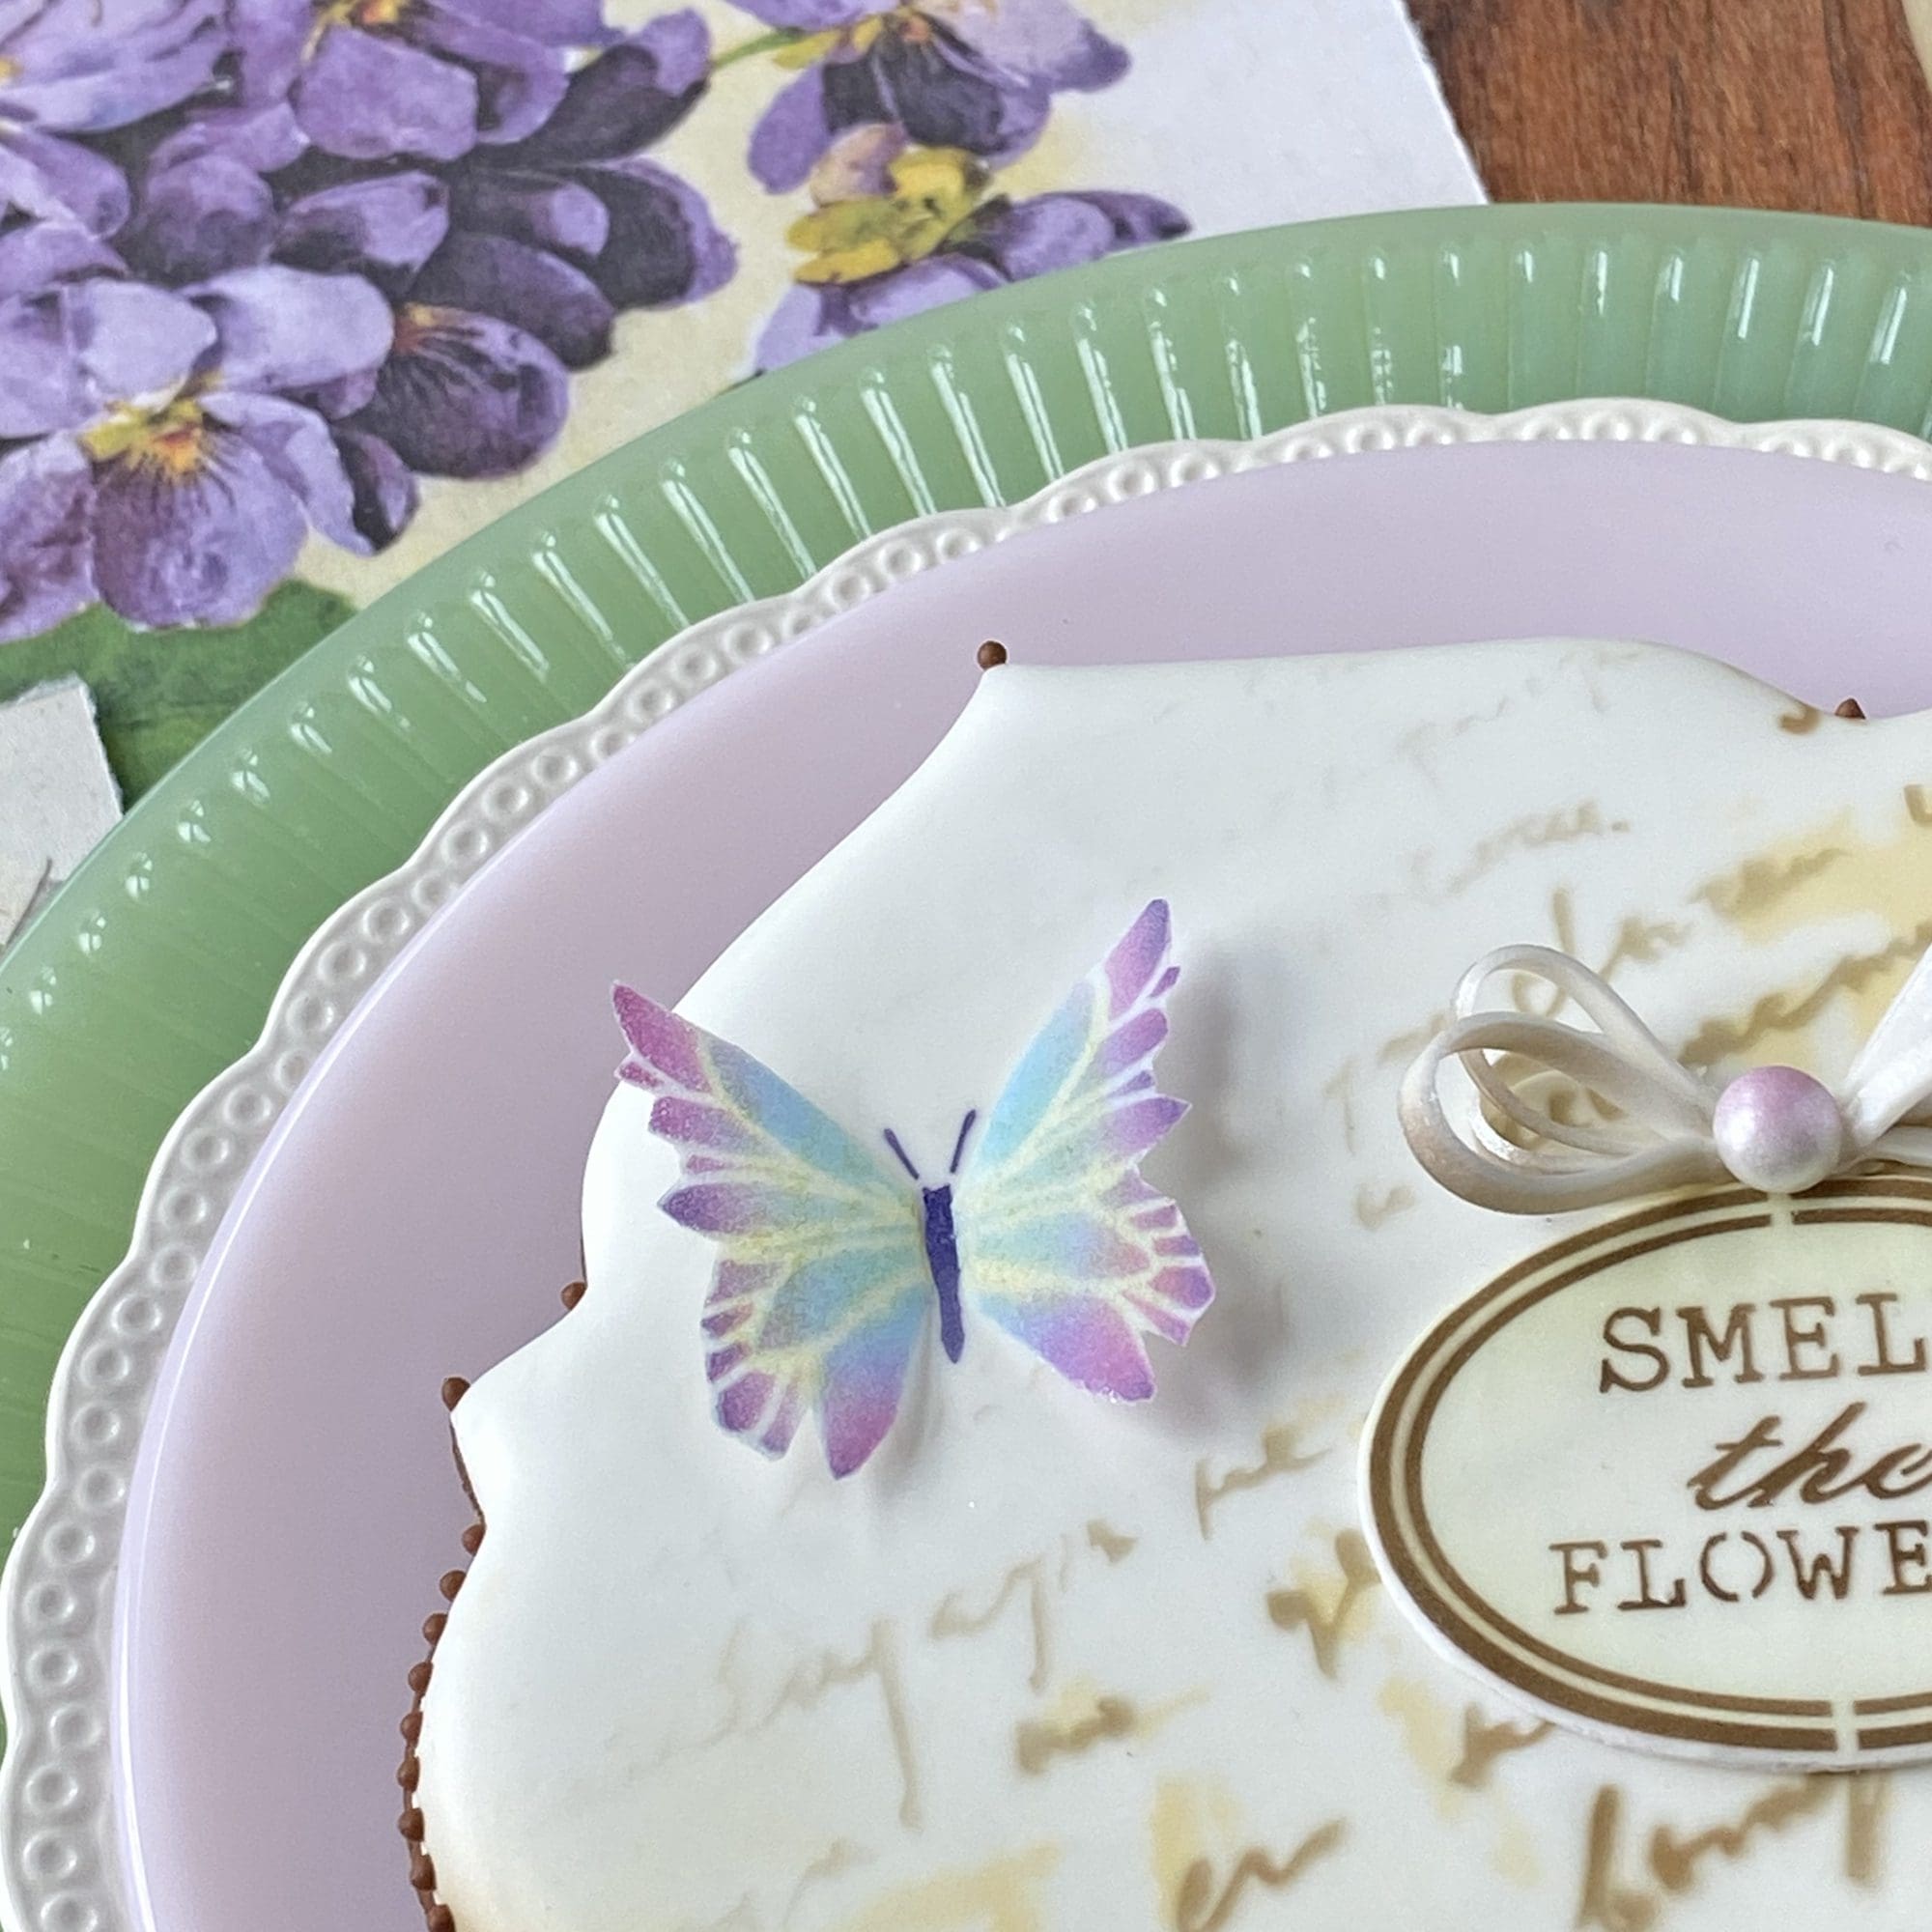
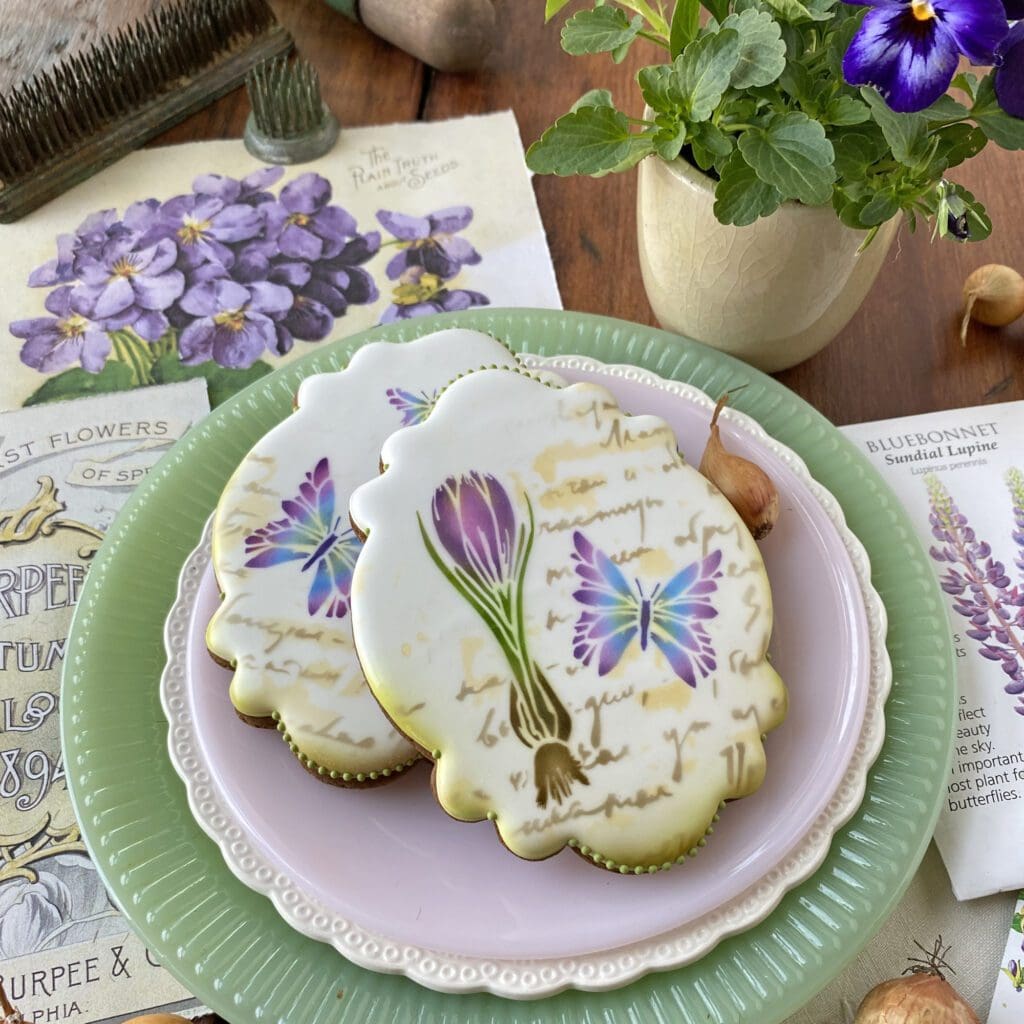
And just because I can’t get enough of these dimensional butterflies, here’s another design with them on the Theron Plaque . . .

I’m zooming in now so you can better appreciate the details . . .
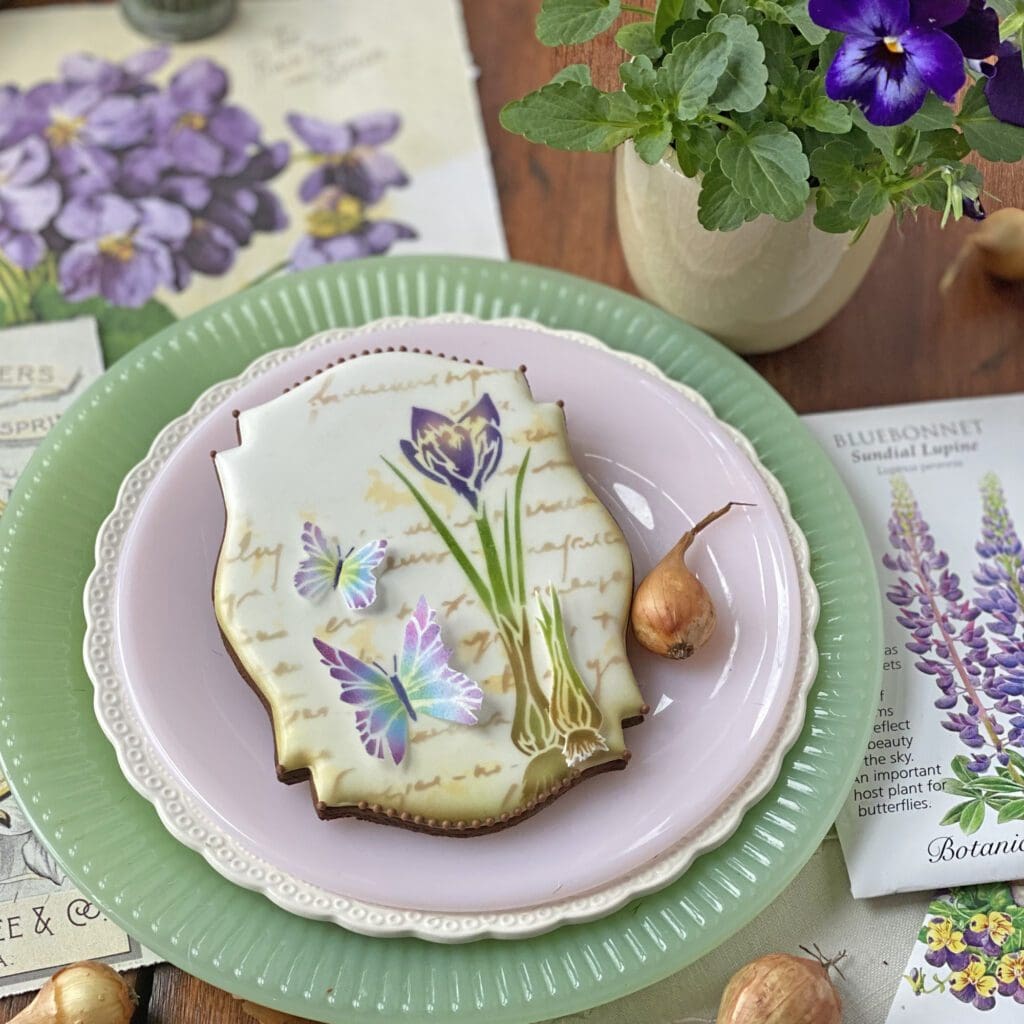
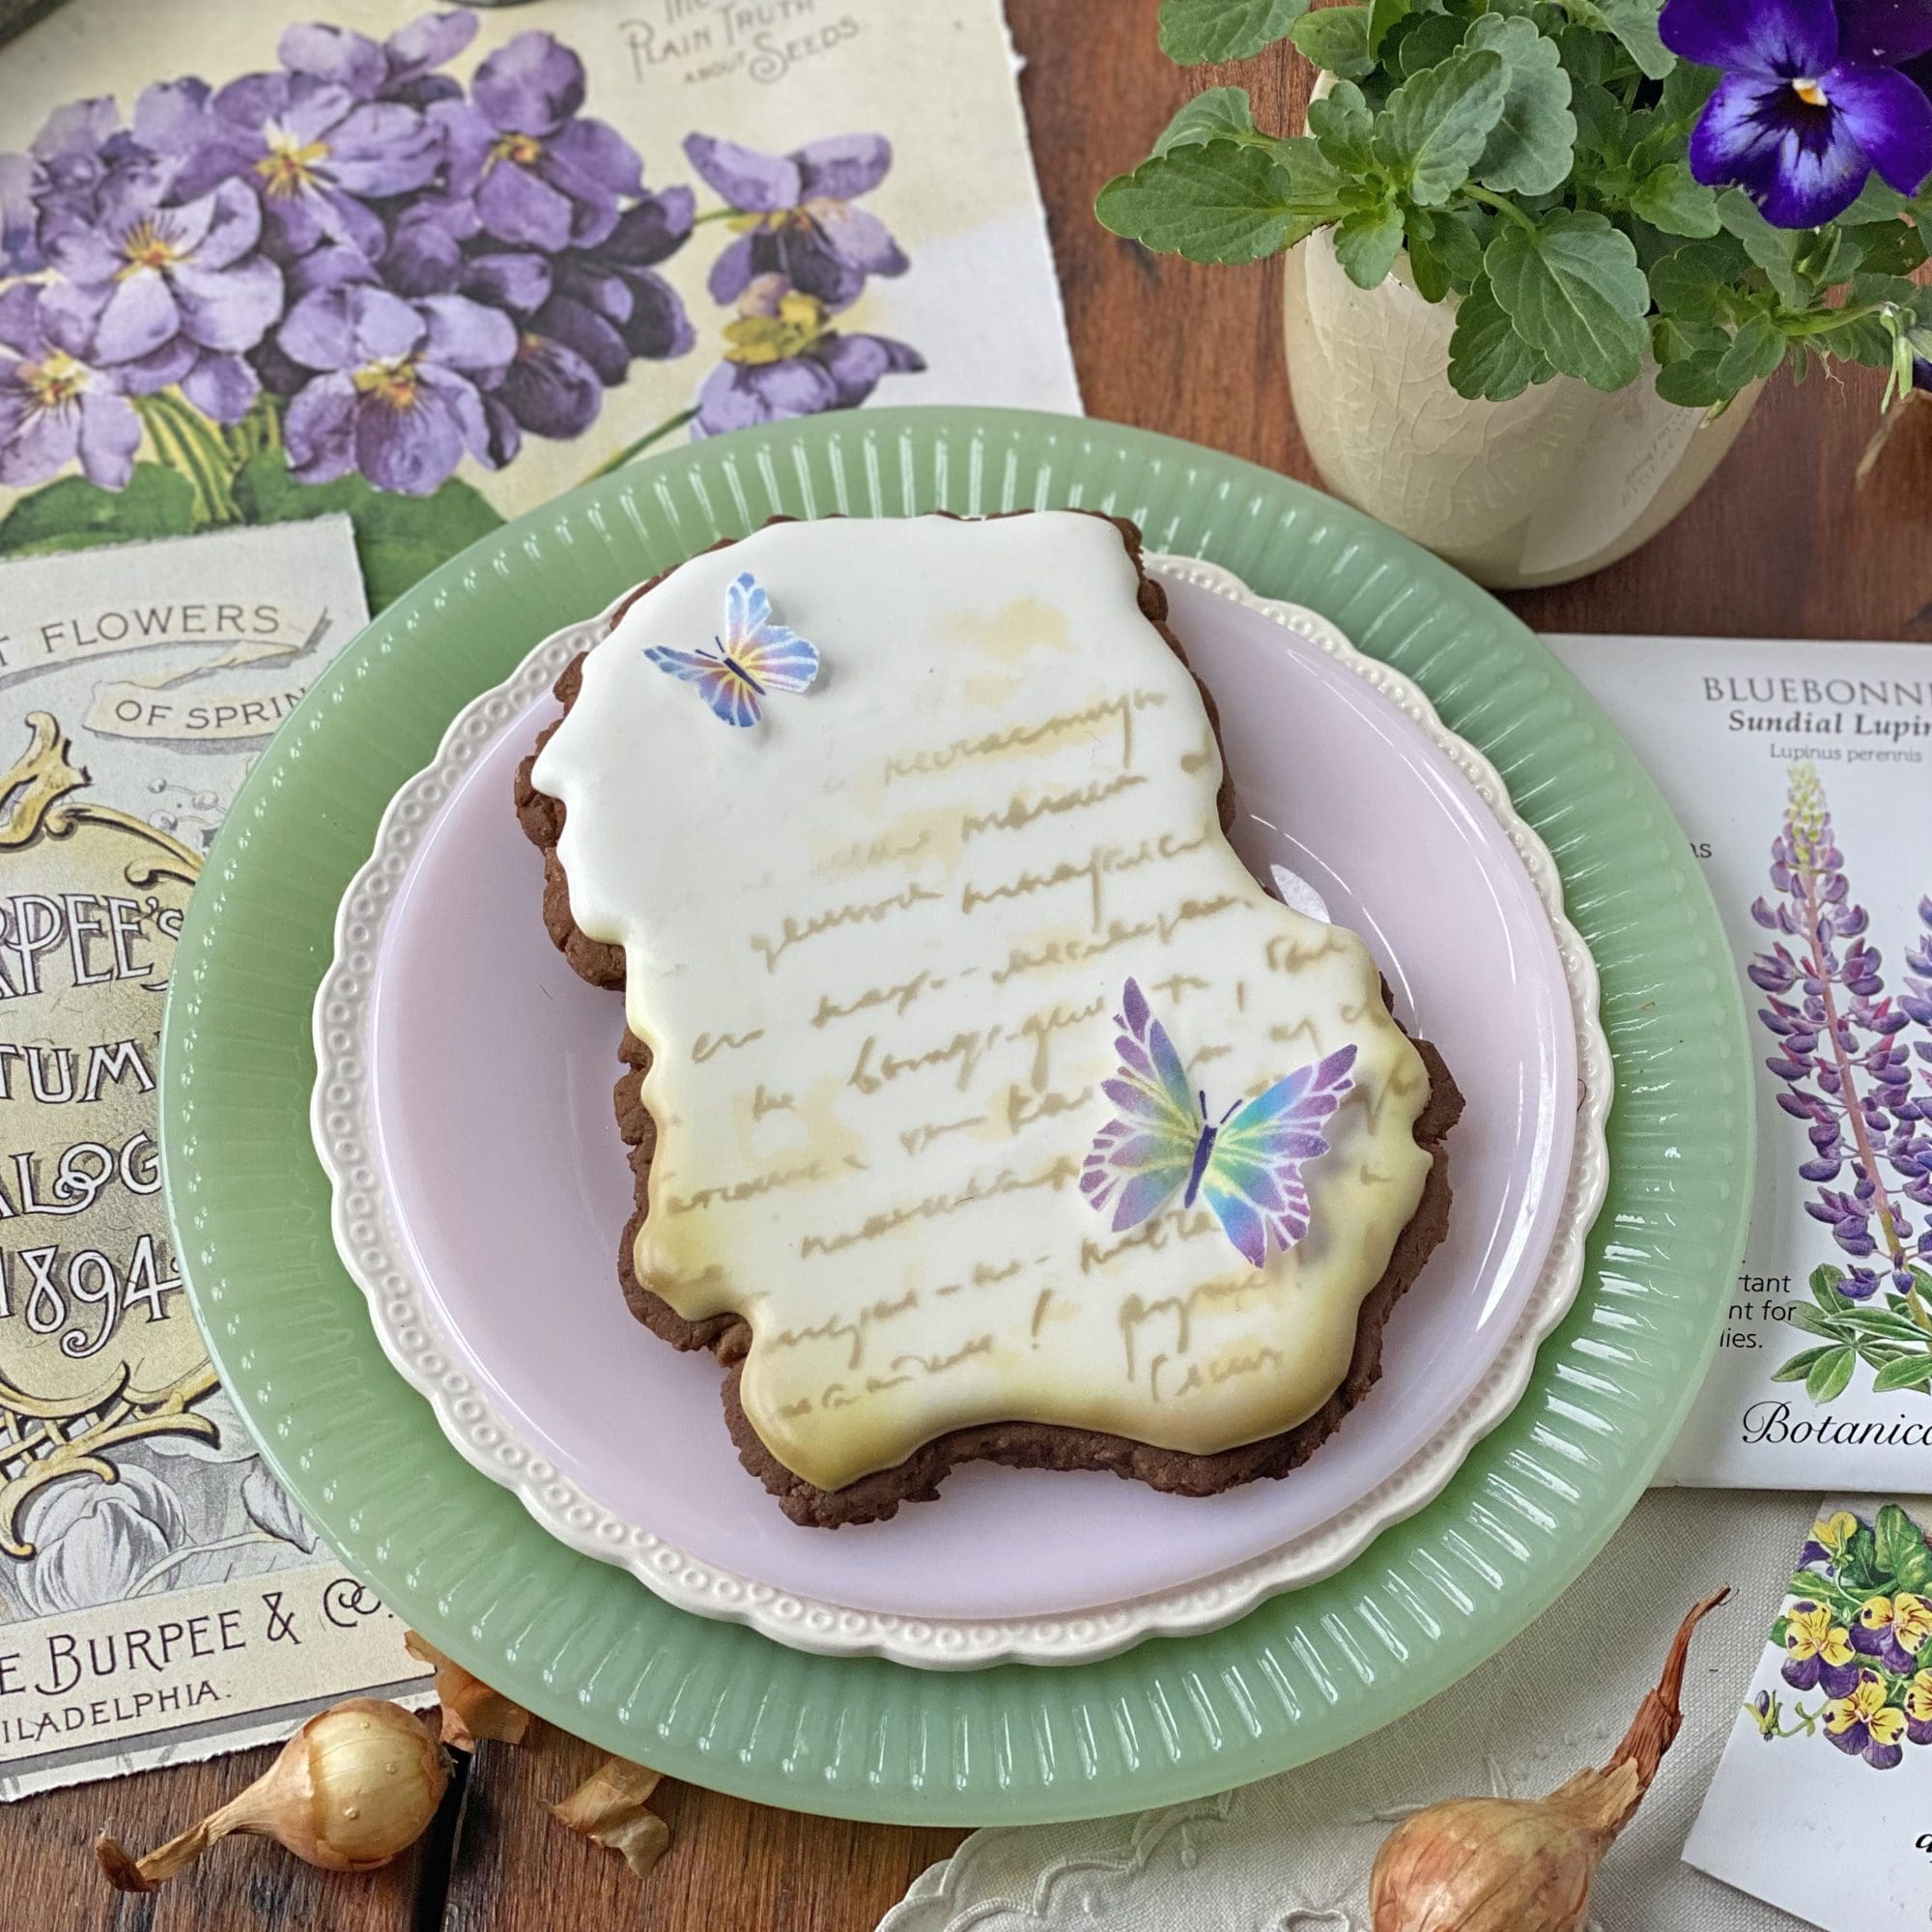
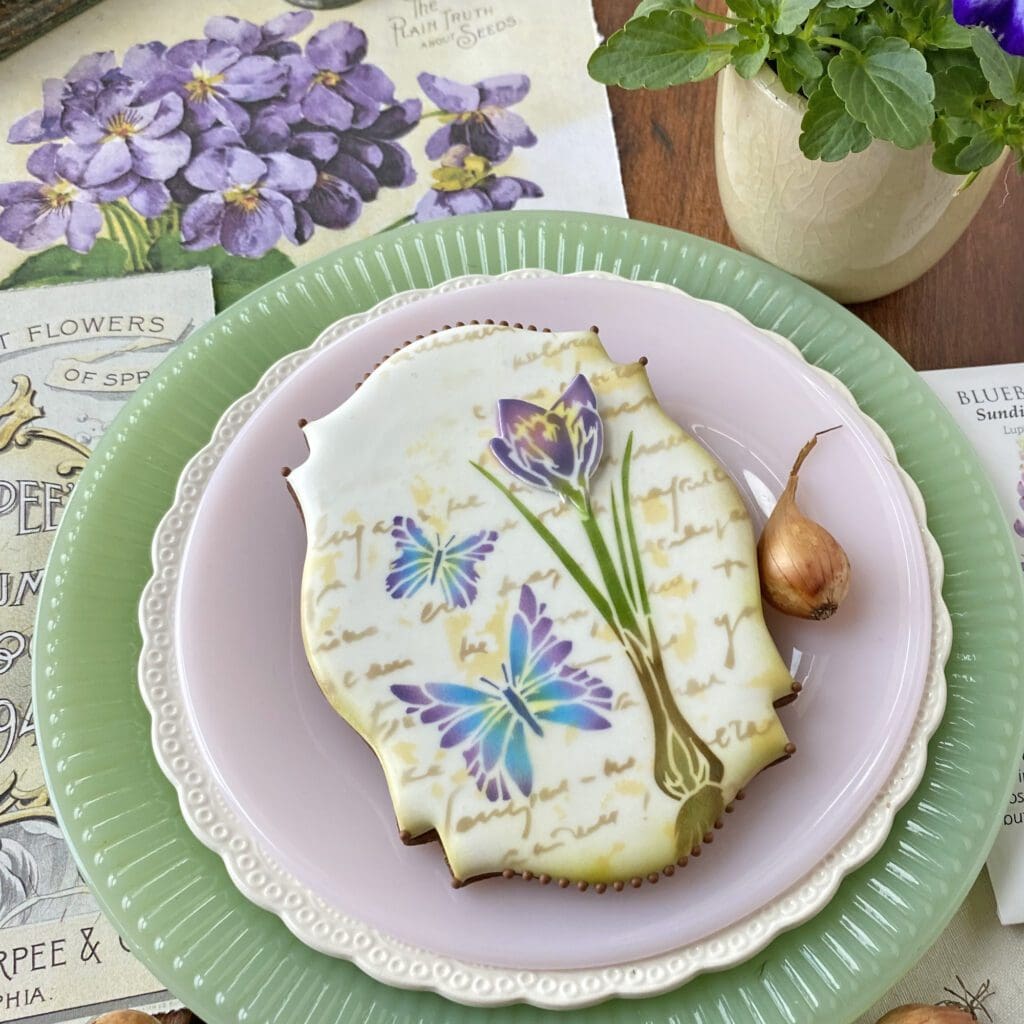
For my last cookie in this section, I turn to butterflies once again, but, this time, I’ve put them on a cookie with a very organic cookie shape. Though much less structured than the Theron Plaque, this shape fits the stencil theme quite well and – get this – it can be made without any cutter. Yes, you heard me right – no cutter! I simply rolled out my dough and then deckled the cookie edges (aka tore them using a ruler as a guide).

Deckling is a fun and easy technique that works well for botanical and other nature-related themes, and pretty much assures that no two cookies will ever look alike.
If you’ve read this far, you know I’m a woman of words. Please indulge me as I talk more about the complementary message and frame set that makes up my Vintage Bulbs two-set release! ![]()
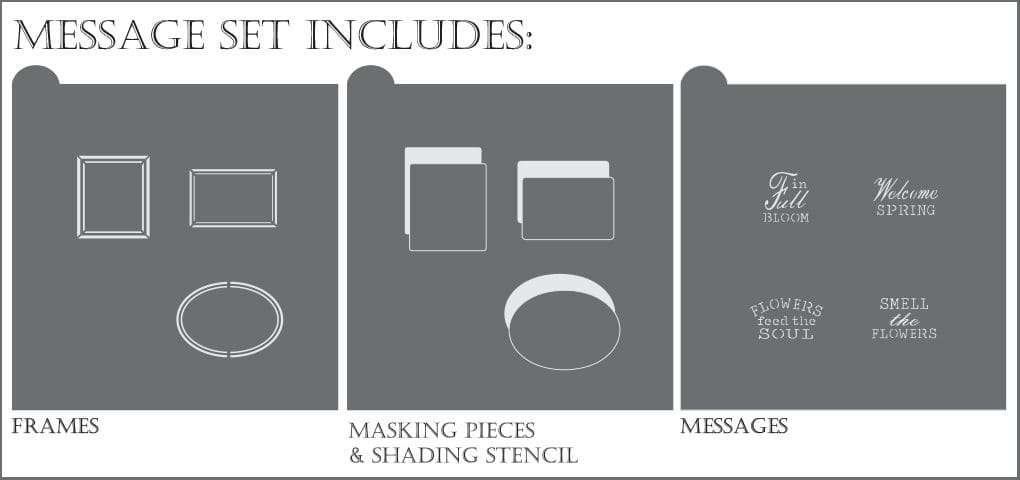
Unlike the background set in this release, this set is pretty simple with the usual four messages and associated frames. To use these elements, just lay a mask on the background stencil wherever you want a message to be, airbrush, remove the mask, and, voilà, a space will be left behind where the words and frame can be stenciled. Or you can make the framed messages as separate fondant appliqués as I often do.
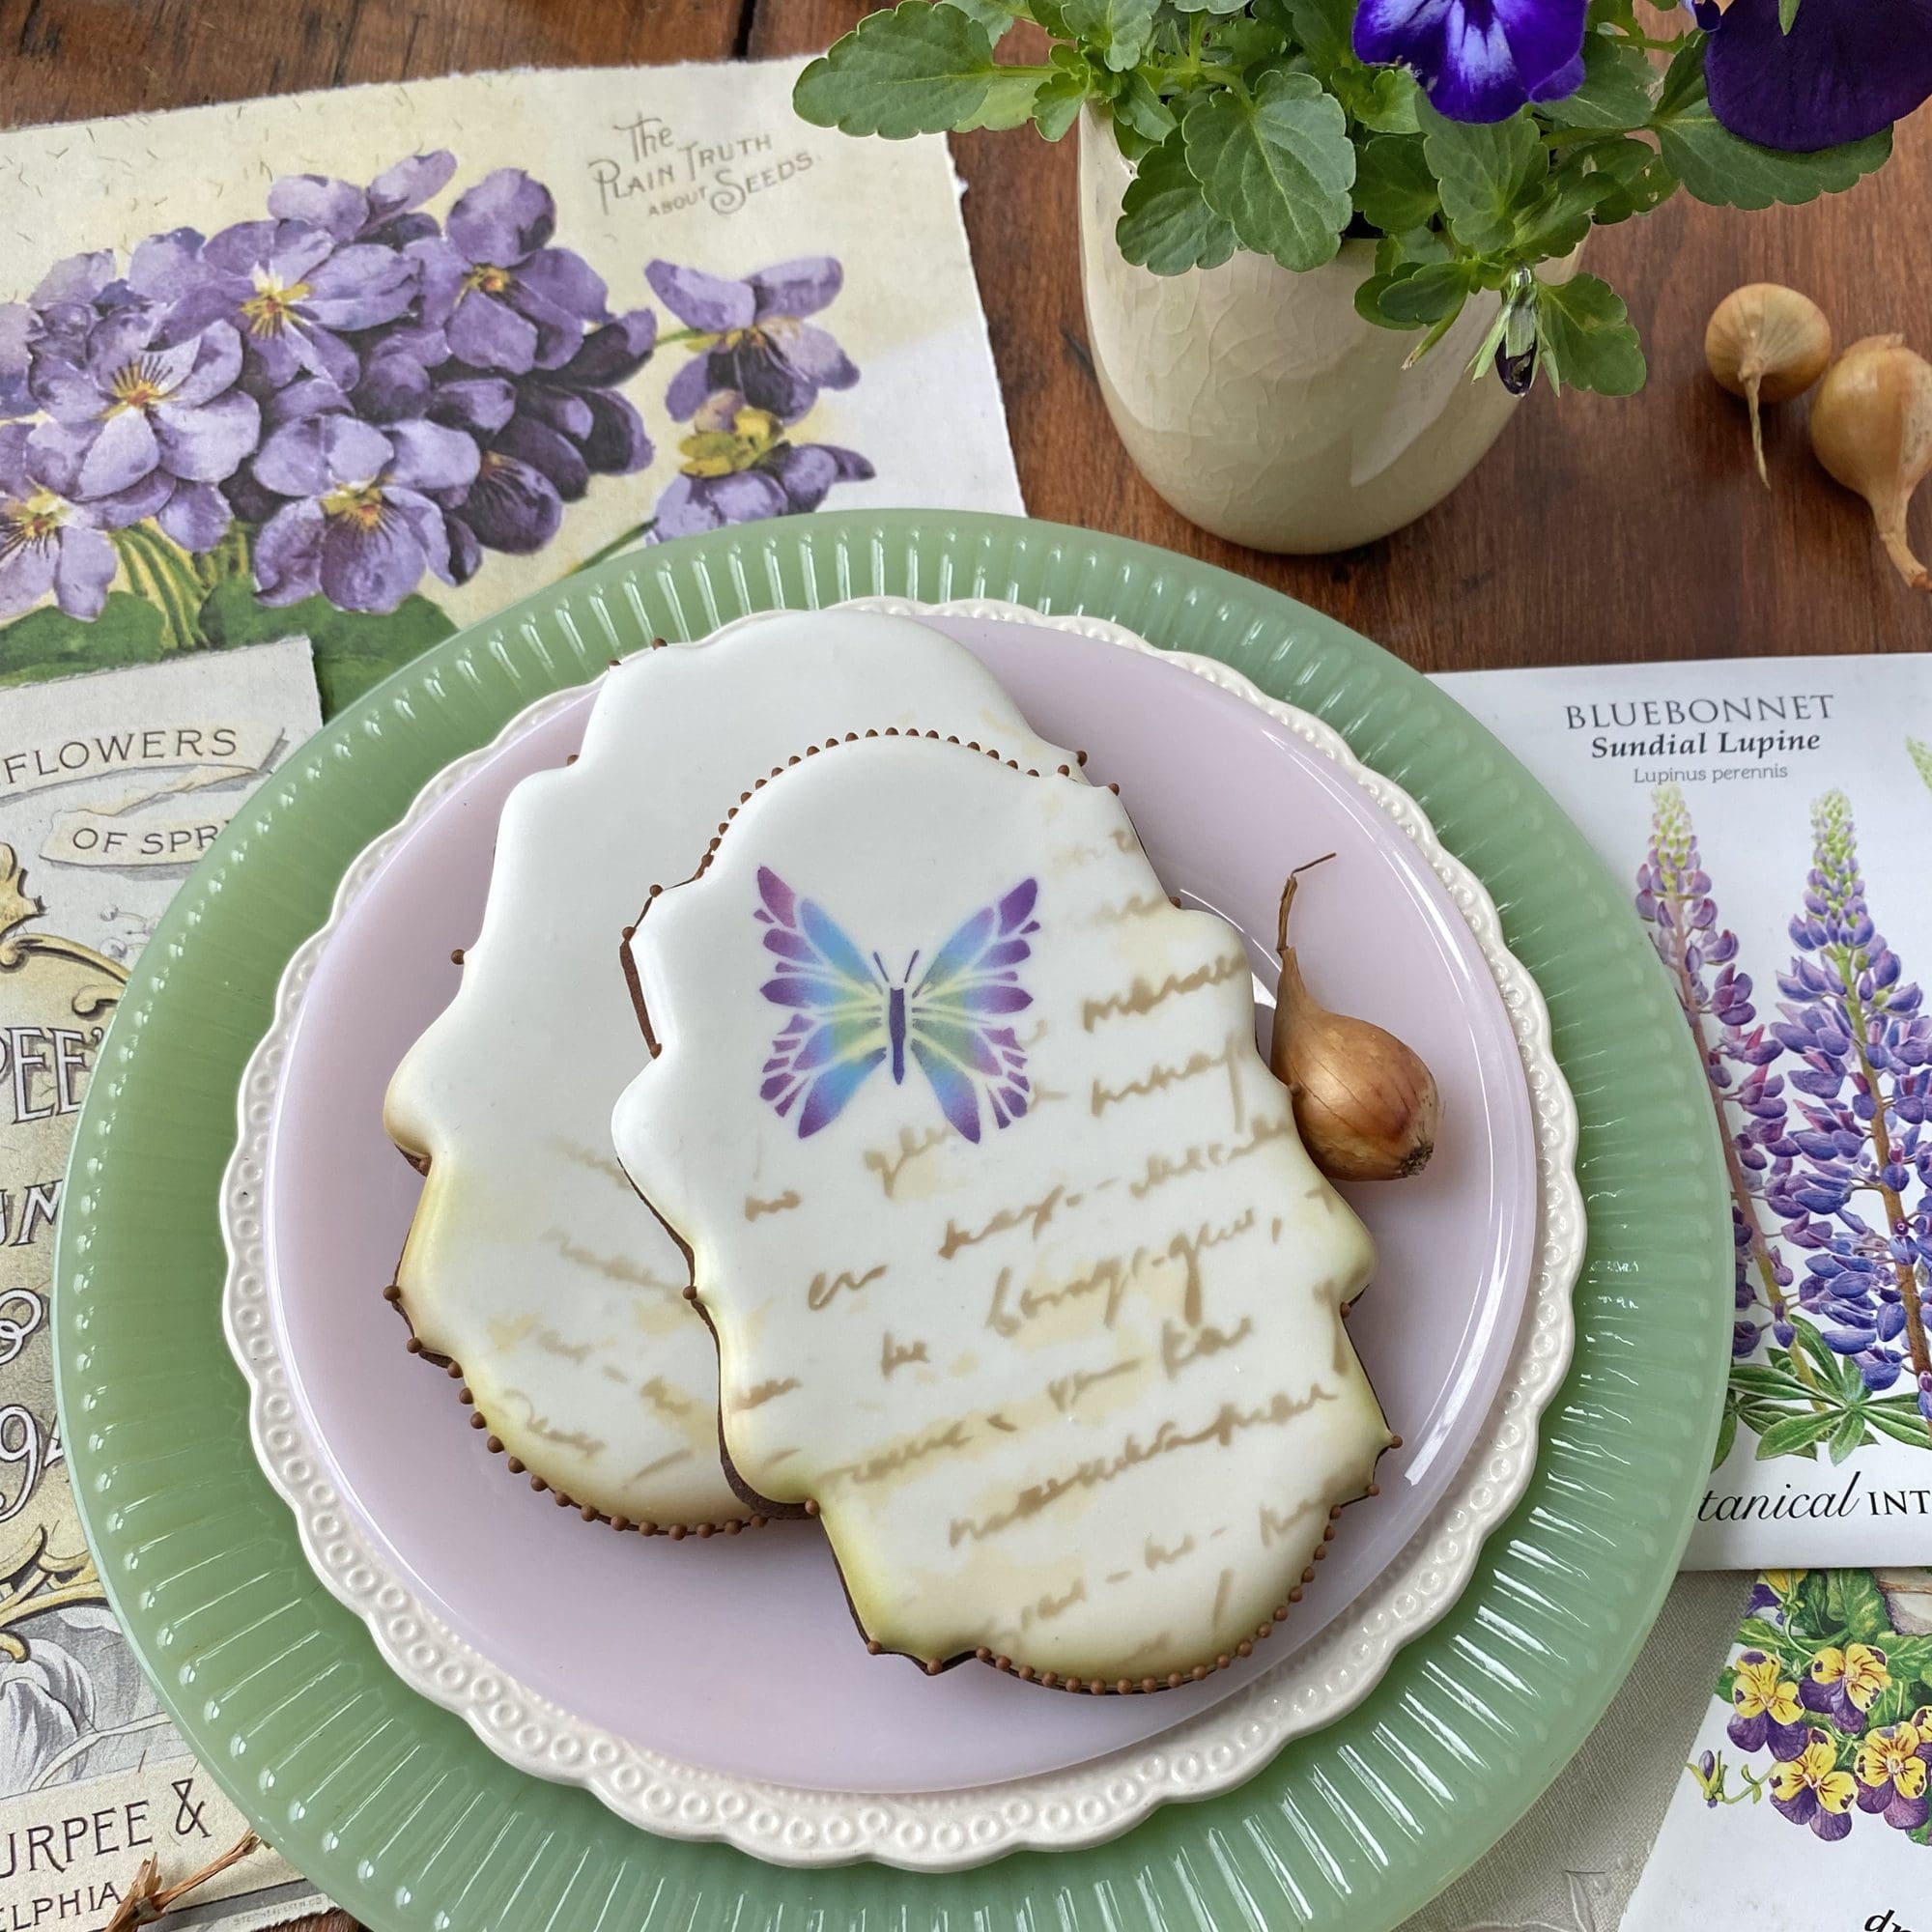
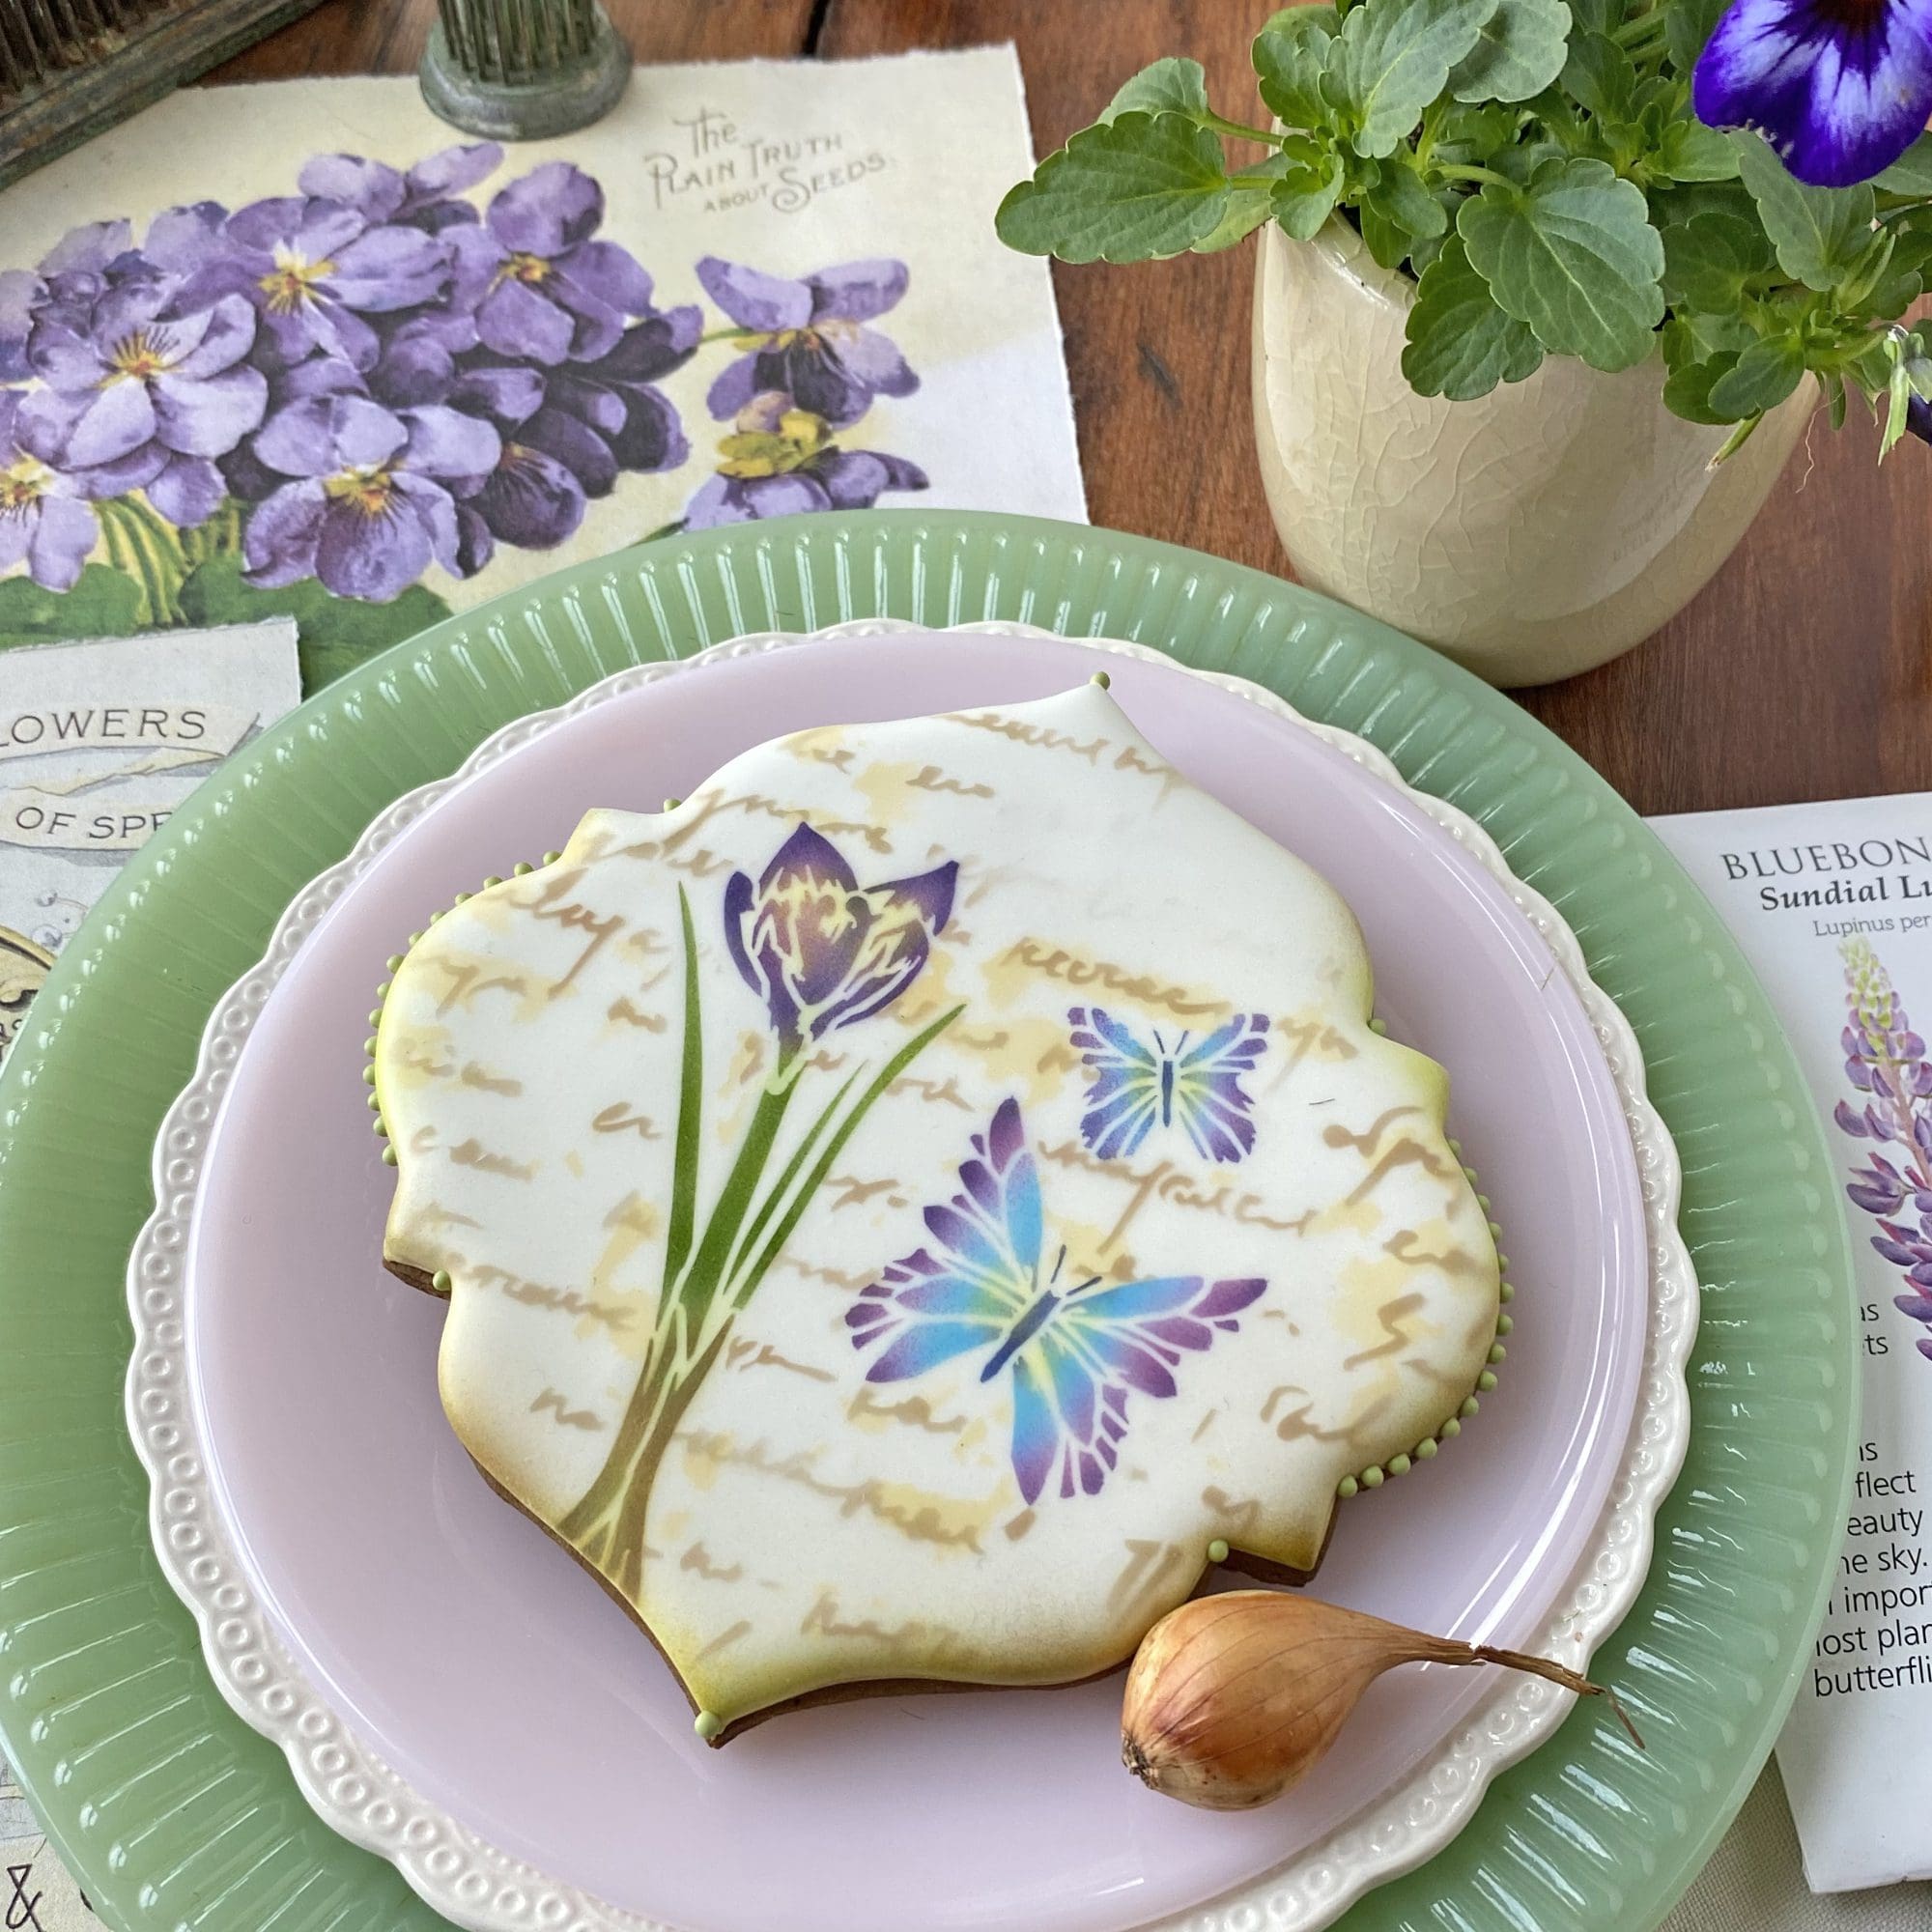
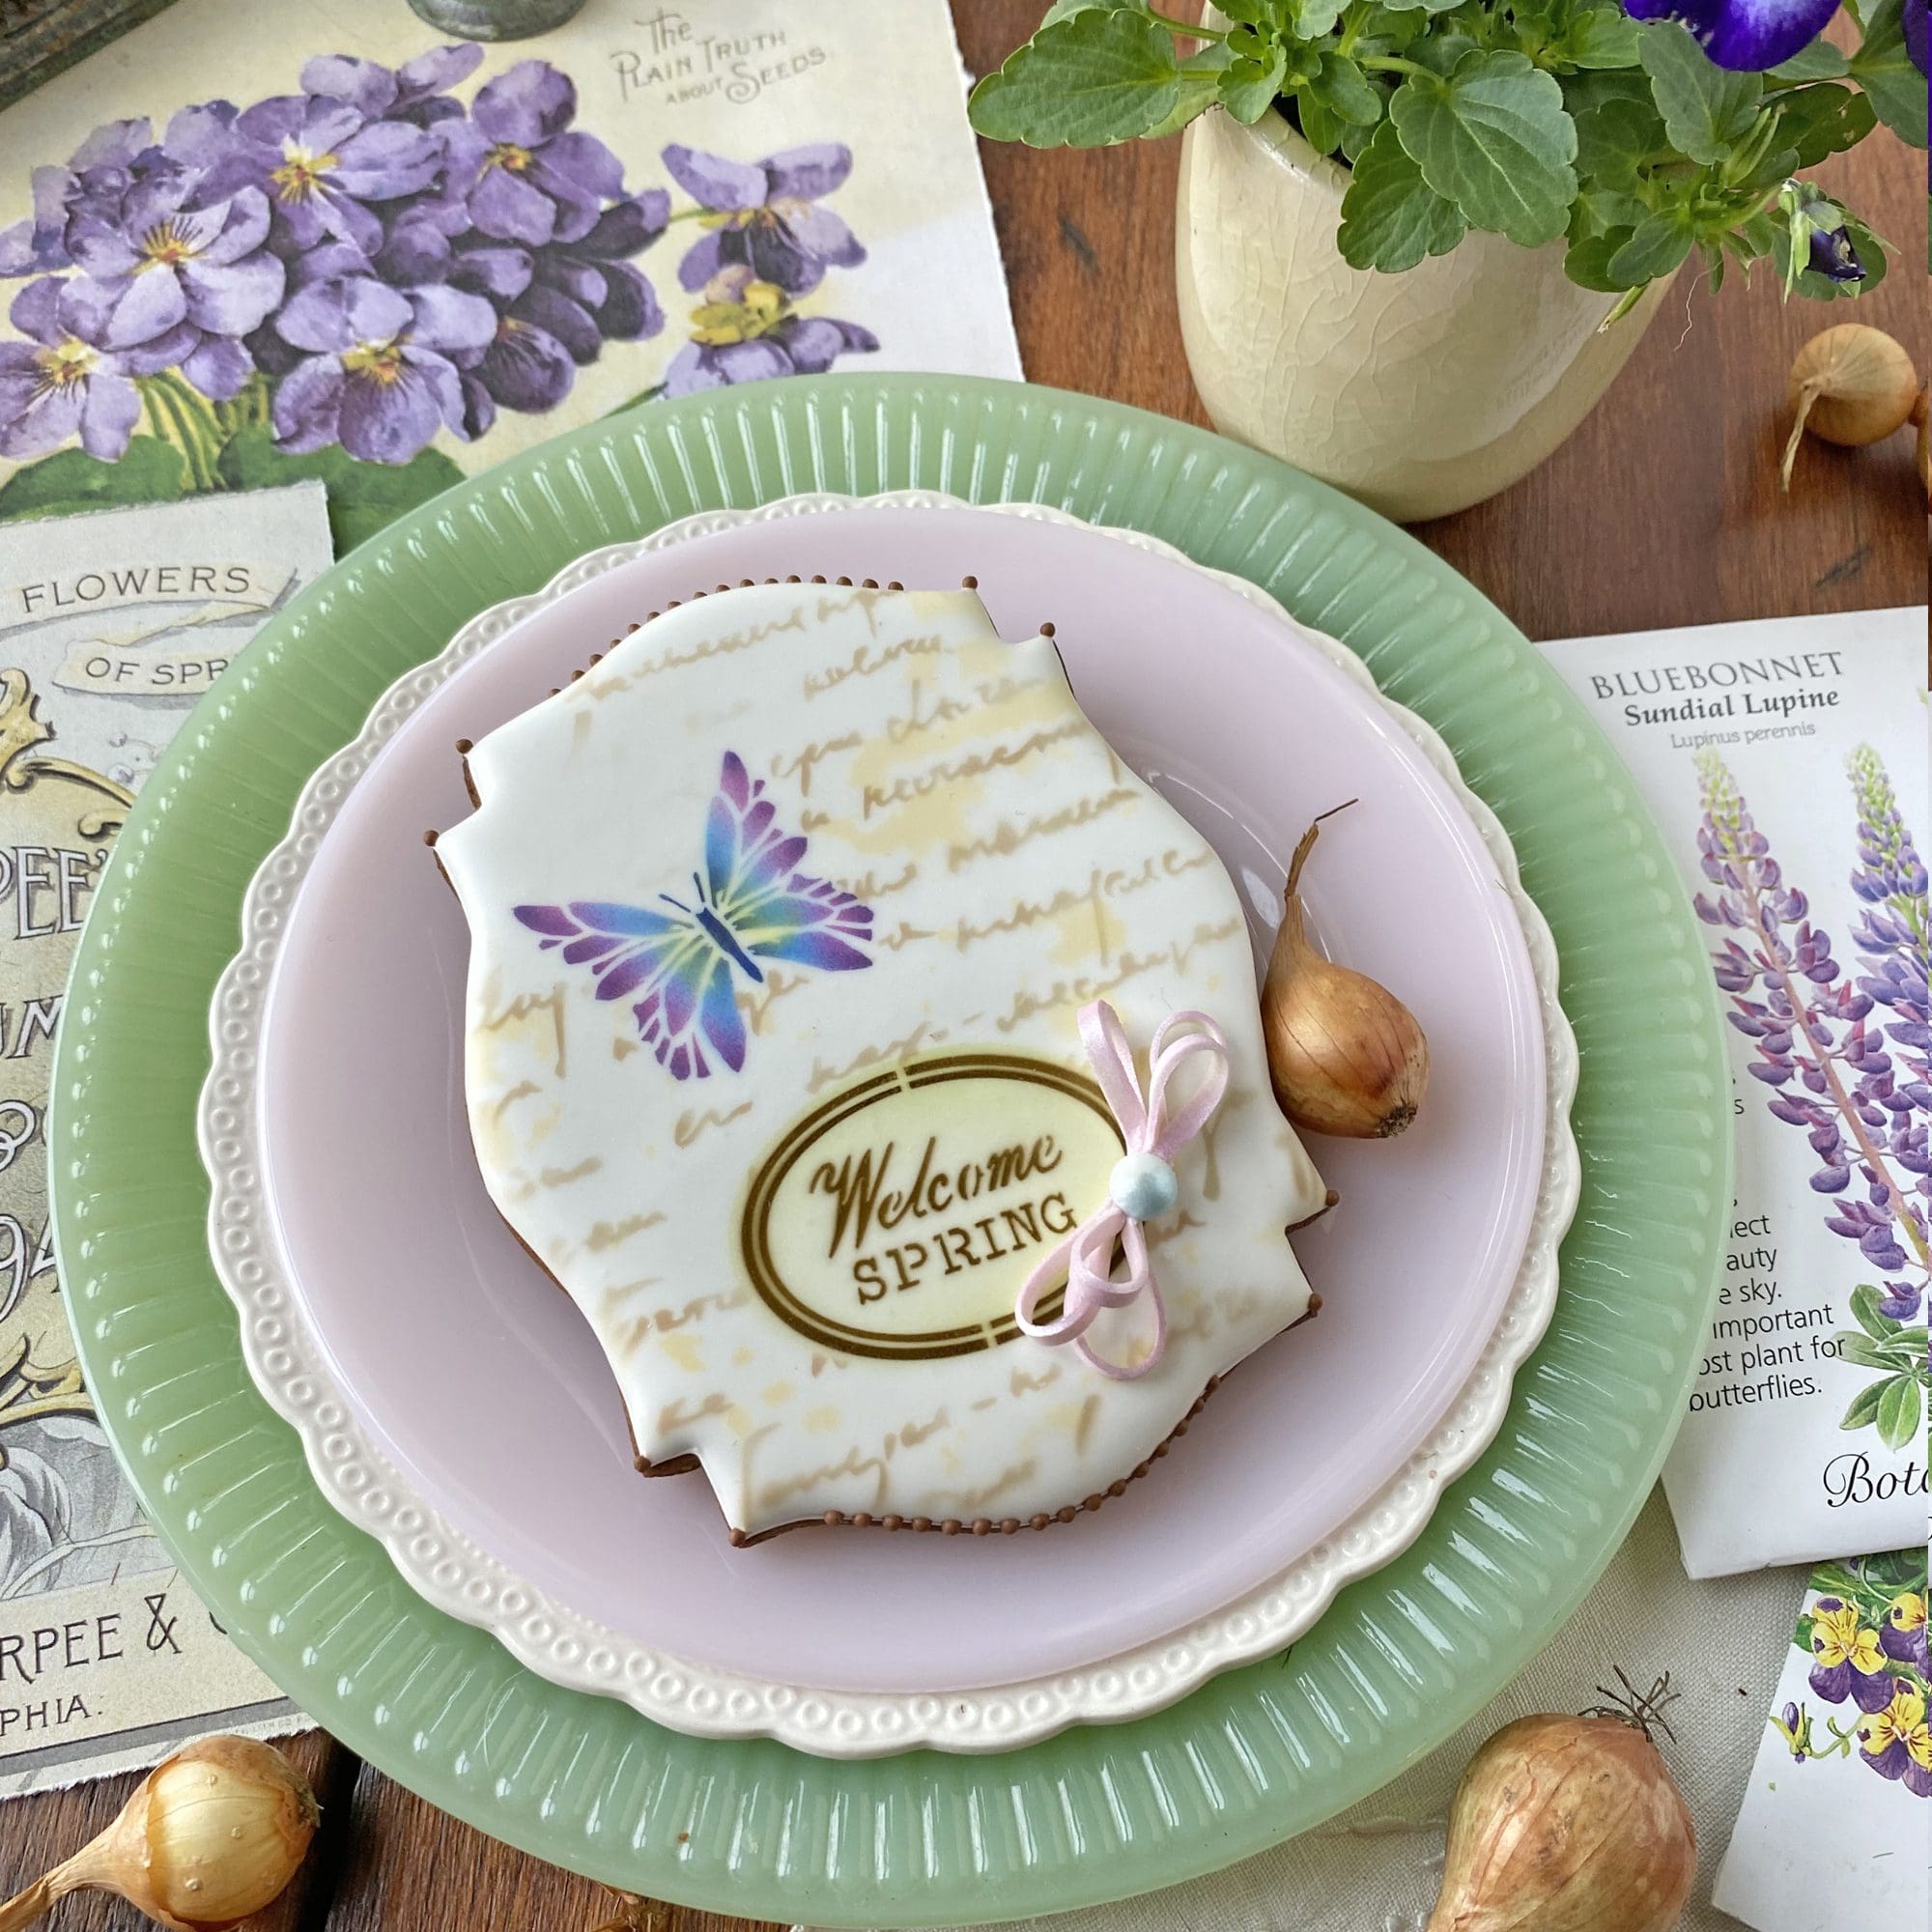
With that basic instruction behind us, let’s move on to some cookies that have framed messages directly airbrushed on them. After that, we’ll take a look at some cookies with fondant appliqués. This first cookie, using my Genie Plaque cutter, is one of my favorites this month . . .

Let’s zoom in on it . . .
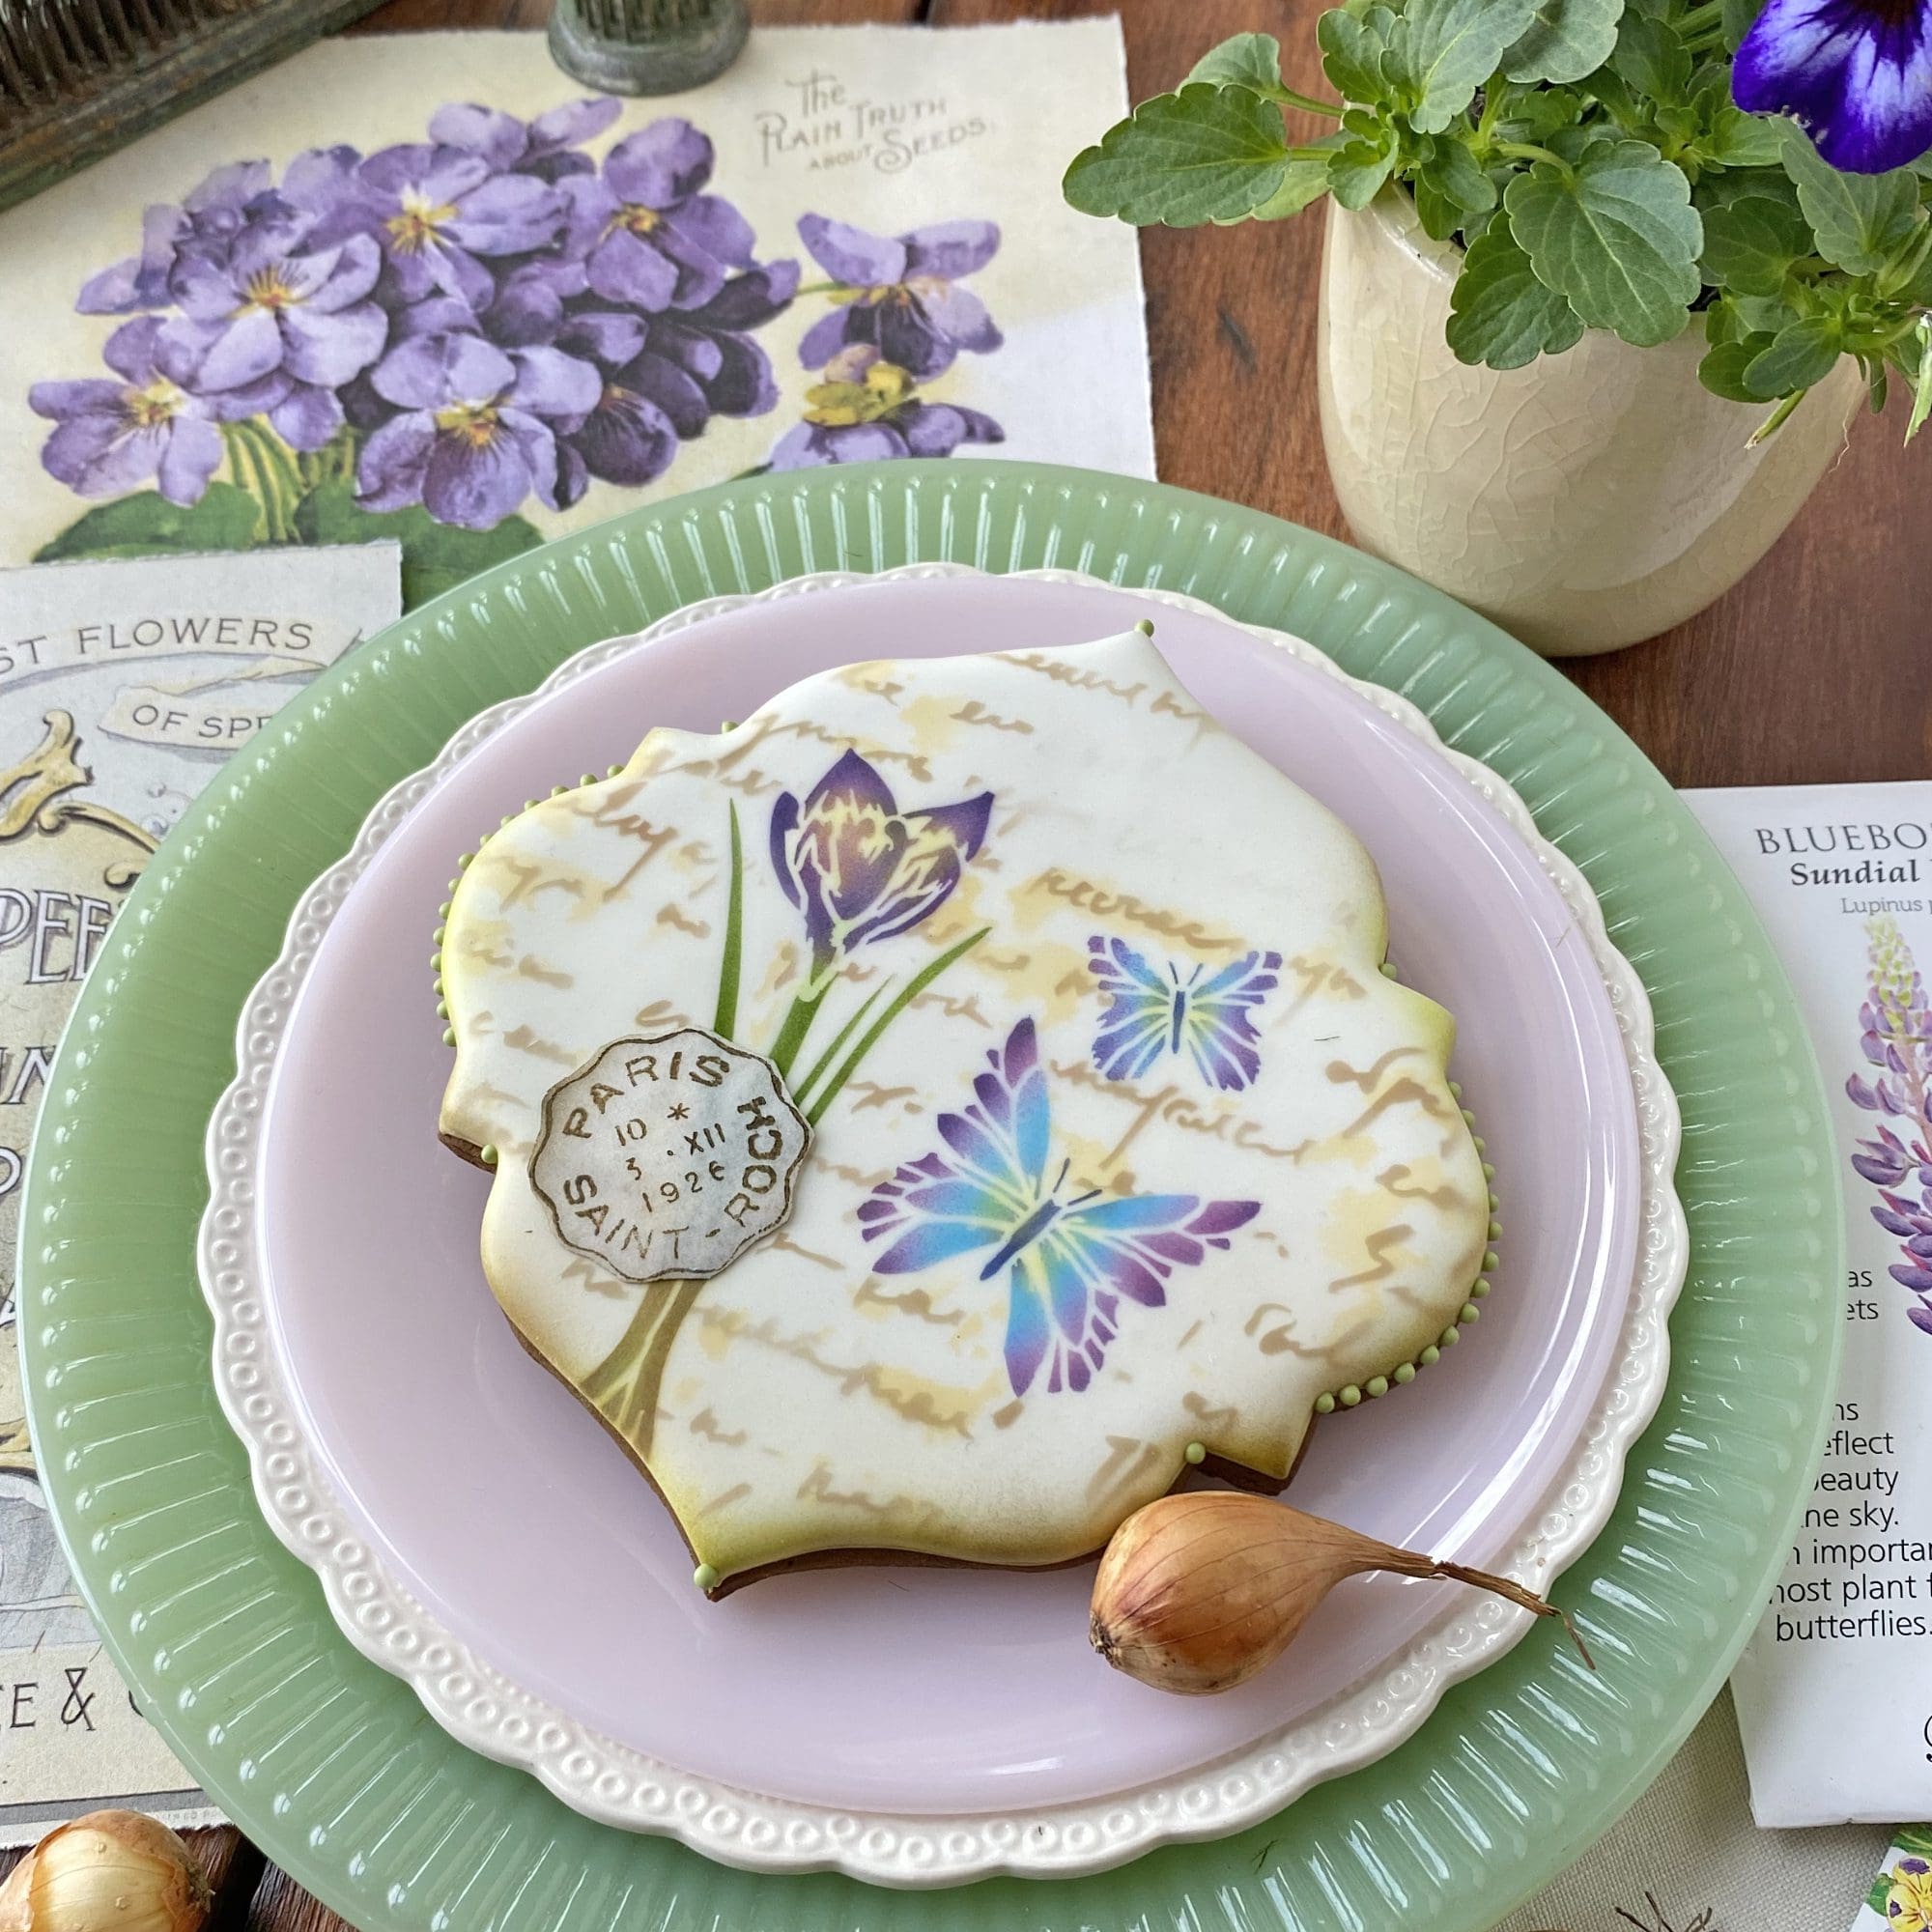
And here it is with an additional wafer paper stamp that I “aged” with brown airbrush coloring . . .

Next up, a series of airbrushed messages all directly stenciled on cookies made with my new Theron Plaque cutter! I really love its universal and elegant shape.

The following cookie is very similar to the one above except that I swapped in a different message and dispensed with the modeling chocolate bow to create a more masculine look . . .
Handily, the Theron Plaque is sized to fit at least one of every element in the release. Here’s the same cookie, now with a crocus . . .
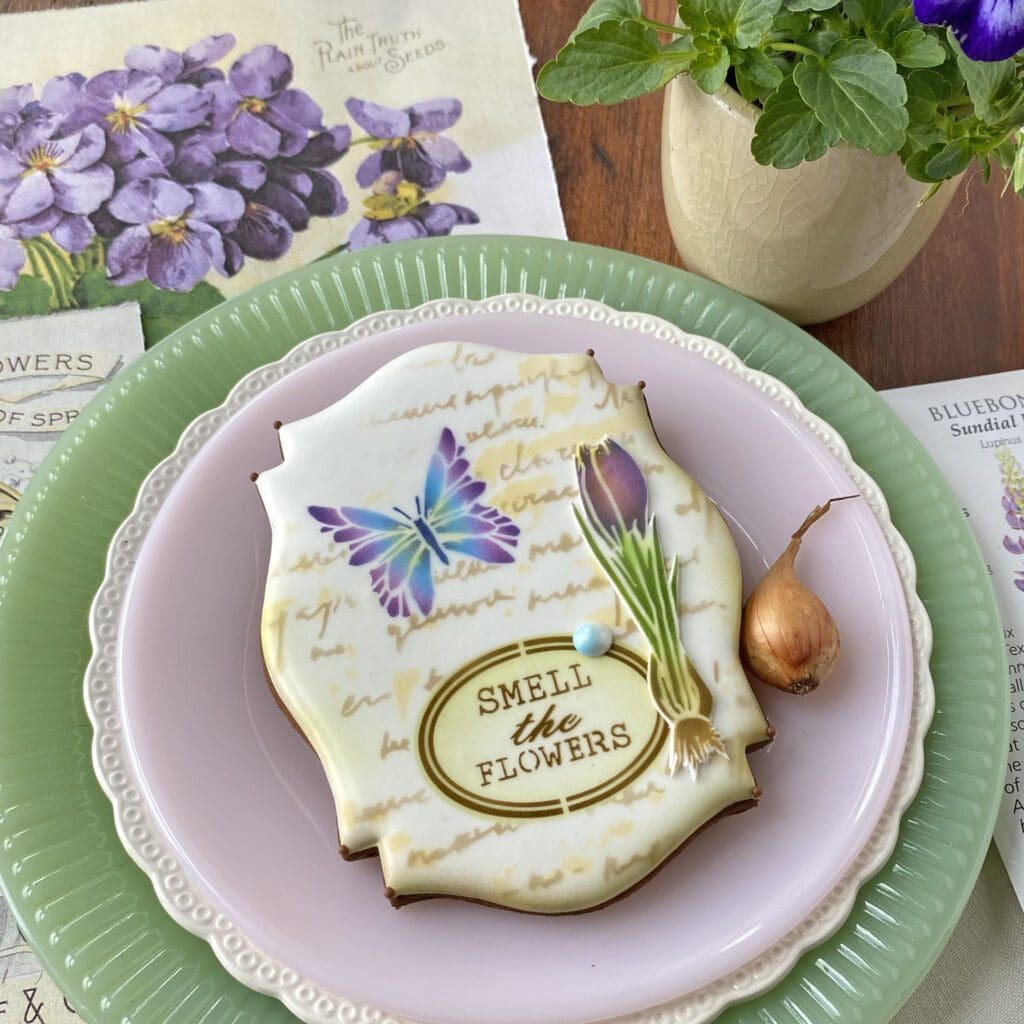
BTW, this crocus is a fondant appliqué. It seems I have a predilection for appliqués because I ended up with far more cookies with message appliqués. Think I’m exaggerating?! Think again. The series of appliqué-rich cookies below proves I’m not! ![]()
This first cookie demonstrates the design flexibility afforded by appliqués. I first tried out an electric green “in Full BLOOM” message on it . . .
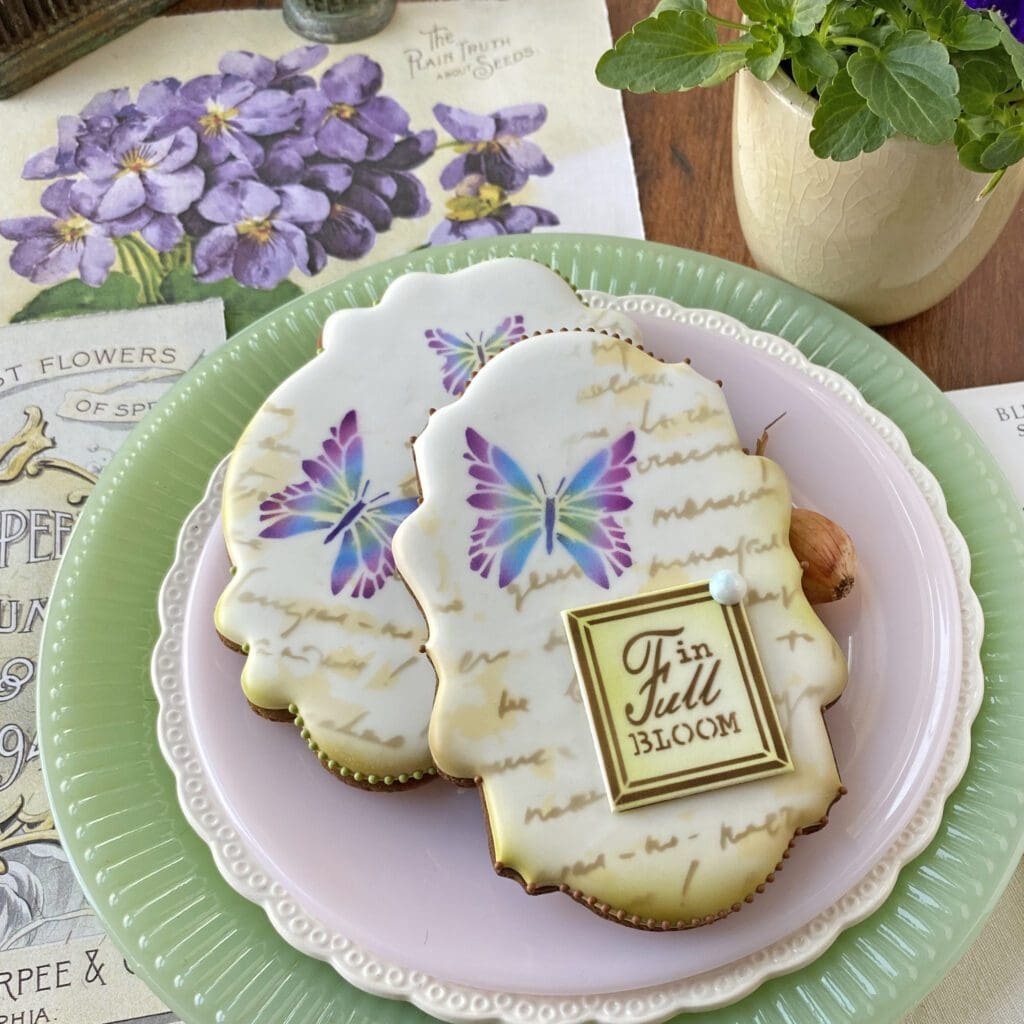
Then I tried out a blue version of the same message . . .
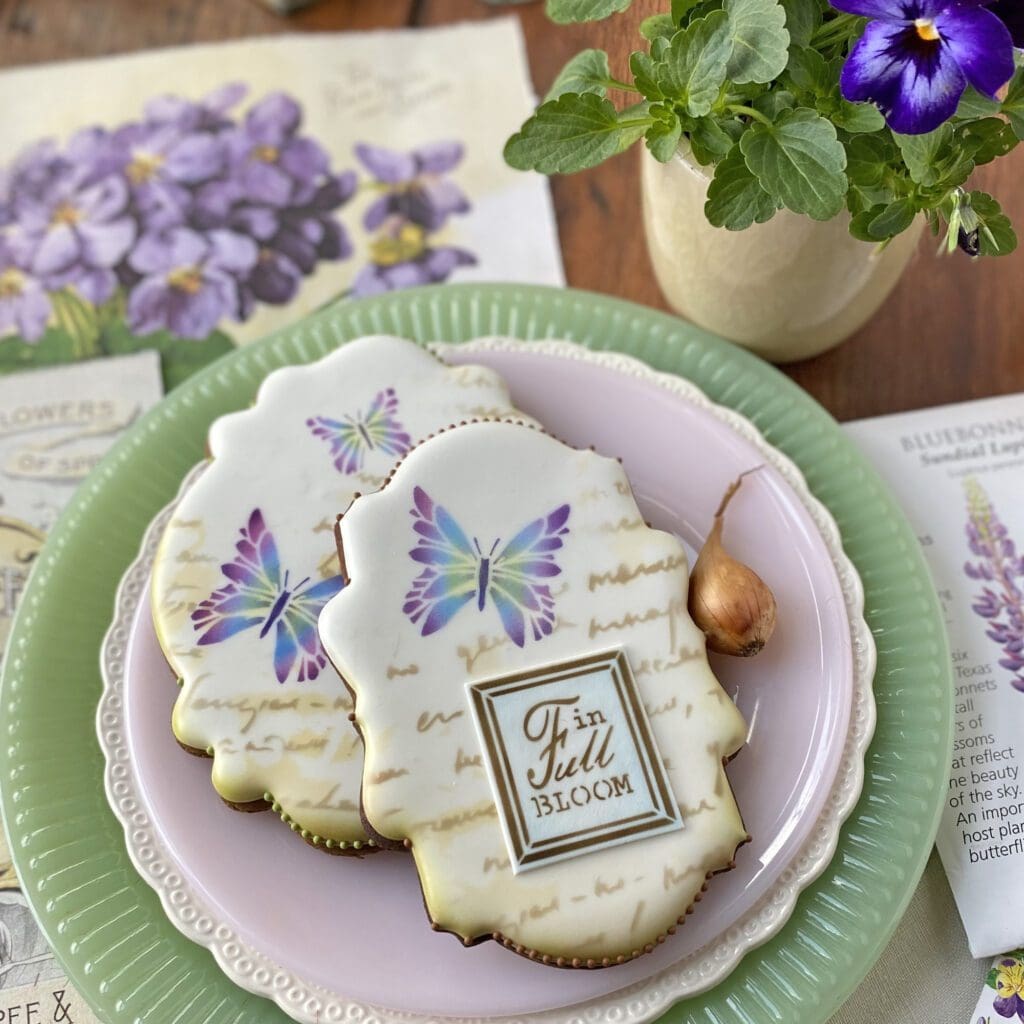
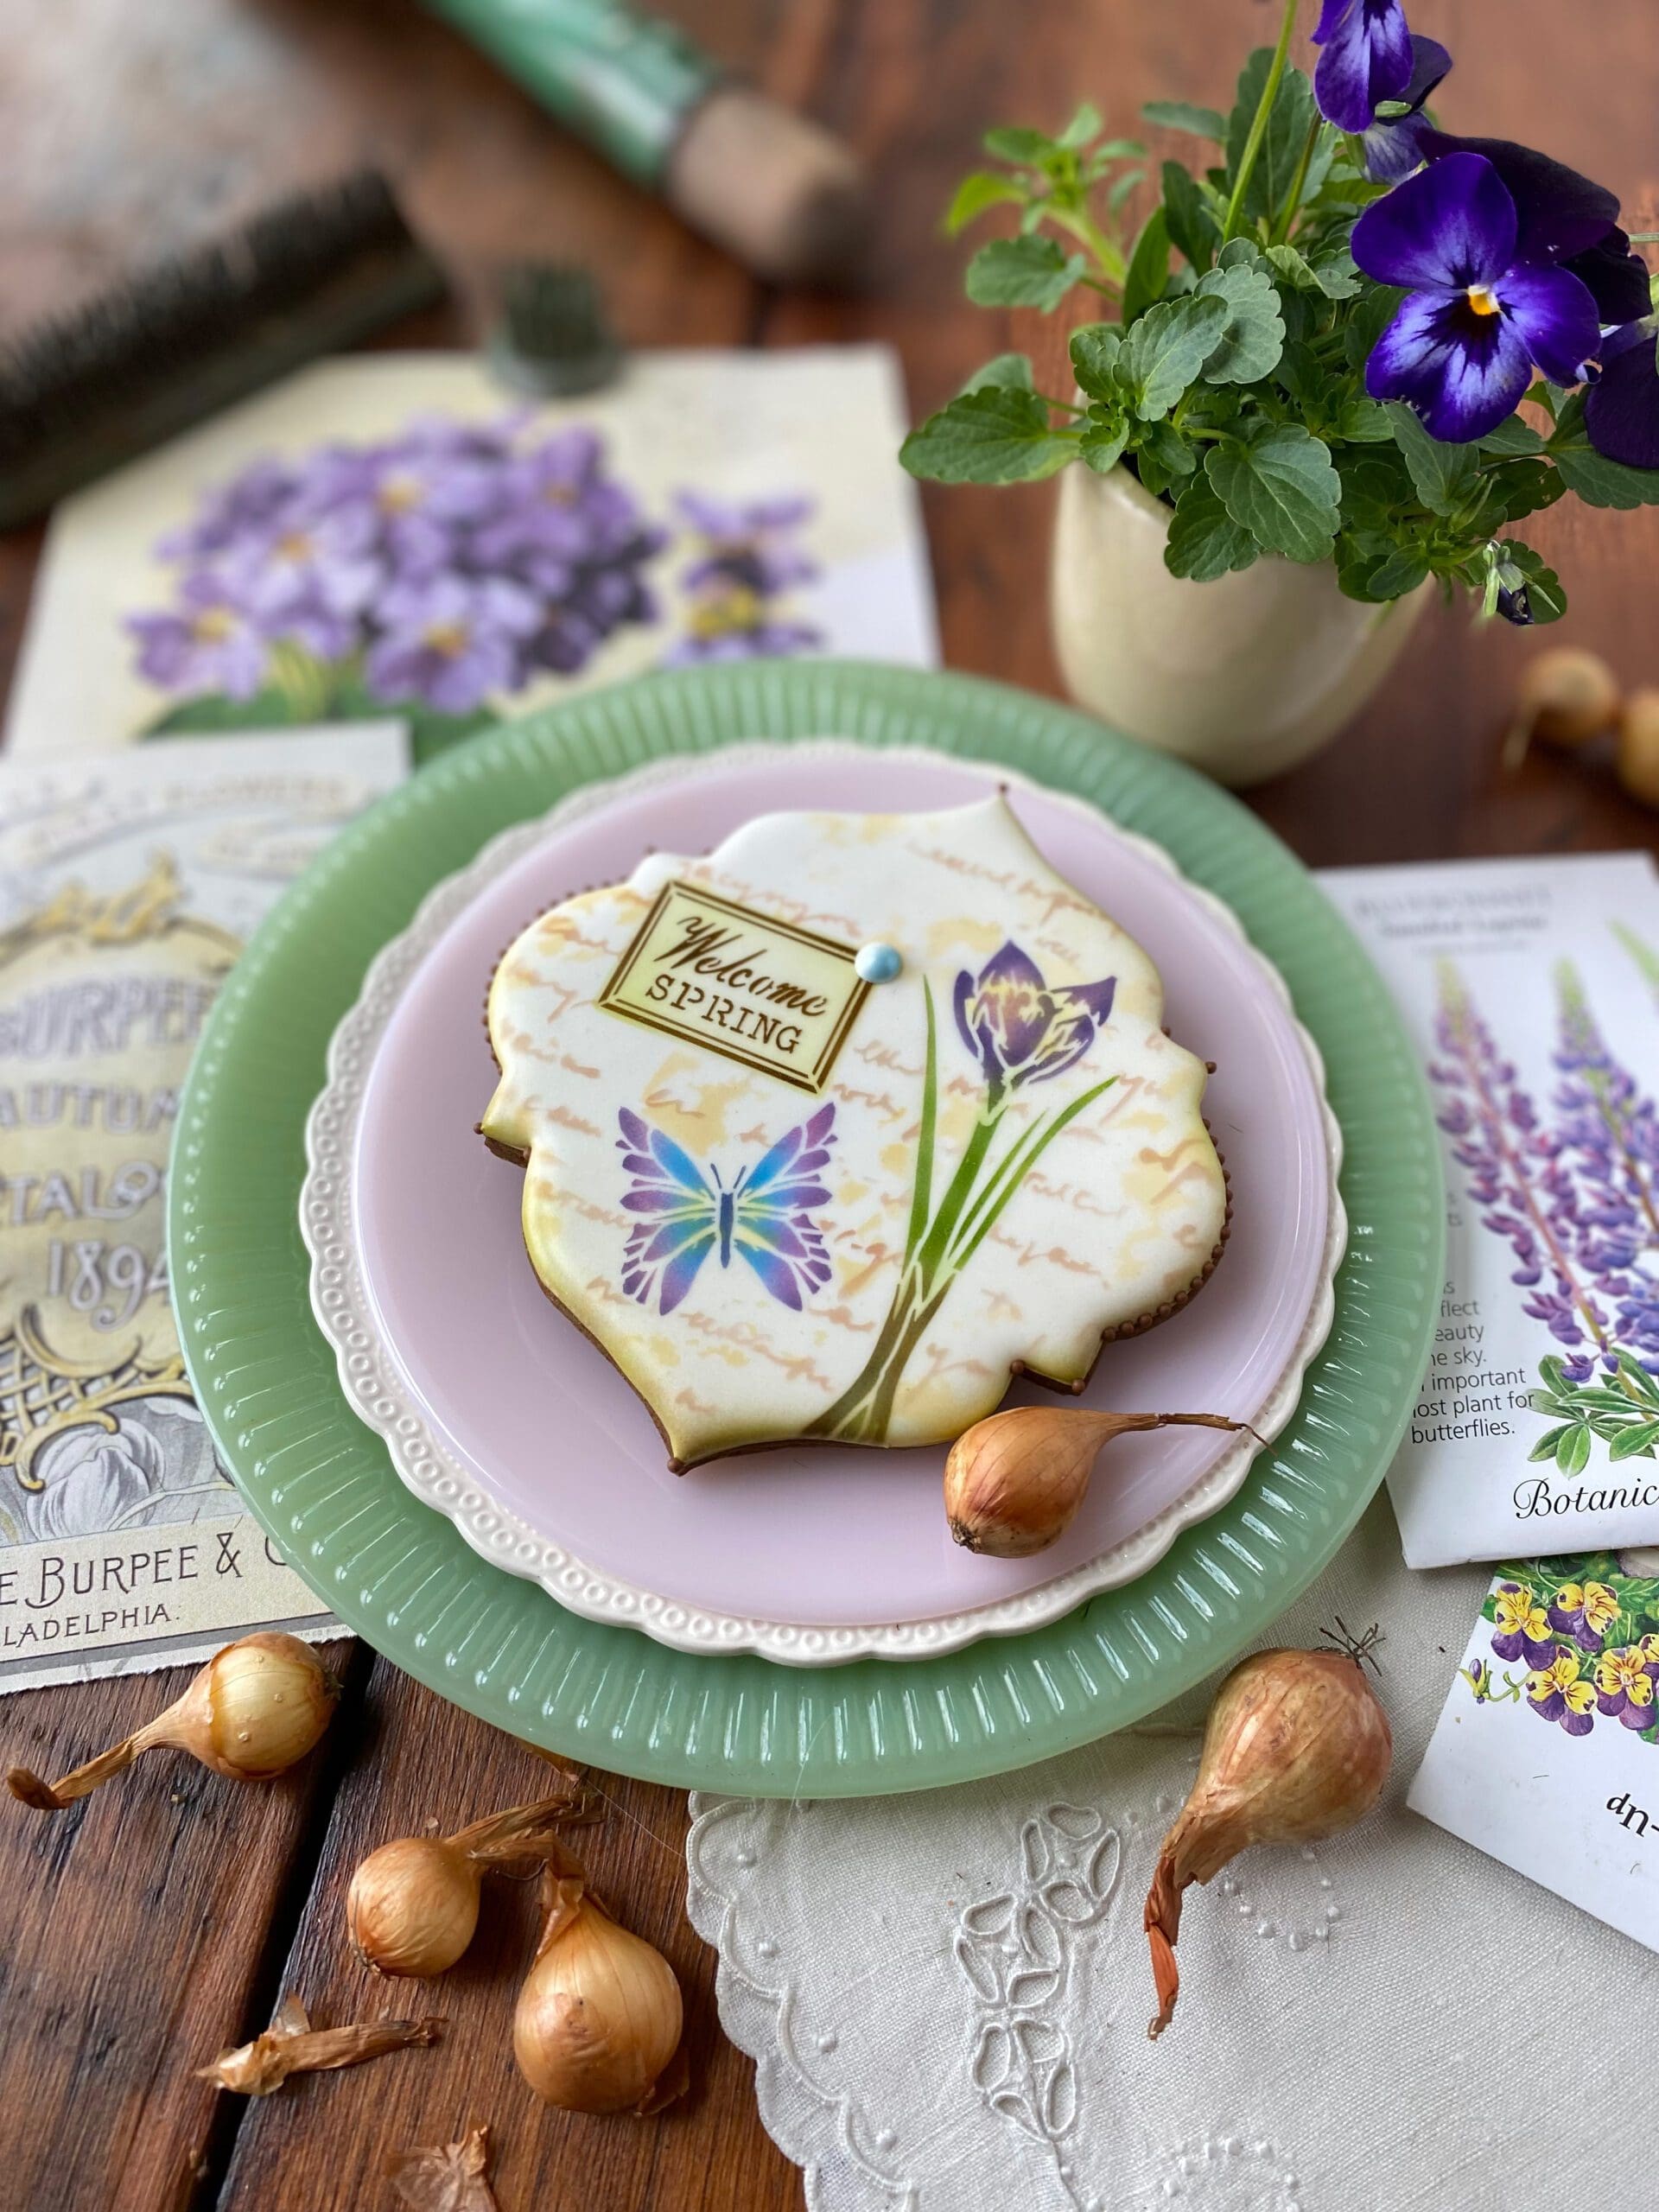
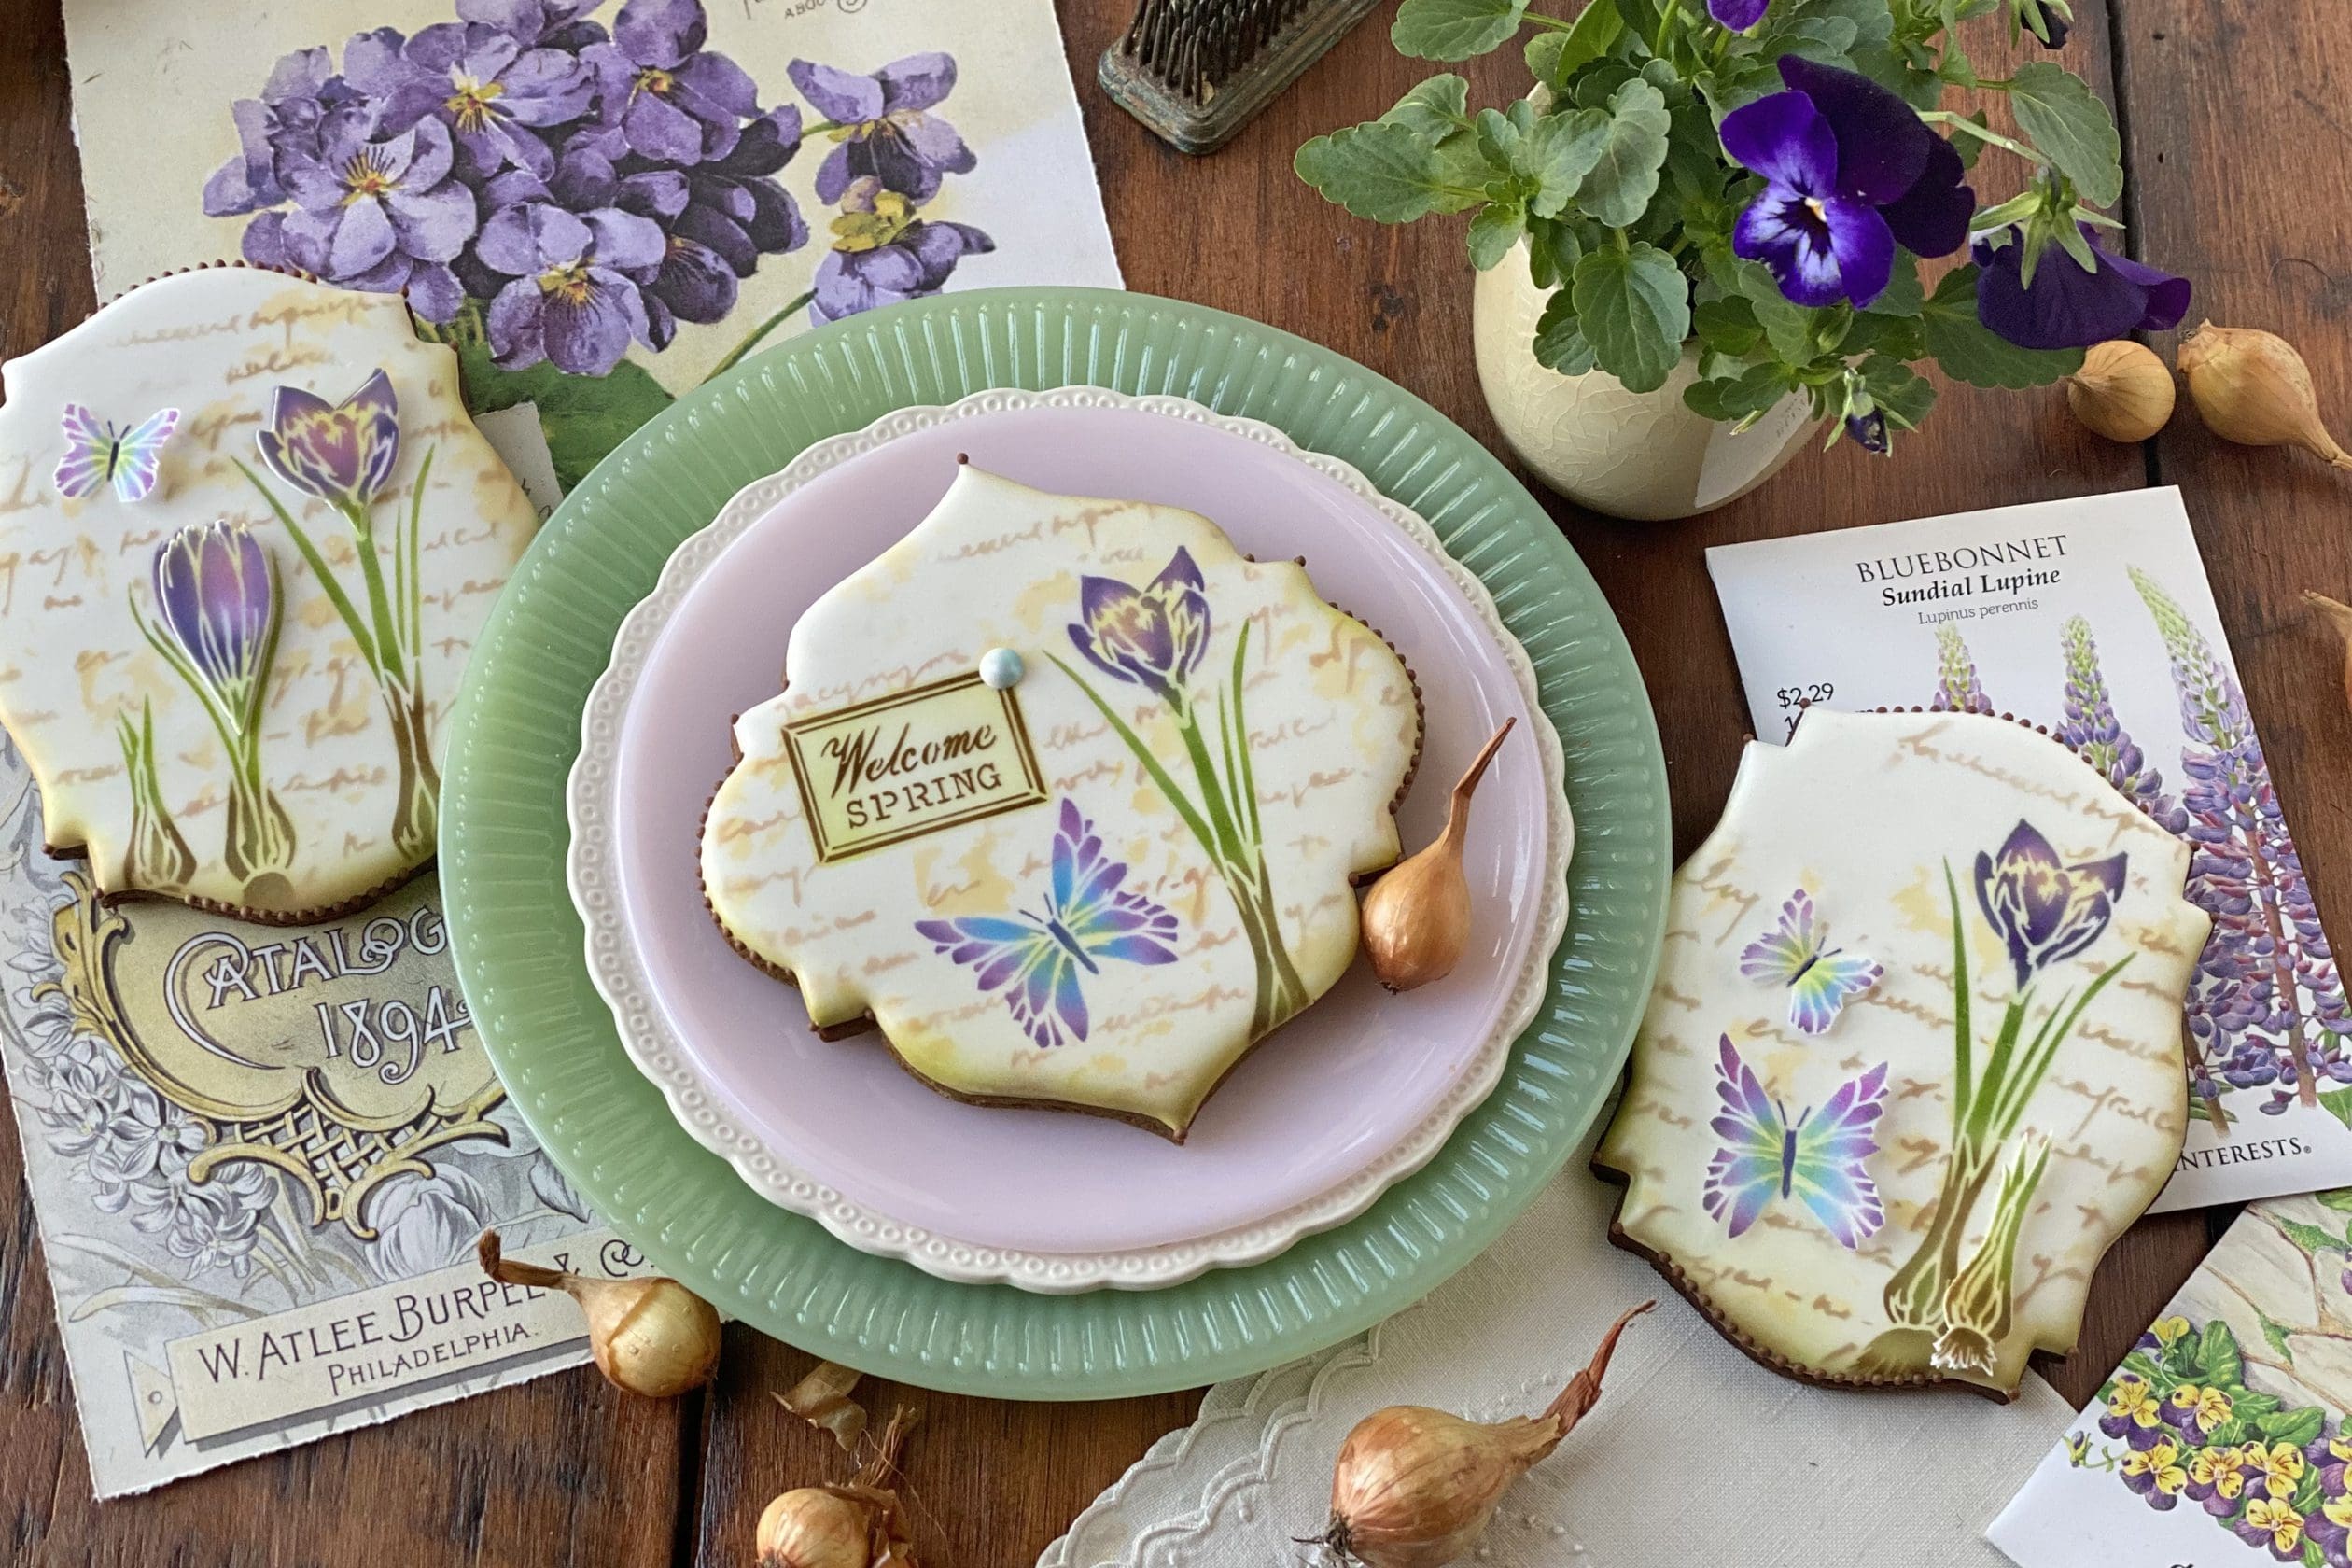
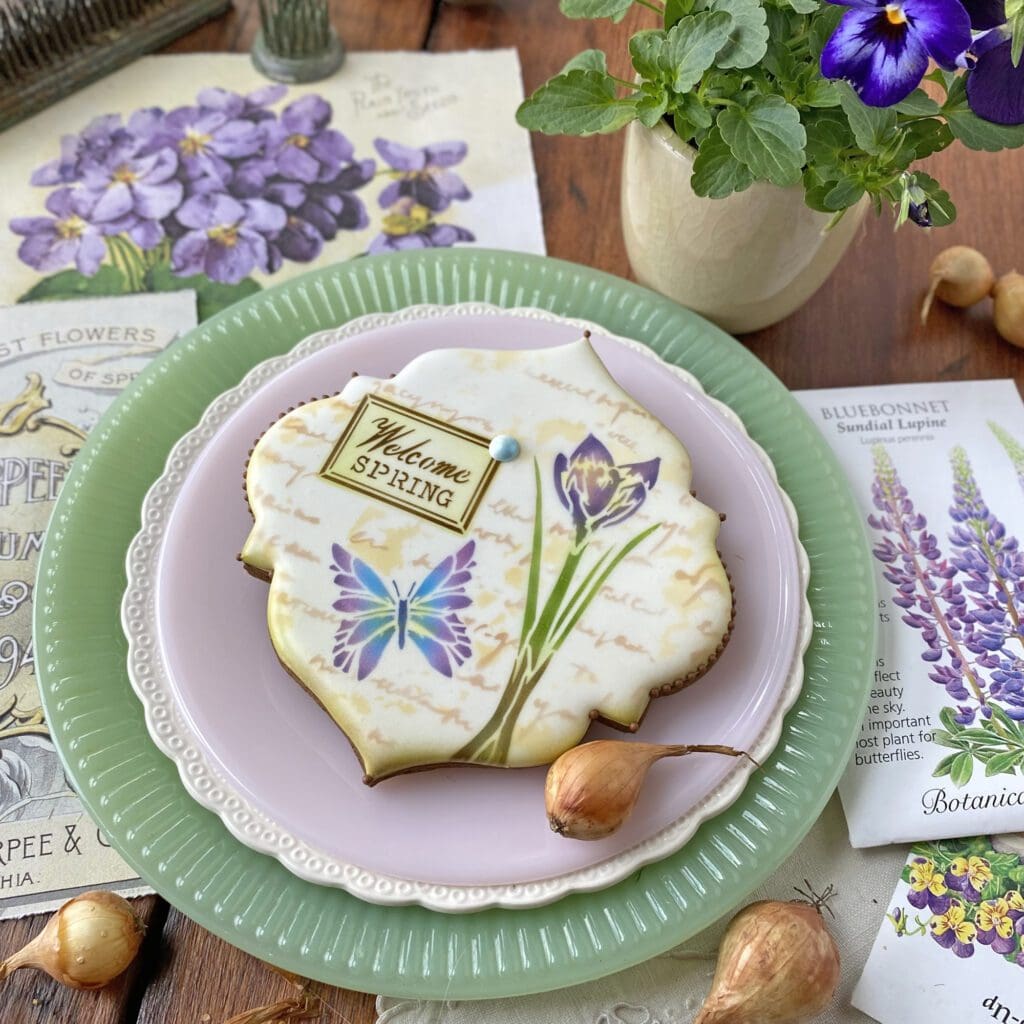
And then I swapped in “Welcome SPRING” . . .

I can’t recall which message I ultimately decided to use, but I know it was a toss-up because all three fit quite well.
Here’s another message appliqué on a larger cookie with more design elements . . .
And, once again, the next two cookies are in fact the same one, just with different message appliqués. (There I go again, being noncommittal! But what can I say?! I like having the flexibility to test different arrangements before making final design decisions!)
Now, I return to that deckled cookie that I shared at the end of the last section. It is big and clearly needed more stuff. So I began adding, rather conservatively, with just a single message appliqué at first . . .
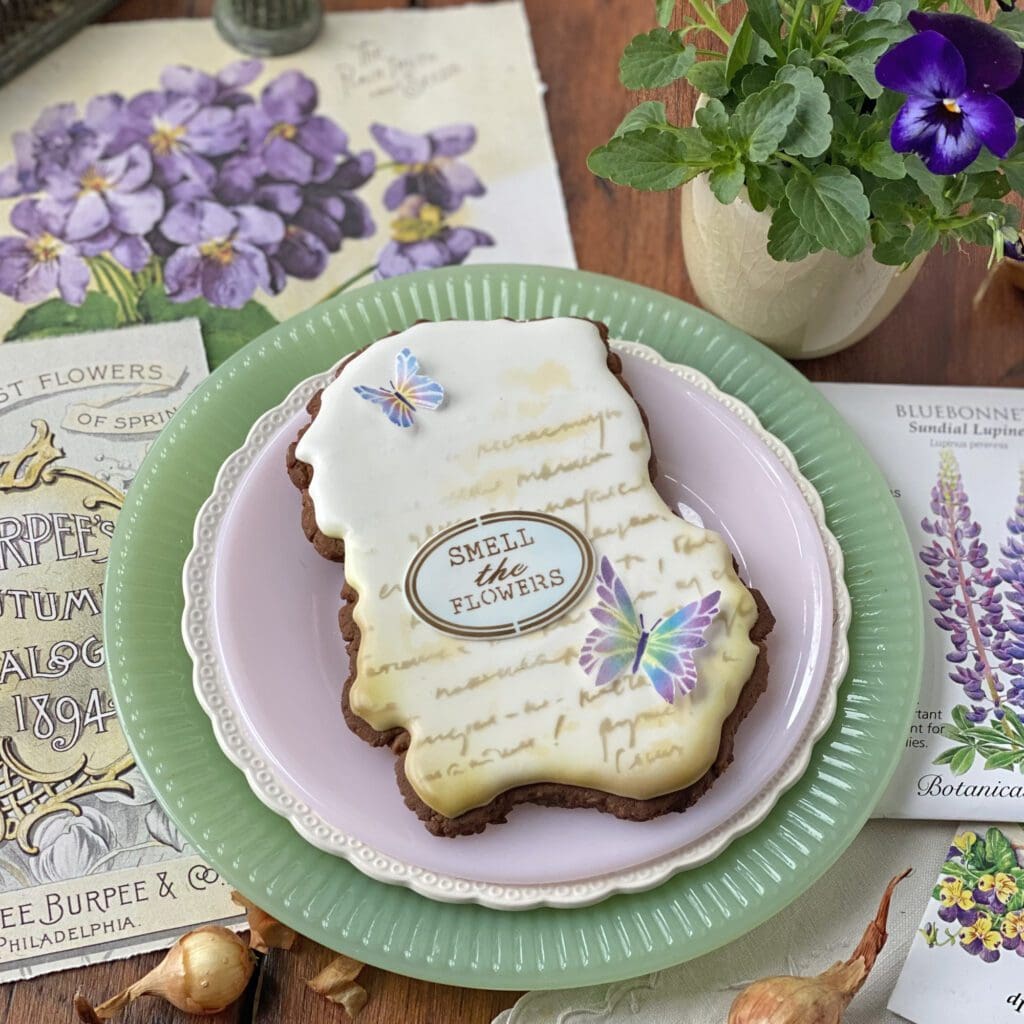
It’s certainly striking in this simple format, but it also looks good with a sampling of every element in the release – a message, a crocus, and two butterflies, oh my!
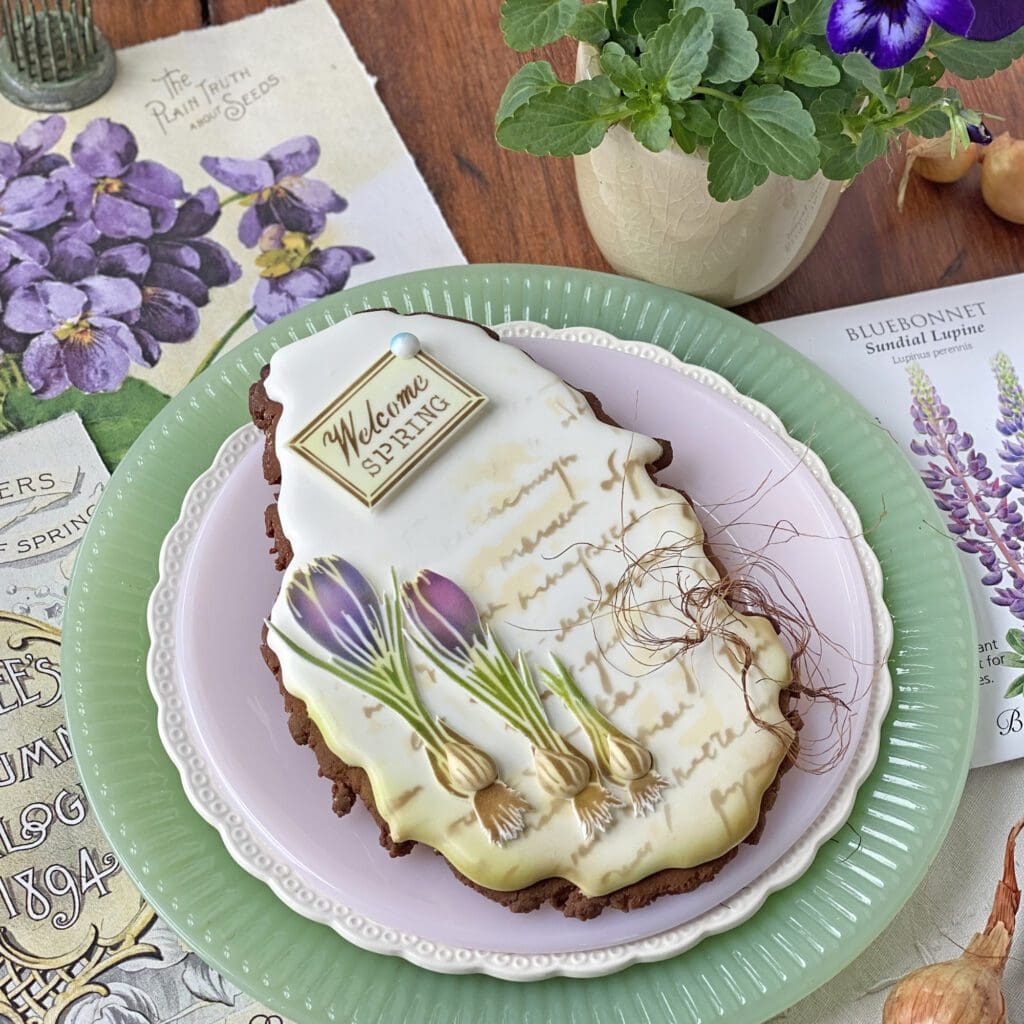
As I mentioned earlier, deckling is fun – so fun, in fact, that I had to make another deckled design. This one uses three of the four crocuses in a progression, and it also has three other surprises. Can you spot them?

Yes! I added dimension to the bulbs by airbrushing tiny bulb royal icing transfers and then attaching them to the crocus appliqués with piping gel. I was planning to add a wee bit of wafer paper to the bulb transfers to make them look more lifelike, but I rather liked the cleanness and simplicity of this design so I decided to go no further – with that idea, that is! Instead, I ended up attaching some tangled cornsilk to one side to enhance the organic look . . .
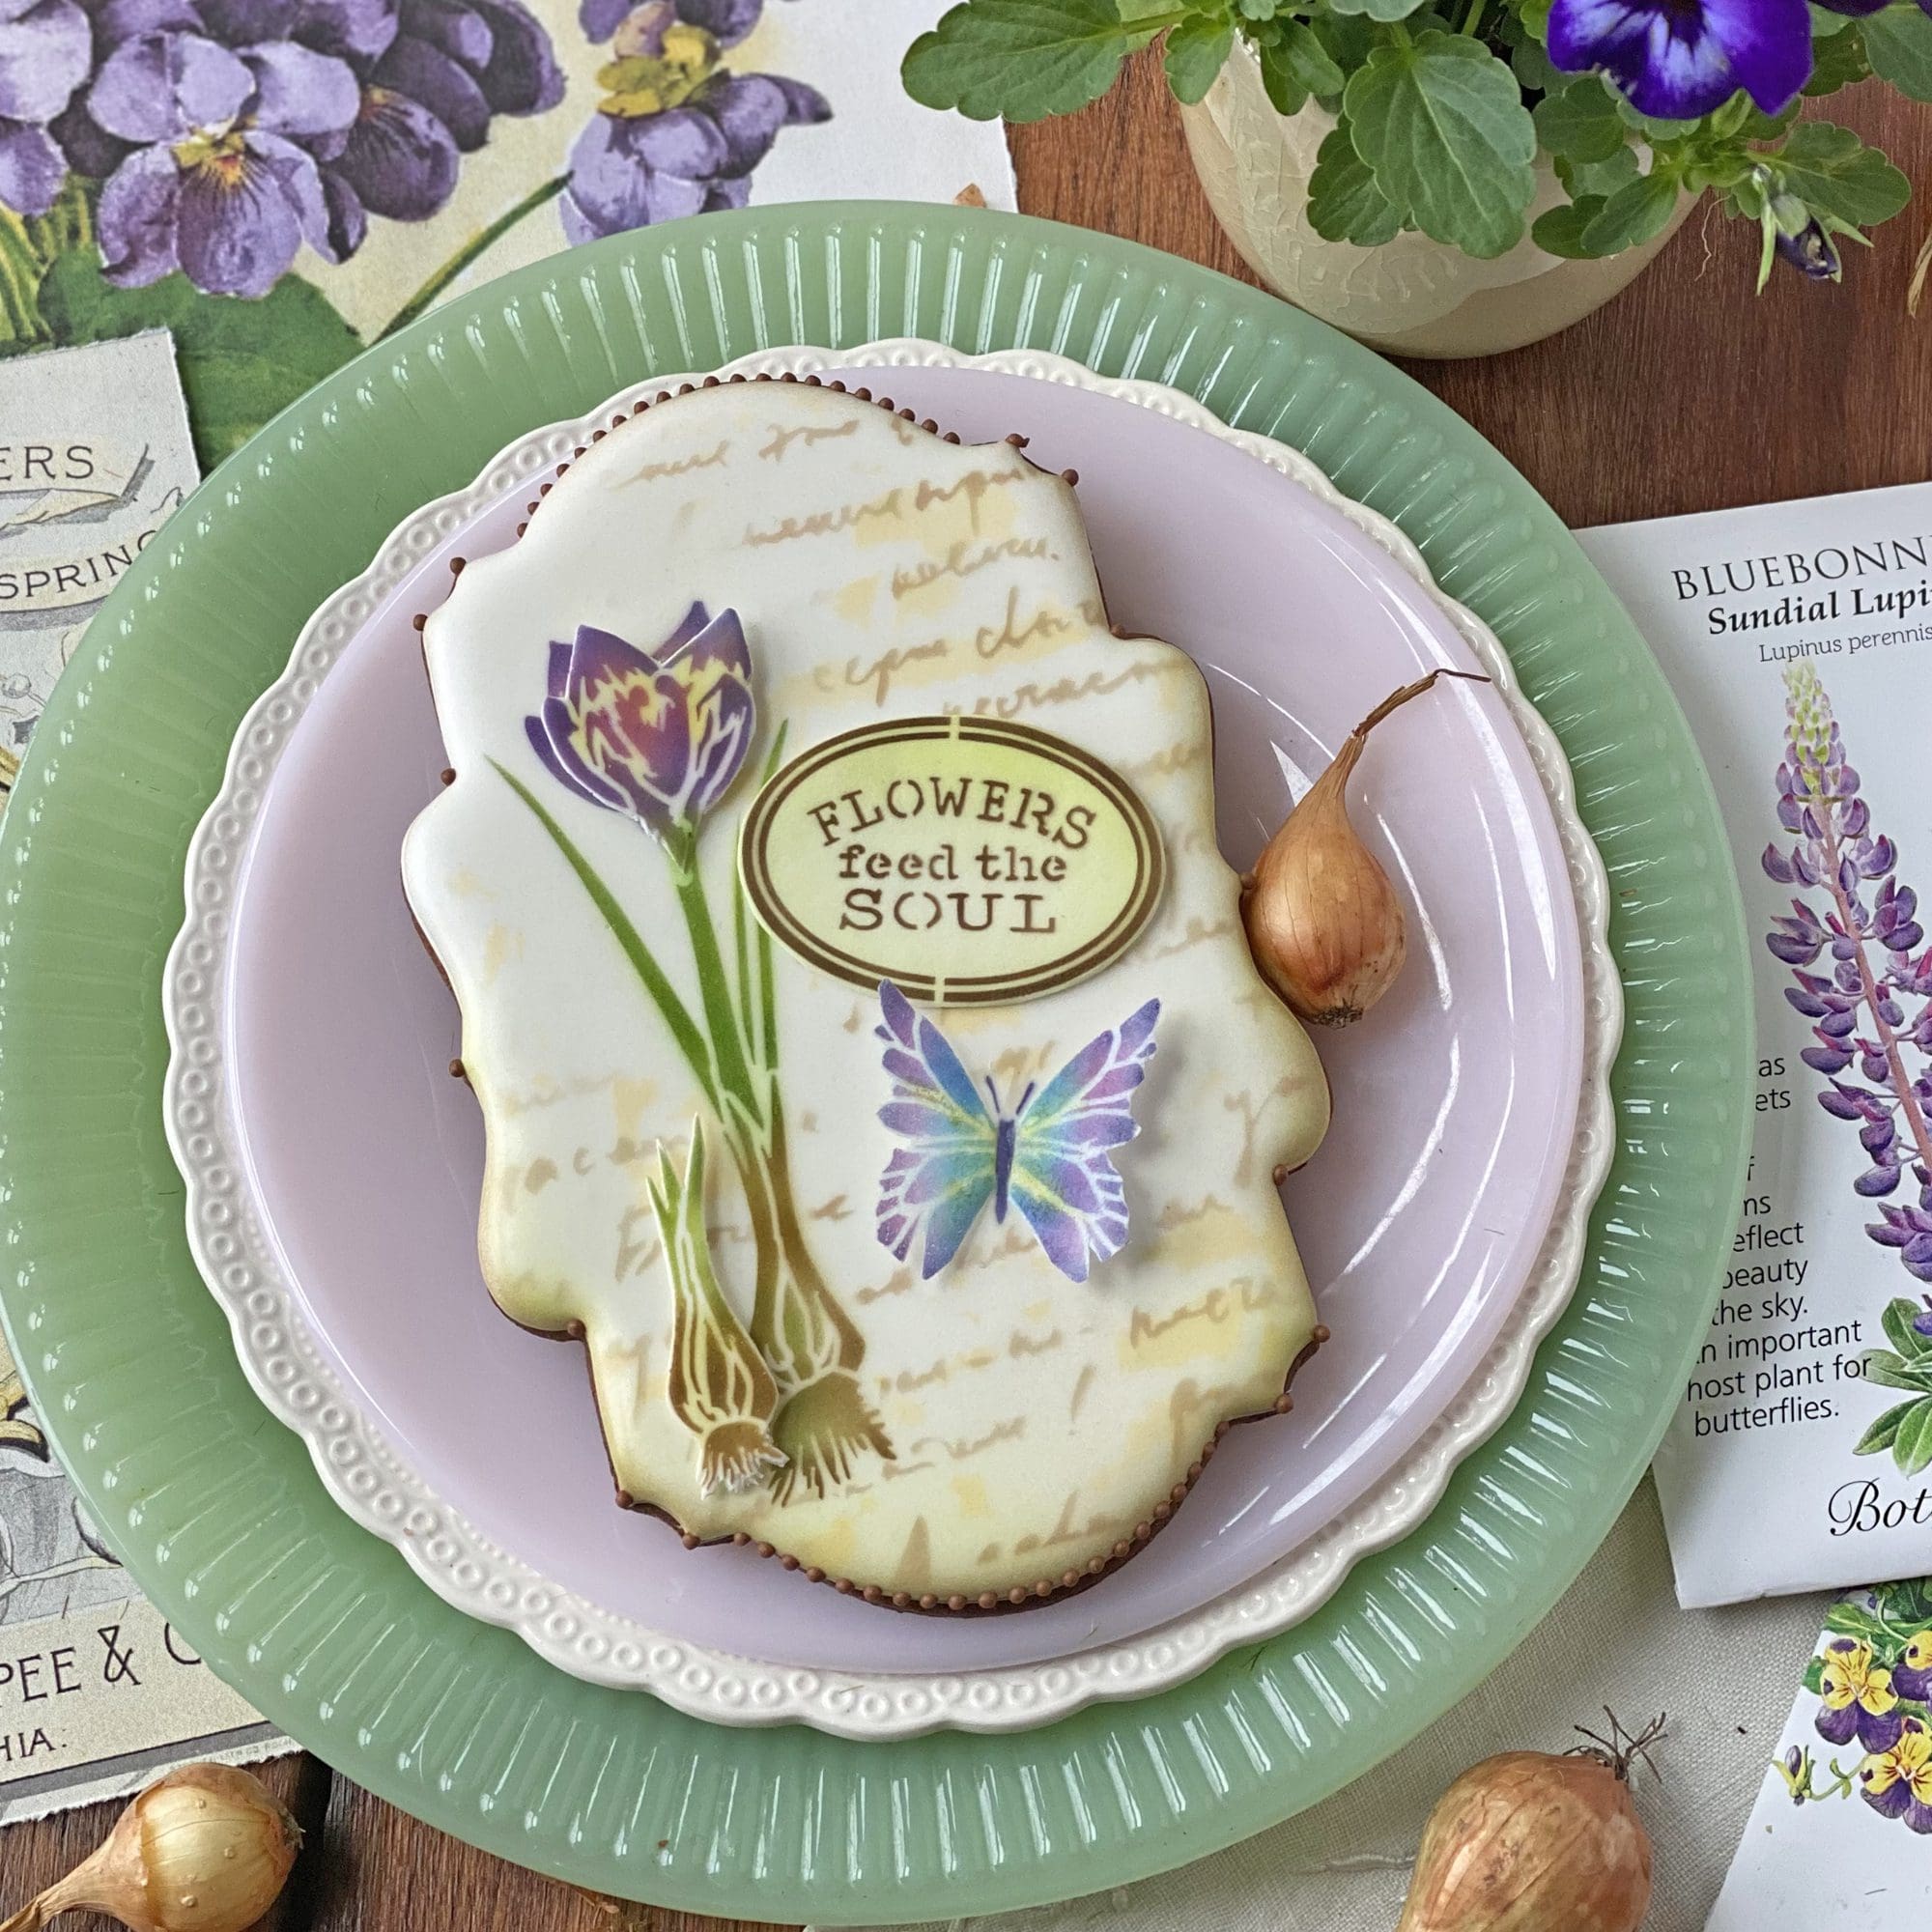
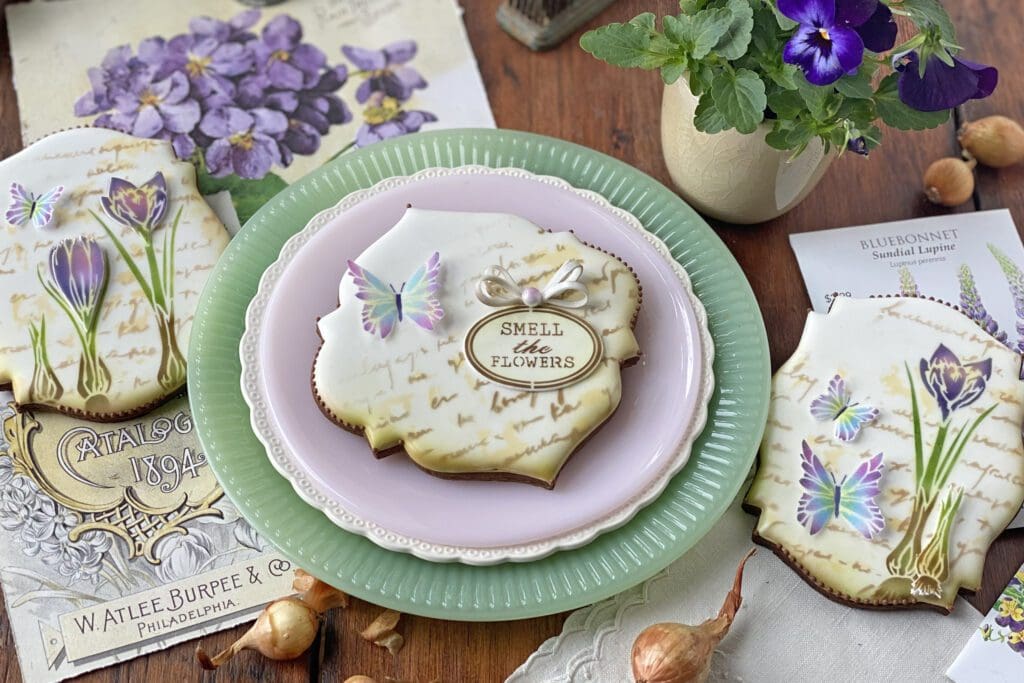
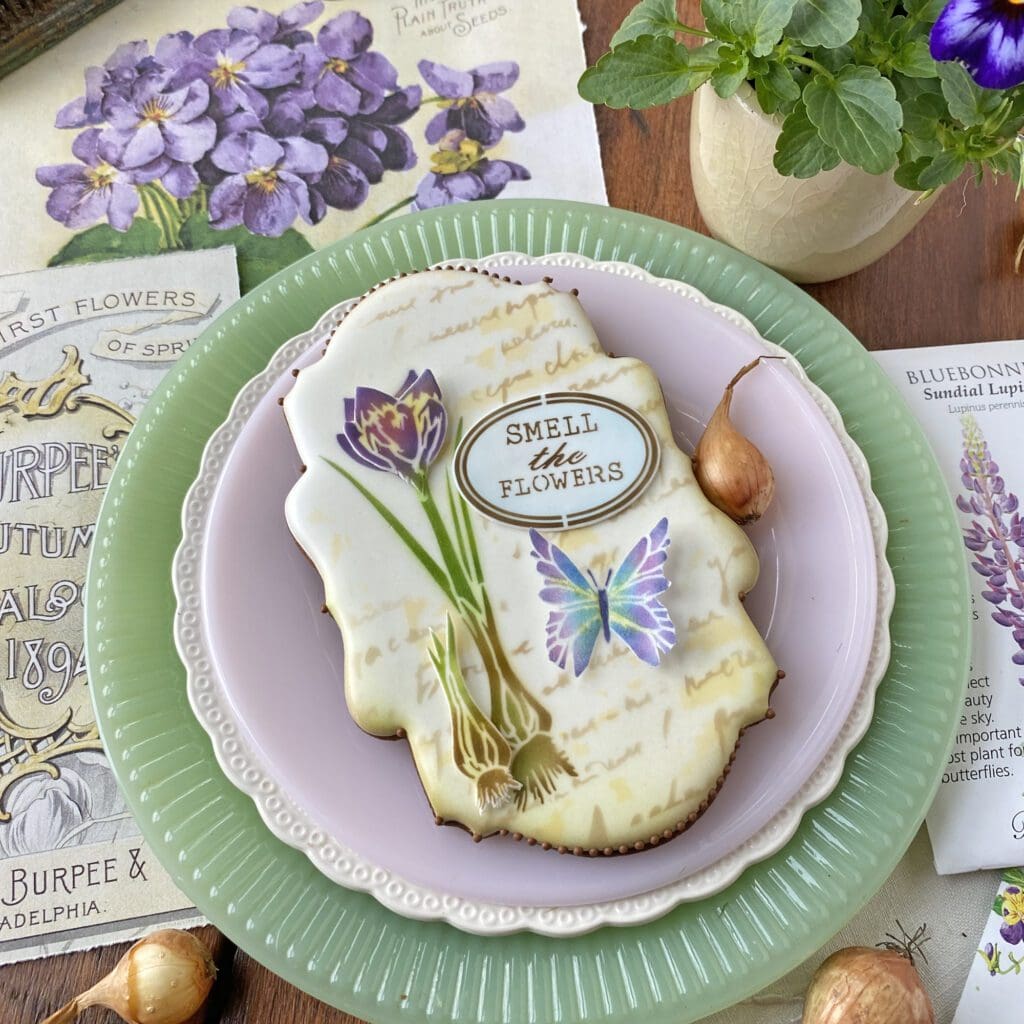
As usual, I could go on and on sharing designs with you. (That’s the beauty of my Dynamic Duos™ sets – their unique masking and layering system opens up a world of design possibilities!) But this post is getting long and it’s getting very late here, so I leave you with a cookie that uses one of my favorite messages in this set – one that I know I should take to heart more often . . .
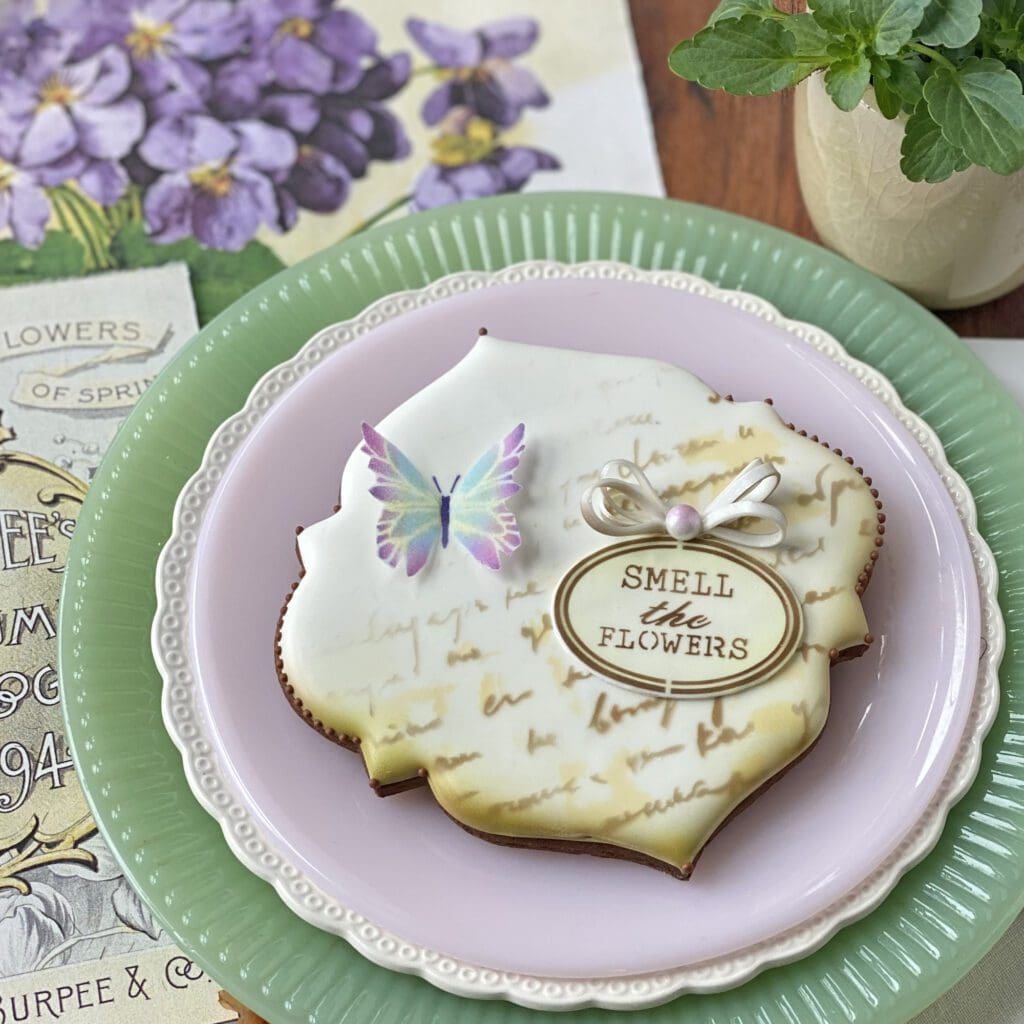

Please take a moment as well to stop and smell the flowers this springtime. They truly do feed the soul!
And don’t forget to read the following important announcement about upcoming changes to my Stencil of the Month Club, and the recap of this month’s key links right after the announcement . . .
Over the course of the past year or so, my partner Confection Couture Stencils has been gathering feedback from Stencil of the Month Club members, which has been very helpful (thank you for your input!). Many of you have mentioned wanting more product variety (i.e., cutters to go with my stencils), more time to experiment with my stencils, and more tips for using them to create beautiful results. Well, we have listened and are acting on your great advice! Going forward, the Club offering will take on a brand new form designed to address all of your desires. After this month, I’ll be bundling one of my trademark Dynamic Duos™ sets, a cutter that fits those sets, and an instructional video in each release. You’ll be getting more than ever in this new kit, and the video will be so richly detailed that you’ll feel like you’re working alongside me in the kitchen!
So how will these new kits roll out? On to logistics . . . Because a video takes longer for me to produce than a typical stencil set, we will also be moving from 12 smaller releases, as we have been doing, to five of these bigger kit releases per year, all while keeping the annual Club pricing about the same. It will take me a few months to design the first of these new kits, so there will be a short hiatus in monthly releases (and billings) until the new release schedule kicks in later this summer. The billing process is also likely to change, but those details haven’t been sorted out yet. That all being said, Club members, please hang with us as we make these exciting product and schedule changes. I am sure the new kits will be all you asked for – and more!
If you have any questions about your particular membership or Club billing in the interim, please contact service@confectioncouturestencils.com. And if you have any kit themes you’re dying to see, please let me know at sweetlife@juliausher.com so I can work them into the new design process that’s kicking off as we speak. Thank you in advance!