
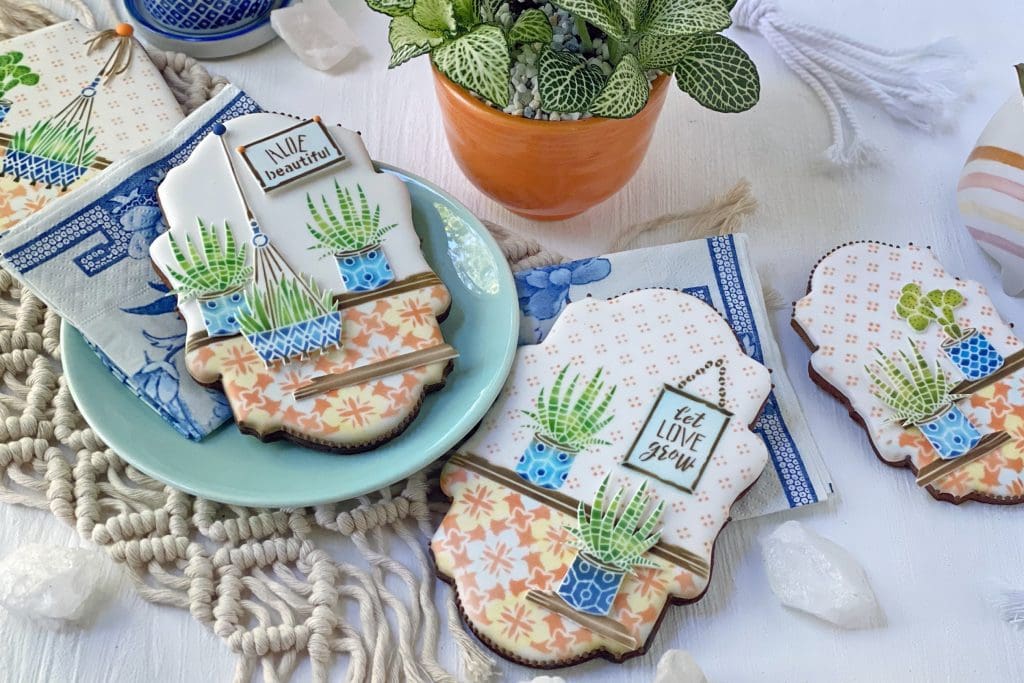
Aloe, beautiful cookiers! I told you my stencil releases were deviating from seasonal and going more trendy! While I’m a bit late to the boho macramé planter craze, there’s no imminent threat of it disappearing any time soon. The look is just so darn cheerful and fun that it’s sure to stick around longer than most would predict. So, with that assurance, here you have my boho-beautiful version of that craze in my latest Dynamic Duos™ release. With five potted plants, a backdrop intended to mimic Mexican tile, and assorted punny messages, these sets were designed to make cookies for a wide range of occasions. Think: women’s birthdays, garden parties, thank-you and pick-me-up gifts, and more! Here’s a visual recap of the release:

And, as always, here are all of the quick links to these stencils on my partner Confection Couture Stencils’ site:
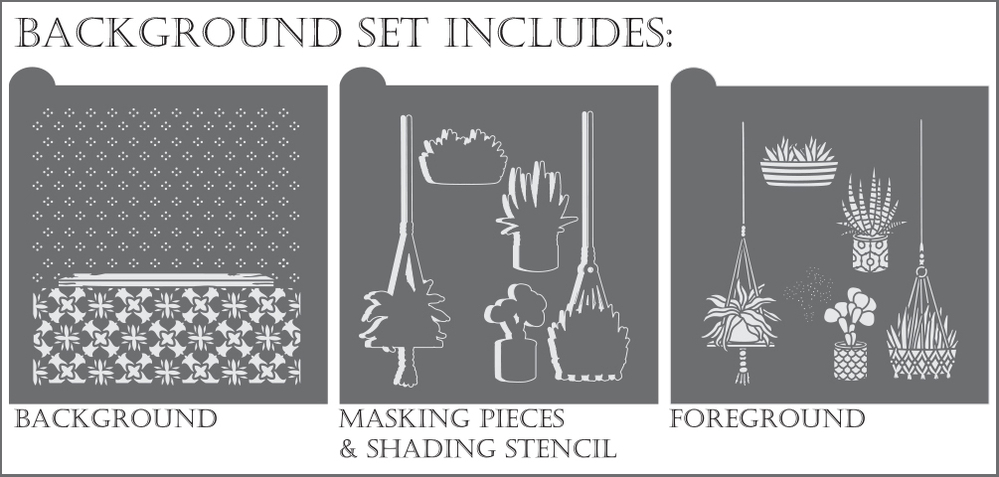
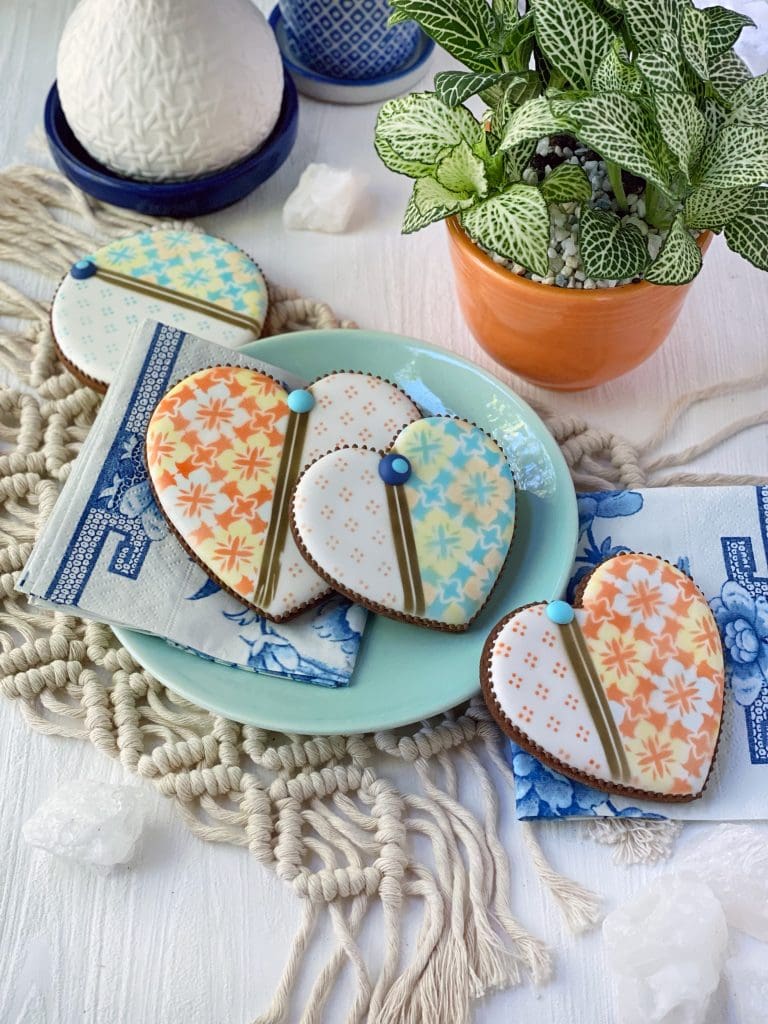
Also, per our new policy: the Mexican tile and dotted wallpaper background stencil in this month’s background set (pictured to the far left in the image directly below) is also available on its own. While you might think, “How can I use it without the plants to sit on the shelves?” Trust me, you can! Its unique two-part nature lends itself well to cookies of almost any shape. You’ll soon see how I turned it on end (literally) to create some boho hearts and basic round “filler” cookies. In the meantime, you can find it under Mexican Tile Dynamic Duos™ Background Cookie Stencil on my partner’s site.
Now, let’s discuss my Stencil of the Month Club for a sec. Then we’ll get into the details of the two complementary sets (background and message/frame) that make up my Aloe Beautiful design. Basically, if you join my club, each month you’ll automatically get the current month’s background set along with my partner’s single companion stencil, all at a substantial (>15%) discount. For example, here’s what my club’s offering looks like this month:

You’ll have so much fun “planting” your pots on this pretty shelf! So don’t delay in joining my club, if you haven’t already.
Ready to talk details?! Good, I thought so! But before we do that, I’m posting two videos for those of you who are more visually inclined. The first is a hyper-time-lapsed video tutorial that shows how I airbrushed one design. Note that I pay close attention to blocking and weighting the stencil along the length of the shelf, as long, open areas like these shelves (and more classic stripes) are prone to blowing up and allowing coloring to go underneath. Yes, the dreaded underspray! But proper weighting and handling of the airbrush can completely quash it! The second is my so-called “style reel”, which includes a small sampling of the many designs possible with the complementary background and message/frame sets.
Now, about that background set . . . here you have it, in all of its eight-piece glory!
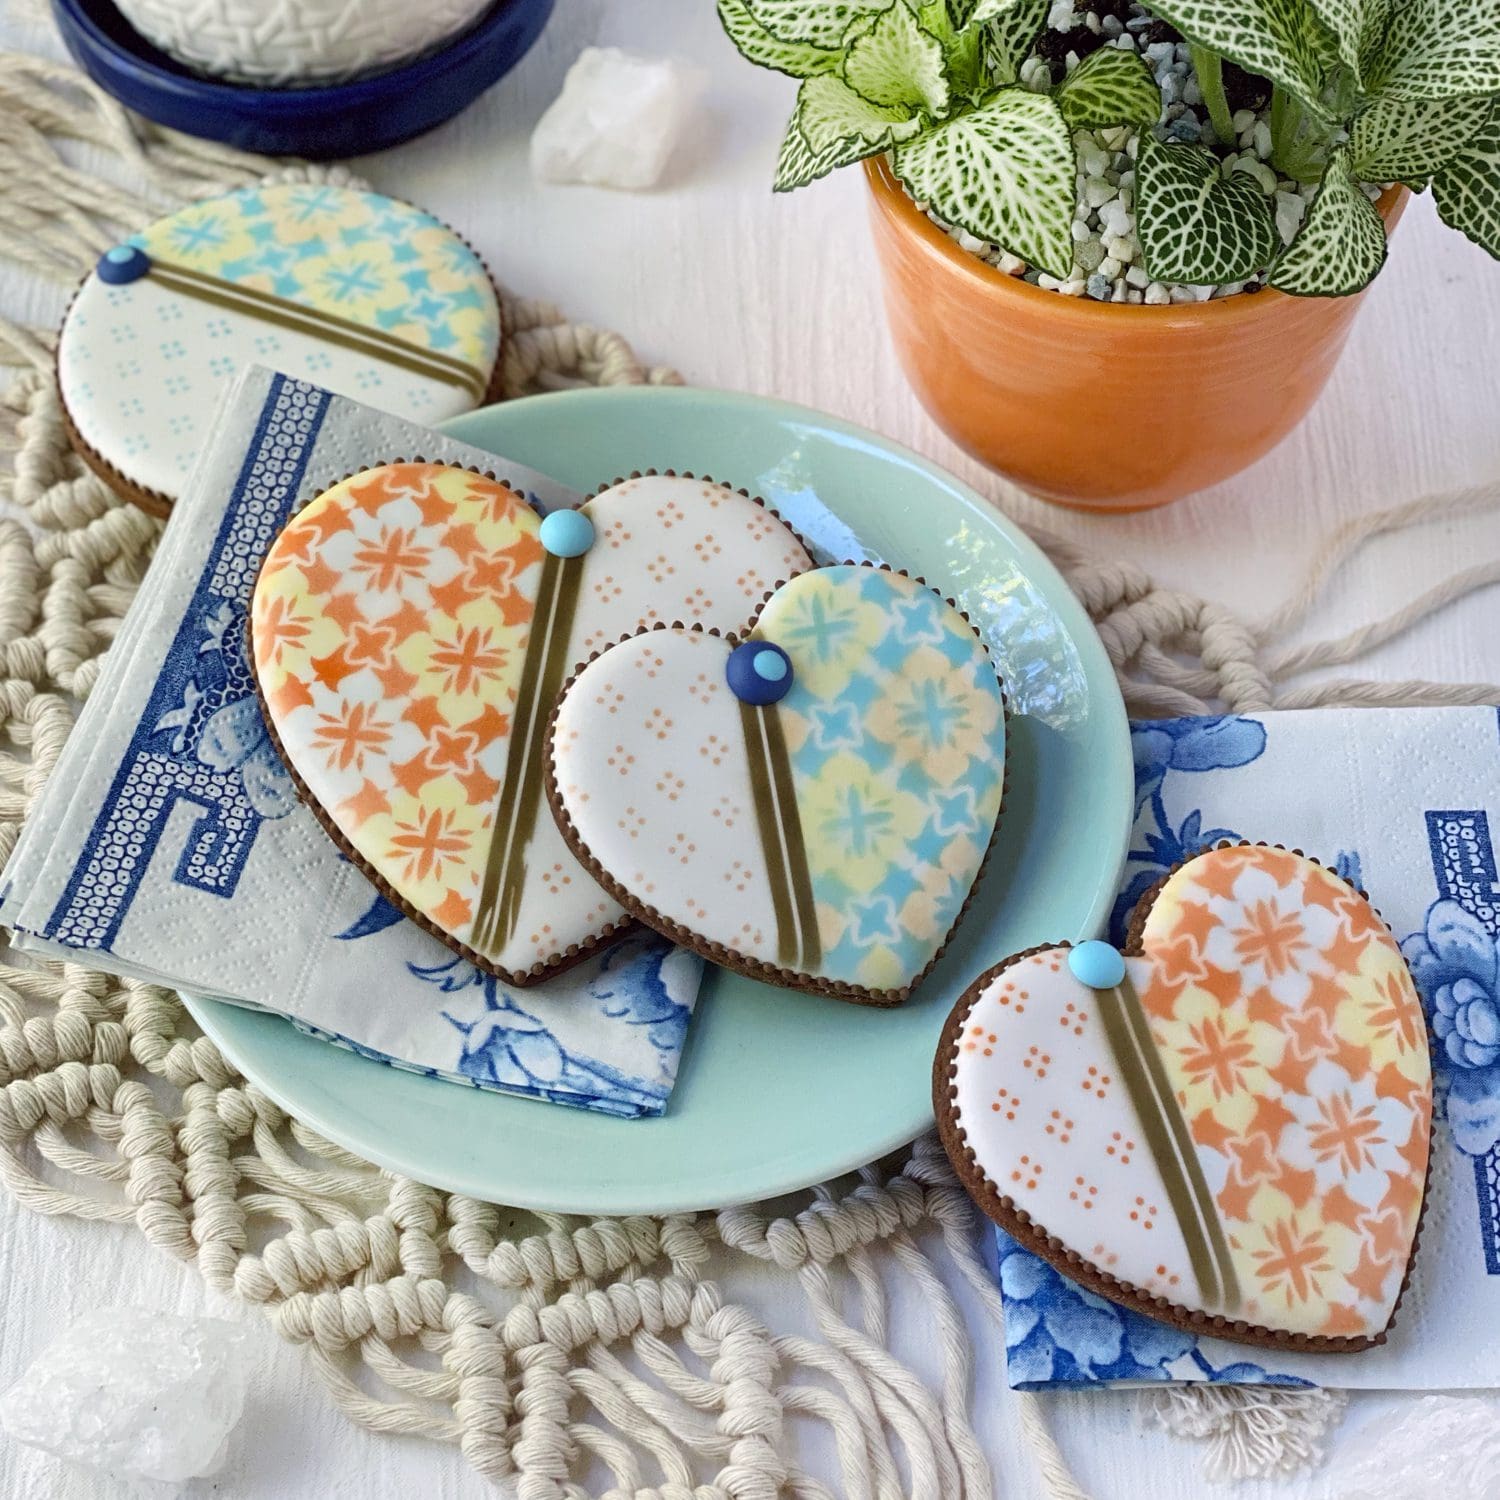
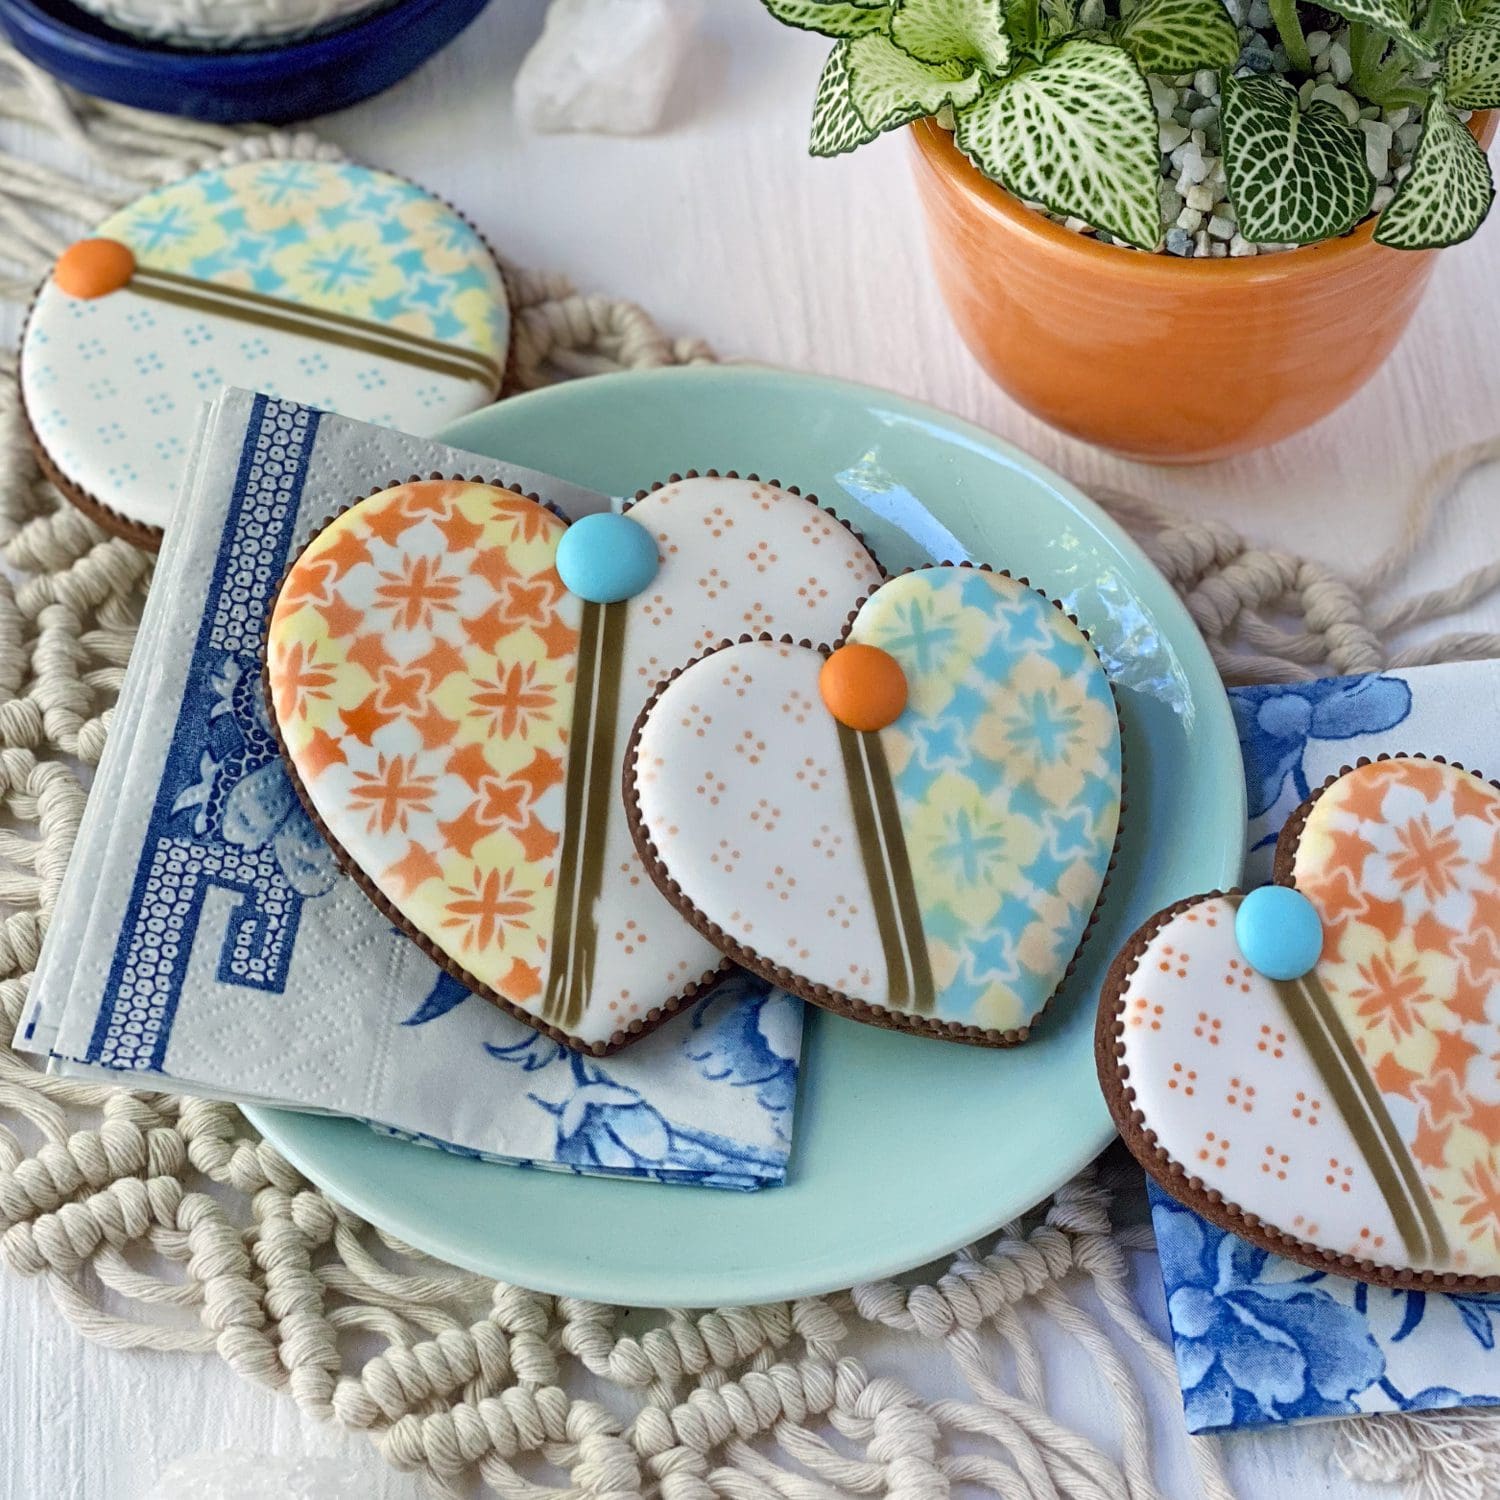
Typically, the easiest way to use this set is to start playing with the background stencil all by itself. In this particular case, it may not be immediately obvious how to use it without the plants, but two-part stencils are always quite versatile. I just turned it vertically to create some fun dual-patterned hearts and rounds. These straightforward designs could be great filler amongst more complicated cookies that use all of the design elements, especially if done in the same color palette . . .

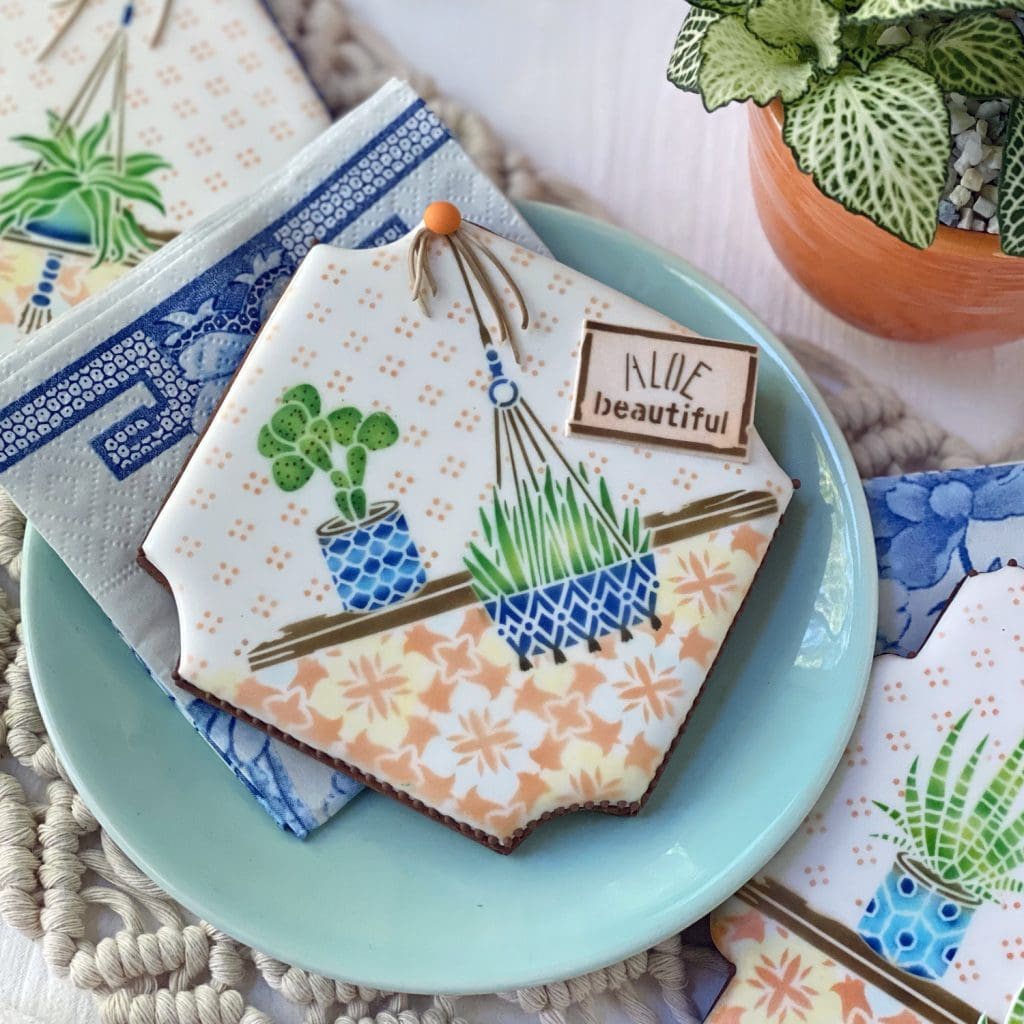
Tip: To tint the interior of the tile pattern, it’s easiest to dust rather than airbrush, as you are assured of no color blending with the stenciled pattern. Here, I dusted in between the orange tiles with pale blue and yellow compressed Petal Crafts dusts, and in between the blue tiles with yellow and orange dusts. Remember, “dusting” is a dry-on-dry technique: dry dust is applied to dry icing with a dry brush.
The buttons on top are nothing more than royal icing transfers. Because I am notoriously indecisive, I made multiple buttons in various sizes and colors and tried them on for size before committing them to the cookies with royal icing . . .

So, will it be big buttons or little buttons?! I ultimately went with the little guys, because I liked how their rich cobalt blue tied in with my other props . . .
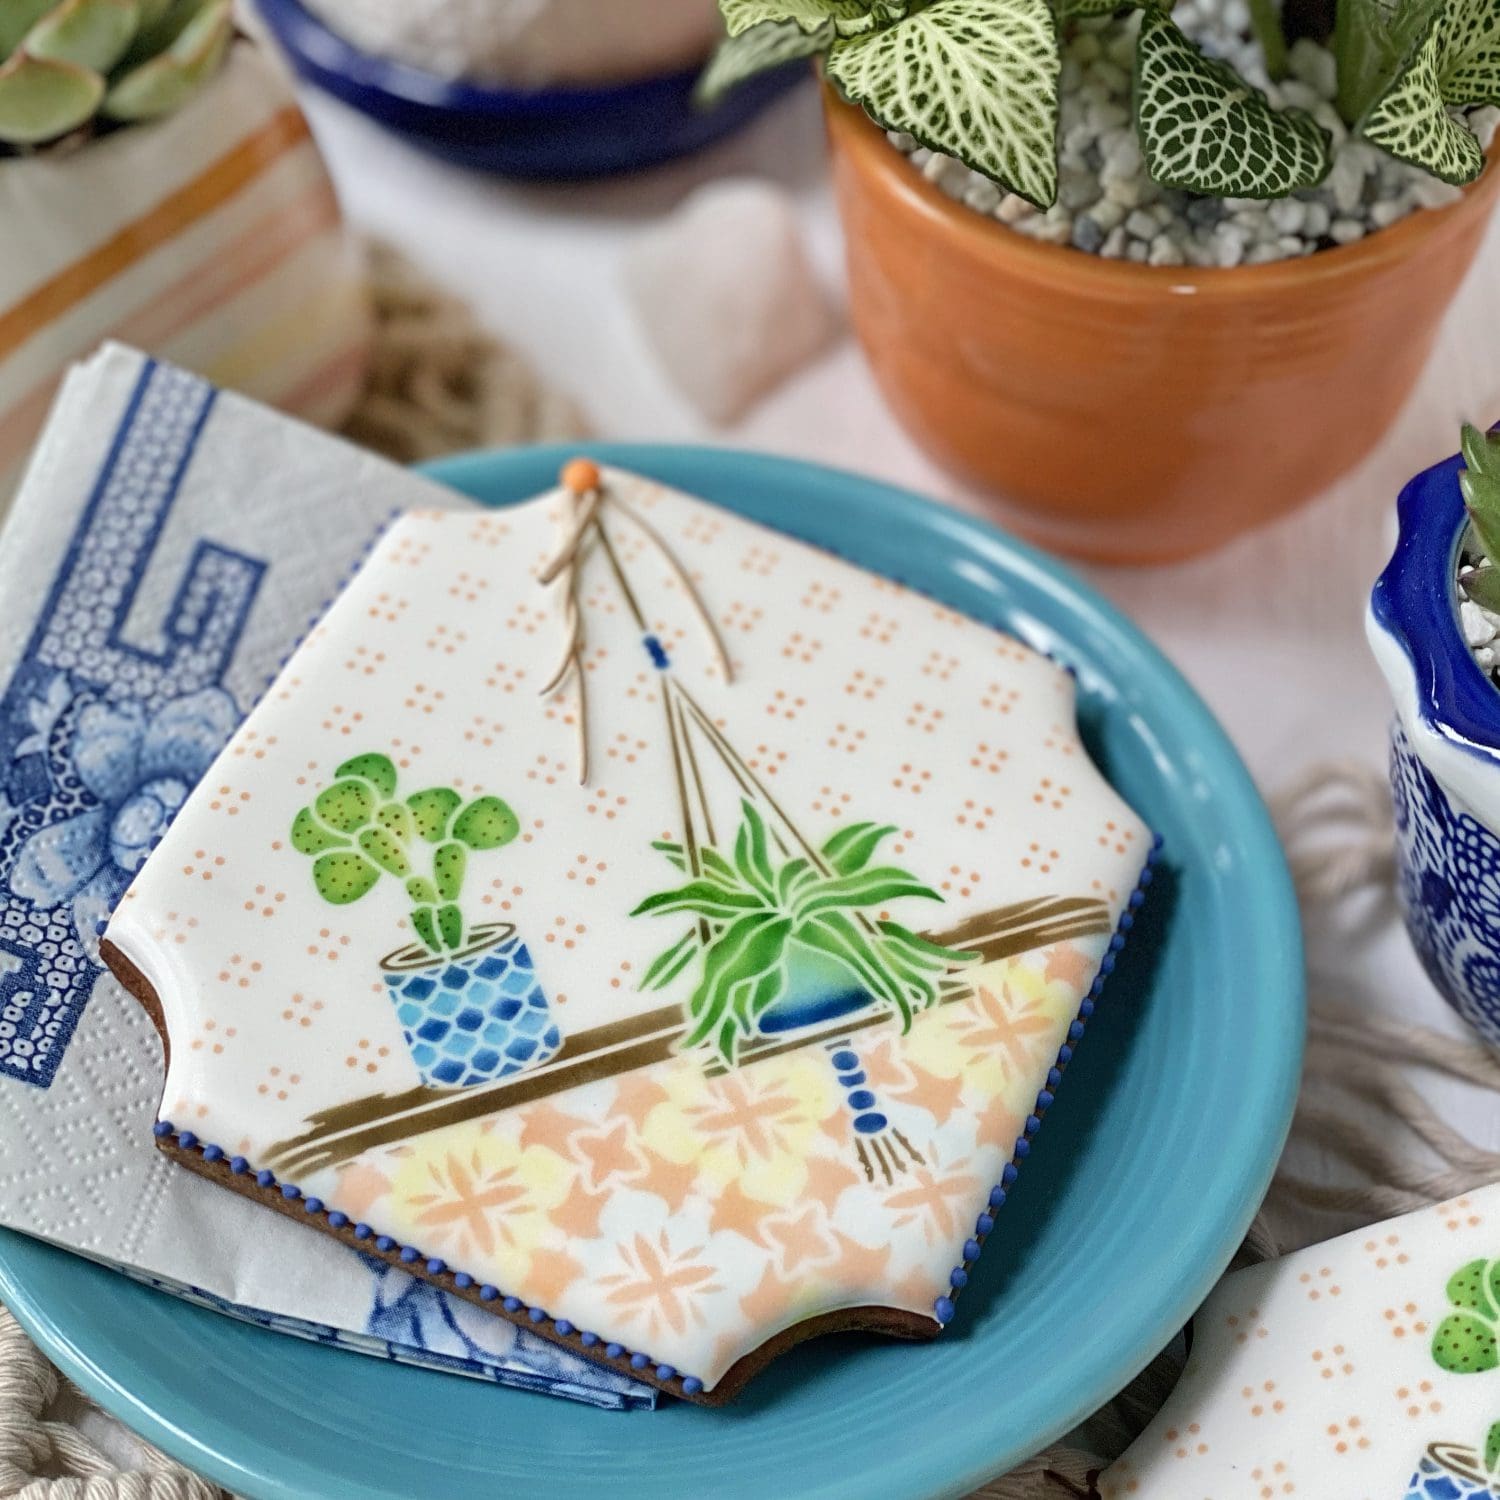
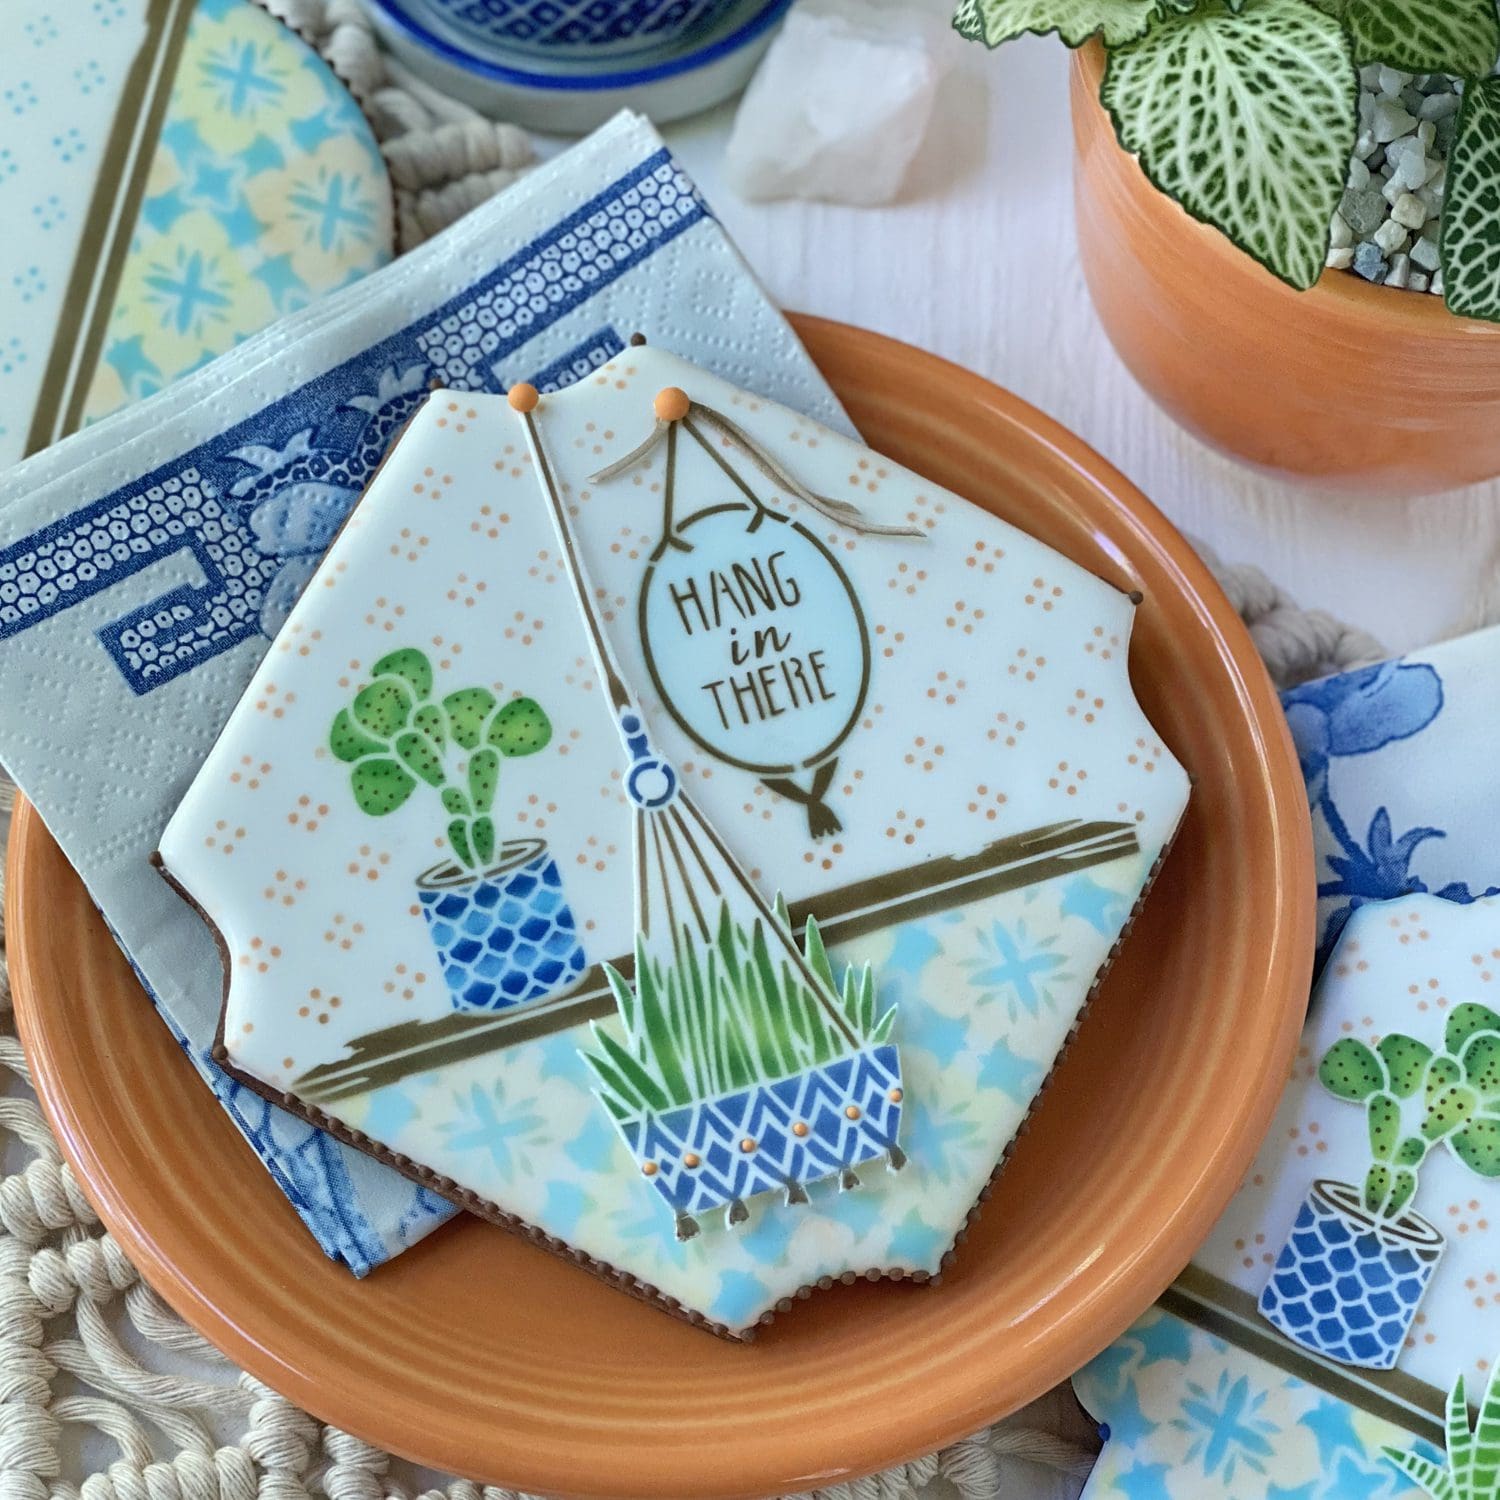
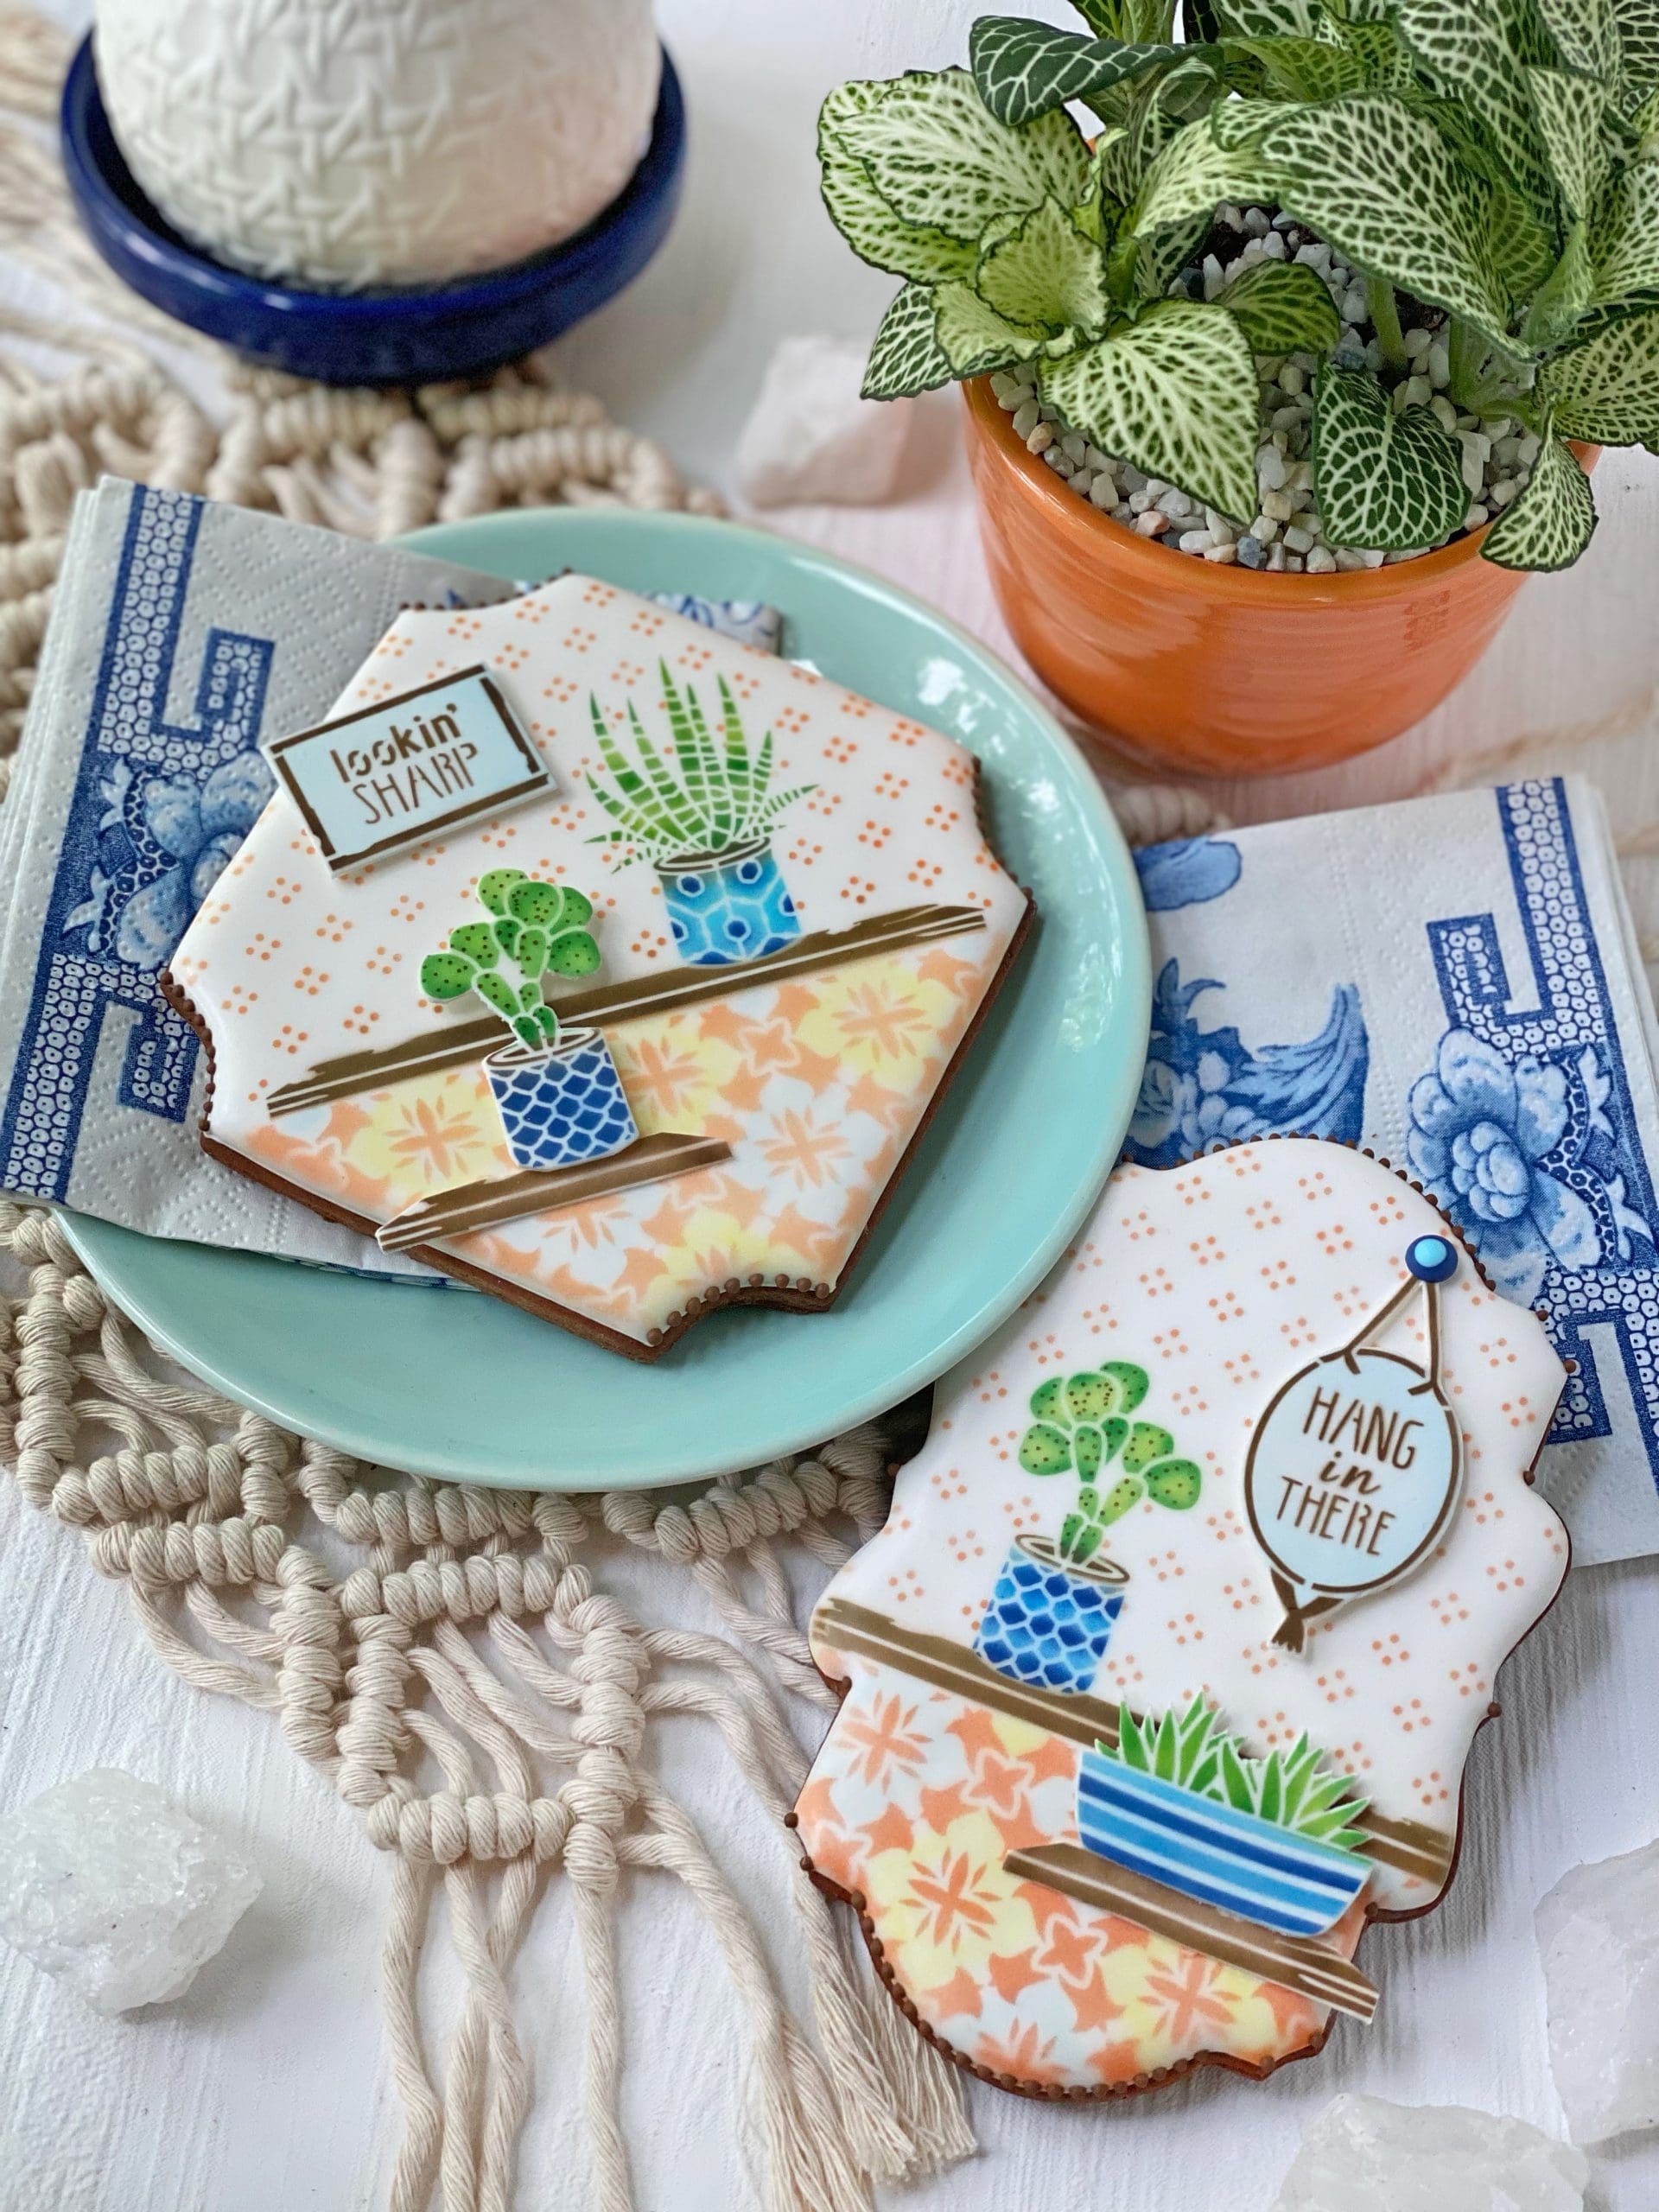
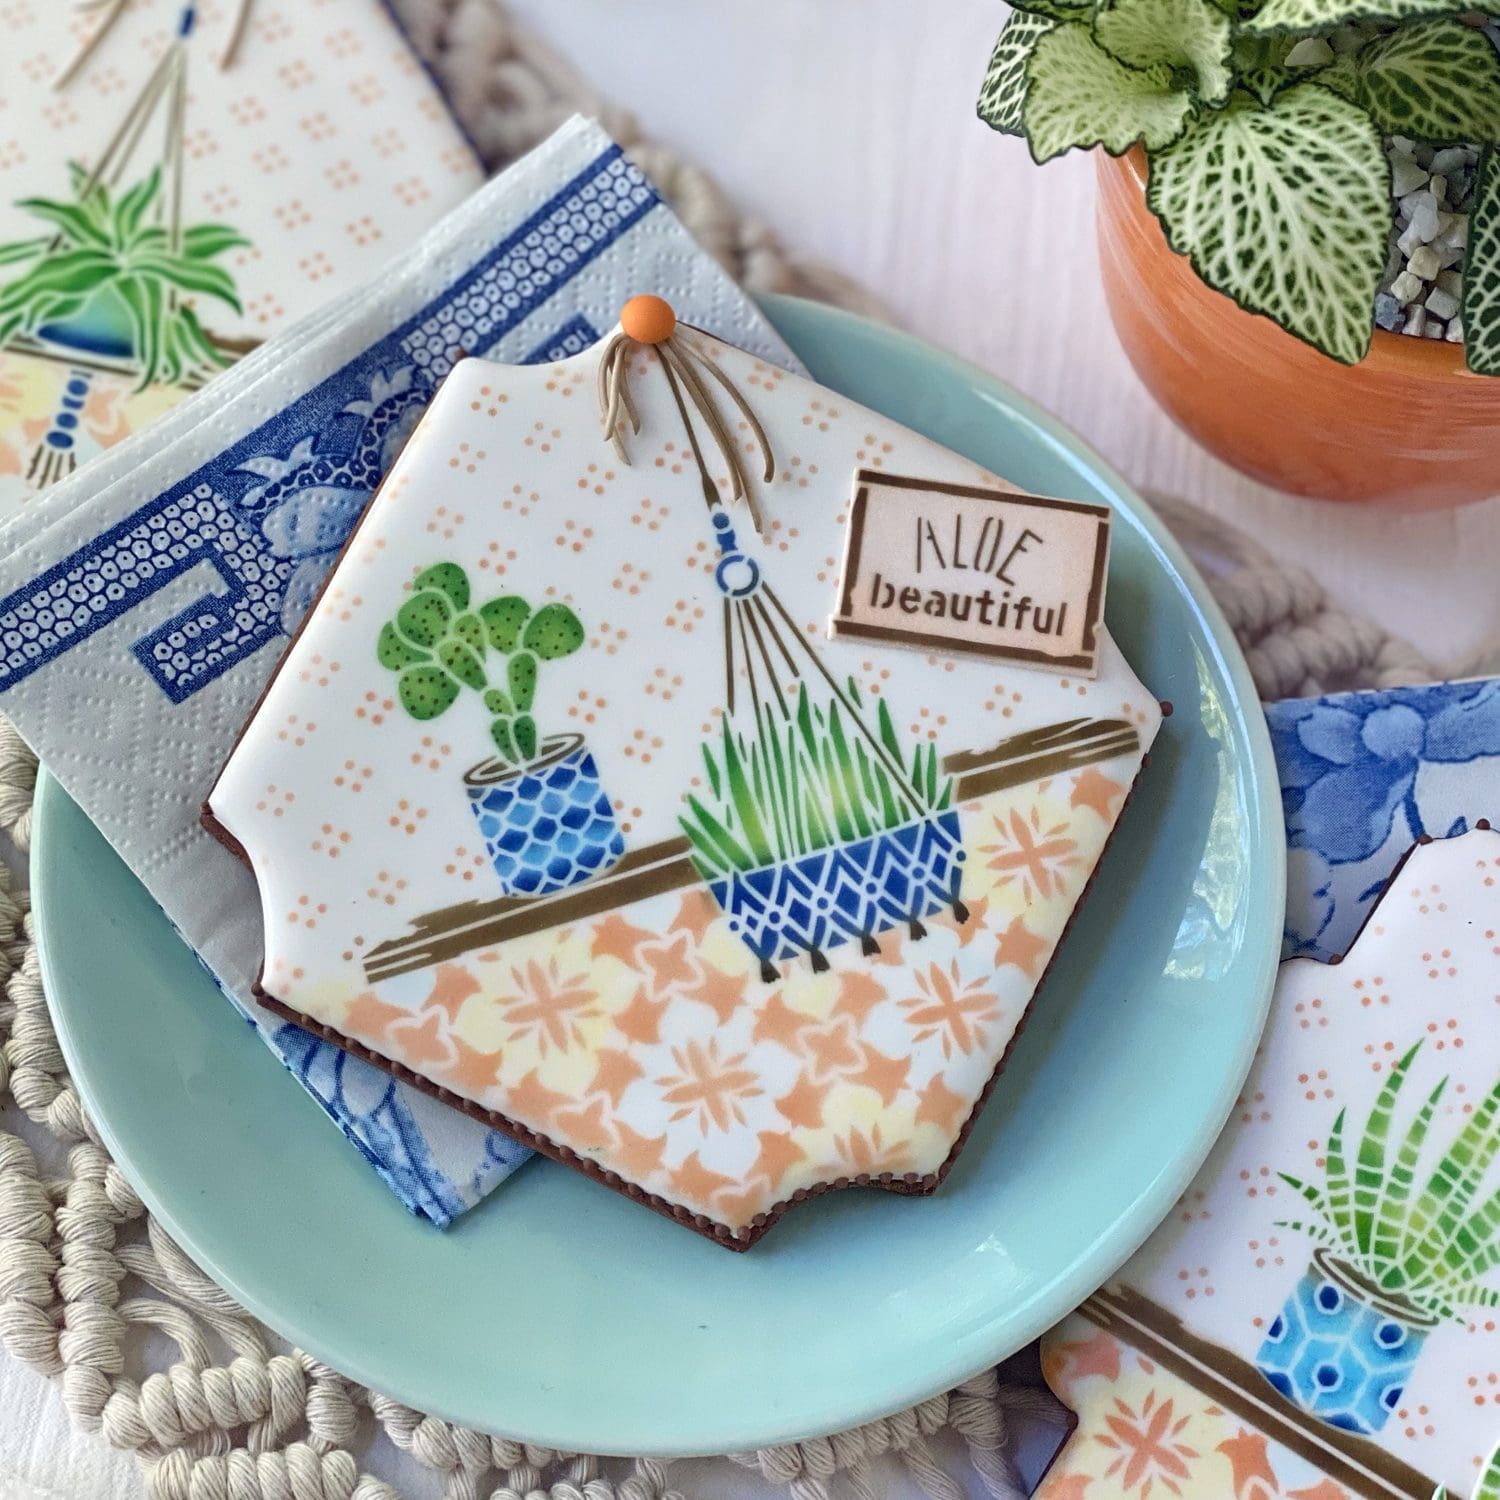
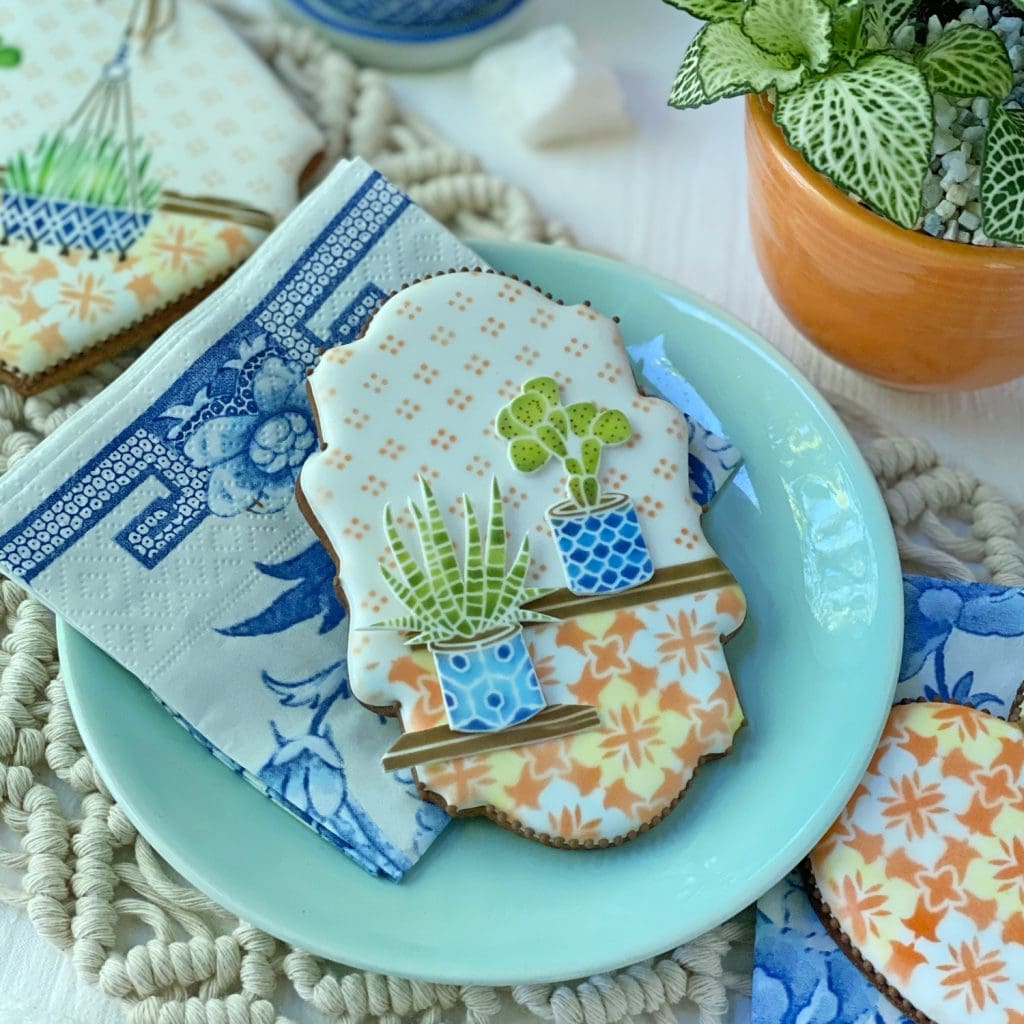
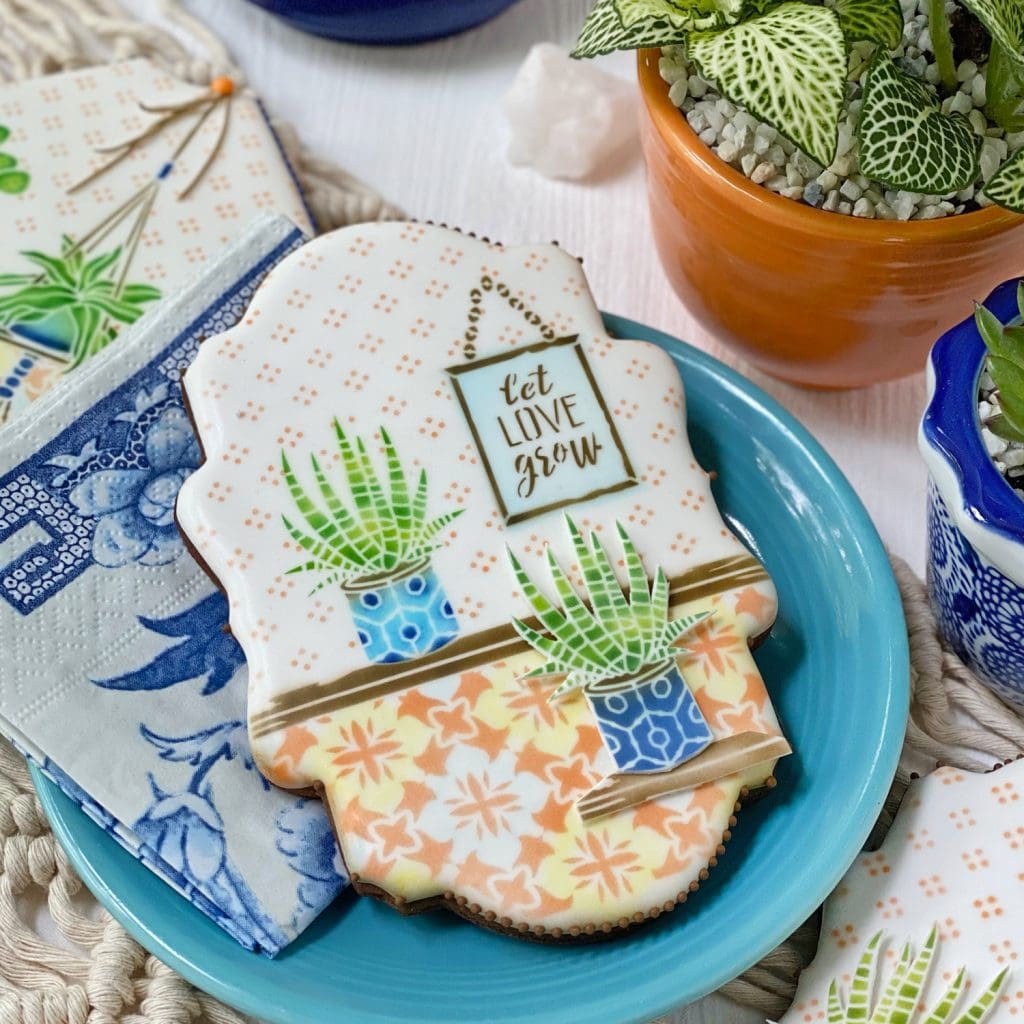
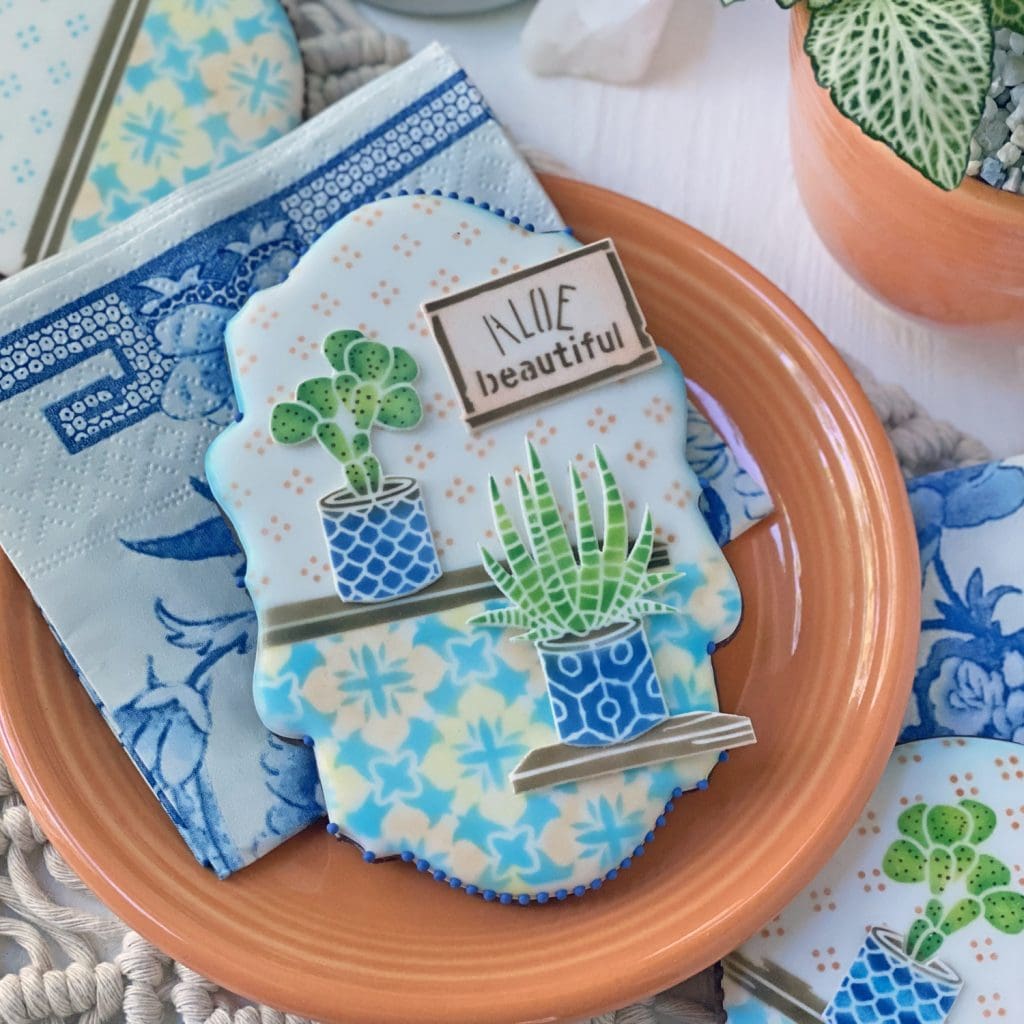
As versatile as that background stencil is, it really was made as a home for plants! So let me show you a few ways to layer the foreground elements on top. Here are a couple of two-plant options on my fave Corner Plaque cookie cutter . . .

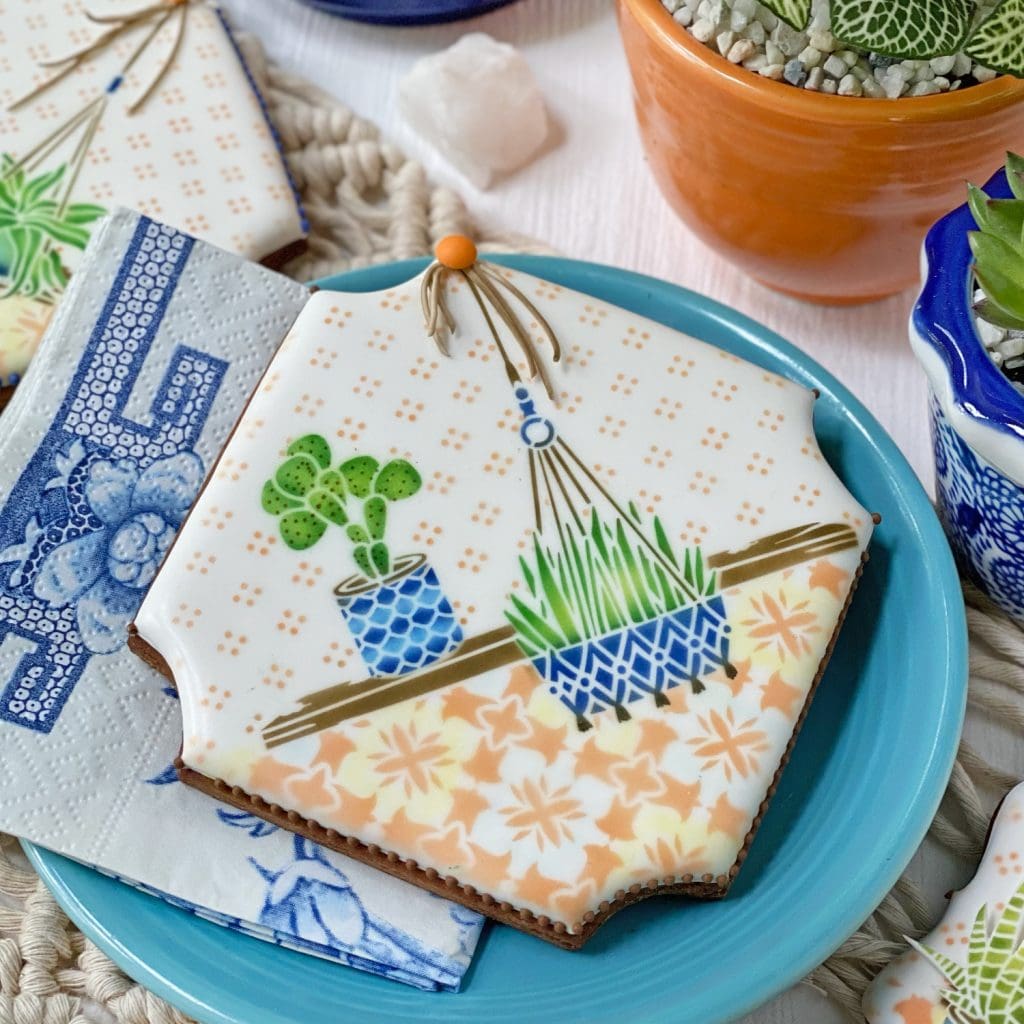
BTW, the macramé cords that are “tied” to the hanging planters are slender tendrils of extruded tan fondant that I airbrushed with a touch of brown to give them more dimension. Of course, smaller cookies of other shapes can also be used . . .
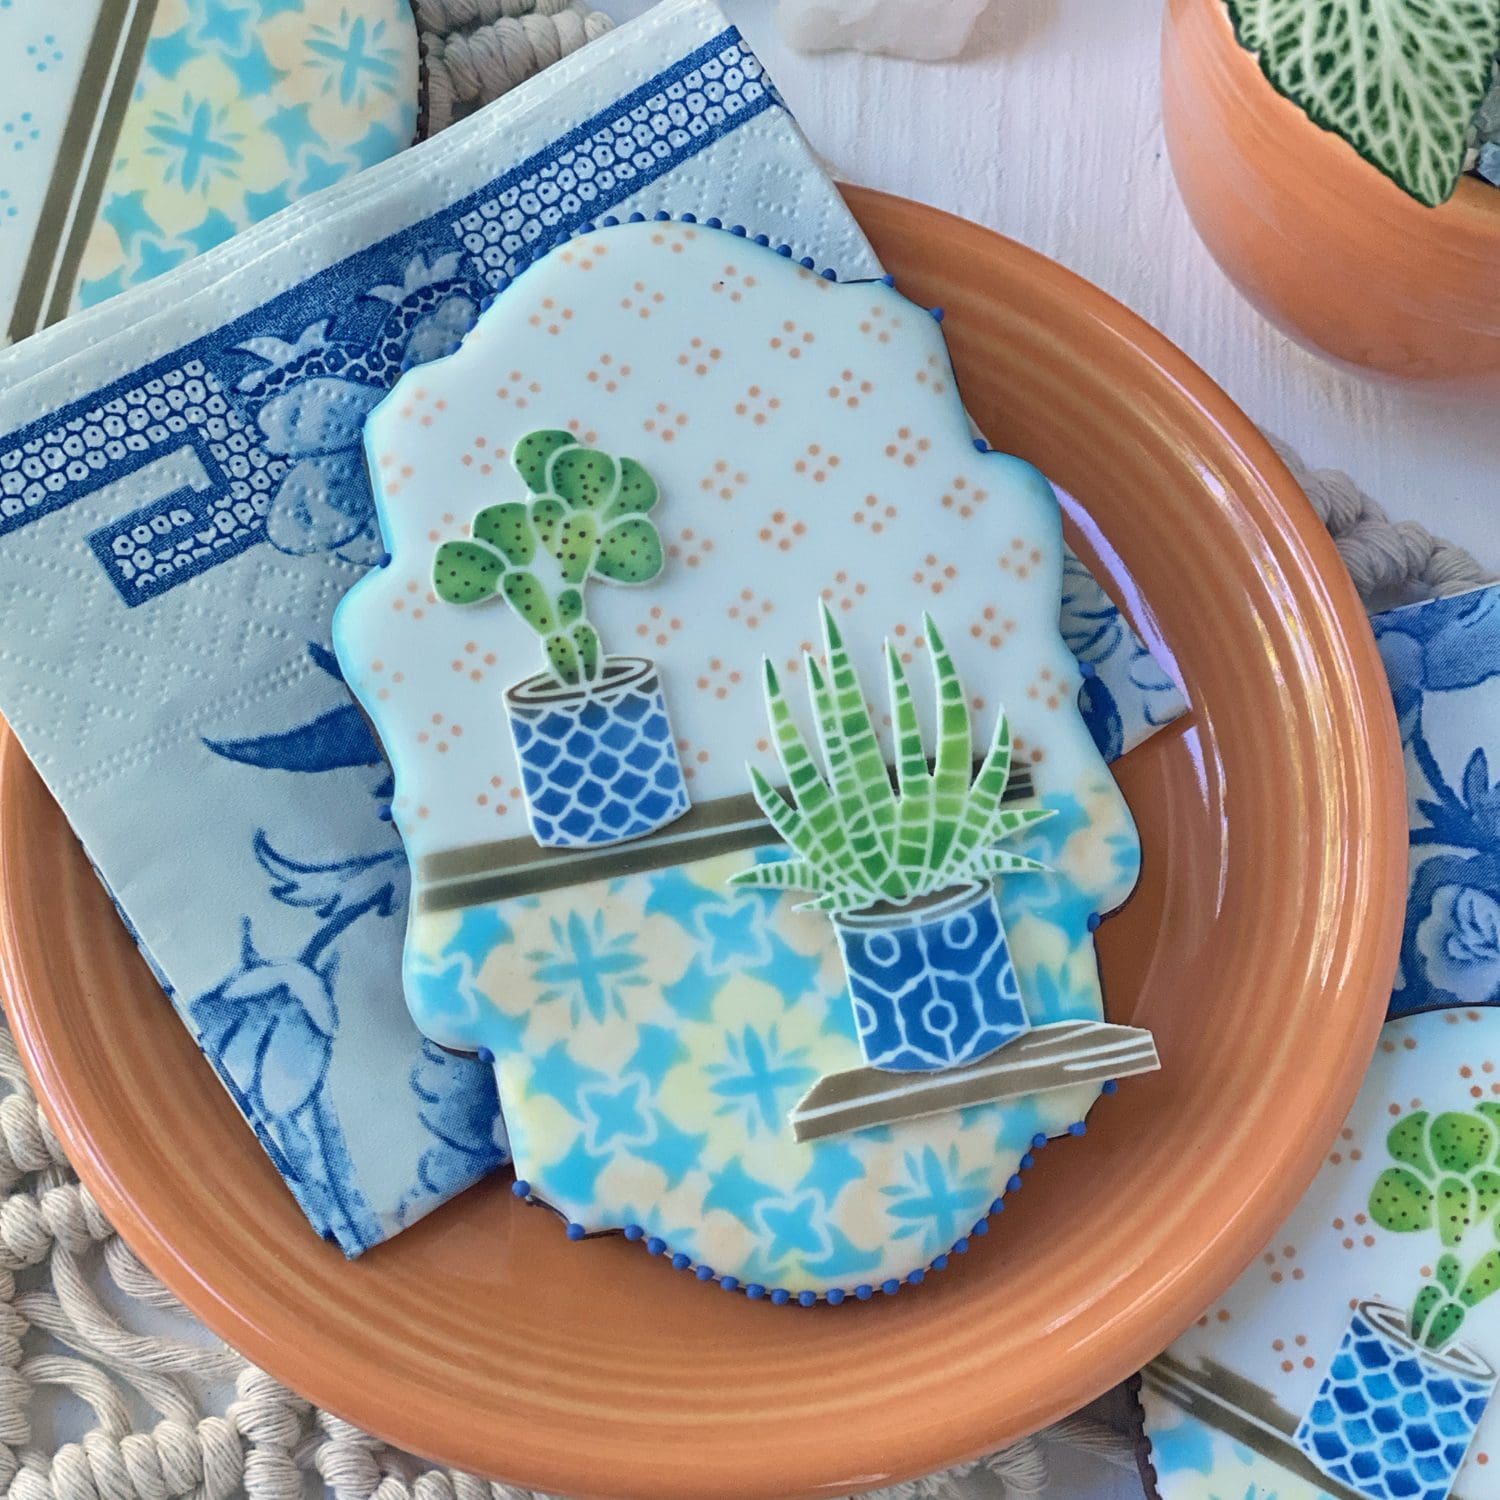
And, below, I’ve given you a blue-tiled version of the cookie above, with a mirror-image placement of the pots . . .

Note that the added dimension on these last two cookies (as compared to the two before them) was achieved by stacking fondant appliqués (cutout sheets of stenciled fondant). Some appliqués were set directly on the cookie, whereas others were given additional lift with a little bit of fondant underneath.
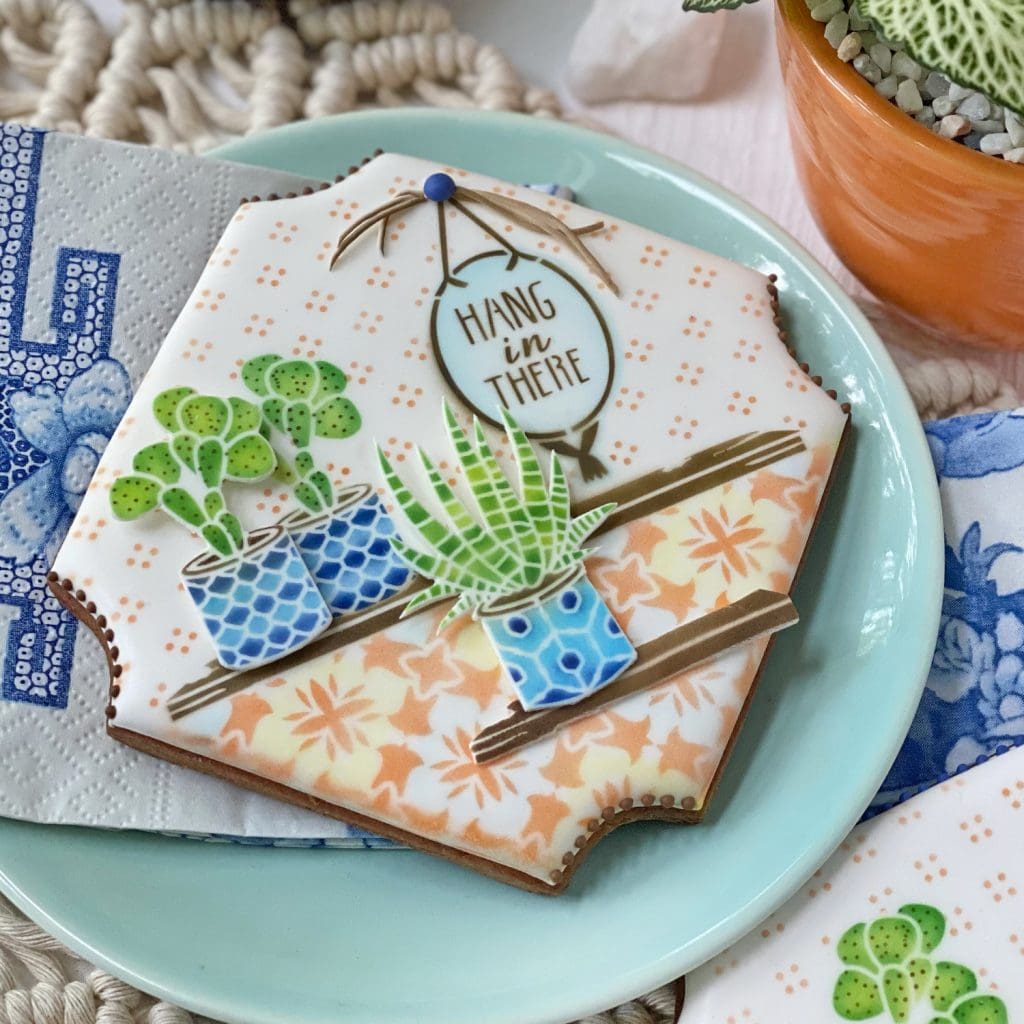
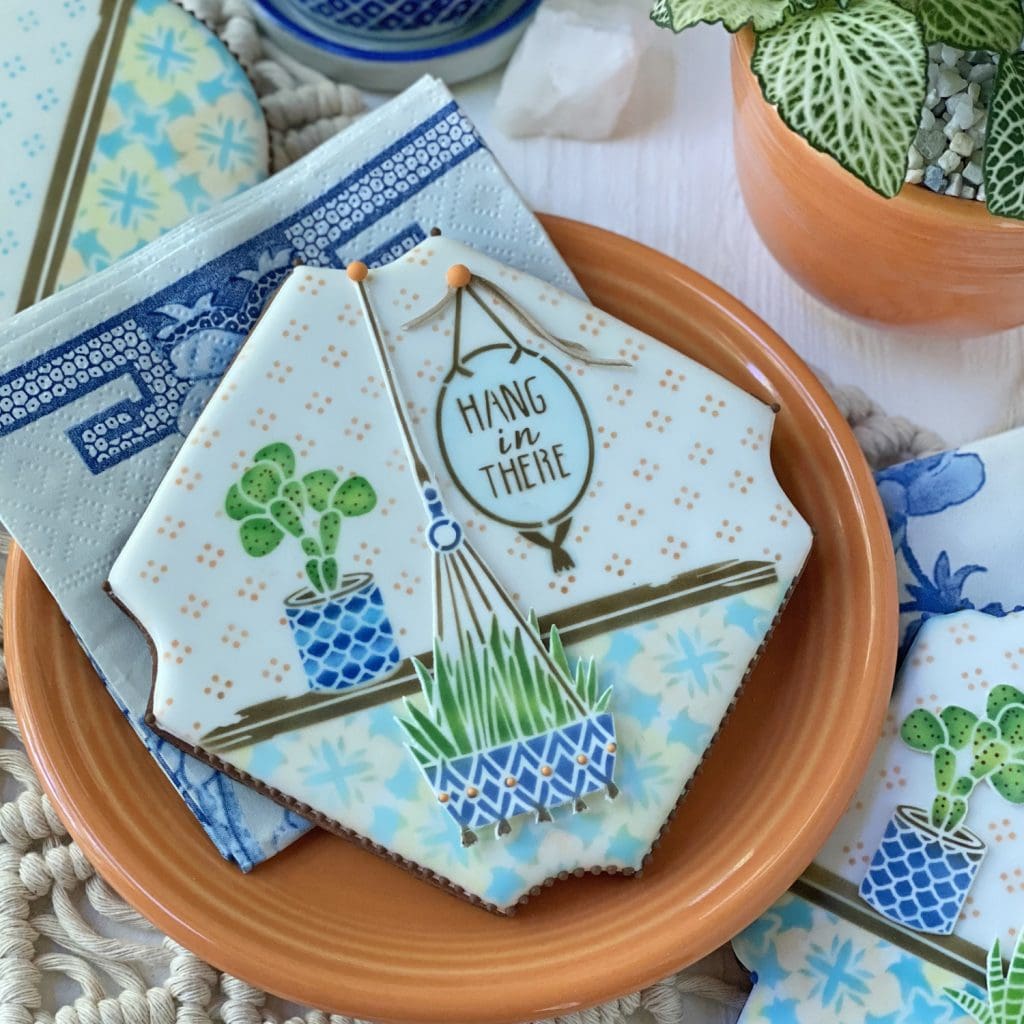
Of course, I love a cookie that makes a strong statement (literally!), so let’s see how these cookies can be jazzed up with the complementary message and frame set.
With five messages and four frames, this set lends itself to so many more design possibilities. First, some cookies where the messages have been directly airbrushed and stenciled on the cookies . . .
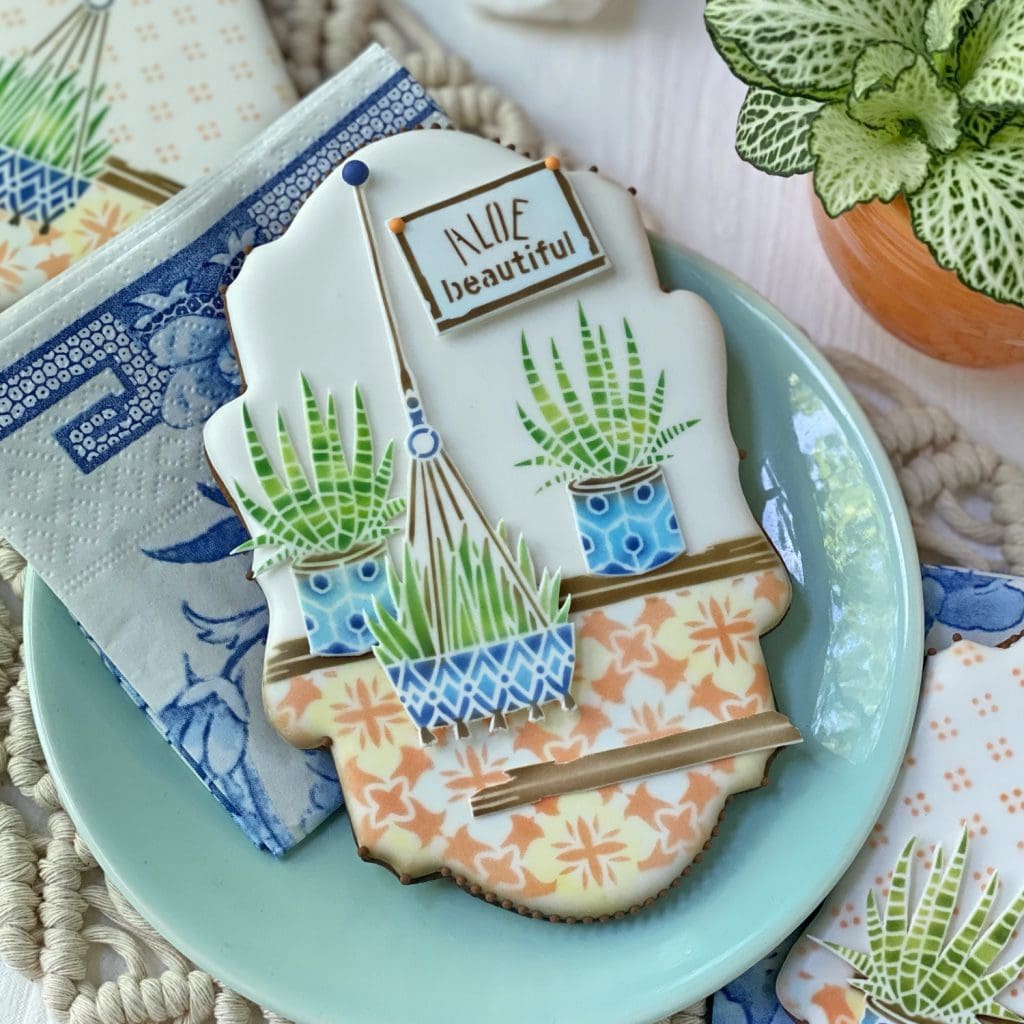
The cookie above is the one that I quickly airbrushed for the time-lapsed tutorial (from an awkward angle, I might add, since the camera was directly in my line of sight). As a result, there’s a little underspray around the frame, which I am sure I could have avoided had I been looking directly overhead while airbrushing. But, handily, the aloe plant partially conceals it!
Aha! Proof positive that correct airbrushing position can eliminate underspray! I did this next cookie off-camera, hovering directly over the cookie!
I couldn’t for the longest time figure out what to put on the big cookie on the bottom right (where, BTW, I masked off the dots to leave white space) . . .

. . . which brings me to sing the praises, once again, of fondant appliqués. I made a bunch of messages in that form (and potted plants too) to allow me to “try them on” various cookies before icing them in place.
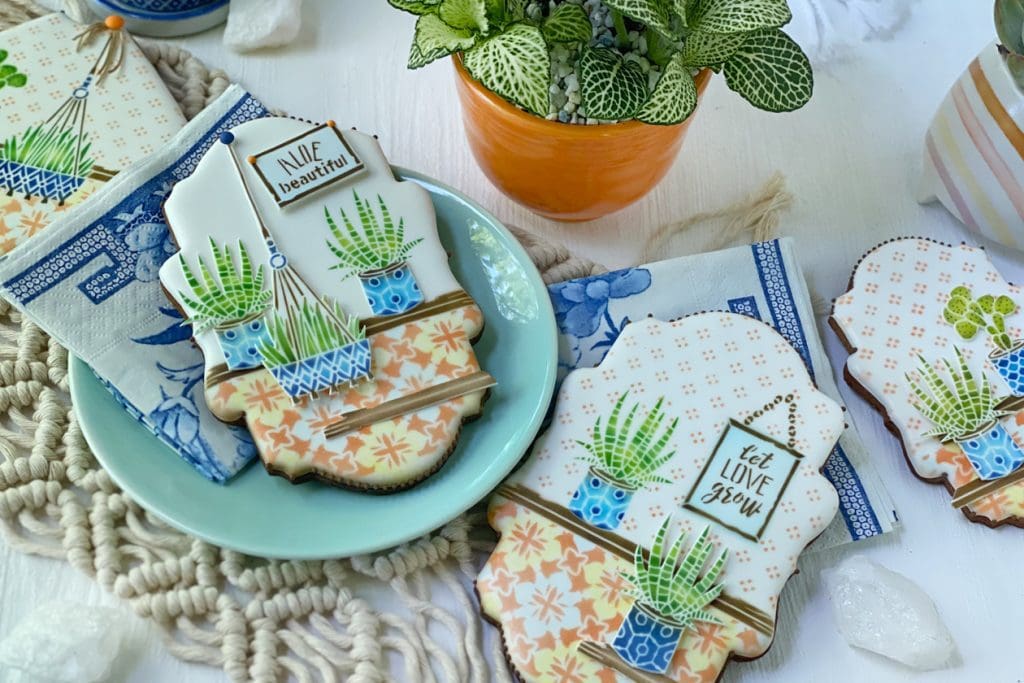
Below are just a few of the cookies I came up with that use appliqués for the messages, and also often for the potted plants and shelf . . .

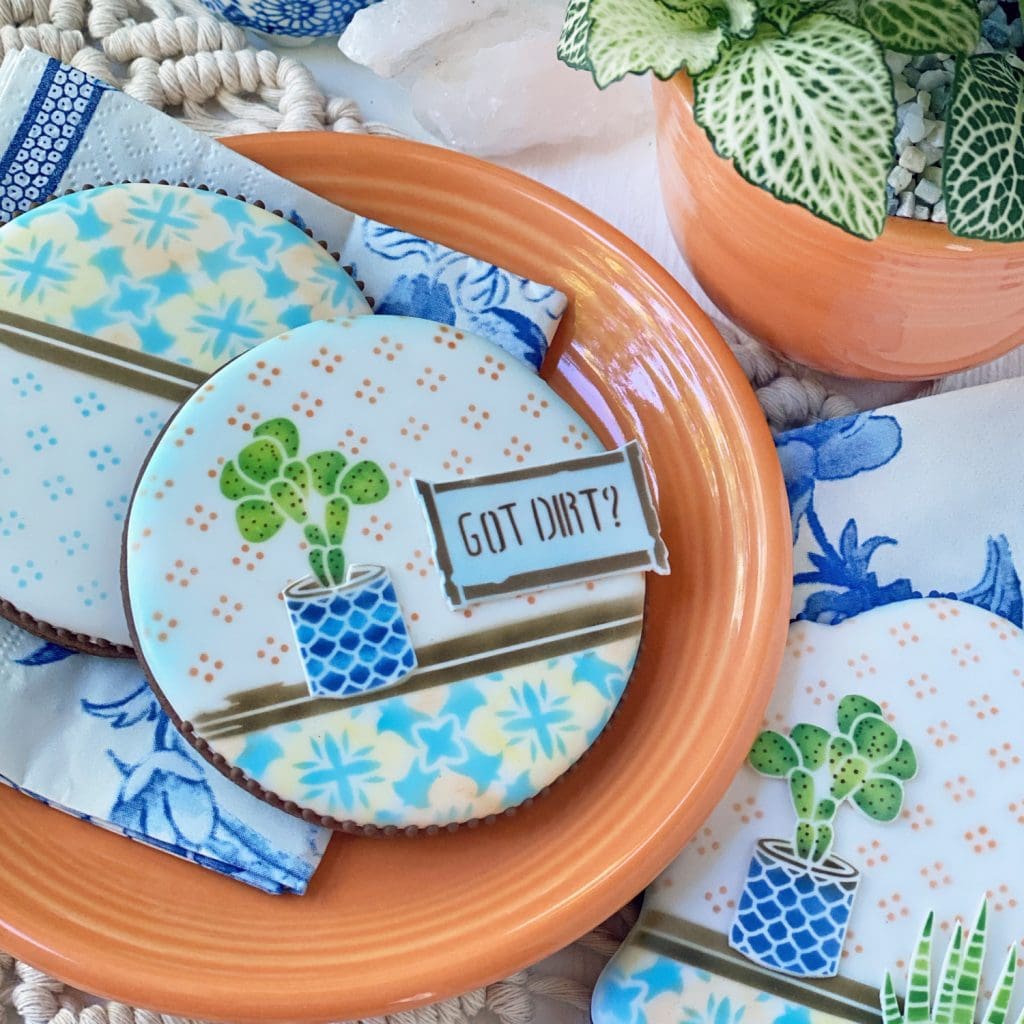

So where did that big cookie without the dots land? After some fiddling with fondant appliqués, it ended up like this . . .
I decided that the bottom shelf helped to break up the expanse of Mexican tile, but it looked best empty! So many possibilities, right?! Even empty shelves!
On that note, I leave you with a final recap image and summary of key links. Until next release, hang in there, let love grow, or . . . choose some other punny (but oh-so-true) idiom to live by! ![]()
If you have any technical questions about these stencils, just email me at sweetlife@juliausher.com or leave a comment below. Please, however, direct all ordering and Stencil of the Month Club questions to my stencil partner, Confection Couture Stencils, at service@confectioncouturestencils.com. Thank you!