
So, for years I’ve been wondering what to do with the stray cow bones from our farm that my husband “arranged” in this vintage cart on our porch.

He so rarely attempts to decorate anything around the house that I didn’t want to remove them lest I unintentionally thwart future (and better) home beautification efforts. So they’ve sat there, season after season, creeping me out. Never in my life did I think I’d ever find a use for them, but, yep, that’s a real cow mandible with teeth in the background of this month’s photos! (The lengths to which I go to style my cookie shoots . . . sheesh! ![]() )
)
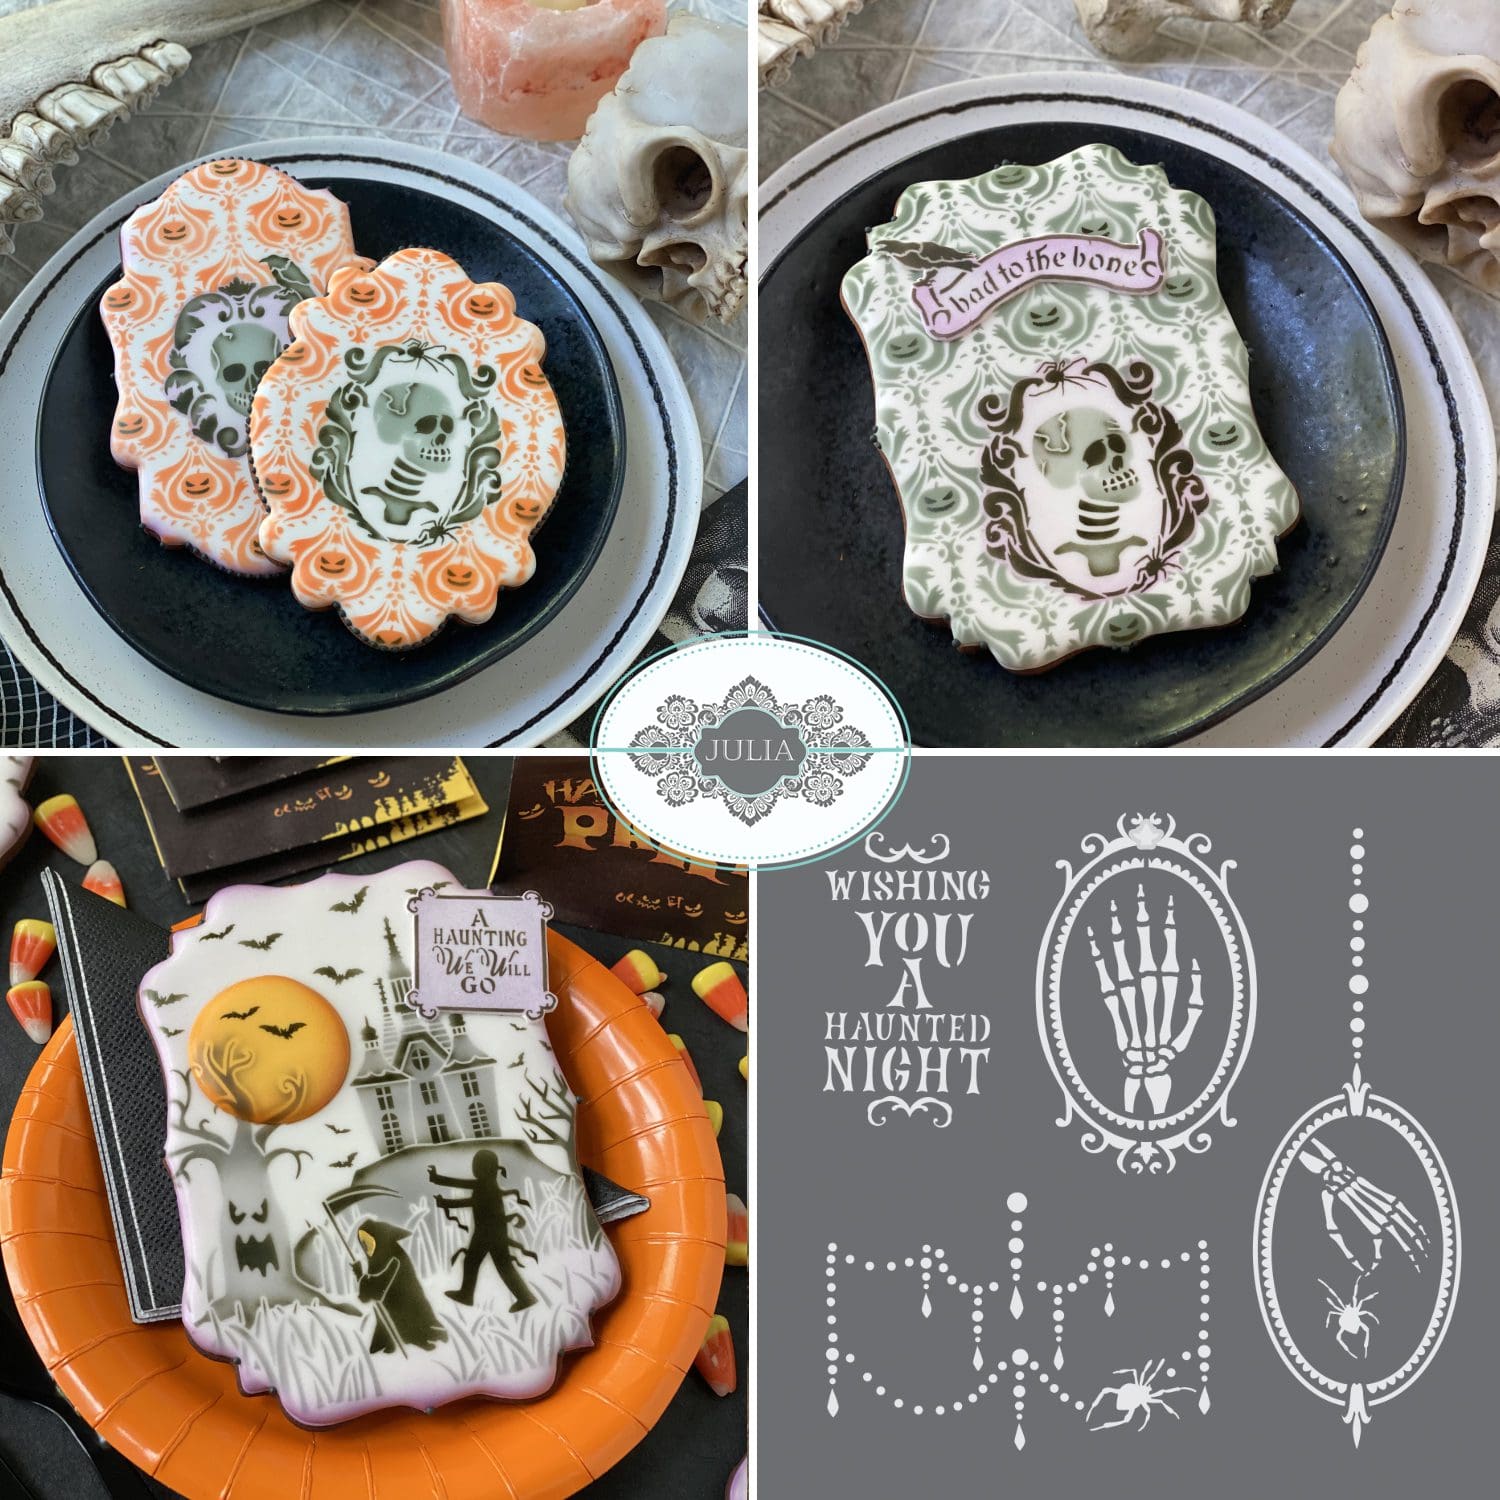
Anywho, more about this month’s release – a duo of scary skeleton portraits that you can “hang” on pumpkin damask “wall paper”! If the thought of getting through all of your upcoming Halloween orders is a bit scary, have no fear! This release makes a big impact with a minimum of airbrushing. It looks great in just one color, applied in varying shades, as you’ll see in many of the photos below. Though, of course, if you’re a more-is-more person like me, you can add colors and stencil overlays to greater degrees, and I show you those options too.
But first, here’s the release in one view:
To help you find the stencils that made these cookies, here are all of the quick links to these items on my partner Confection Couture Stencils‘ site:
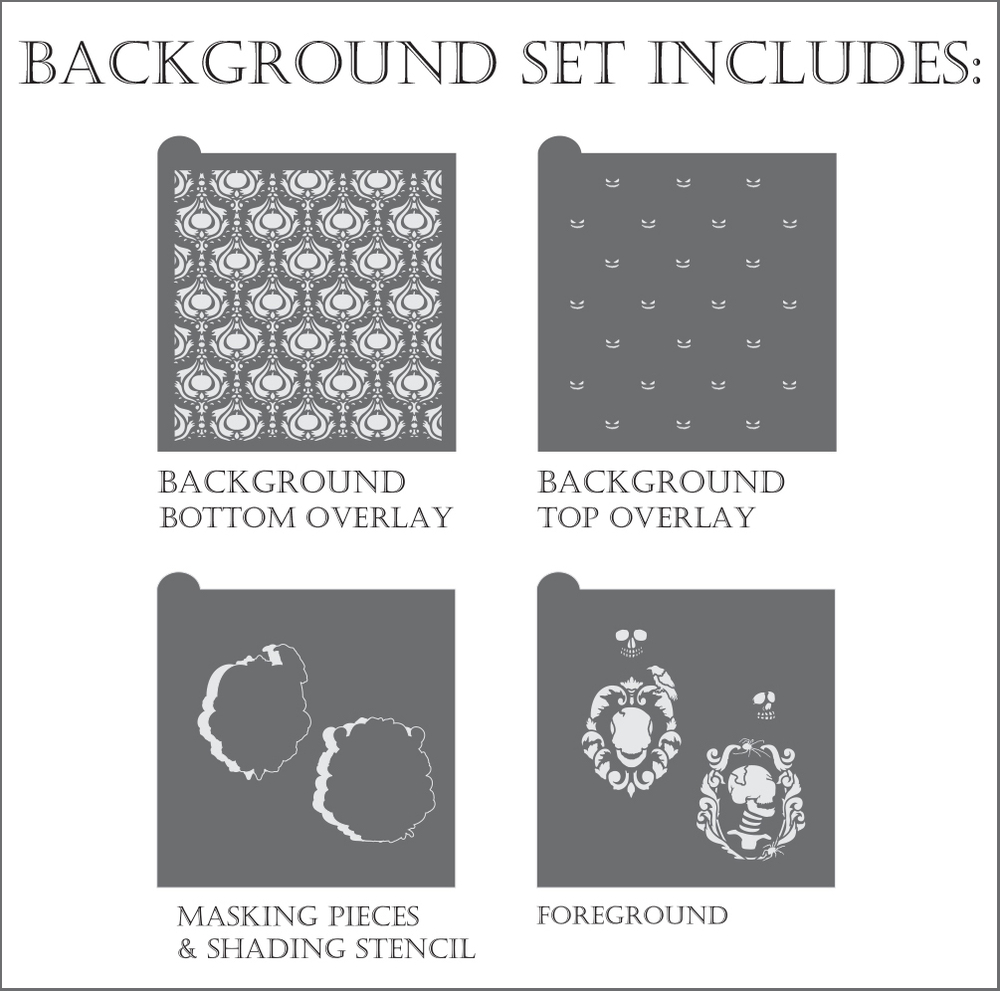
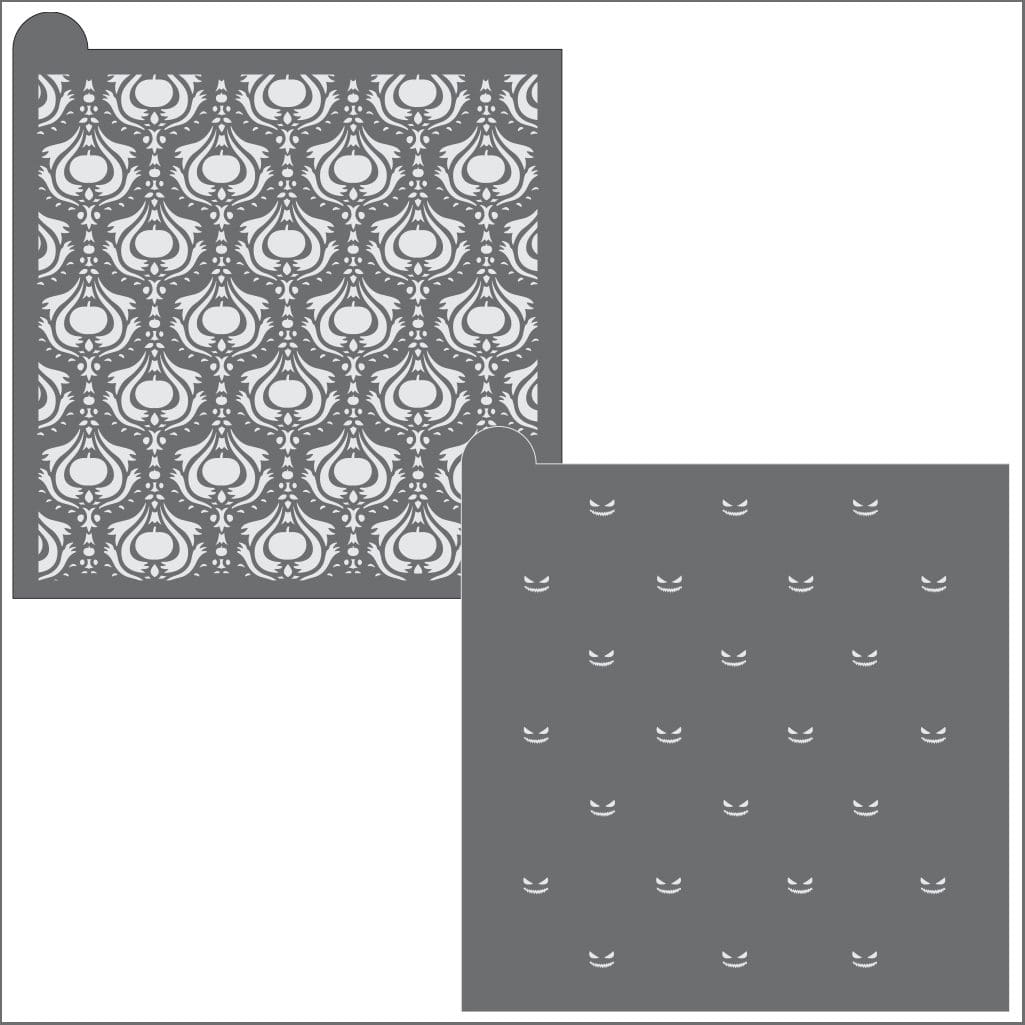
Also, as you hopefully know by now: the pumpkin damask background stencil (which actually consists of both a stencil and a jack-o-lantern face overlay, as shown below) is also sold separately and can be found under Halloween Damask Dynamic Duos™ Background Cookie Stencil on my partner’s site.
Now, humor me for a bit as I talk about my Stencil of the Month Club with those not lucky enough to know about it yet. Basically, if you join it, each month you’ll automatically get the current month’s background set along with my partner’s single companion stencil, all at a substantial (>15%) discount. For example, here’s what my club’s offering looks like this month:
Pretty spook-tacular, if I do say so myself! In addition to the club savings, there’s so much you can do with just the background set that comes each month. But, we’ll talk about those options in a sec. First, I want to give you a quick video overview of how I airbrushed and stenciled one simple two-color style (see the time-lapsed tutorial below). And, second, for those who may not want or need to read on for more details, the second video shows a range of styles possible using both the background and message and frame sets that, together, comprise this release.
Now, to the readers amongst us: let’s move on to exploring the background set in more detail . . .
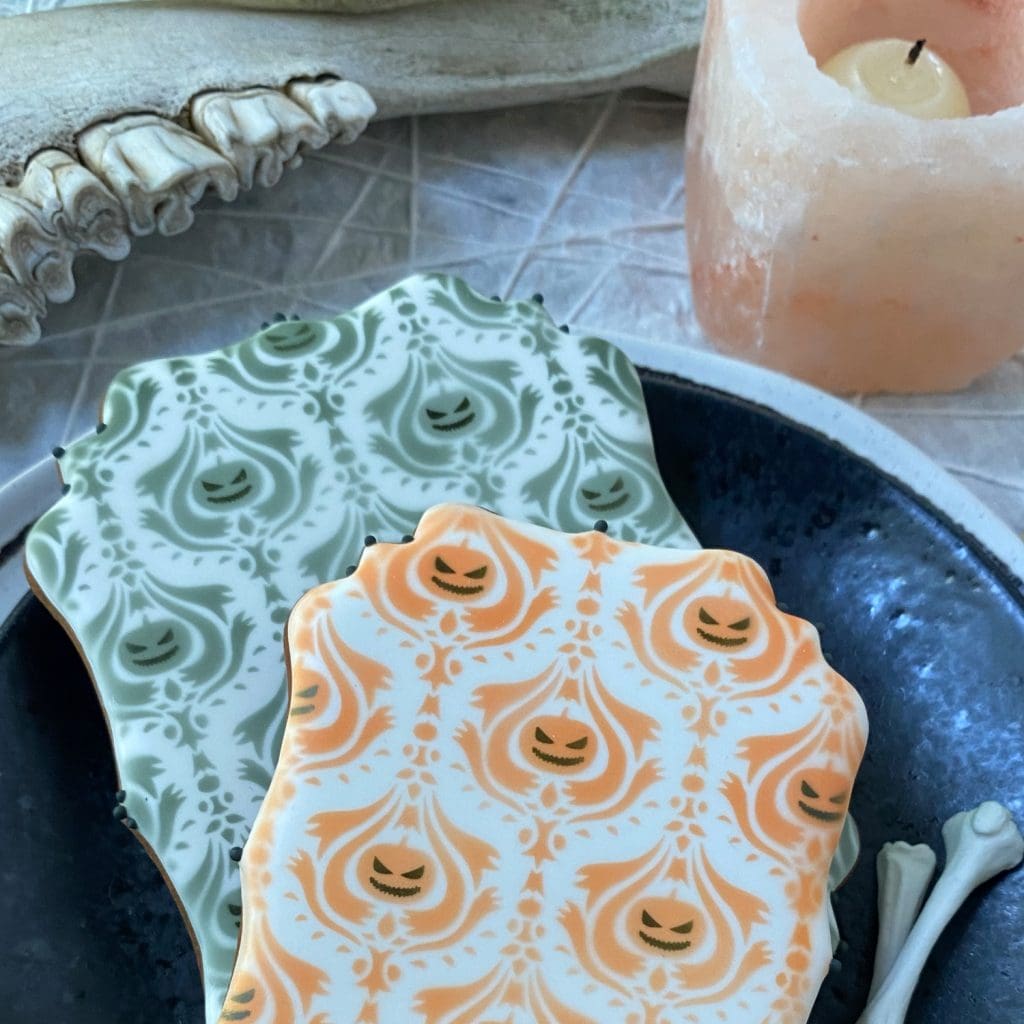
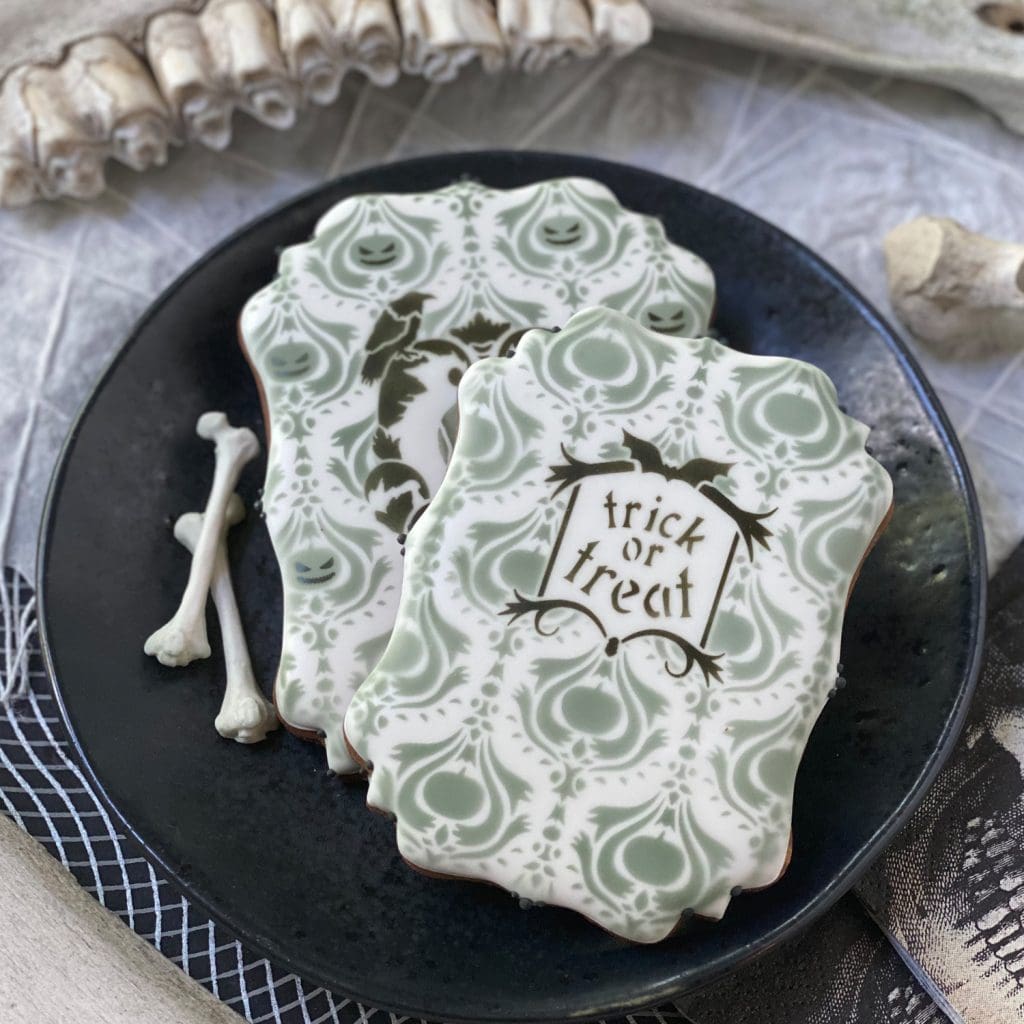
As you can see from the unusual layout above, this set departs from the norm with the addition of the jack-o-lantern face overlay that goes on top of the pumpkin damask background pattern. Of course, you don’t need to use the face overlay (I show a cookie without it a little later on), but it really adds magic to the background pumpkins. Here’s what the two stencils can look like all by themselves, first on some plaques with no additional embellishments . . .
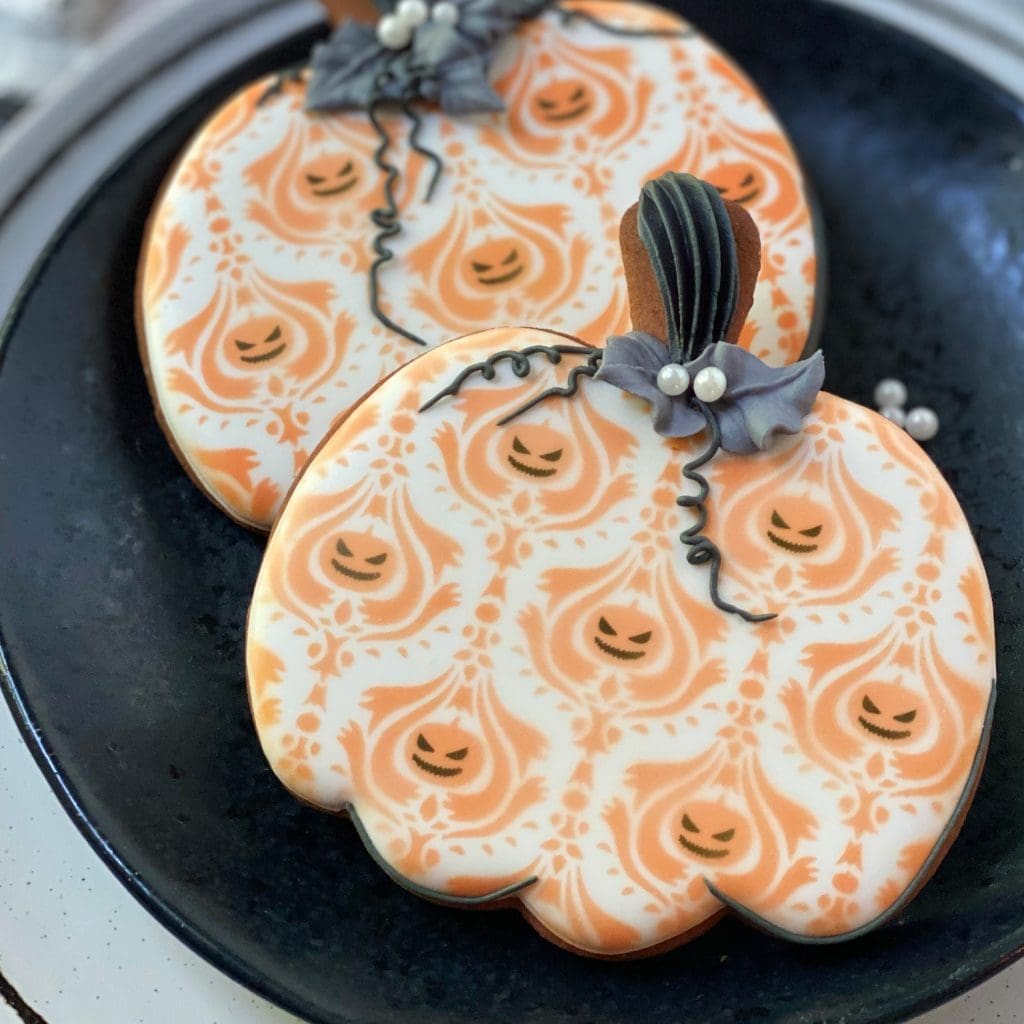
Alternatively, you could make a playful pumpkin using this same stencil and overlay, and the addition of a piped stem and leaves . . .
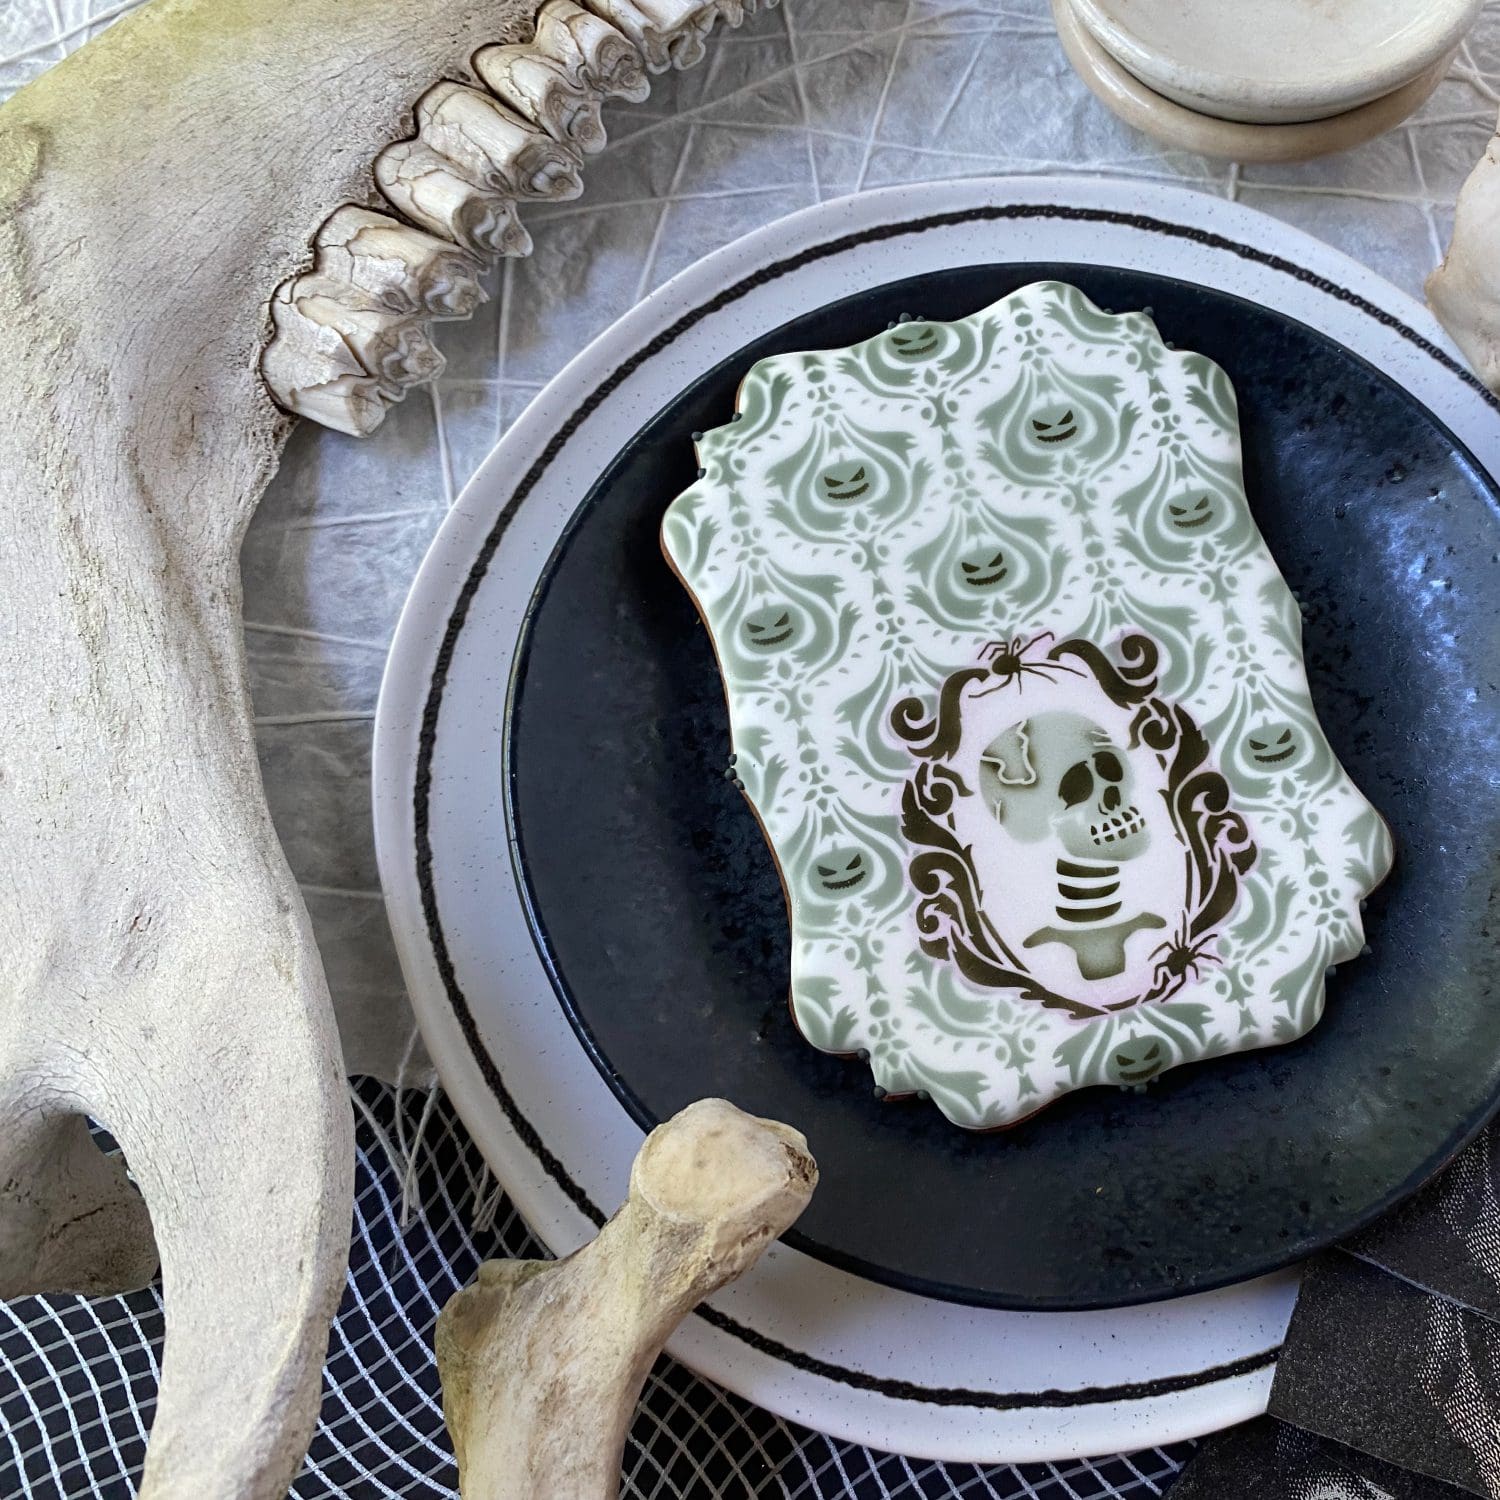
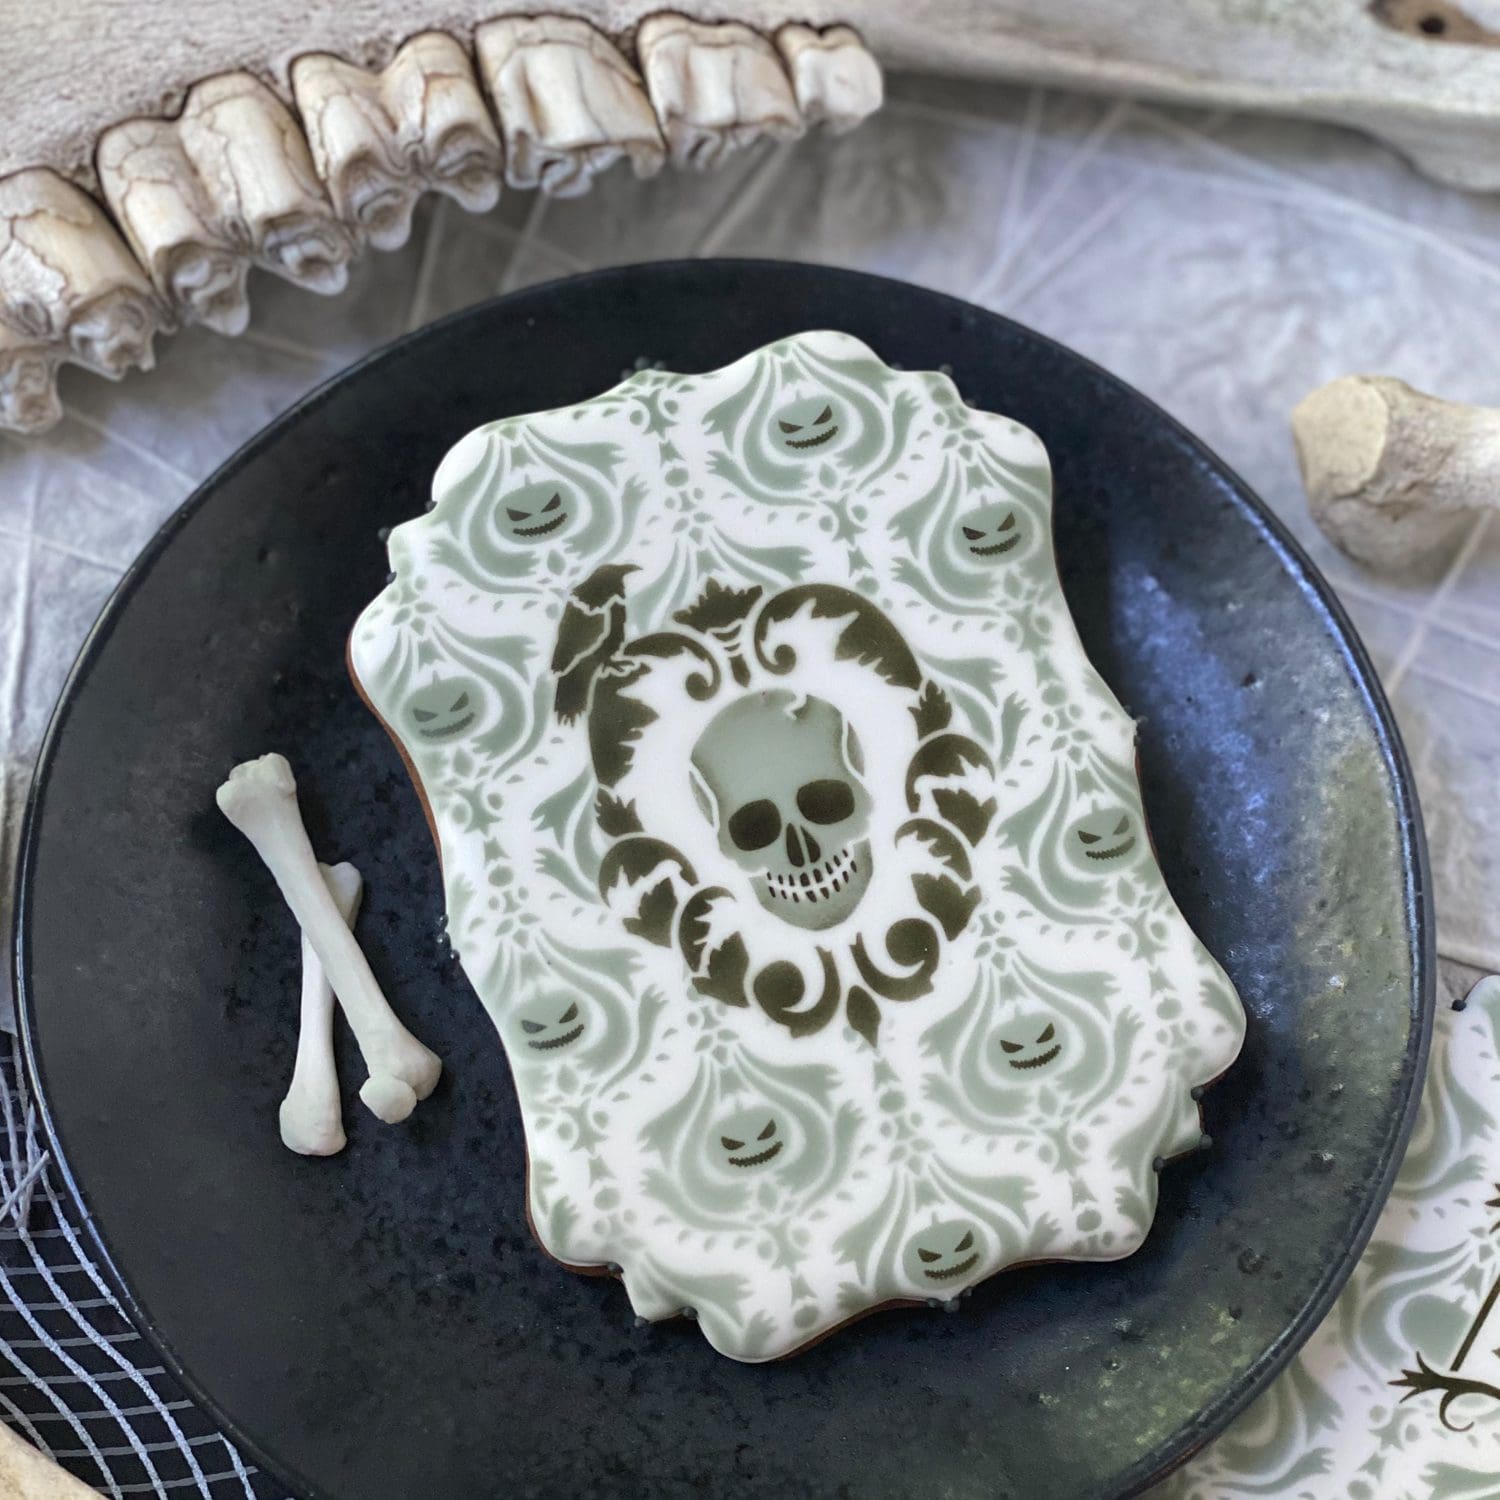
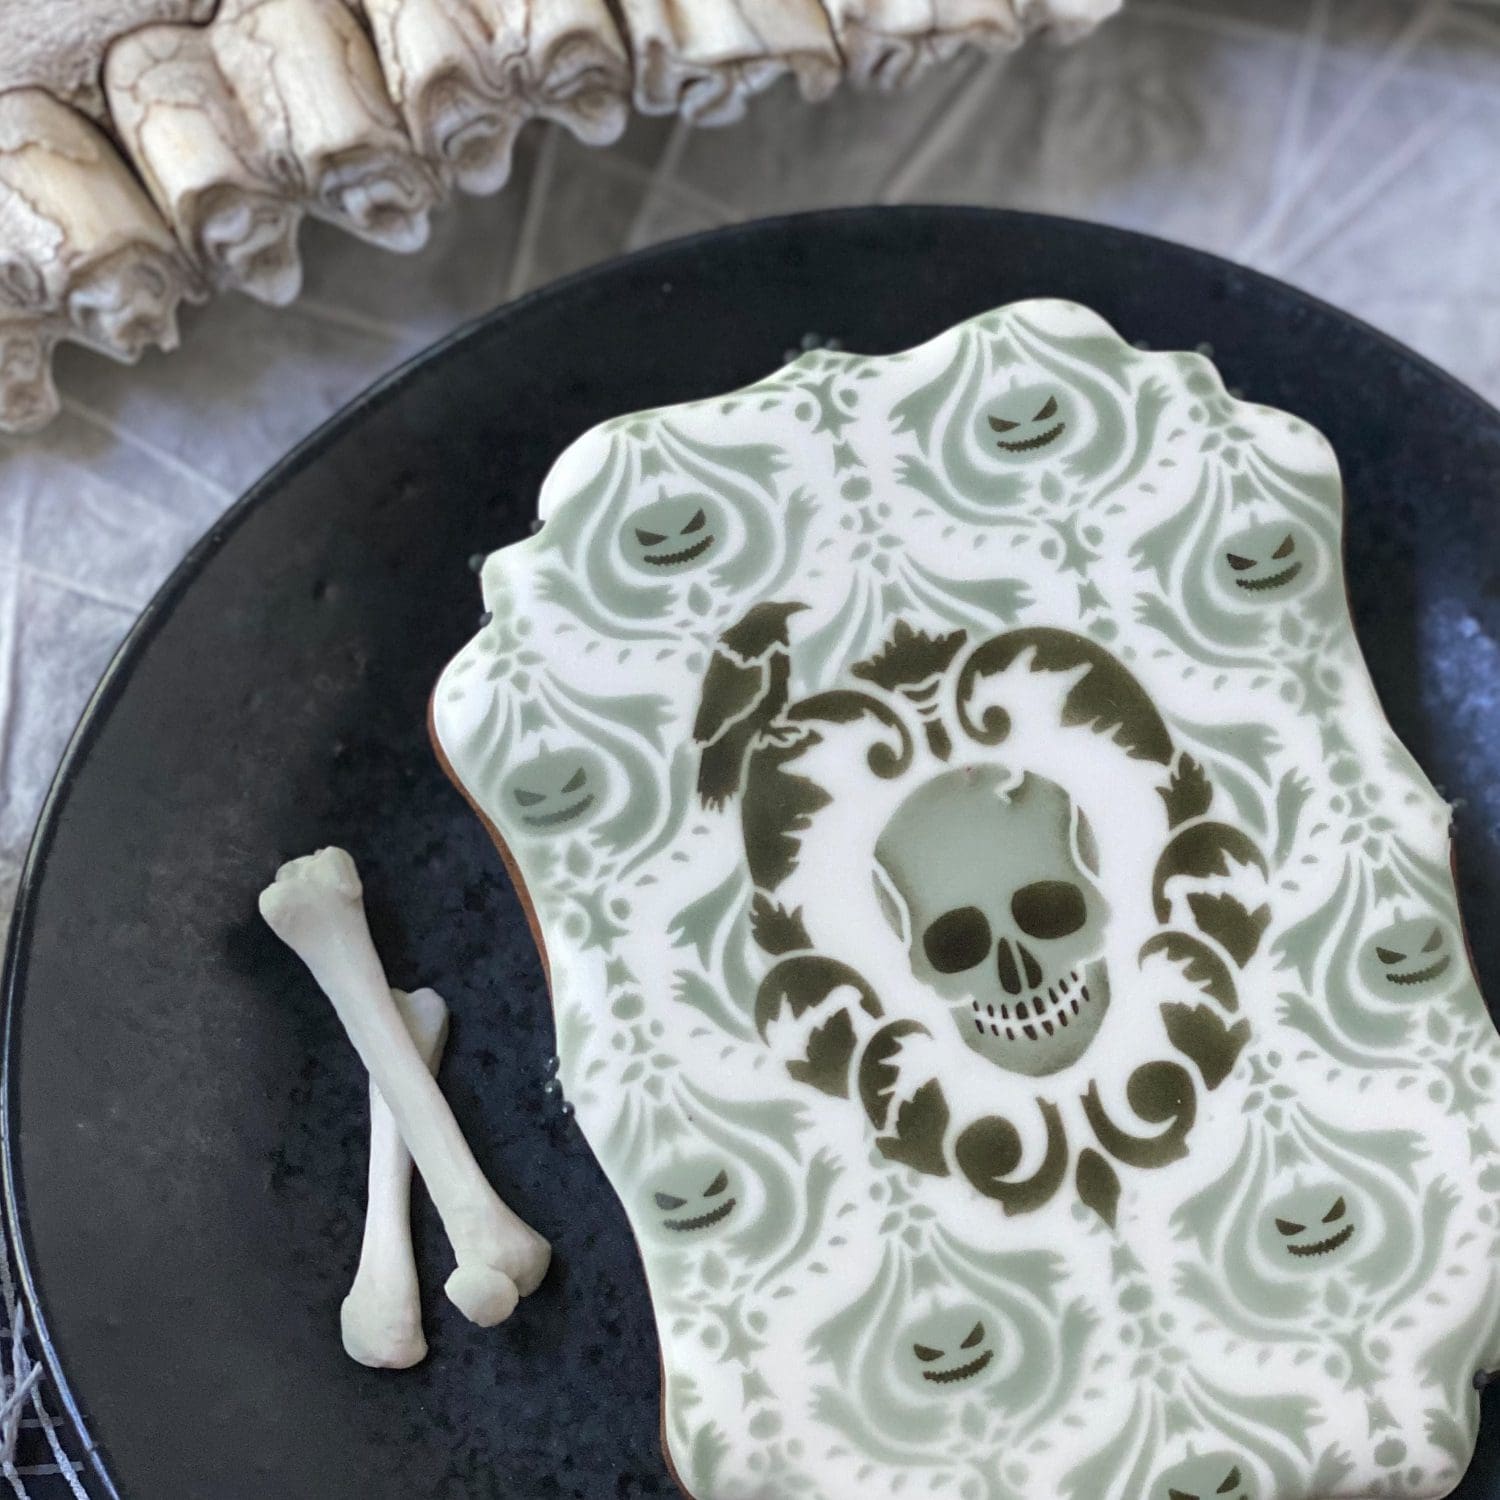
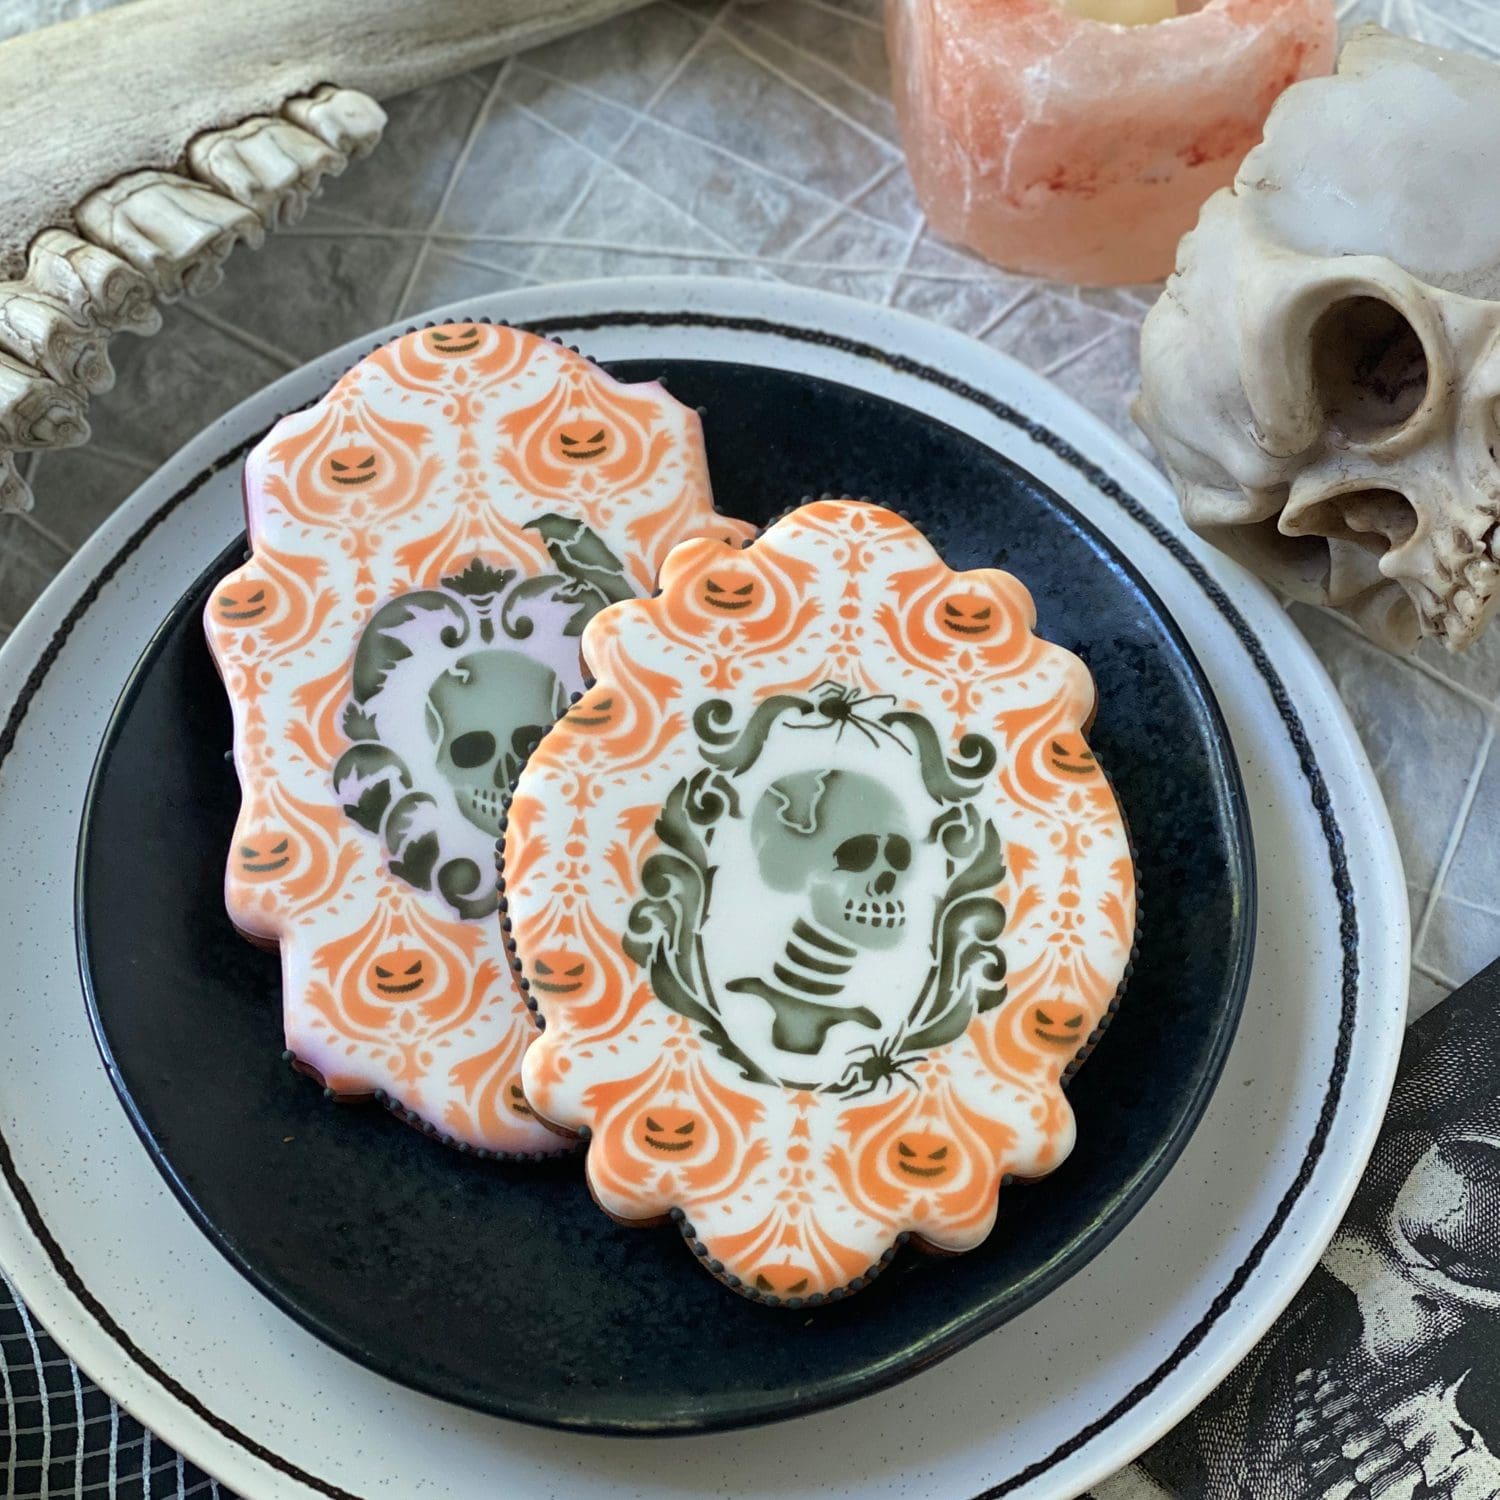
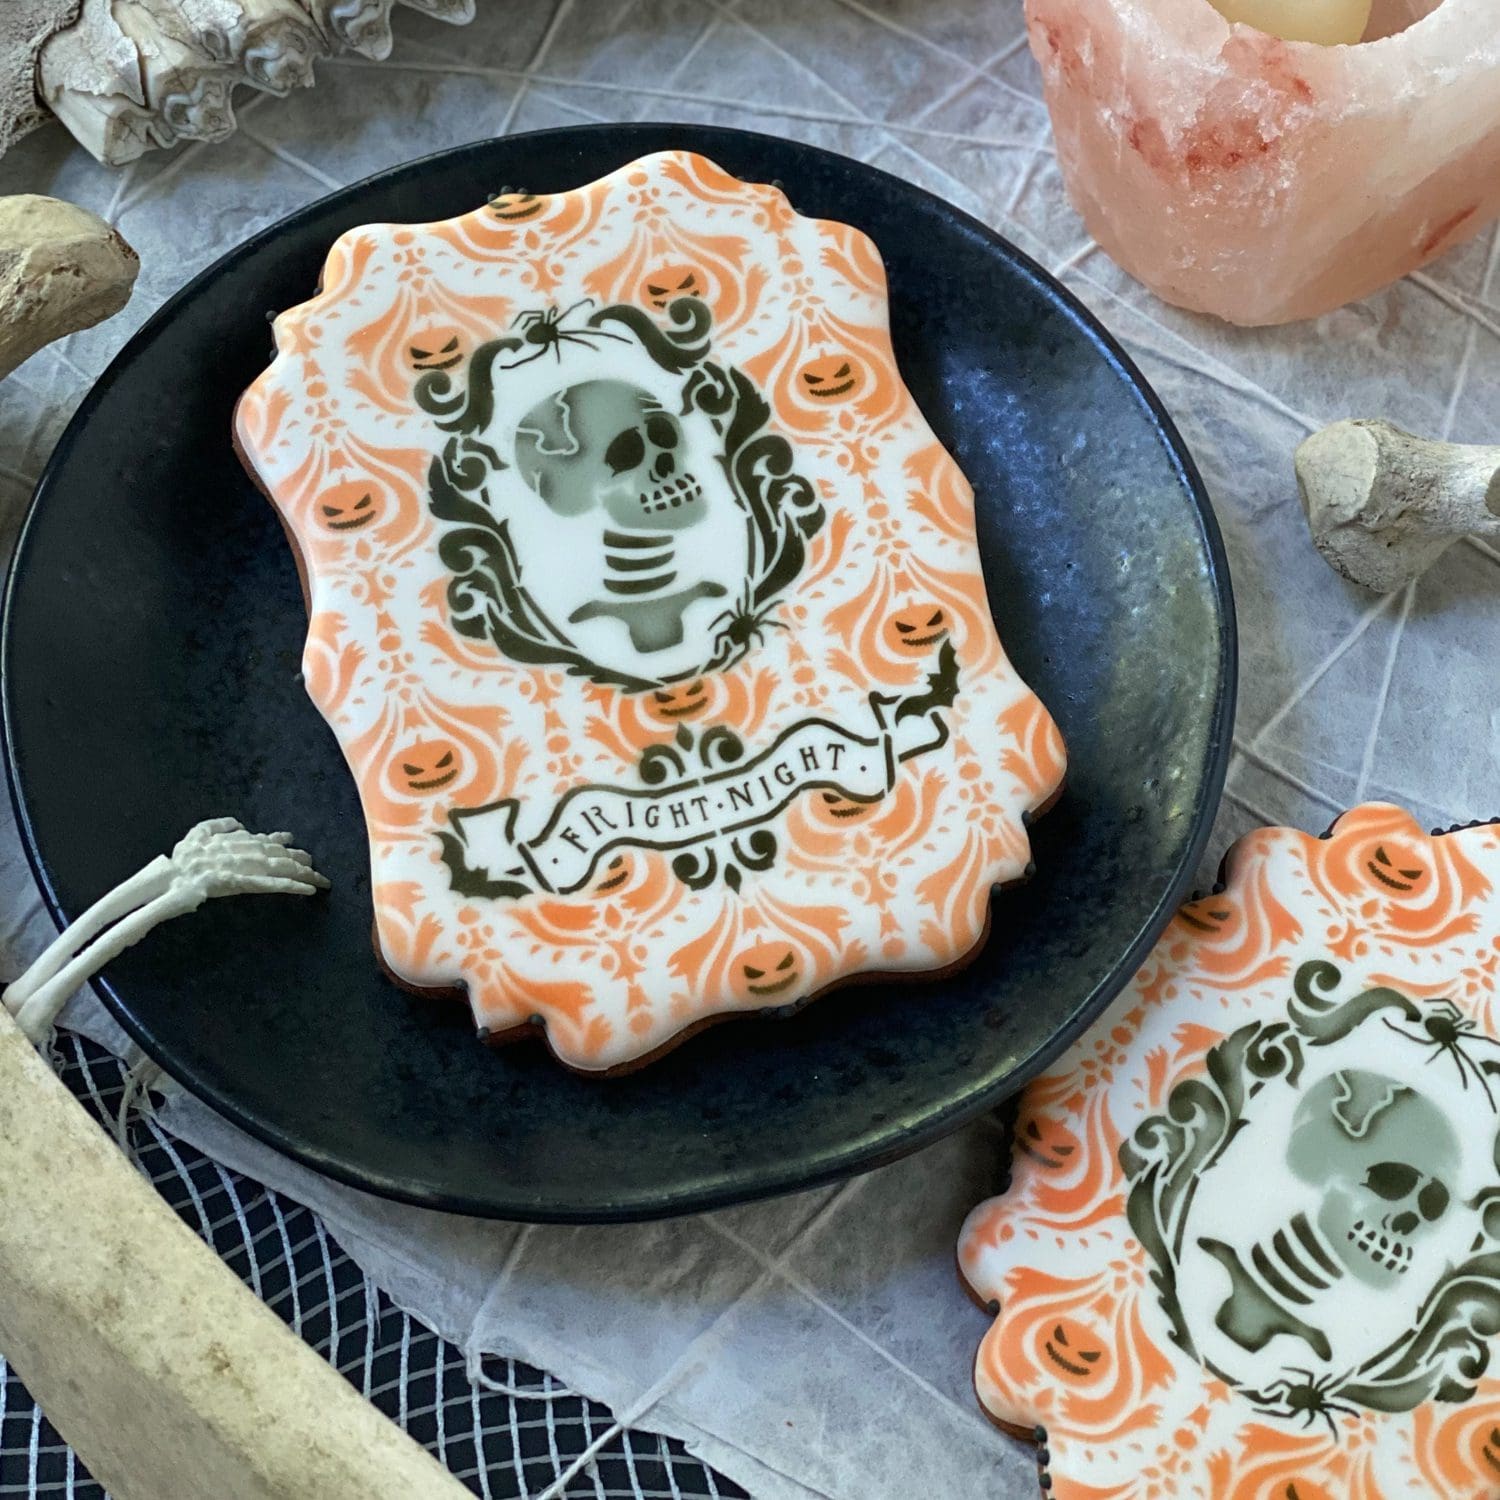
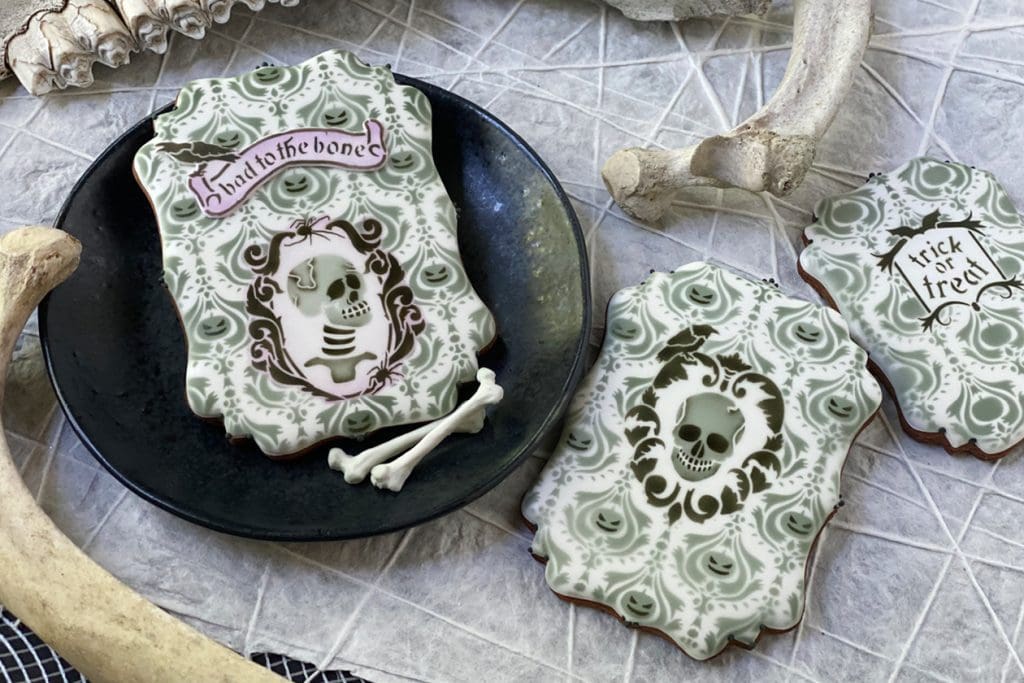
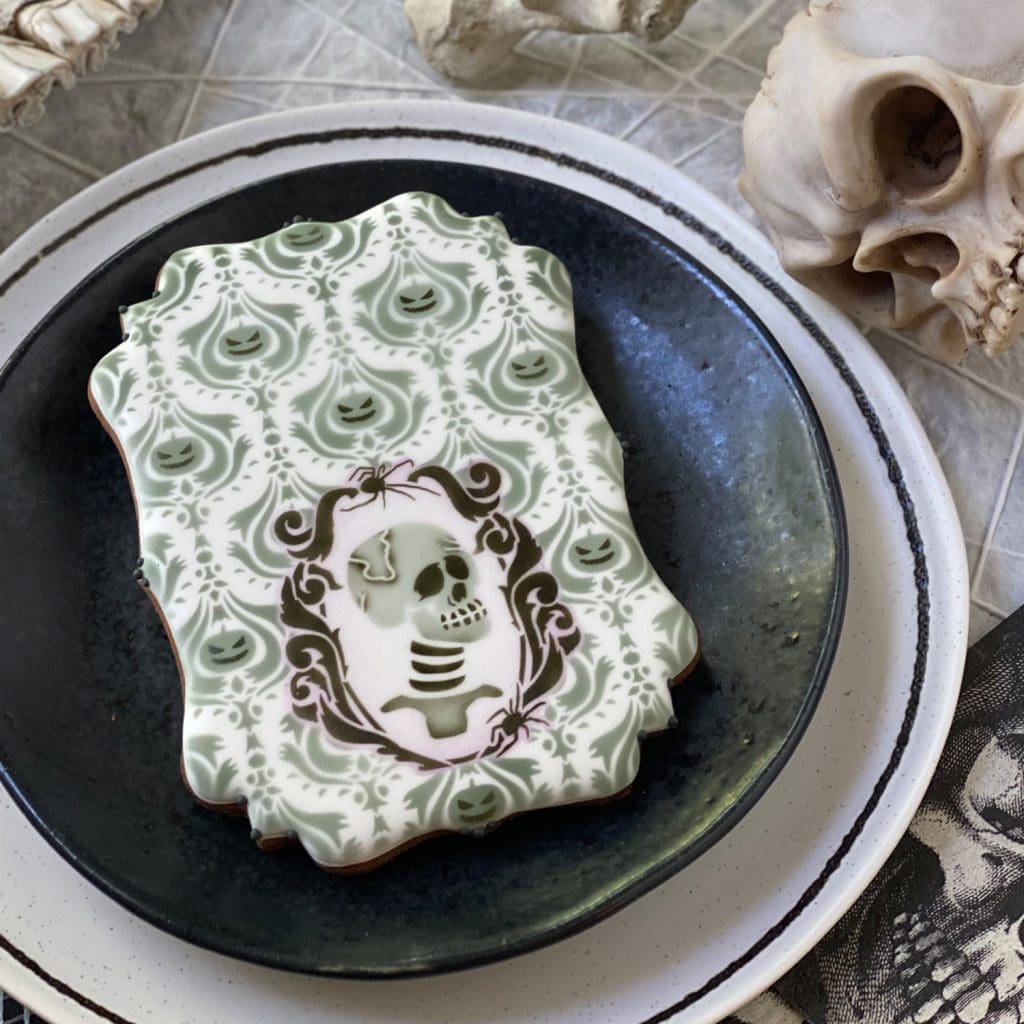
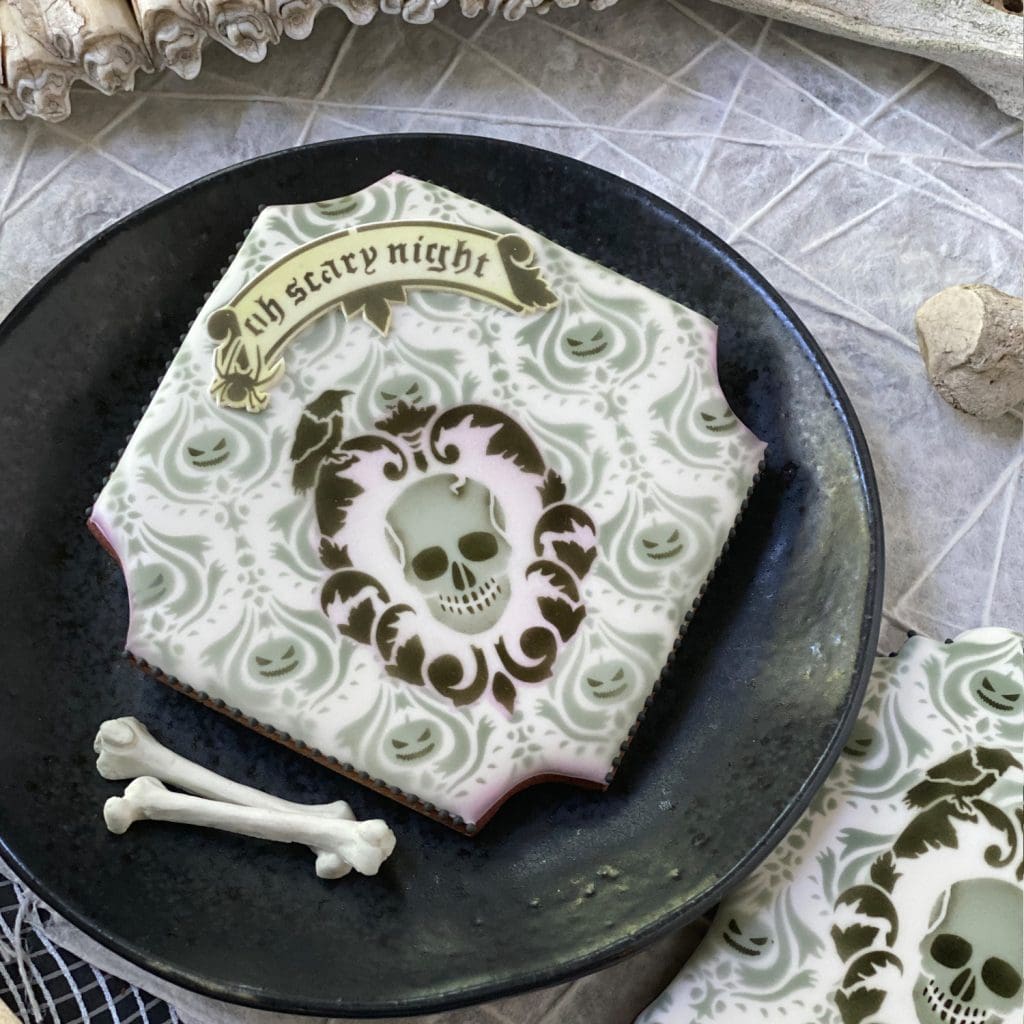
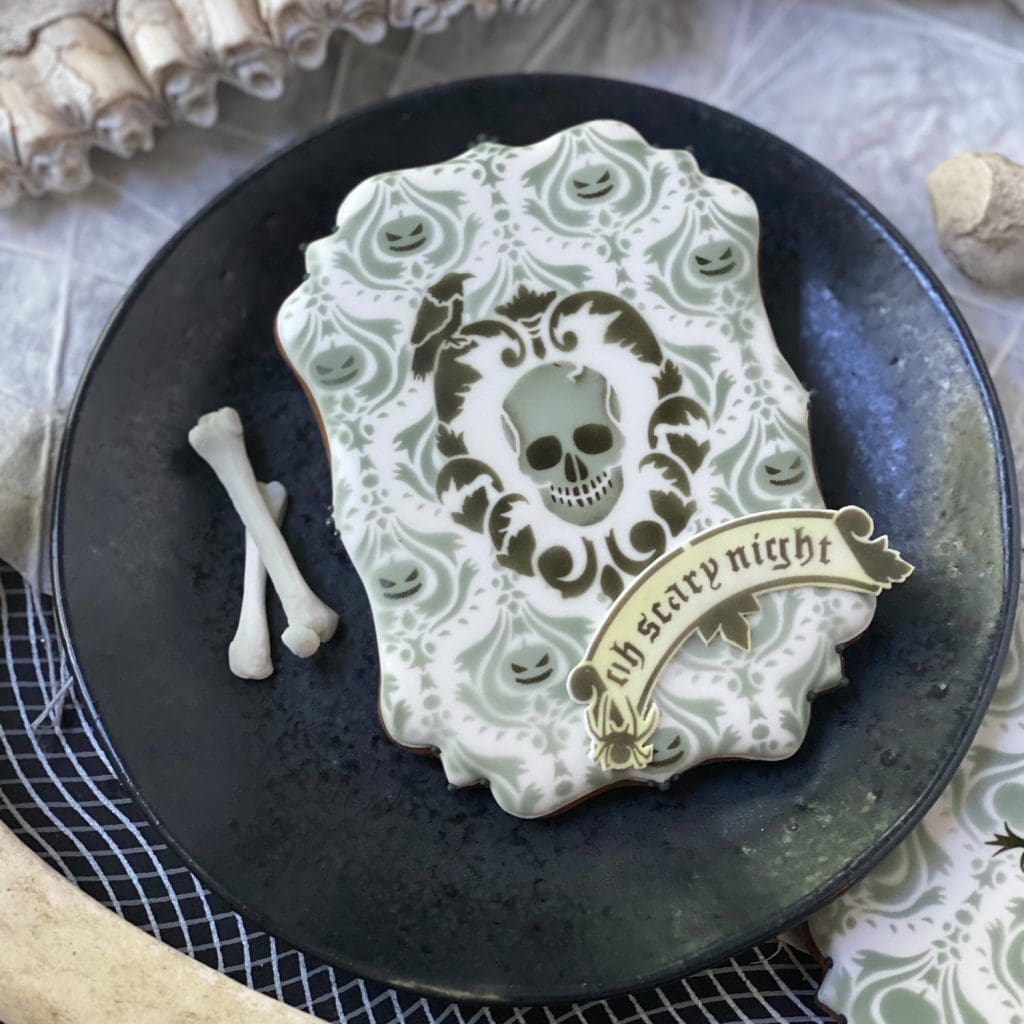
In fact, these stencils are so universal that they could work on just about any Halloween shape. That being said, I tend to prefer multi-purpose shapes and multiple layered elements, so let’s turn now to cookies that make use of this set’s foreground elements (the skulls and eye-and-teeth overlays) on plaque shapes. First, a few cookies only in black (with a touch of purple in some cases), just to demonstrate how striking these stencils can be with essentially one color . . .

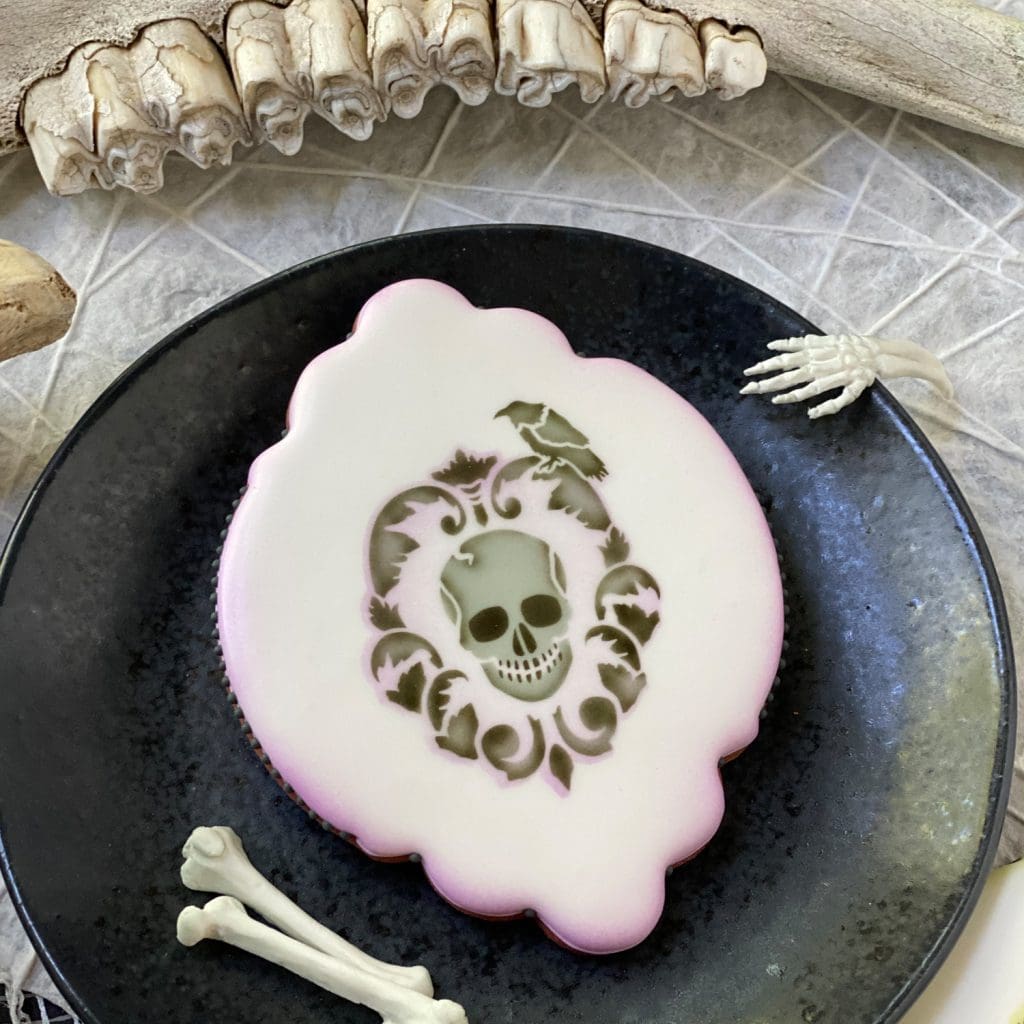
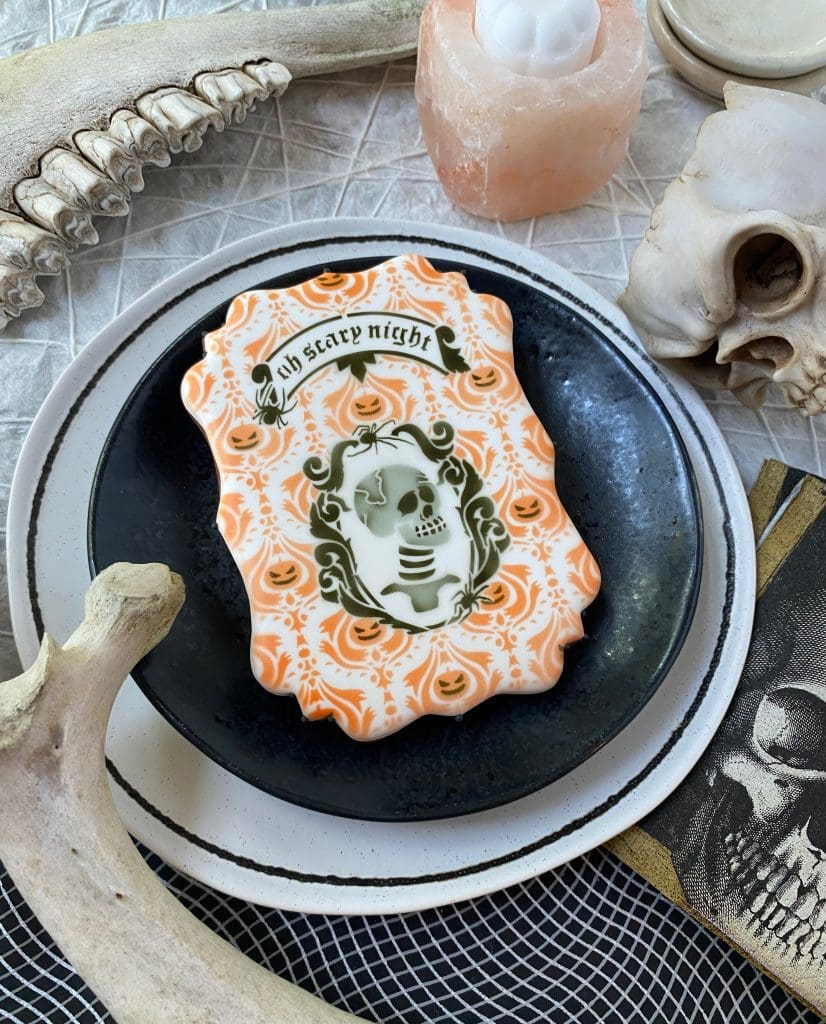
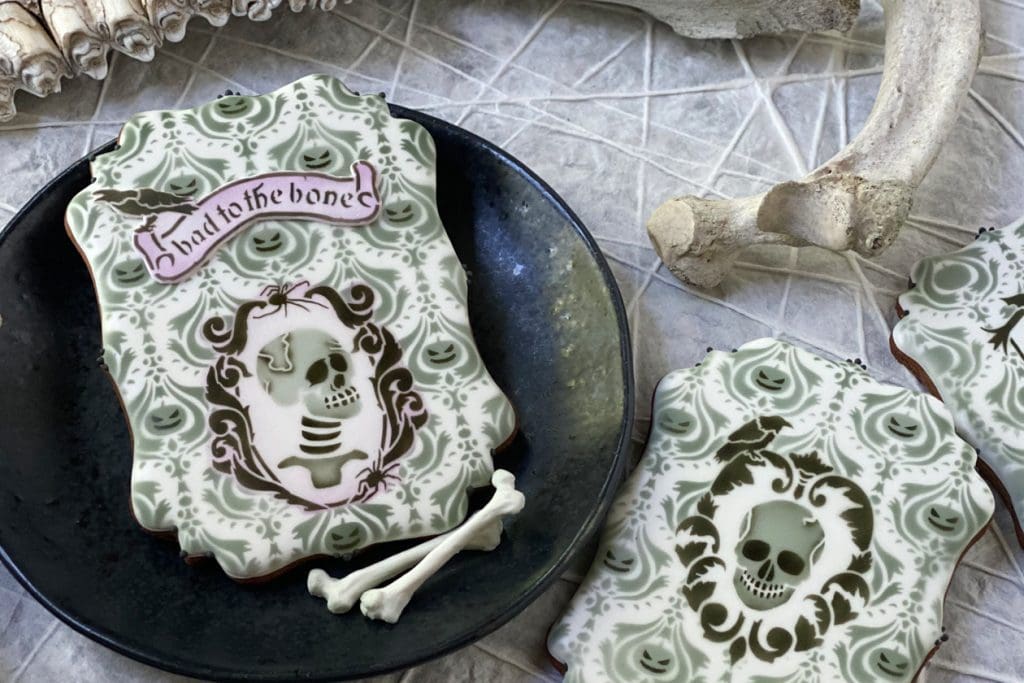
I just love those cow bones, but let’s look more closely at the cookie because that’s what we’re all really here for, right?!
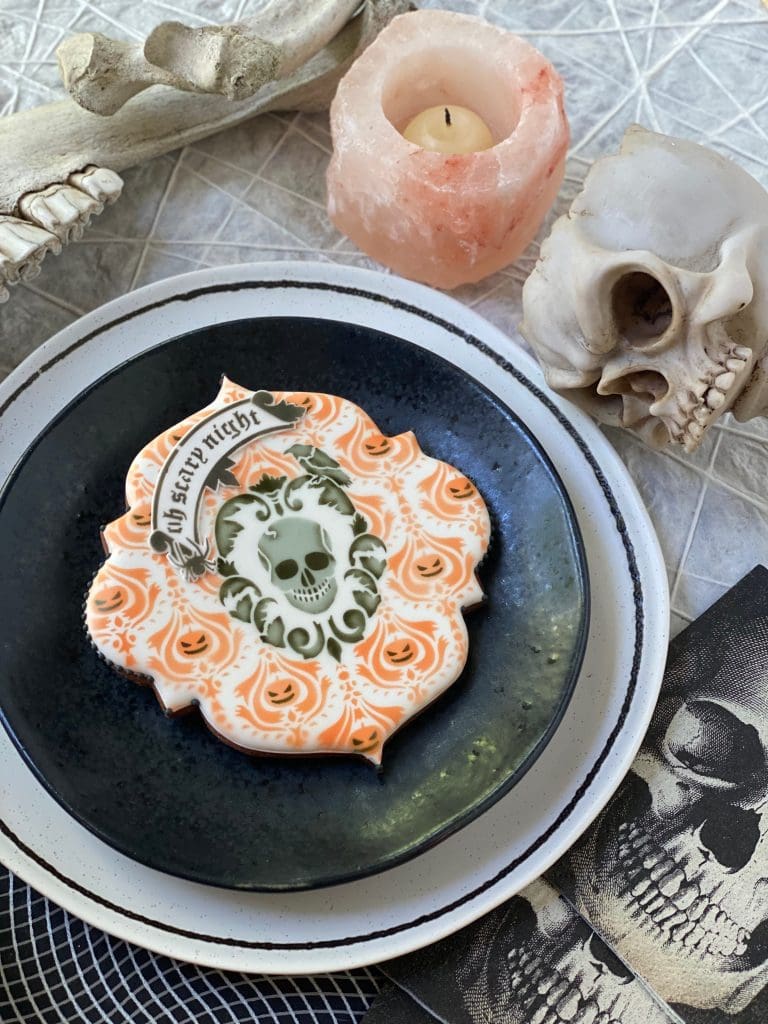
And here’s the other skull portait without the touch of purple . . .

Once again, a closer view, which I share for purposes of inspecting the spray pattern . . .
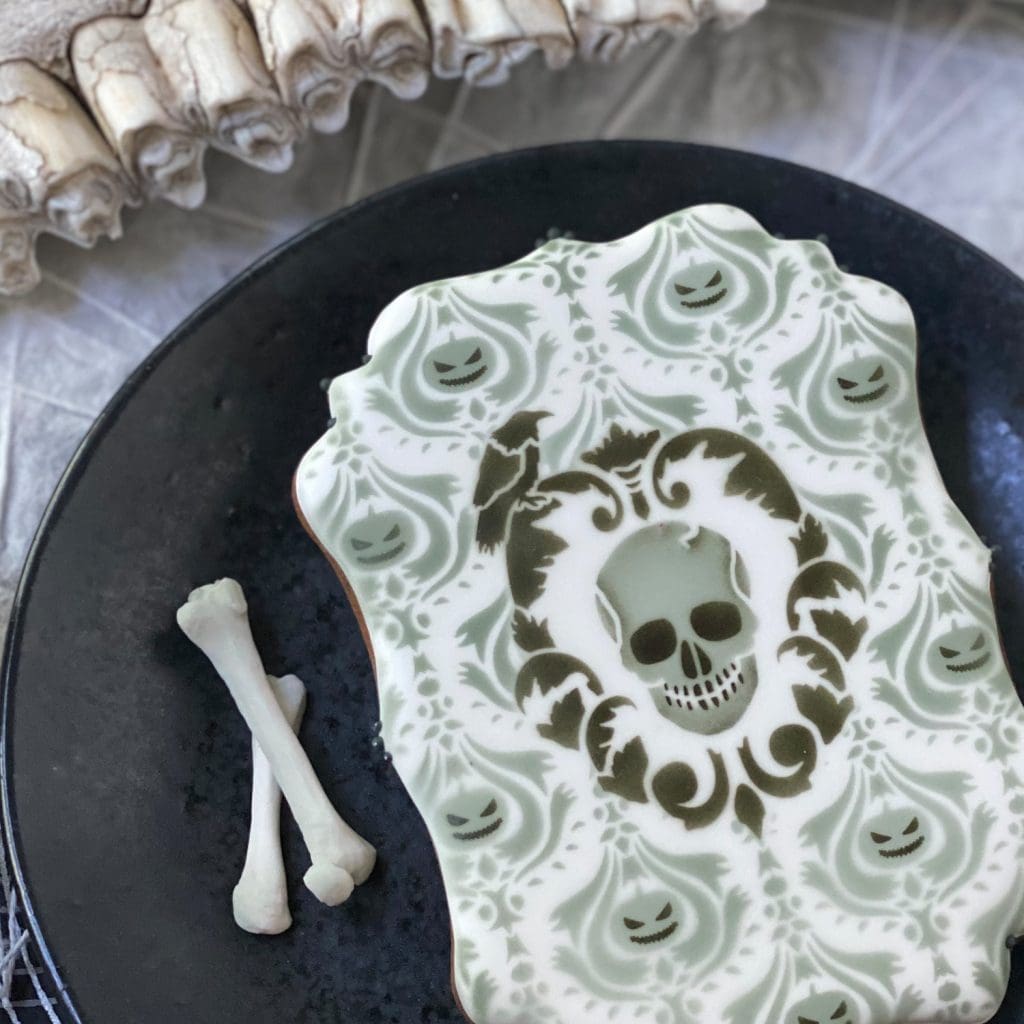
I used Spectrum Flow Black for what appears to be gray and AmeriMist Super Black for the really black black. Spectrum Flow alcohol-based colorings tend to be less saturated taken straight from the container and also spray very smoothly (without speckling), so they’re great for spraying broad expanses of relatively “soft” colors. The other key to achieving such a uniform spray is to be sure your airbrush gun is clean, but, moreover, that your compressor is operating at sufficiently high output pressure (20 psi or more). If the pressure is too wimpy, the food coloring won’t be “atomized” into a fine spray, and speckling is nearly guaranteed.
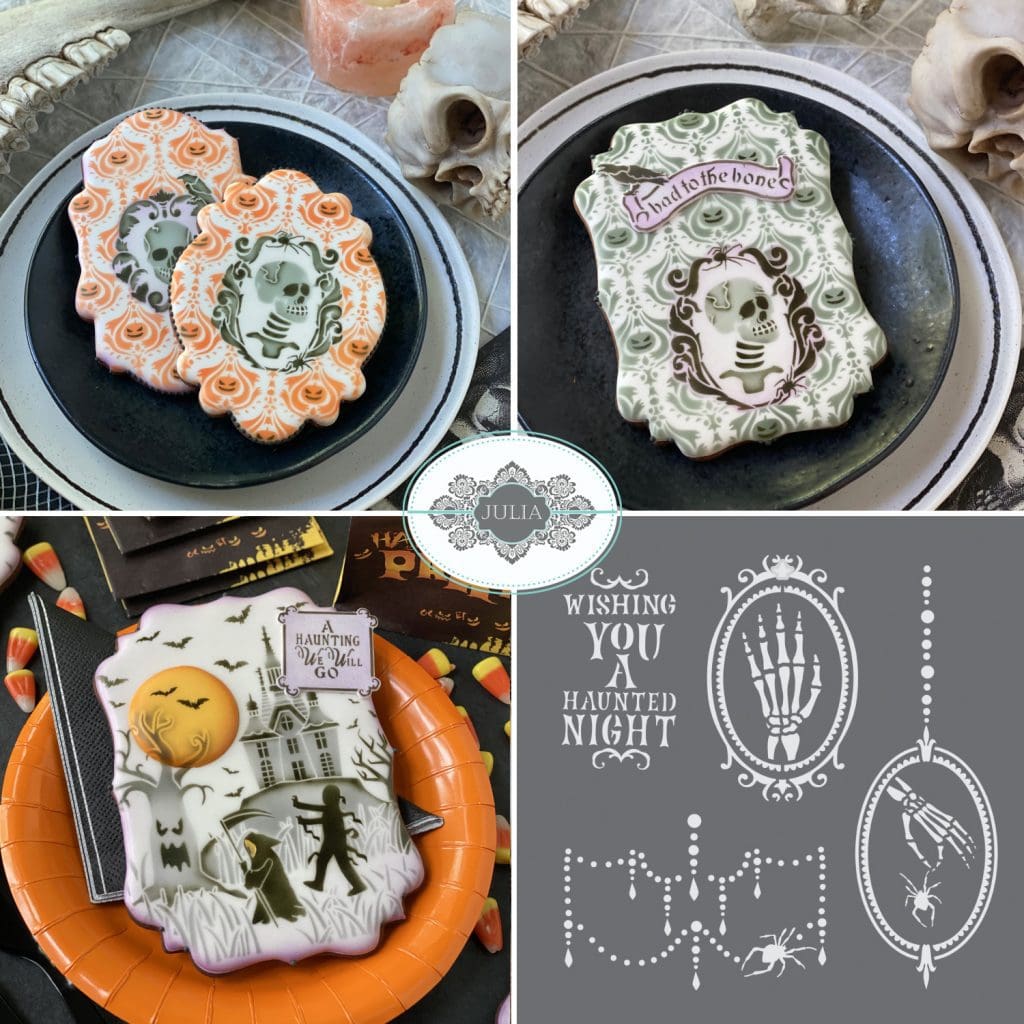
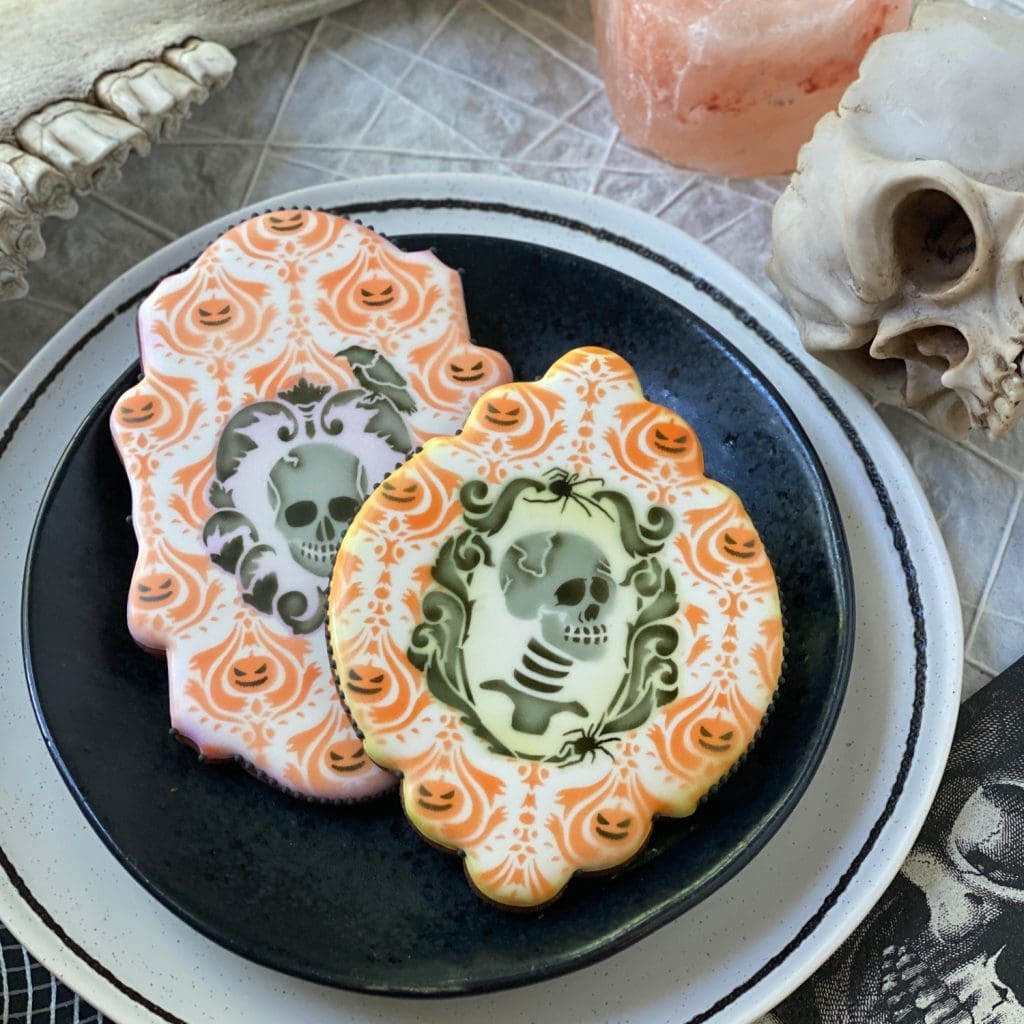
Of course, if you want more traditional Halloween orange and black, and the added challenge of working with multiple colors, that’s possible too! The cookies look great in either palette . . .
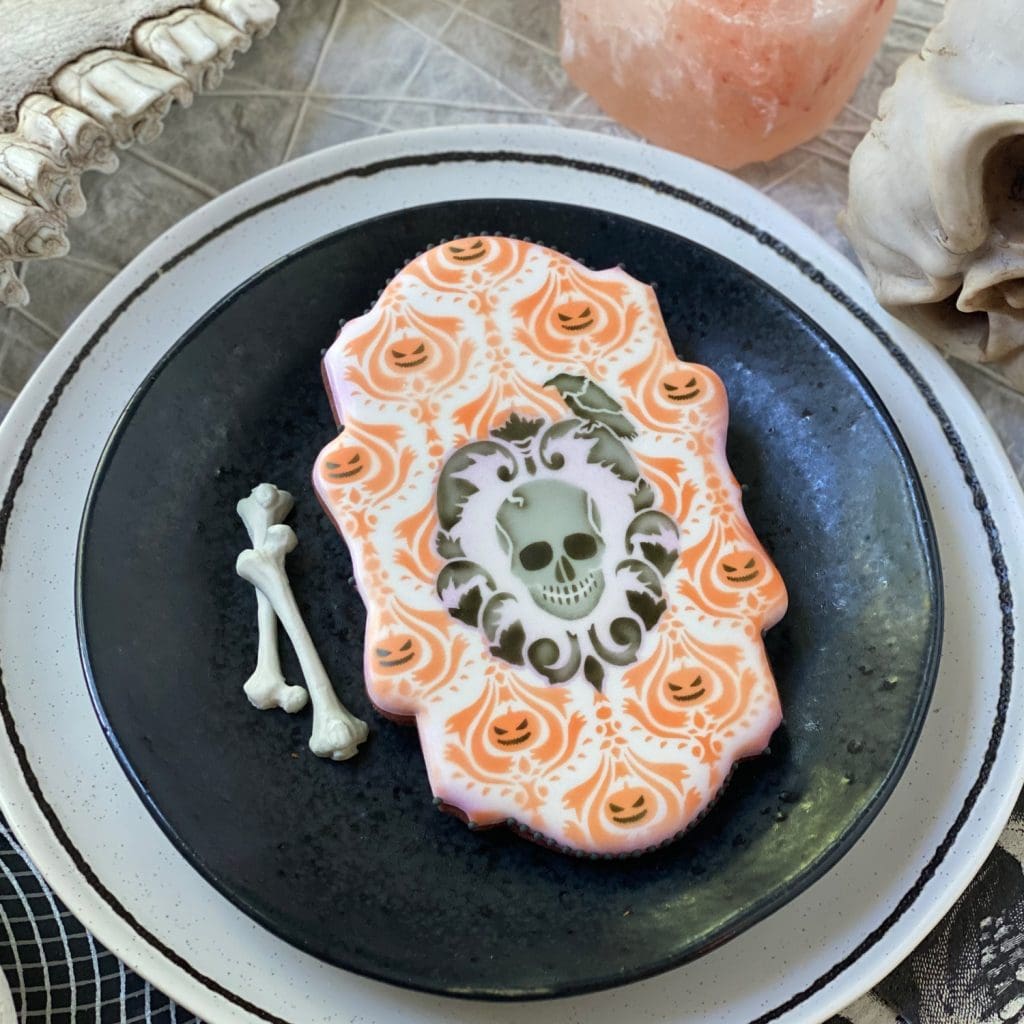

On the taller of the two cookies above, I used the shading stencil in the set to create a “halo” of AmeriMist Regal Purple around the skull, whereas in the top cookie below, I did the same thing but with AmeriMist Electric Green . . .
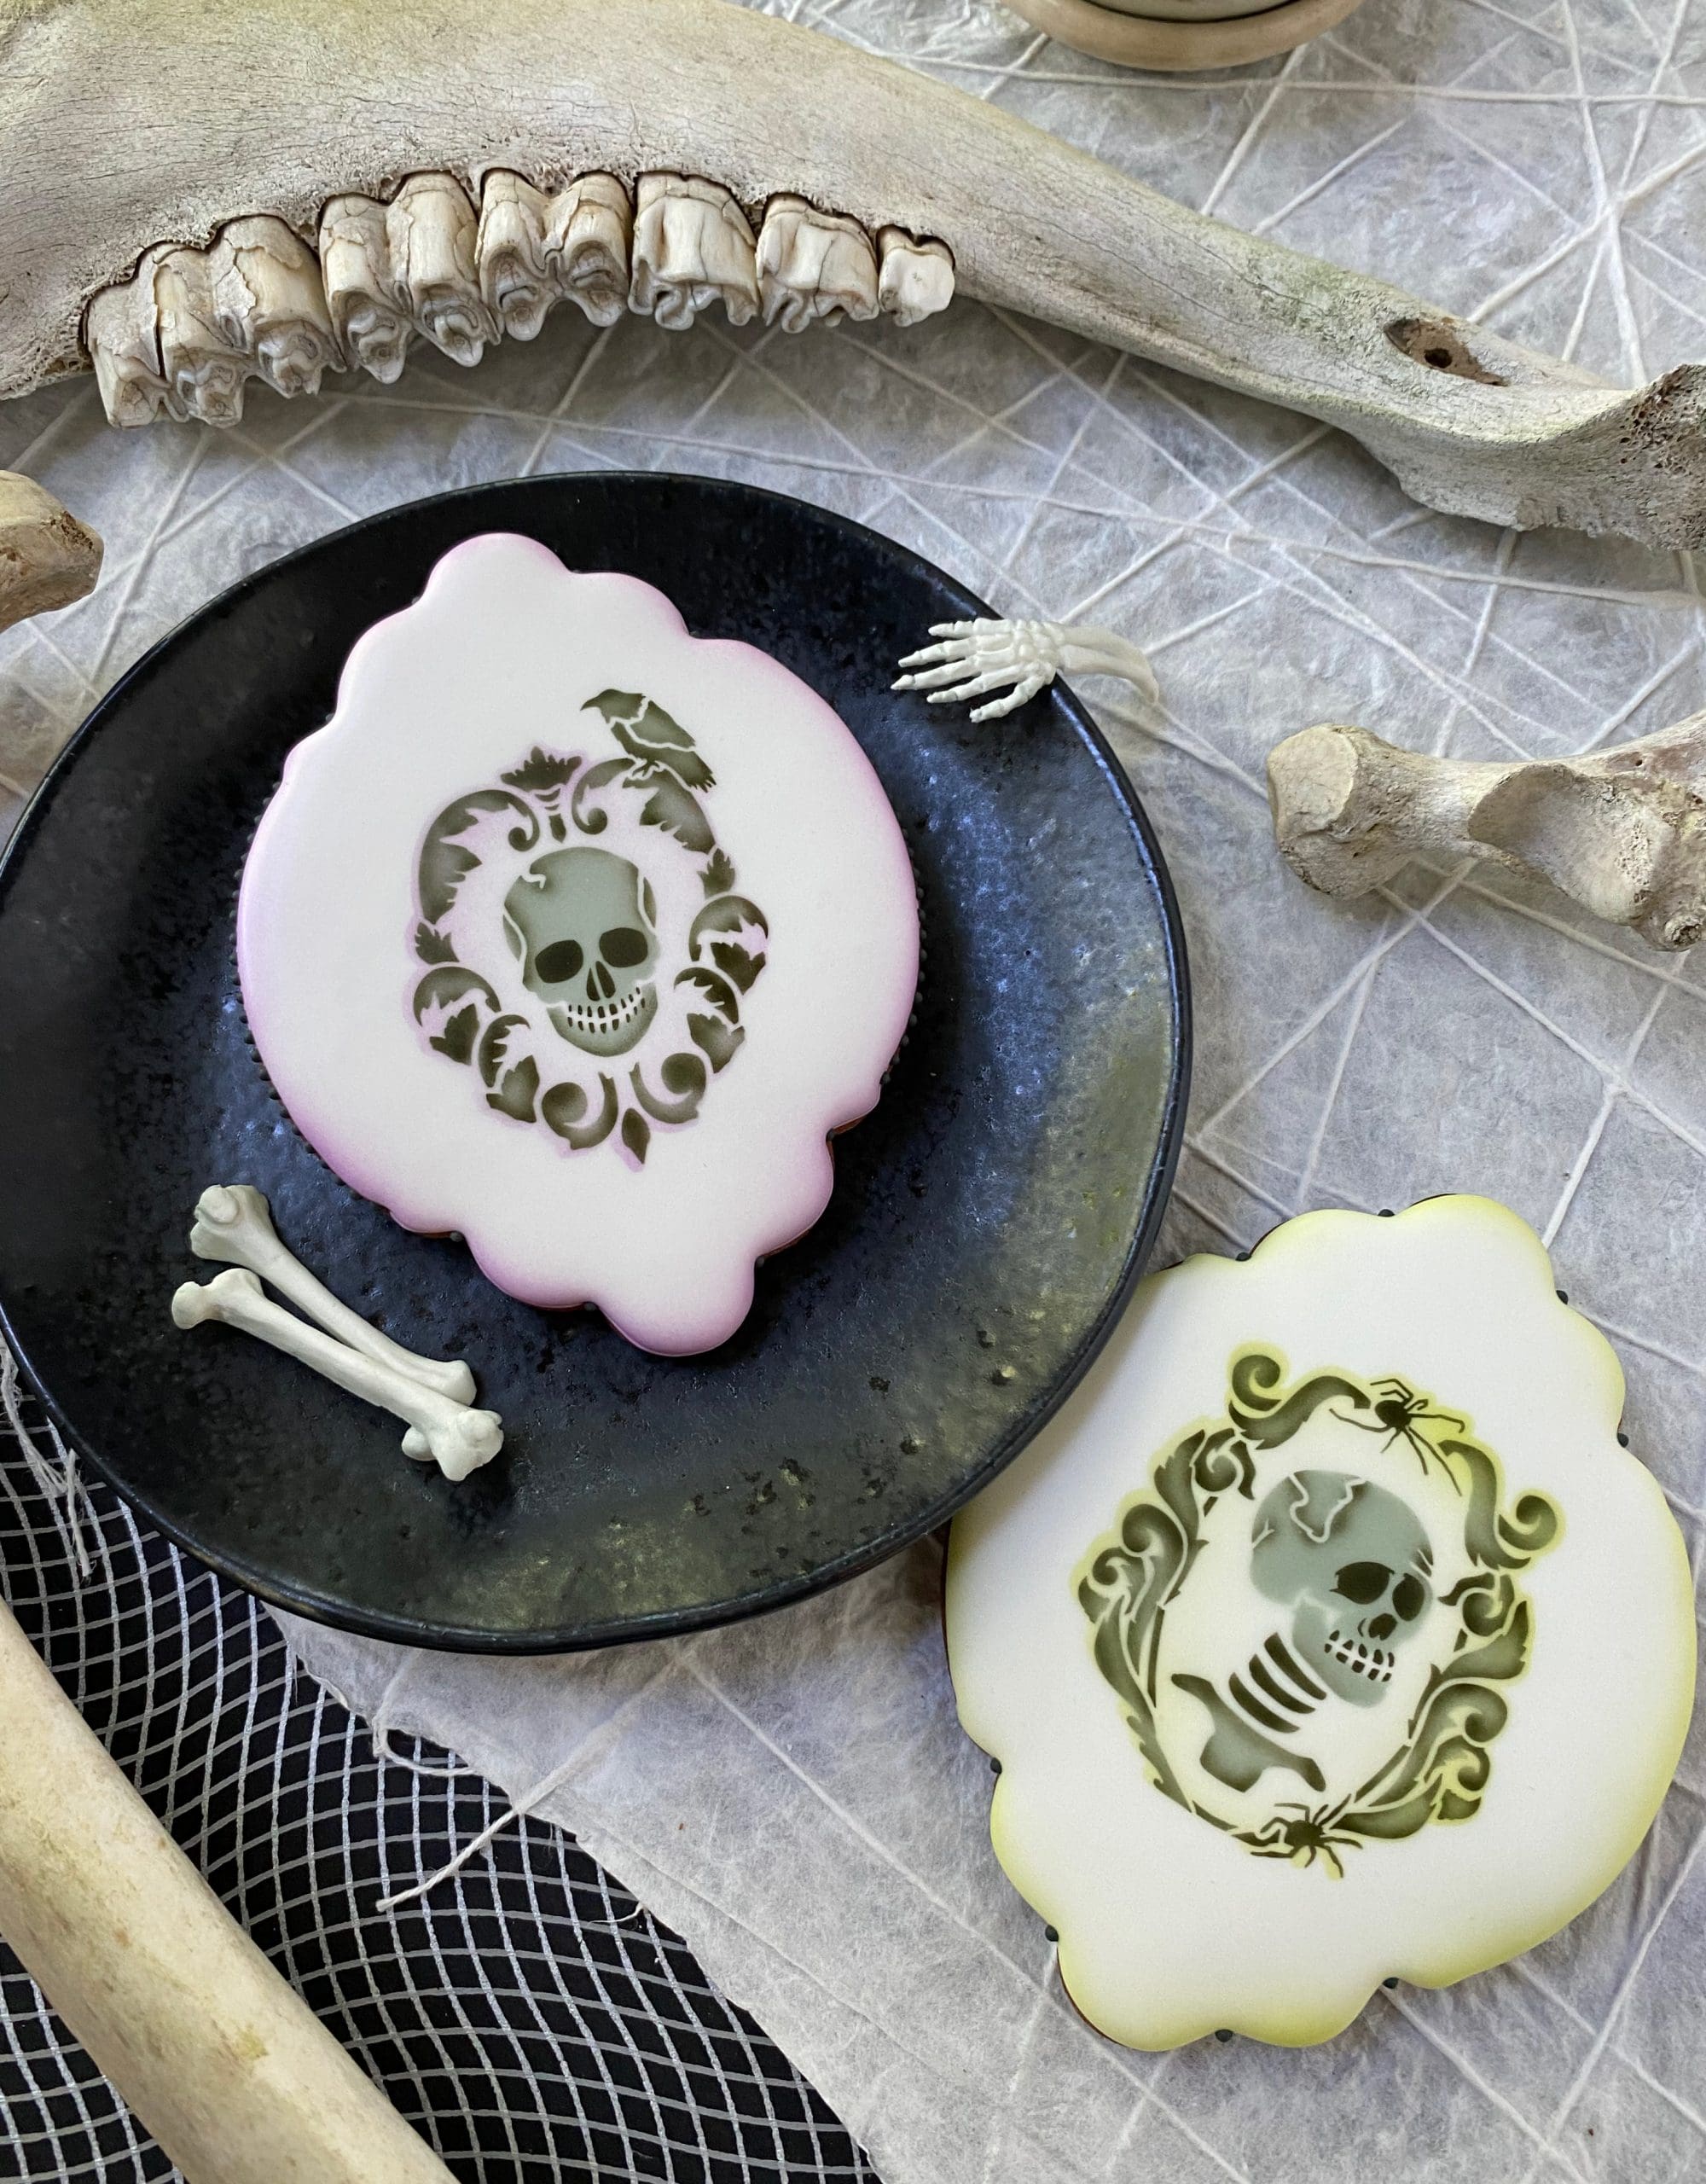
But, again, if layered stencils are too much to tackle at present, don’t worry! You can easily dispense with the background stencils (pumpkin damask and face overlay), and just use the skeleton portraits on plain white cookies. Not only is the effect quite striking, but a few plainer cookies always give the eye a resting place in an otherwise more complicated set . . .
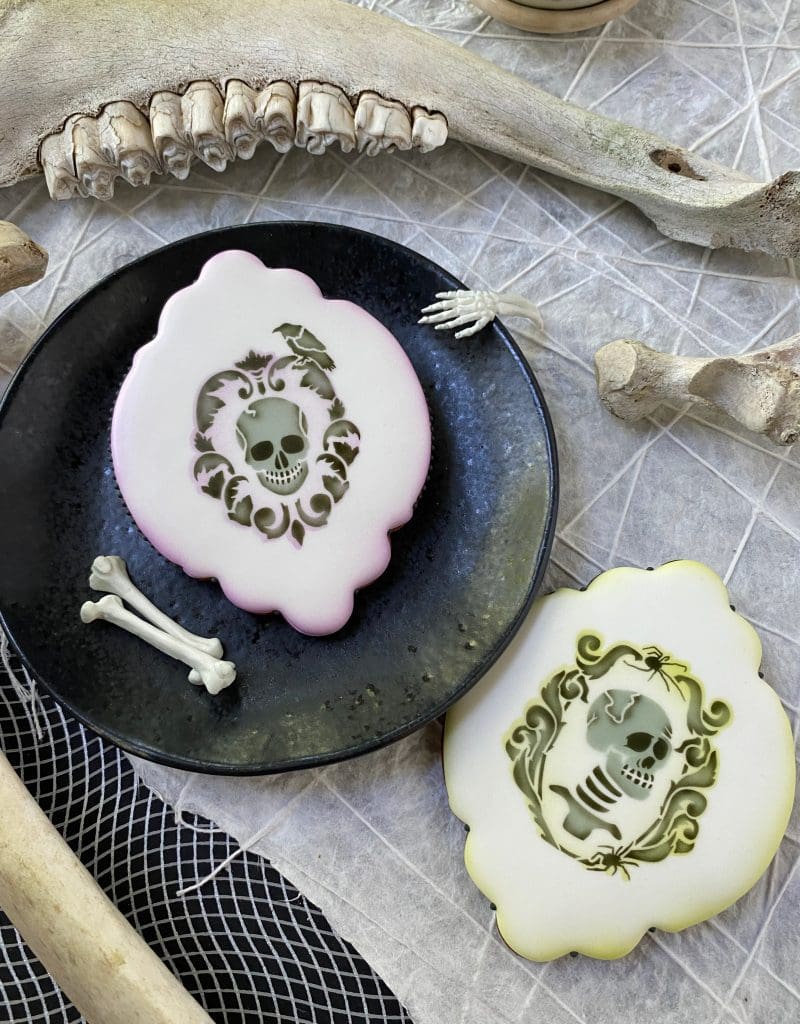
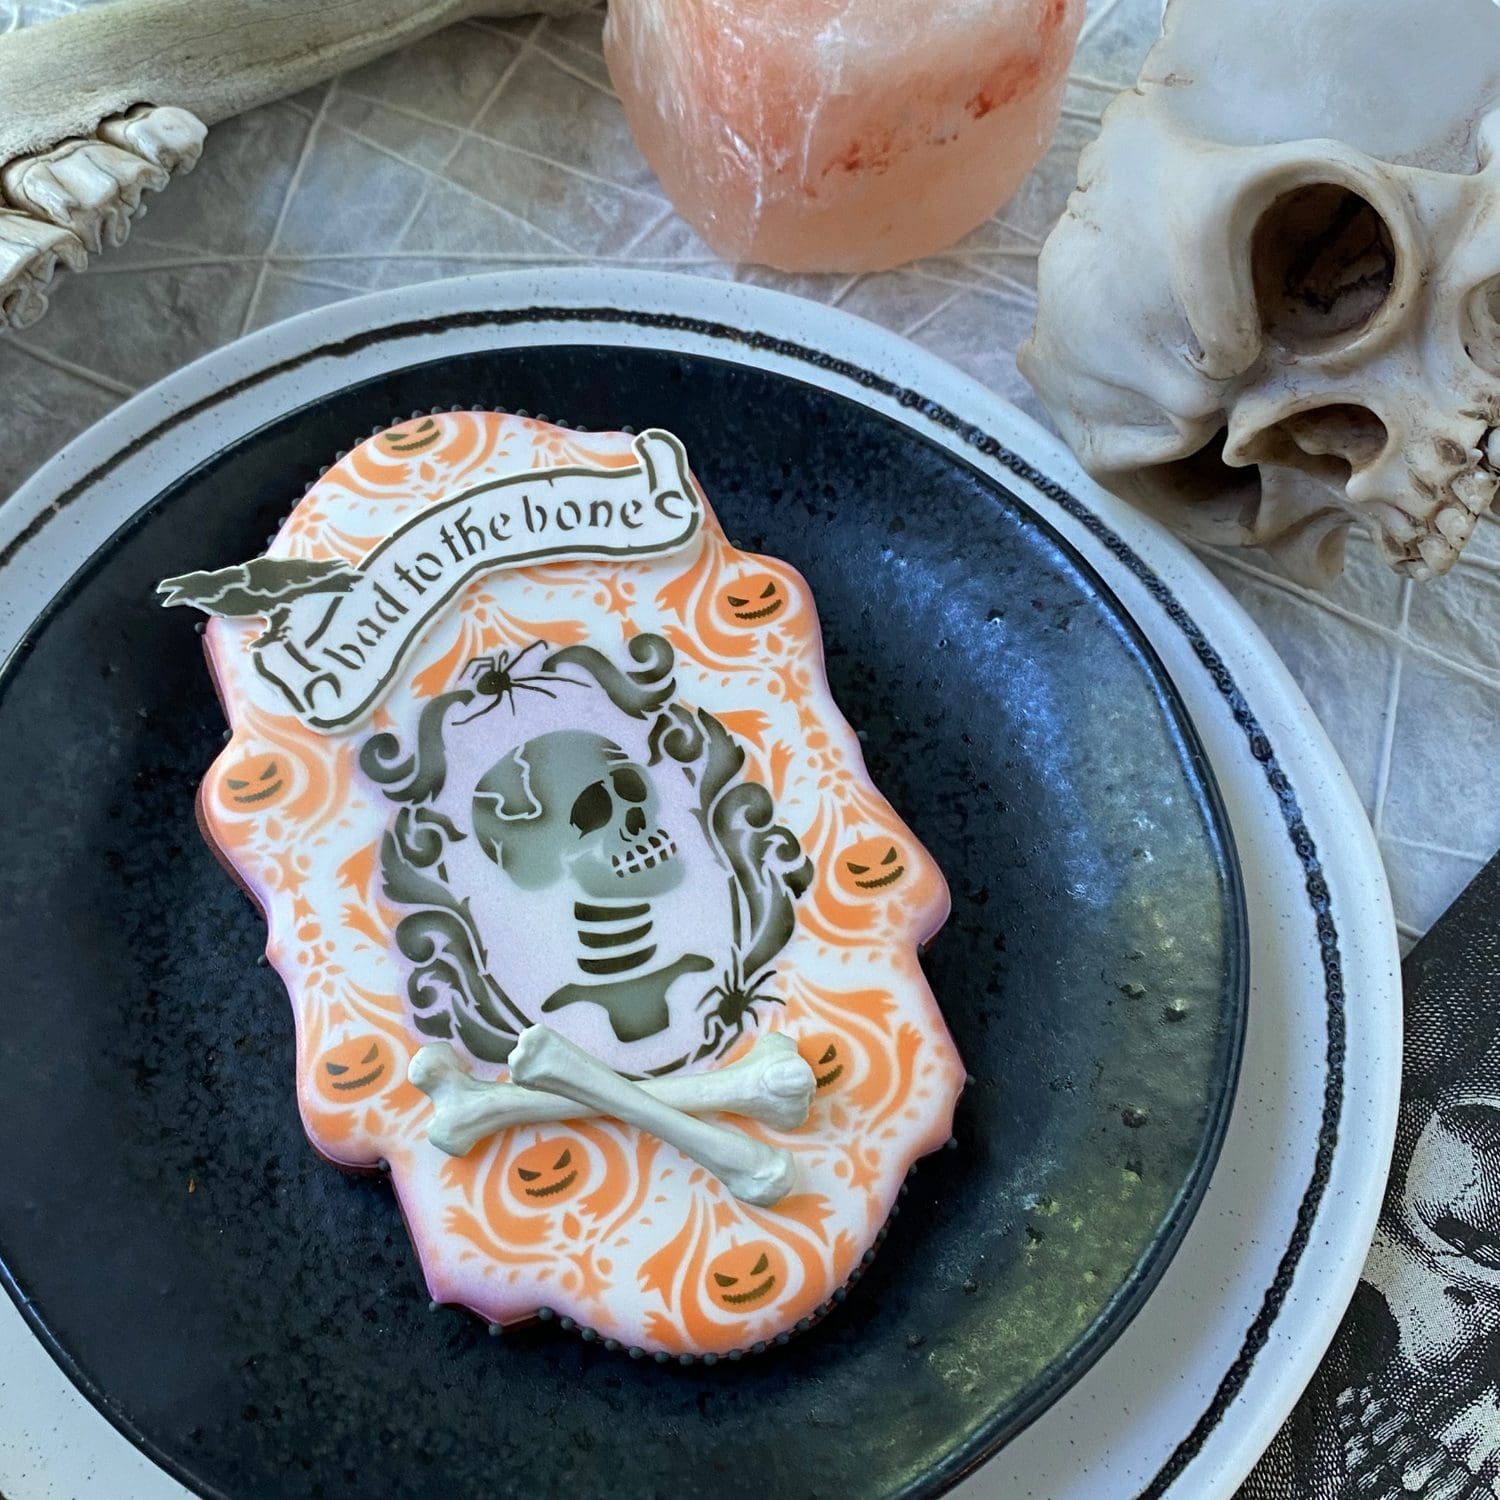
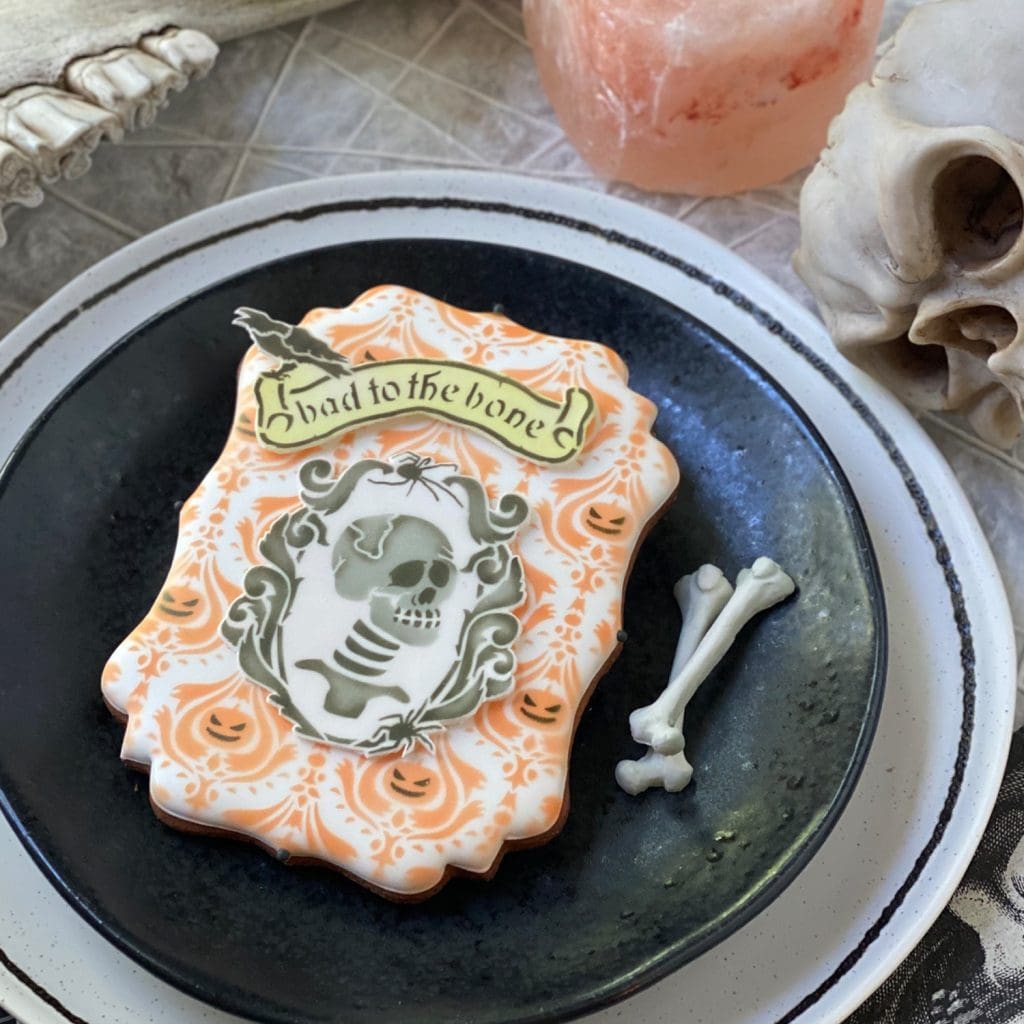
Before we move on to the complementary message and frame set, I leave you with a closer view of the top cookie so you can fully appreciate the creepy, but fun molded fondant bones I’ve used to garnish the plate. (Aside: I highly recommend the mold I used; it’s very detailed and includes many more skeleton parts!)
Now, let’s get to layering on the messages and frames . . .
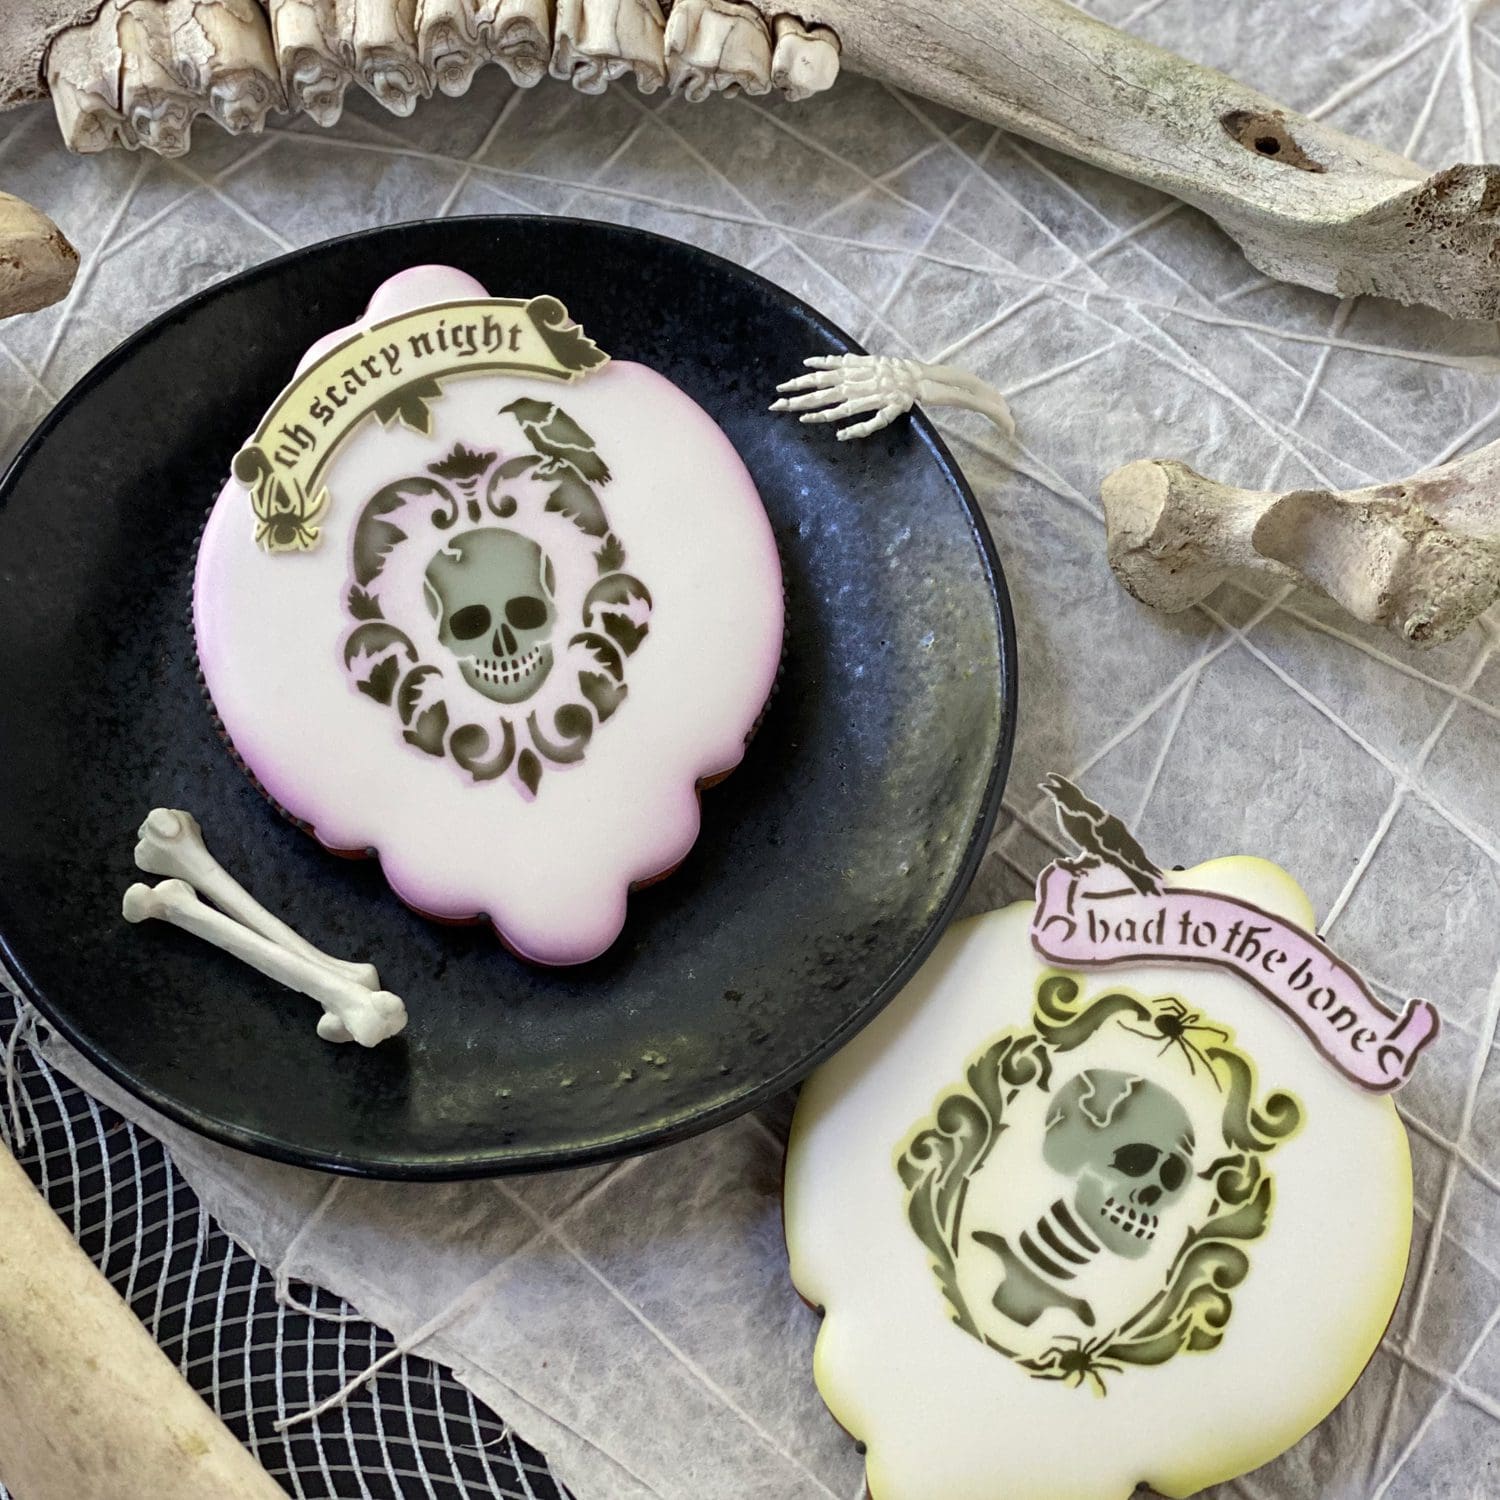
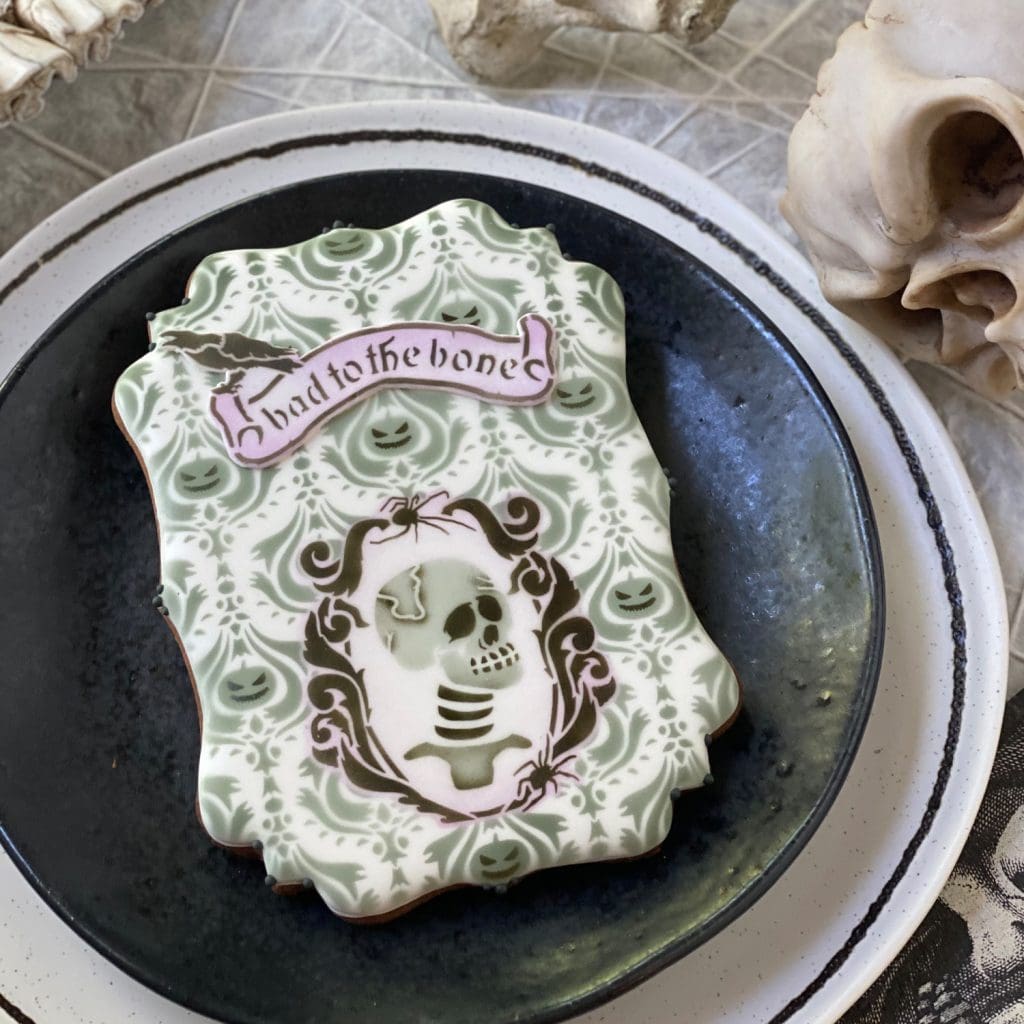
There are four fun banners that come in this complementary set. I’m going to start by showing you how I jazzed up the background-less cookies immediately above with two different sets of messages, both made as fondant appliqués . . .
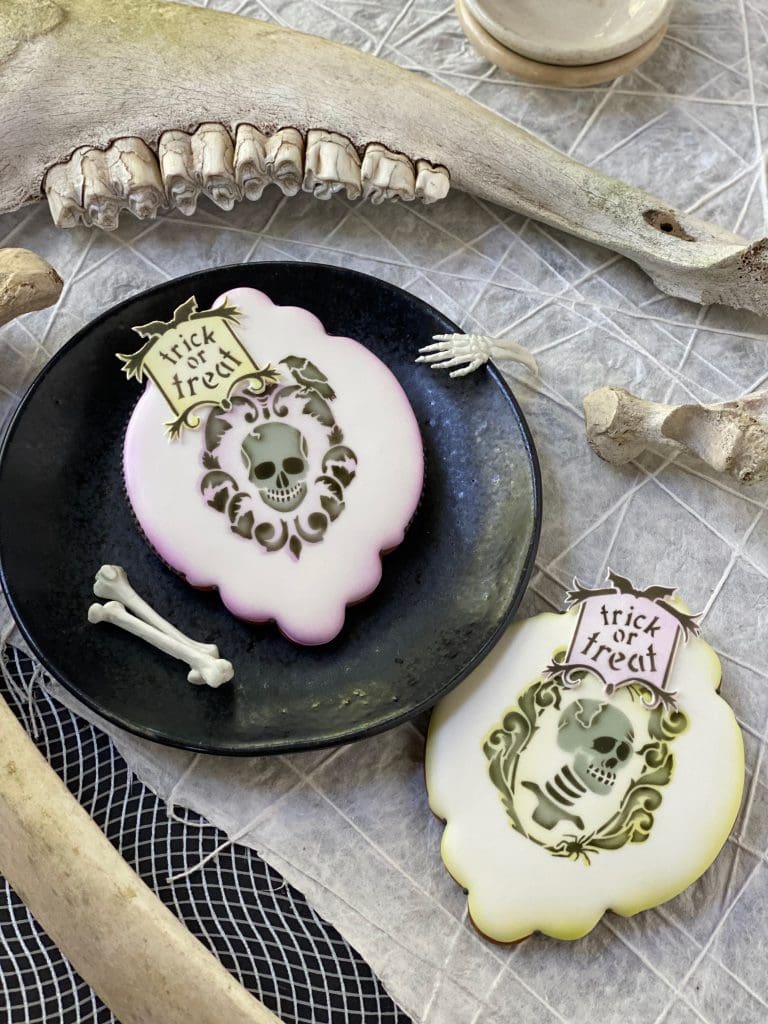
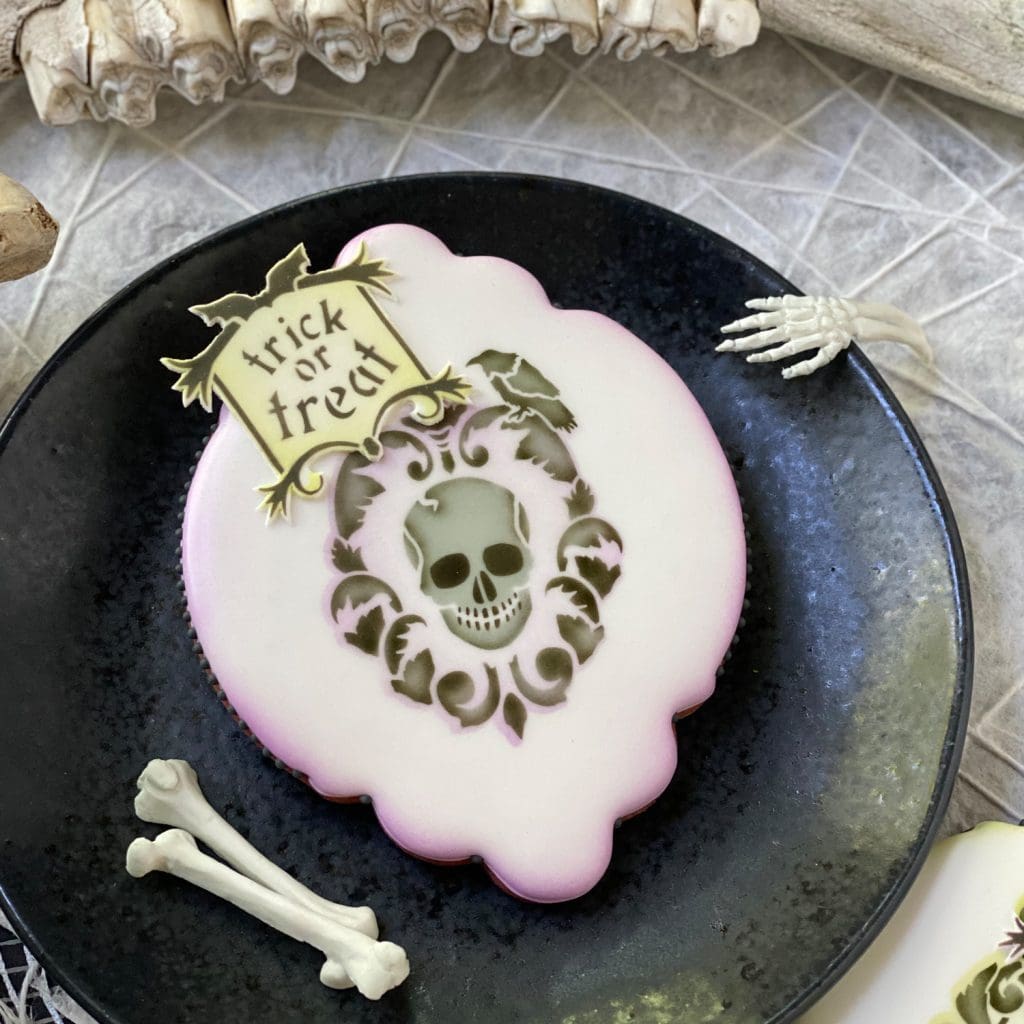
While I love the delicacy of the “Trick or Treat” frame, I personally think these scroll-type banners fit this cookie shape more gracefully . . .

But that’s the beauty of fondant appliqués: I can make them ahead and then try them out every which way before attaching them to cookies with icing. They offer so much design flexibility!
Another up-close-and-personal view of those marvelous molded skeleton parts . . .
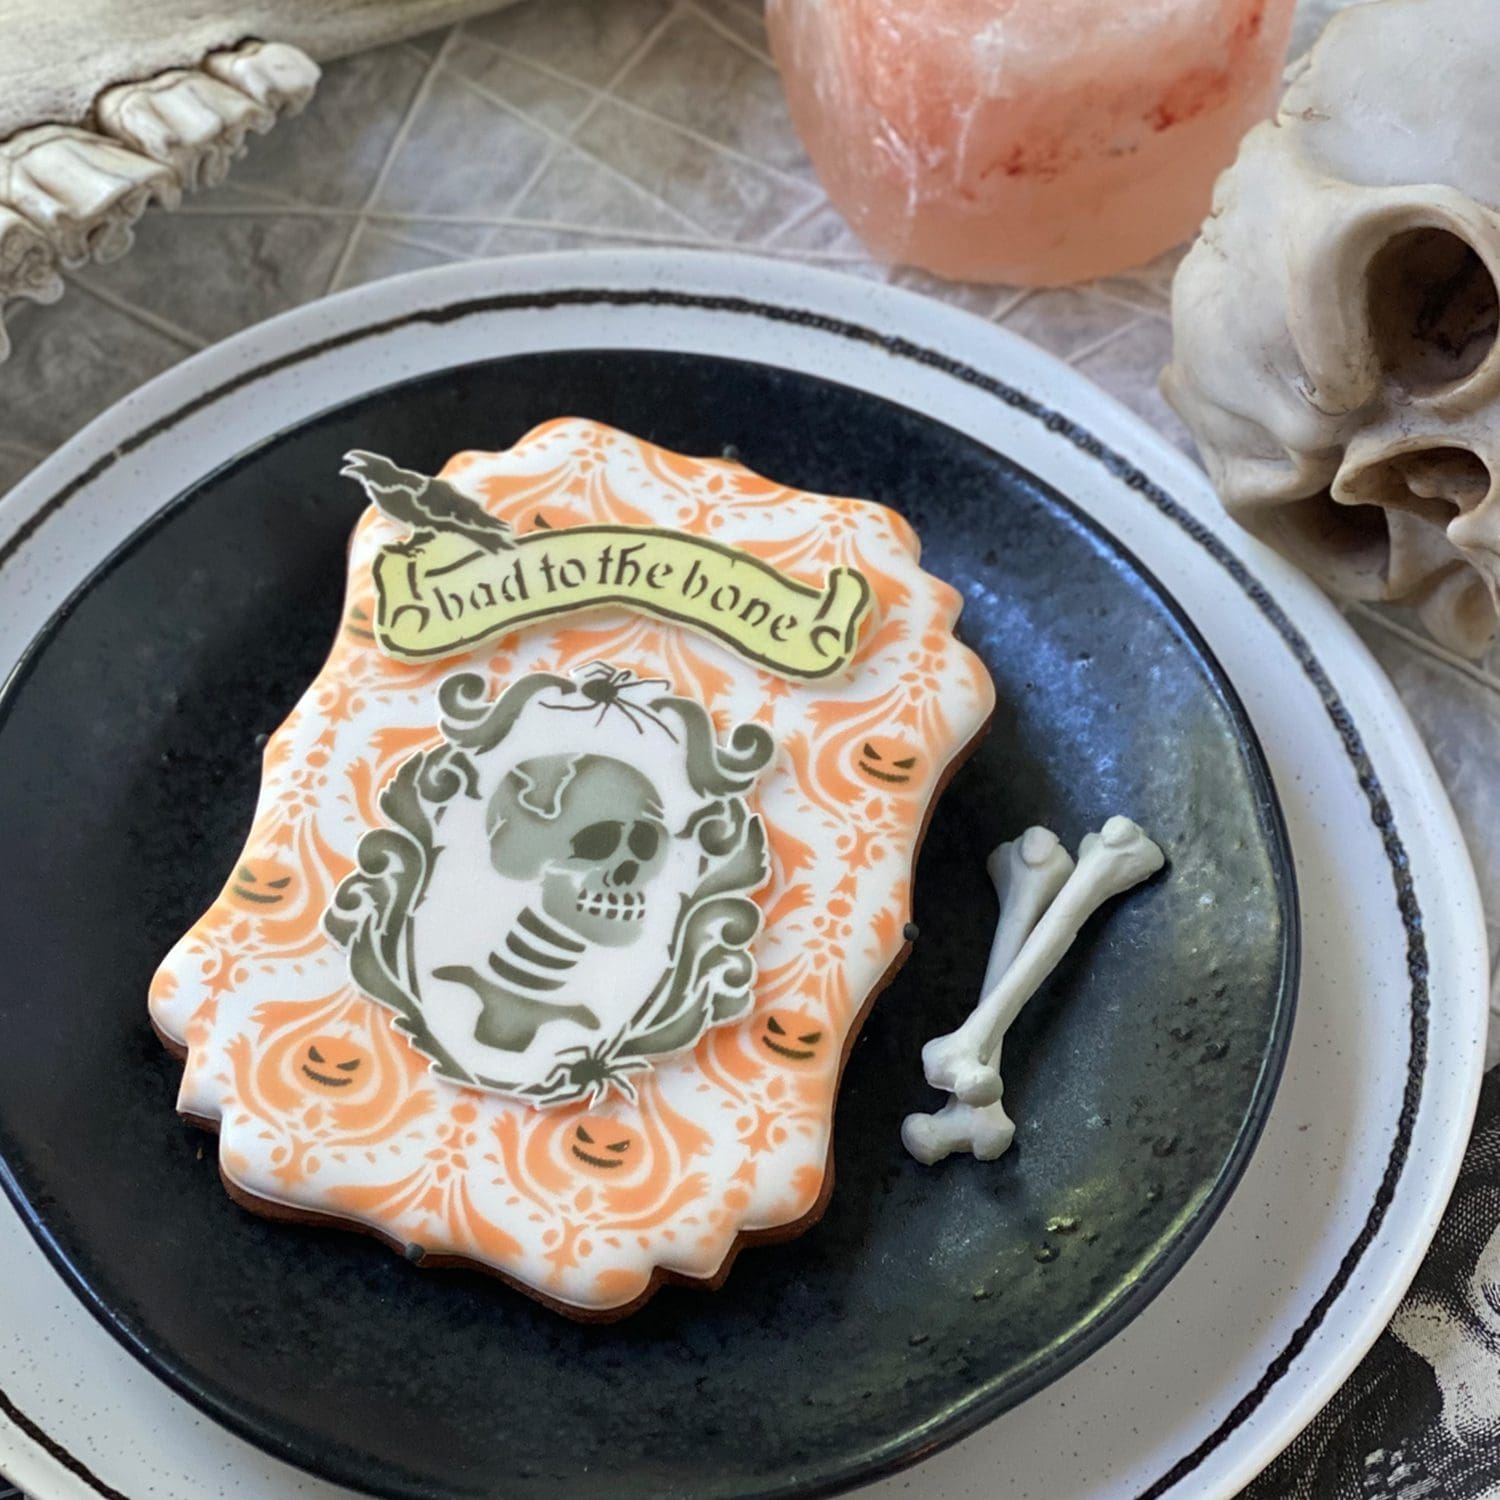
Now, on to a series of orange-and-black cookies that make full use of the background set. The message on this cookie is directly airbrushed and stenciled on the royal icing. You can tell because it doesn’t have the added relief of the appliqués you just saw.
Below is another appliquéd message, with a slight twist. It’s been shaded with Electric Green and also hovers further above the cookie than the previous ones, thanks some tiny fondant props stuck underneath. With elaborate backgrounds such as this one, I tend to prefer raised, appliquéd messages, because they add some visual separation between the words and background pattern. In this case, the skull was also made as a fondant appliqué, resulting in extra interest and depth.
A similar appliquéd message dresses up this cookie, even without the added green accent color around it . . .
Back to another directly airbrushed message . . .
And, the final cookie in the orange series is this fully-loaded one, complete with appliquéd message, a purple shadow around the skull, and molded fondant bone accents! So many possibilities!

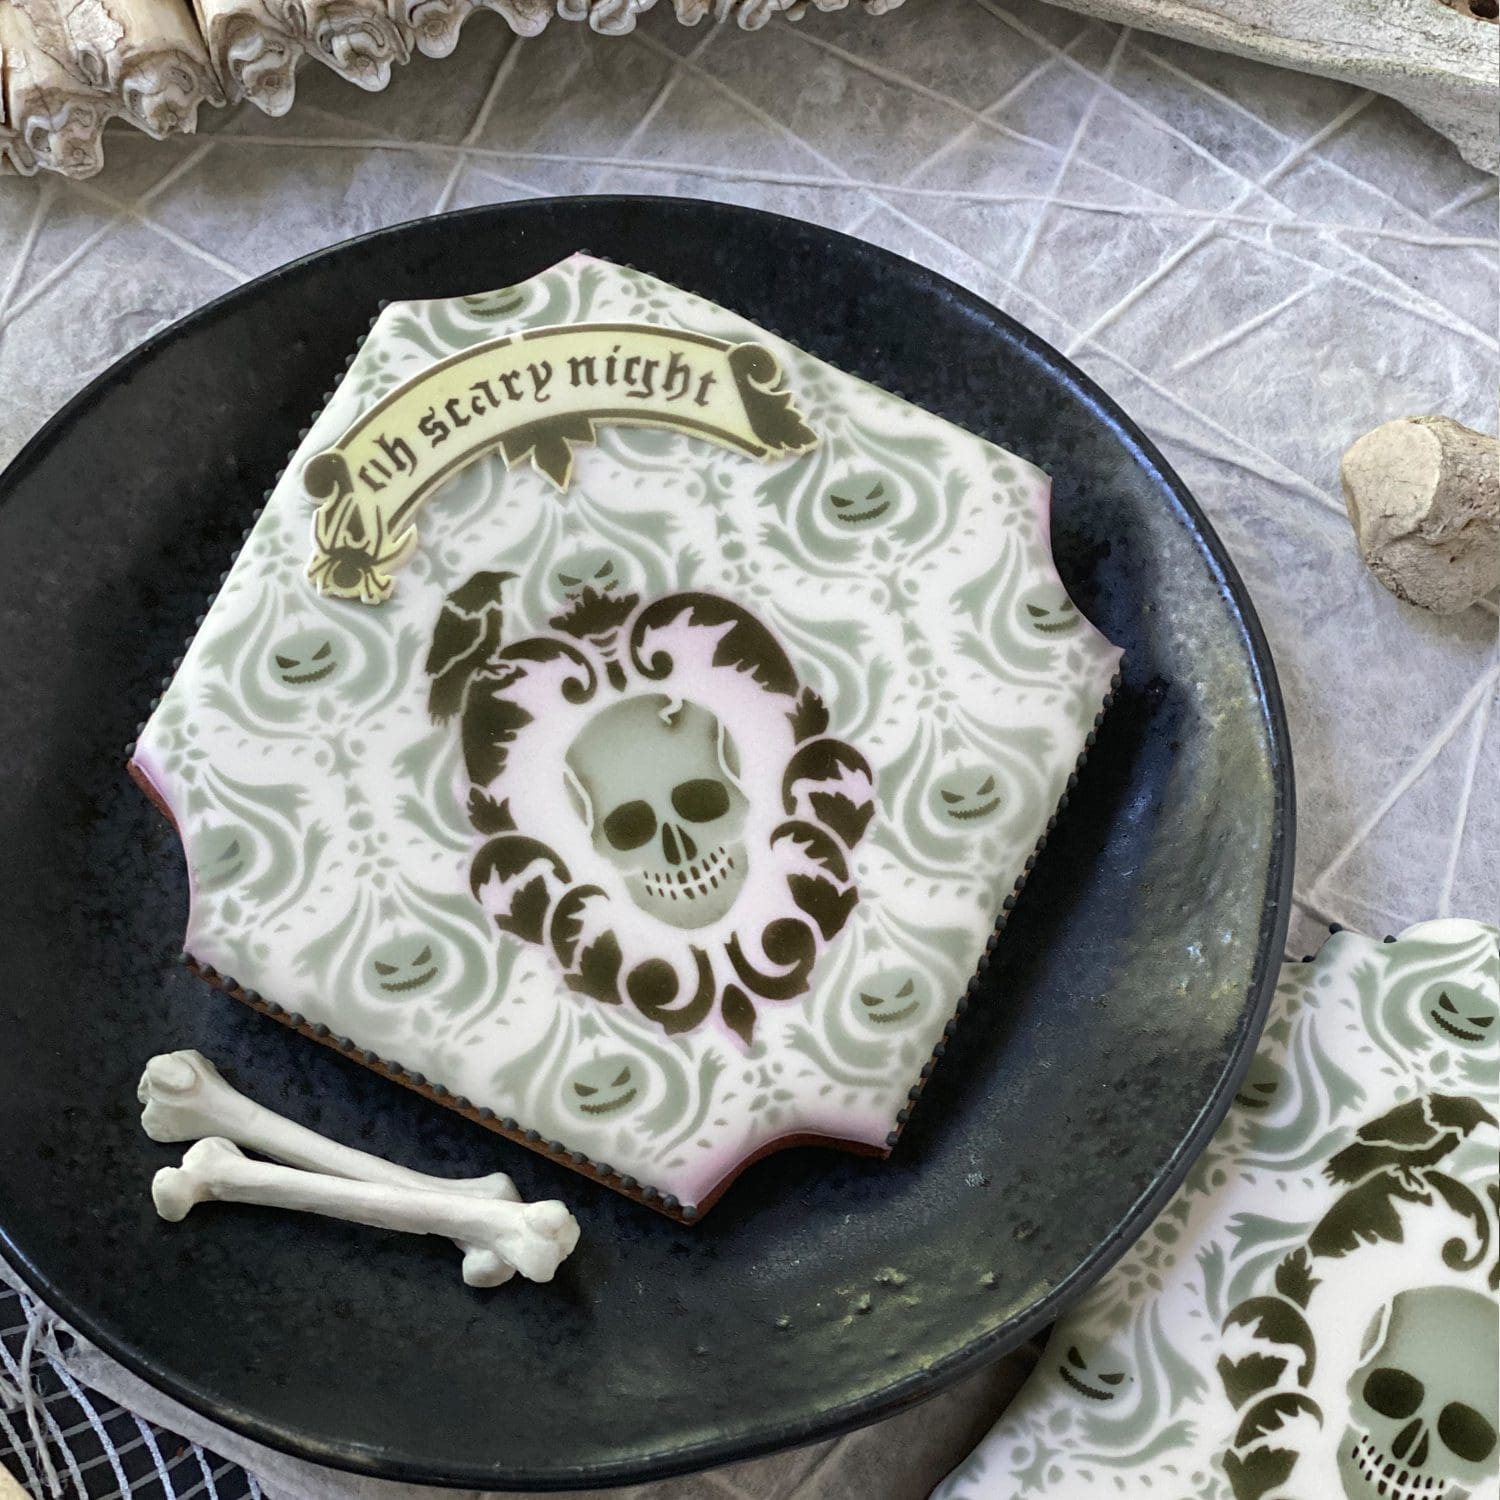
But, sometimes less is more, and the next cookie is a great example of this principle. In this case, I skipped the face overlay altogether and used a message without any skull. Plus, the use of only black lends a greater air of sophistication (if Halloween cookies can even be sophisticated, that is! ![]() ) . . .
) . . .
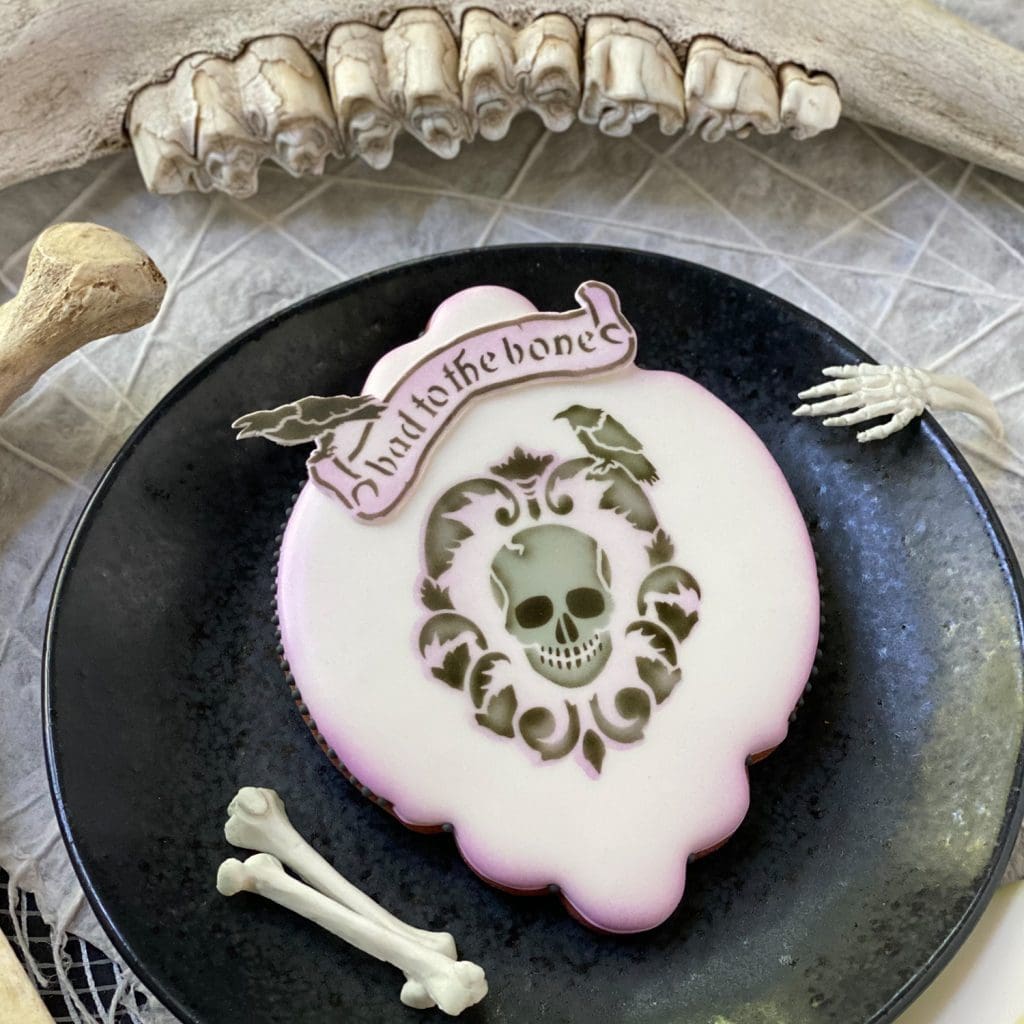
The messages and frames were originally designed to neatly surround the skulls, as shown directly below . . .
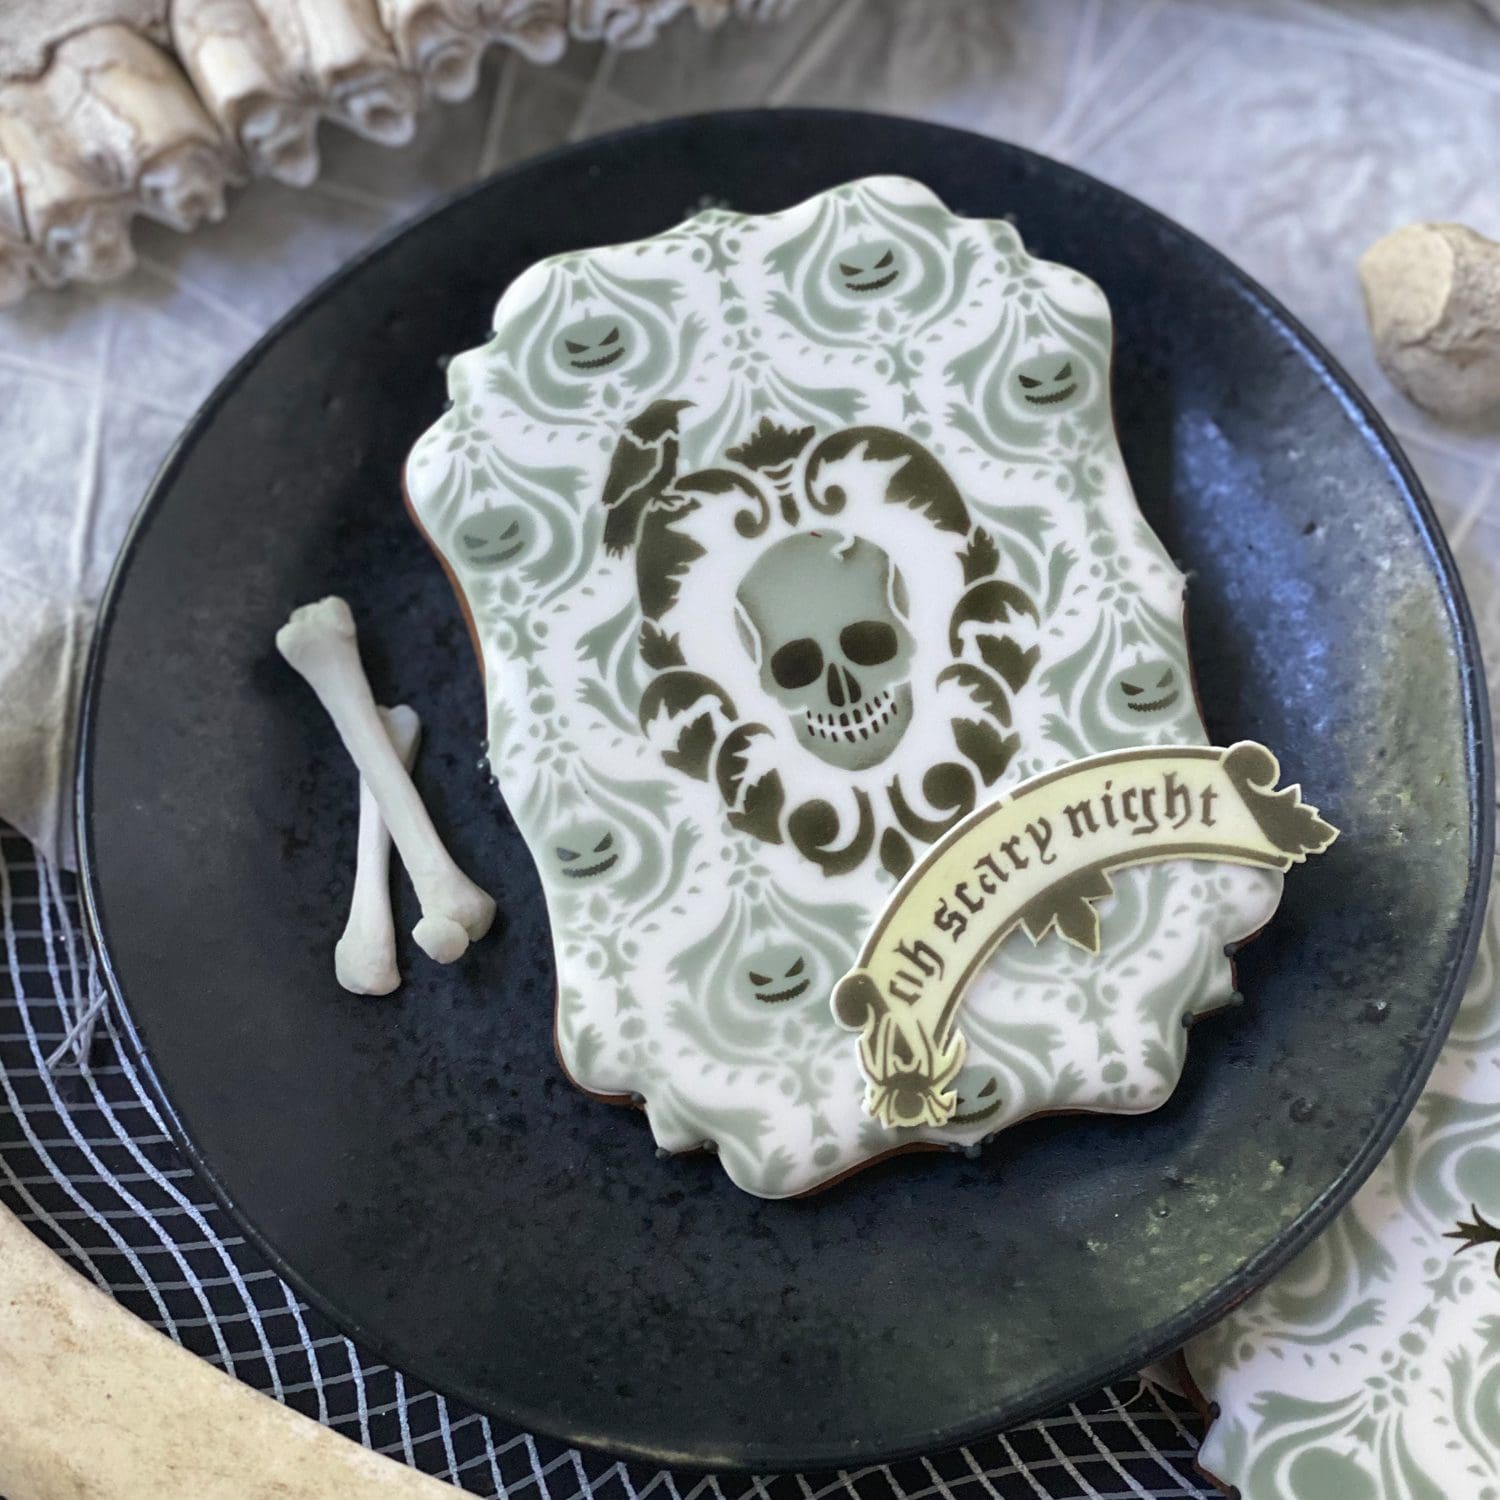
But, in messing around with the myriad fondant appliqués I’d made in advance, I discovered that they look equally nice at the bottom of the cookie, and offset from the center line of the skull. This message even hangs off the cookie a bit, which is yet another benefit of making fondant appliqués. They can “extend” the eye appeal of your cookies by hovering above them, sitting at an angle to them, or showing up in other unexpected ways.
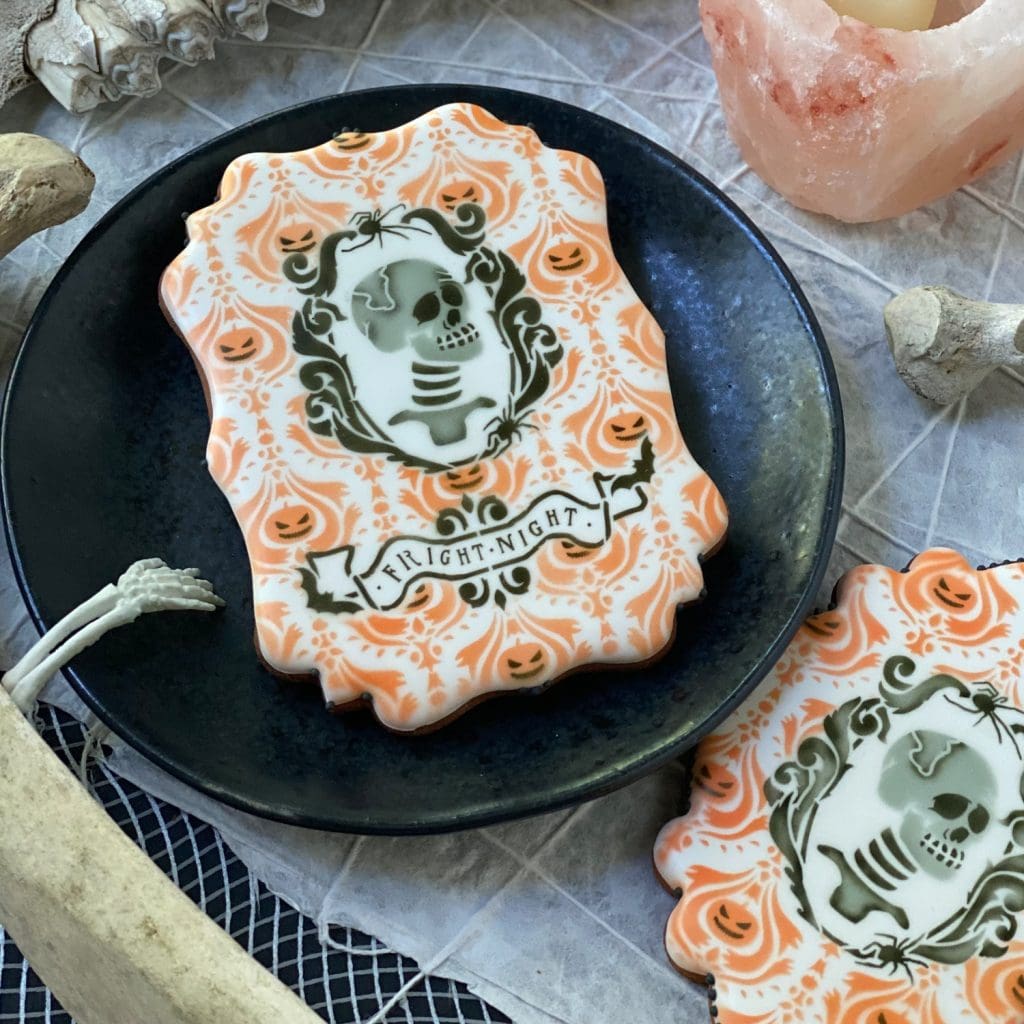
And, on that note, I leave you with a final cookie bearing the name of this release . . .
Let there be no bones about it: You’re going to have loads of skele-fun playing with these sets. (Sorry, I’m a sucker for skele-puns! ![]() )
)
If you have any technical questions about these stencils, just email me at sweetlife@juliausher.com or leave a comment below. Please, however, direct all ordering and Stencil of the Month Club questions to my stencil partner, Confection Couture Stencils, at service@confectioncouturestencils.com. Thank you!