Description
Congrats! You’ve made it to Part 4 of Julia’s Airbrushing-Stenciling Intensive (Creative Embellishments), which means you’re ready to take the lessons learned in Parts 1 to 3 about precision-control airbrushing, shading, and conscious color commingling, and apply them off-cookie to make airbrushed-stenciled embellishments that will truly take your cookies over the top! As a reminder, Julia’s four-part course represents the sum-total of all the lessons she learned (often the hard way!) about airbrushing and stenciling on cookies while developing her JULIA-brand stencil line and related tools from 2016 to 2024. Though the overarching goal of this course is to help you become a more confident and proficient airbrusher-stenciler of cookies and a smarter consumer-user of airbrushing-stenciling tools, each of the four course parts (see “Notes” below) has distinct goals of its own.
In this part, Julia demonstrates how to make three key types of airbrushed-stenciled embellishments, including fondant appliqués, edible paper cutouts, and royal icing transfers, using four different mediums. She also shows how to shape each type of embellishment using simple contouring techniques and tools, and then how to put them all together into stunning dimensional cookie designs. As in Parts 2 and 3, Julia continues to work with stencil sets in her own Prettier Plaques™ and Dynamic Duos™ lines to demonstrate her key lessons. However, you needn’t purchase the exact same sets she uses to get the full value from this part of the course. Again, you can substitute other JULIA stencil sets or others’ layered sets that you might already have, just as you can in earlier parts of the course.
Once you’ve purchased this lesson, you’ll automatically receive a receipt with a link to the downloadable course handout, which encompasses all four parts of this course. Specifically, it includes links to Julia’s preferred airbrush system components and stenciling supplies, a recap of the course’s key lessons, inspiration images, and more. Then, simply return to this page to view the tutorial as often and for as long as you like. If you are logged into the site, the sneak peek video above will disappear and be replaced with the full-length video. To log in, simply go to the upper right account area of the site (in laptop viewing mode), and enter the username and password you created at the time of purchase.
Notes:
- The four parts of this course include:
- Part 1: Airbrush System and Handling Fundamentals/with Troubleshooting and Routine Cleaning (see the “Video Tutorials” section of this site)
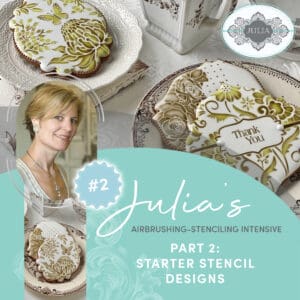
- Part 2: Starter Stencil Designs/Single- and Dual-Color Designs with up to One Mask/Layer (see “MORE LIKE THIS” below)
- Part 3: Advanced Stencil Designs/Multicolor Designs with up to Two Masks/Layers (see “MORE LIKE THIS” below)
- Part 4: Creative Embellishments/Going Off-Cookie with Airbrushing-Stenciling (YOU’RE HERE!)
- Parts 3 and 4 are also available in a discounted bundle, as are Parts 1 and 2 (see “MORE LIKE THIS” below).
Details
Skill Level: Beginner to advanced; even advanced decorators will learn from Julia’s signature airbrushing-stenciling techniques and her approach to cookie design and composition that are shared in this lesson
Video Format: Professionally filmed and edited in studio setting
Video Length: 2:01:35
What You’ll Learn in Part 4 (3 Key Embellishments; 4 Primary Topics):
- Fondant appliqués (both flat and contoured), including:
- how to roll fondant thinly and uniformly to ensure sharp airbrushed-stenciled patterns
- how to airbrush-stencil on fondant, reinforcing precision-control airbrushing, shading, and conscious color commingling lessons of Parts 2 and 3
- best trimming practices
- how to contour fondant appliqués
- Edible paper cutouts (made with both wafer paper and frosting sheets; both flat and contoured), including:
- differentiation between two types of edible paper (i.e., wafer paper and frosting sheets)
- how to airbrush-stencil on edible paper, again reinforcing precision-control airbrushing, shading, and conscious color commingling lessons of Parts 2 and 3
- how to finish edible paper cutouts, including dusting, simple cutting, and deckling (tearing edges)
- how to shape different types of edible paper with wafer paper conditioner and other tools
- Royal icing transfers (both piped and stenciled; both flat and contoured), including:
- pros and cons of various piping/stenciling substrates (i.e., parchment paper and acetate)
- how to make piped transfers, including optimum icing consistency, making piping templates, preferred piping substrate, and removal from substrate
- how to airbrush-stencil piped royal icing transfers, again reinforcing precision-control airbrushing, shading, and conscious color commingling lessons of Parts 2 and 3
- how to make stenciled royal icing transfers, including optimum icing consistency, preferred stenciling substrate, contouring, and removal from substrate
- Putting it all together (aka design composition and assembly), including:
- understanding why and when to add embellishments (i.e., for balancing compositions and color, masking errors, or just because you’re a more-is-more person like Julia!)
- tips for ensuring balanced and beautiful compositions
- differentiation between two types of “adhesives” (i.e, piping gel and thick royal icing)
- tips for adding even more dimension with both permanent and temporary props
What You’ll Receive:
- Forever-access to Part 4 video recording on this site
- Detailed 74-page course handout (don’t worry; it’s mostly photos!) for Parts 1 to 4 including:
- Course goals
- Inspiration images (primarily for Parts 2 to 4)
- Airbrushing-stenciling supply list with source links
- Recap of key lessons in each course part
- Compressor and airbrush gun feature comparison charts and other video graphics
- Julia’s preferred system components with source links
- Troubleshooting tips
- Additional resources to advance your airbrushing-stenciling skills
- Access to Julia via email or Superpeer for course Q&A (at any time, though please allow 48 hours for a response)
Video Outline (Time Stamp):
- Course and Part 4 introductions, including types of embellishments covered in Part 4 and their advantages (0:00 – 11:37)
- Tool overview for Part 4 (11:38 – 19:23)
- Fondant appliqués (19:24 – 37:27)
- Overview of types of fondant appliqués covered in Part 4 (19:30 – 23:40)
- Rolling fondant (23:41 – 24:29)
- Airbrushing-stenciling fondant, including trimming and shading edges (24:30 – 28:53, 29:21 – 33:18, 34:06 – 36:09)
- Contouring fondant appliqués (28:54 – 29:20, 33:19 – 34:05, 36:10 – 37:27)
- Edible paper cutouts (37:28 – 1:00:29)
- Differentiation between two types of edible paper (i.e., wafer paper and frosting sheets) and overview of types of edible paper cutouts covered in Part 4 (37:34 – 39:15)
- Making wafer paper cutouts, including airbrushing-stenciling, trimming, dusting, and contouring with water and wafer paper conditioner (39:16 – 53:45)
- Making frosting sheet cutouts, including airbrushing-stenciling, deckling (aka tearing edges), and contouring (53:46 – 58:21)
- Comparison of embellishments made thus far (i.e., fondant appliqués, wafer paper cutouts, and frosting sheet cutouts) and trial cookie composition (58:22 – 1:00:29)
- Royal icing transfers (1:00:30 – 1:30:36)
- Overview of types of royal icing transfers covered in Part 4 (1:00:35 – 1:02:57)
- Making plain piped royal icing transfers (i.e., beads aka buttons), including optimum icing consistency, pros and cons of various piping substrates (i.e., parchment paper and acetate), and preferred piping substrate (1:02:58 – 1:07:46)
- Making airbrushed-stenciled piped royal icing transfers, including optimum icing consistency, making piping templates, preferred piping substrate when airbrushing-stenciling, and removal from substrate (1:07:47 – 1:21:23)
- Making stenciled royal icing transfers, including optimum icing consistency, preferred stenciling substrate, contouring, and removal from substrate (1:21:24 – 1:29:35)
- Putting it all together (1:30:37 – 1:50:52)
- Decorating cookies with mishaps, including discussion of two types of “adhesives” (i.e., piping gel and thick royal icing), composition tips, and use of permanent fondant props to add dimension (1:30:52 – 1:42:25)
- Decorating cookies without mishaps, just to take them over the top (!), including more composition tips and use of temporary props to add dimension (1:42:26 – 1:48:29)
- Recap of key course and Part 4 lessons with closing remarks (1:50:52 – 2:01:35)
Purchase Agreement: Julia M. Usher and Julia M. Usher, LLC are the sole copyright owners of this video tutorial and handout. Reproduction, distribution, resale, and/or any other use for financial gain of this video or handout, in whole or in part, are strictly prohibited. However, as the purpose of Julia’s tutorials is to teach, any knowledge gleaned from this video and handout can be used to make cookies or other products for either personal use or sale. In purchasing this tutorial, you acknowledge that you agree to these terms of use.
Julia’s Return Policy: Due to the online nature of this tutorial, all sales are final.
Video Production: Two 5:7 North, August 2024
Music: Carefree by Kevin MacLeod via Creative Commons license
Only logged in customers who have purchased this product may leave a review.

Reviews
There are no reviews yet.