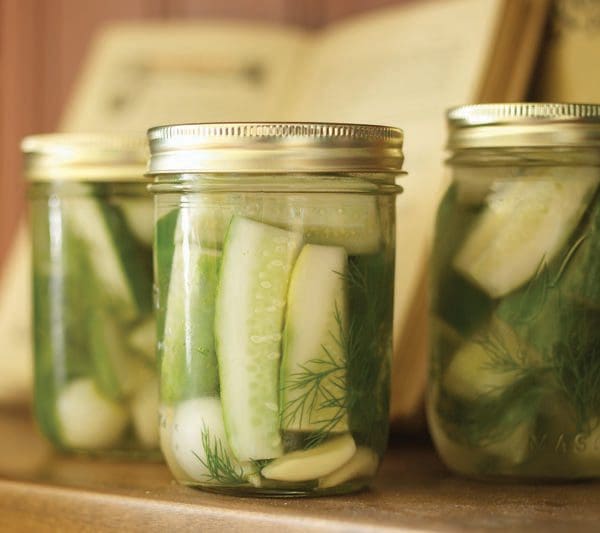
To the uninitiated, pickles can be off-putting. Any food that vies for blue ribbons at the state fair automatically implies a certain level of complexity. Couple this award-winning potential with the lore of champions relinquishing titles over softness, cloudiness, or God forbid, spoilage, and the intimidation factor is enough to cause seasoned cooks to gasp at the sight of a Mason jar. Immediate gratification determines the winner for me, which is why I often opt for simple refrigerator pickles like these dill spears. They don’t require lengthy fermentation or any fussy boiling protocol; plus, the pickles will end up greener and crisper for having avoided the sterilizing bath. Note: This recipe hails from my James Beard-nominated column “Prep School” for Sauce magazine.
Yield: About nine 1-pint jars
Prep Talk: Because the jars do not undergo processing in boiling water, they must be stored in the refrigerator at all times. For best eating, allow the flavors to meld about 3 weeks.

Ingredients:
Method:
1 | To fit the cucumbers in pint-size jars, cut them in half cross-wise; then quarter each half lengthwise. (For full-size dill spears, simply quarter the trimmed cucumbers, without cutting them in half first. And, use quart-size jars to allow adequate room.)
2 | Lay the cucumbers and onions in a 10 x 15-inch glass baking pan. Sprinkle evenly with 5 teaspoons salt. Cover with ice cubes and let stand at room temperature about 3 hours. (This step is called brining, and is an essential one. Brining draws out excess moisture that subsequently gets drained off. The pickles stay crunchy, and, as a secondary benefit, the vinegar that’s added later doesn’t get diluted. This means the acid concentration in the jars remains close to 5-percent, precisely the level that helps fend off bacterial growth.)
3 | Wash nine 1-pint jars, nine lids, and their rims in hot soapy water. Rinse well and drain. Dry the jars in a 225°F oven and keep them there until you are ready to fill them.
4 | Evenly divide the dill and garlic across the jars; then drain the cucumber spears and onions, and distribute the veggies across the jars.
5 | Combine the vinegar, water, and remaining salt (3 tablespoons plus 1 teaspoon) in a non-reactive pot and bring the mixture to a boil. Divide the hot mixture across the jars, taking care to cover the contents completely.
6 | Slide a sterilized non-reactive spatula down the sides of each jar to release any trapped air bubbles that may harbor bacteria. Cover and seal while still hot. Cool to room temperature; then refrigerate as instructed above.


Be the first to hear about my latest events, tutorials, and product announcements by subscribing to my newsletter!
Schedule willing, I release one each month, roughly mid-month. And, guess what else?! Once you subscribe, you’ll receive a special one-time coupon code for 20% off my online tutorials. The code will be delivered in your subscription confirmation email, so keep your eyes peeled (as it cannot be resent). Thanks in advance for subscribing!
Live sweetly, Julia