

I’ve just begun to play with dough-wrapping to create cool 3-D cookie effects – and I love it! But what the heck is dough-wrapping, you might ask?! Good question! It’s basically the art of creating contoured cookie pieces by baking cut dough on top of pans and other ovenproof objects. As easy as it all sounds, there are definitely a few tricks to getting smooth, even cookie surfaces without any breaks or tears. So read on! Or watch my latest YouTube video on the same topic.
What you’ll need:

Method:
1 | Prepare your dough. I’ve found that my usual sugar cookie and rolled gingerbread dough recipes, found in my books Cookie Swap and Ultimate Cookies, both wrap pretty darn well – and by “well,” I mean without spreading too much during baking and then cracking or tearing in the process. Though generally speaking, I find that doughs with a relatively high ratio of vegetable shortening to butter (or all shortening) fare better. Shortening has a higher melting point than butter, so doughs with it are less prone to spreading and tearing (all other things, such as quantity of flour or leavening, being equal). Tip: That said, every curvy baking surface “stresses” the dough in a unique way, so it’s always best to test-bake a piece of dough before going full steam ahead into a project. If it spreads too much, gradually knead in more flour until it holds its shape nicely in the oven. If that doesn’t work, try a gradual reduction in the leavening. In either case, I underscore “gradual,” because the addition of too much flour, or the removal of too much leavening, will lead to a leathery dough.

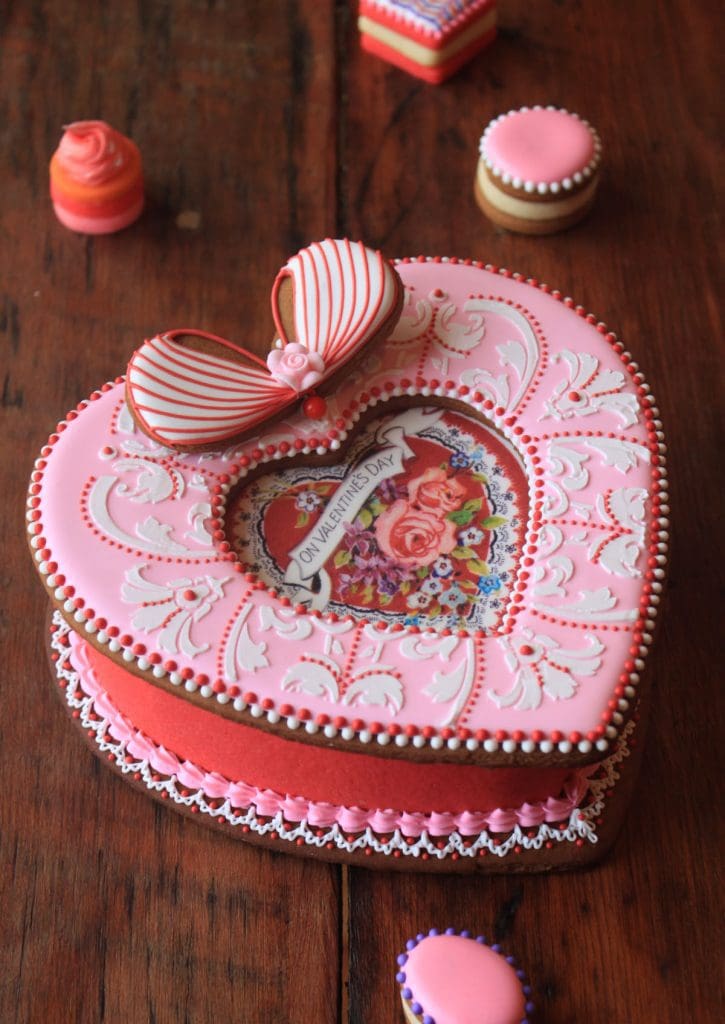
Note: I used sugar cookie dough for the sides of the boxes pictured right, but I first tinted it red by beating in a healthy squeeze of liqua-gel food coloring using my electric mixer fitted with the paddle attachment. Beat just long enough to evenly distribute the color, as over-beating can also toughen dough.
2 | Select the pan (or other ovenproof thing) to shape your dough. You can bake cookie dough over almost any ovenproof object as long as the dough can be laid on it without cracking prior to going in the oven. Pans or objects with gentle curves are preferable to those with relatively sharp ones or squared-off corners, since the the dough hanging to either side of the curve (or corner) can weigh itself down, causing it to stretch during baking and break at that point. For my heart box sides, what to use was a no-brainer – sides of a heart-shaped cake pan, what else? Of course, the “right” object will be a function of your cookie design, so my best suggestion is to get creative. (For instance, for my holiday party cracker cookies, the handle of a whisk was perfect for shaping the cylindrical bodies of the crackers. Read more about that project in “Also See,” below.)

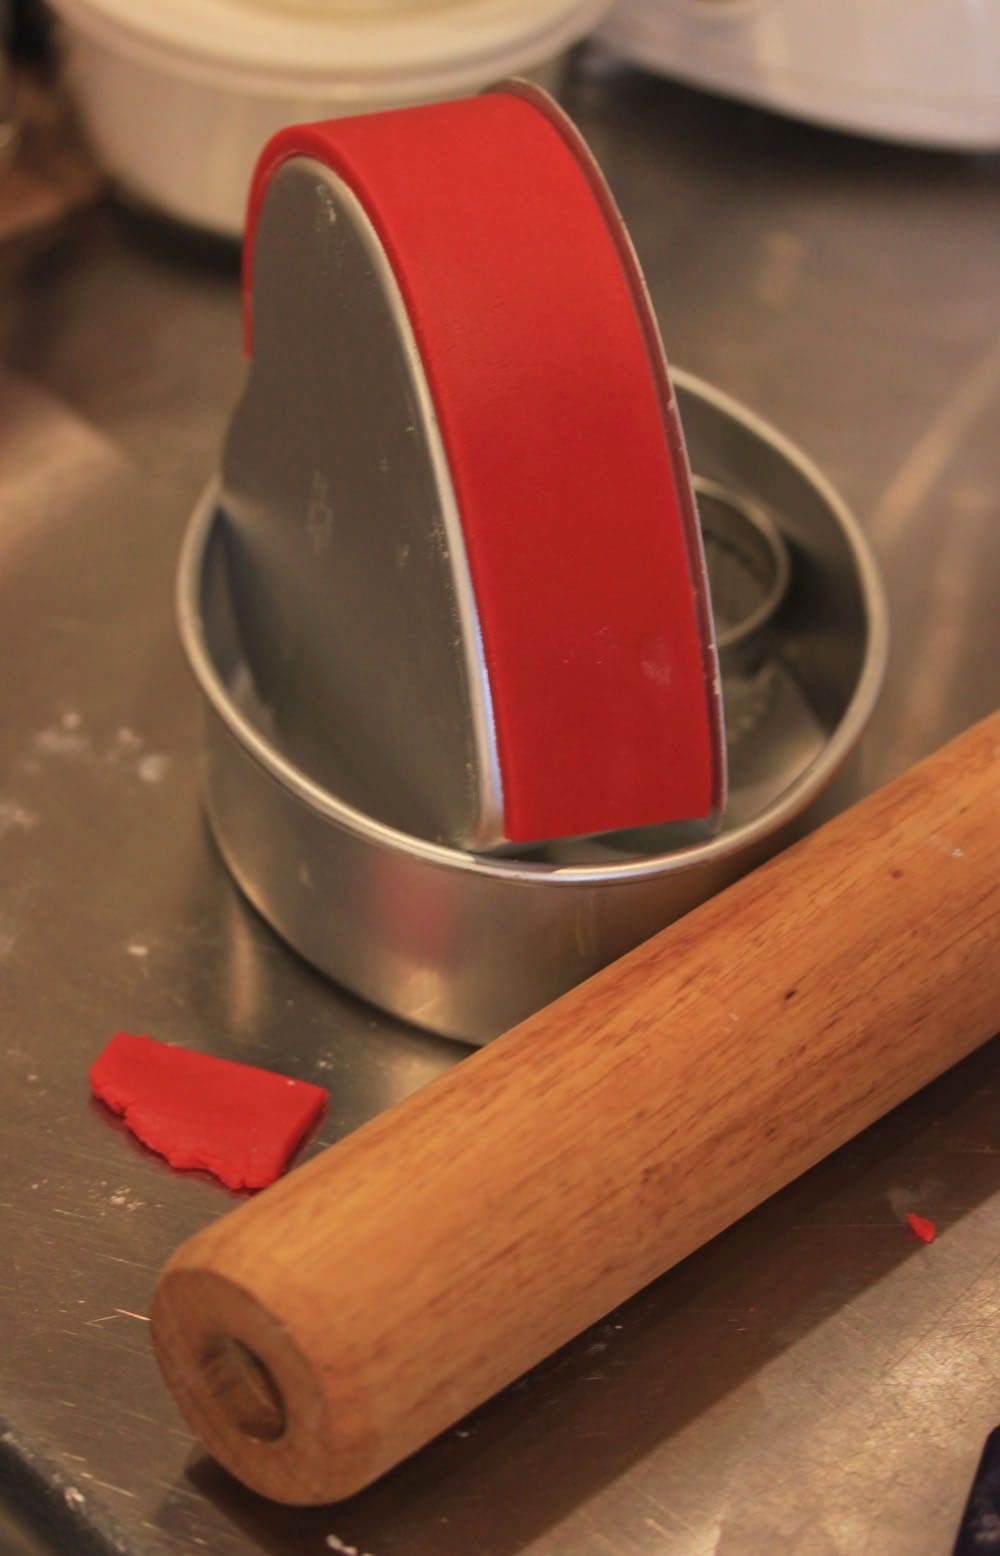
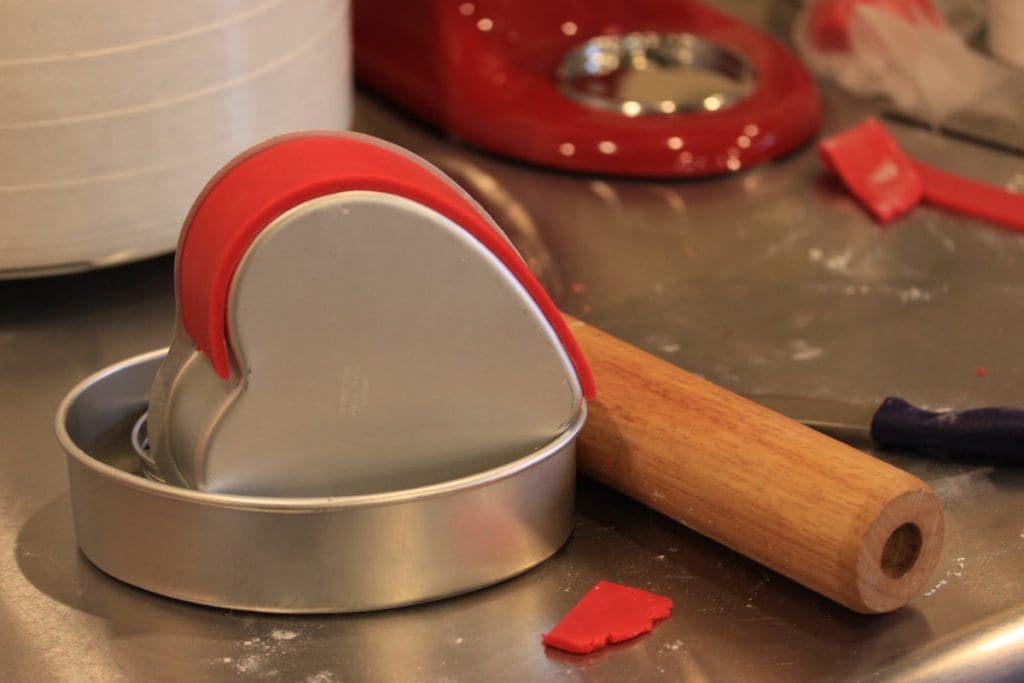
3 | Get your pan ready for baking. This step may not be so obvious, which is why you really need to read it! For best results, you’ll want to bake your dough on a horizontal plane, rather than vertically. If I had laid dough strips on the sides of the heart pan and then baked the dough with the pan flat on its bottom, the dough would have slumped right into the oven, into a big blobby mess. And big blobby mess would have soon erupted into fire. So instead of dismantling all of the smoke detectors in my house, I tilted the heart pan on its side, stuck it into another pan, and kept it in position by wedging a few cookie cutters around its base (second photo). Tip: I’ve also found it’s best not to grease the surface of the pan. Greasing only causes the dough to slide and stretch more during baking, thereby increasing its chances of breaking.

Once your pan is fixed in an upright position, carefully place the piece of dough directly on top of it. In this case, I cut strips of dough to fit the side (height) of the cake pan, with a touch of room to spare to allow for spreading in the oven. Since the pan was on its side, it was easiest to bake one half-heart at a time, so I trimmed the length of the dough to fit that side of the pan exactly before the dough went in the oven (second and third photos). Tip: Be sure the dough is roughly centered on the curve, i.e., that about the same amount of dough is hanging down one side as the other. If the dough is “unbalanced,” the longer, heavier side may weigh itself down, causing “stretch” marks to appear – or the dough to break – during baking.
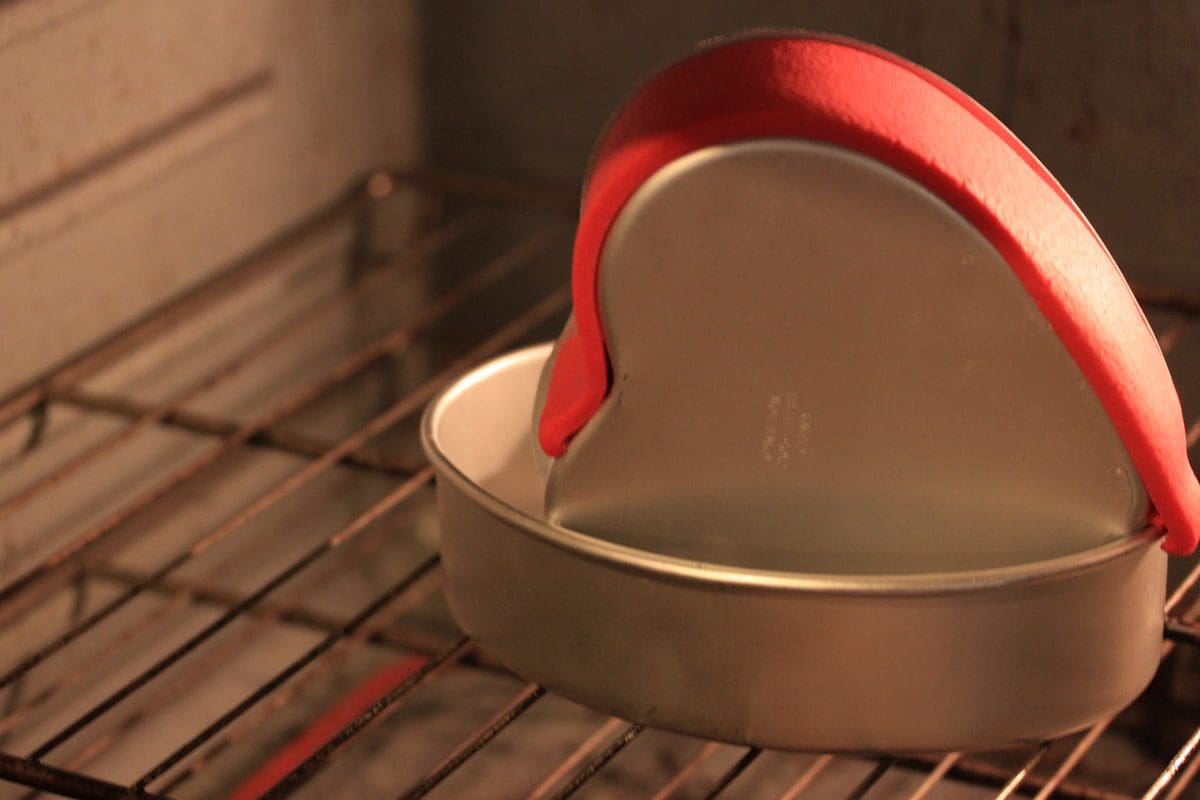
4 | Bake as usual, for the most part. Bake the dough at the same oven temperature you always would, but watch the dough pretty closely. If it starts spreading too much, or you see any tears, then trim the dough back to its original length. In the fourth photo, you’ll see that my dough had expanded beyond the halfway point on the pan. What you can’t see is that the dough was beginning to tear around the sharp point at the bottom of the heart. I quickly trimmed off the excess dough, which seemed to be dragging everything along with it, and the tearing stopped immediately!
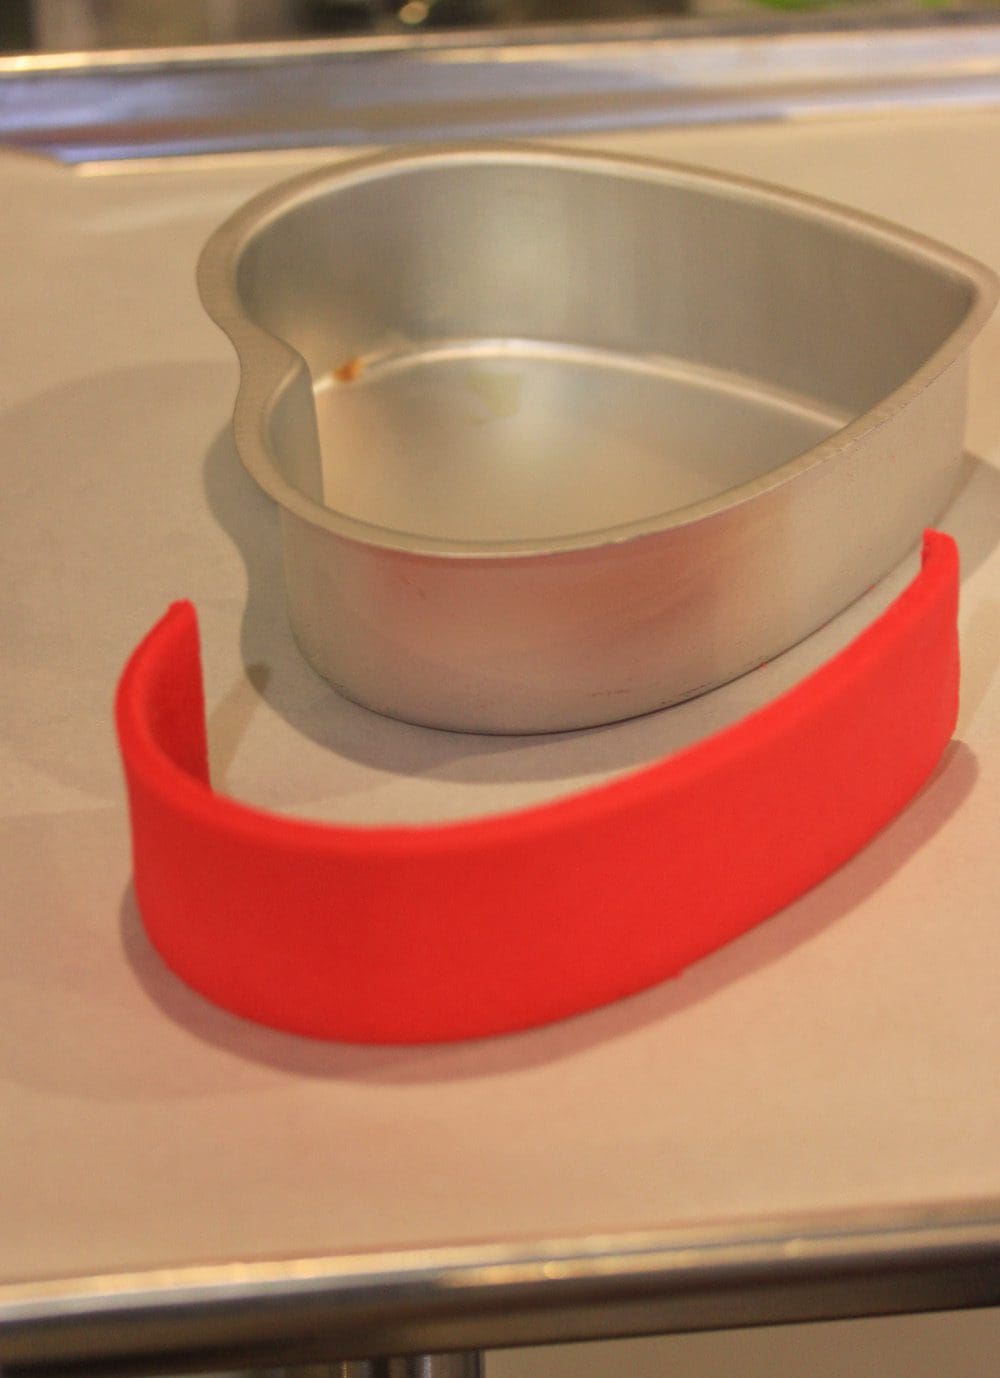
Once the dough is baked, remove the pan from the oven, and while the dough is still hot, trim any ends to further straighten them. Let the dough cool on the pan until it is set but still slightly warm; then gently remove it to cool completely. If the dough doesn’t immediately fall off the pan, you may need to ever-so-gently pry it off with the tip of a paring knife. Once one end is disengaged from the pan, the whole piece will usually pop right off, so be sure to do any prying very close to your work surface! There’s nothing worse than seeing a perfectly baked cookie fall to its demise.
And that’s all she wrote! Not so hard, right? Not so sure; then check out more contouring tips in video form: